1. Introduction
This manual provides detailed instructions for the safe and efficient operation of your Haisito P3648 36V/48V Smart Battery Charger. This versatile charger is designed for various battery types, including Lithium, LiFePO4, and Lead-Acid (AGM, GEL, EFB, Flooded, MF, VRLA, SLA, WET) batteries, and is specifically compatible with 48V EZGO RXV & TXT golf carts using the 3-Pin triangle style plug. Please read this manual thoroughly before first use to ensure proper function and safety.
2. Important Safety Information
Always observe the following safety precautions to prevent injury or damage to the charger or battery:
- Read all instructions before using the charger.
- Use the charger only for charging 36V or 48V batteries as specified.
- Ensure proper ventilation during charging. Do not operate in an enclosed area.
- Avoid charging frozen batteries. Allow them to warm up before charging.
- Do not expose the charger to rain or excessive moisture.
- Disconnect the AC power before making or breaking connections to the battery.
- Wear eye protection and protective clothing when working with batteries.
- Keep out of reach of children.
- Only charge Lithium batteries with a Battery Management System (BMS).
- Do not attempt to repair severely damaged or depleted batteries with the repair function.
3. Product Overview
The Haisito P3648 is a smart battery charger and maintainer designed for versatility and safety. It features automatic voltage identification and multiple charging modes.

Figure 1: Haisito P3648 Smart Charger with included accessories (alligator clips and EZGO RXV plug).
Key Features:
- Wide Compatibility: Charges Lithium, LiFePO4, and Lead-Acid (AGM, GEL, EFB, Flooded, MF, VRLA, SLA, WET) batteries. Includes a golf cart charging port adapter for EZGO RXV & TXT.
- Dual Voltage & Rapid Charging: Supports 36V (up to 18A) and 48V (up to 13A) charging with easy switching between modes.
- Advanced Protection: 9-stage charging process with built-in over-voltage, over-current, short-circuit, high-temperature, and reverse connection safety protections.
- Fully Automatic & Intelligent: Smart trickle charge technology automatically enters "Stand By" mode when fully charged, preventing overcharging.
- Battery Repair & Maintenance: Advanced recovery mode for weak, old, and idle Lead-Acid batteries (not for Lithium/LiFePO4 or severely damaged batteries).
4. Setup and Connection
Before connecting the charger, ensure the battery voltage matches the charger's capabilities (36V or 48V). Always connect the charger to the battery first, then to the AC power outlet.
4.1 Connecting to a Golf Cart (EZGO RXV/TXT)
- Ensure the golf cart is turned off and the ignition key is removed.
- Locate the charging port on your EZGO RXV or TXT golf cart.
- Connect the 3-Pin triangle style plug from the charger to the golf cart's charging port. Ensure a secure connection.
- Plug the charger's AC power cord into a standard 100V-240V AC outlet.
- Turn on the charger using the power switch.

Figure 2: Dimensions of the EZGO RXV 3-Pin triangle style plug for compatibility reference.
4.2 Connecting with Alligator Clips (General Use)
- Ensure the charger is unplugged from the AC outlet.
- Connect the red (+) alligator clip to the positive (+) terminal of the battery.
- Connect the black (-) alligator clip to the negative (-) terminal of the battery.
- Plug the charger's AC power cord into a standard 100V-240V AC outlet.
- Turn on the charger using the power switch.

Figure 3: The Haisito P3648 charger connected to a battery using the included alligator clips.
5. Operating Instructions
Once connected and powered on, the charger will display information on its LCD screen. Follow these steps to operate the charger:
5.1 Initial Power-On and Display
Upon power-on, the LCD screen will illuminate, displaying current battery voltage, charging status, and selected mode. The charger automatically identifies the battery voltage (36V or 48V) and type (Lithium, LiFePO4, Lead-Acid).

Figure 4: The charger's display indicating automatic identification of 36V or 48V battery types.
5.2 Mode Selection
Use the "MODE" button to cycle through available charging modes and current selections. The charger offers different current settings for 36V and 48V batteries, as well as a repair mode.
- 36V Modes: 5A, 10A, 18A
- 48V Modes: 5A, 8A, 13A
- Repair Mode: For Lead-Acid batteries only.

Figure 5: The charger's interface highlighting the four selectable modes for different battery types and the repair function.
5.3 Charging Process
The charger employs a 9-stage smart charging process to optimize battery health and longevity:
- Battery desulfation
- Soft start charging
- Bulk charging
- Absorption charging
- Trickle charge
- Battery test
- Recondition charging
- Float & maintenance charging
- Small current to maintain charging

Figure 6: Visual representation of the charger's 9-stage smart charging cycle.
5.4 Estimated Charging Times
The following table provides theoretical charging times based on battery capacity and selected current. Actual times may vary depending on battery condition and ambient temperature.
| Battery Capacity (Ah) | 36V Charging Time (H) | 48V Charging Time (H) | ||||
|---|---|---|---|---|---|---|
| 5A | 10A | 18A | 5A | 8A | 13A | |
| 50(Ah) | 6H | 3H | 0.9H | 6H | 3.2H | 1.3H |
| 100(Ah) | 12H | 6H | 2.2H | 12H | 6.2H | 2.9H |
| 120(Ah) | 15H | 7.8H | 2.6H | 15H | 8.1H | 3.2H |
| 150(Ah) | 18H | 9H | 3.1H | 18H | 9.2H | 4.1H |
| 300(Ah) | 32H | 18H | 4.9H | 32H | 18.5H | 5.3H |
| 800(Ah) | / | / | 15H | / | / | 17H |
Note: These values are theoretical and for reference only.
5.5 Temperature Detection
The charger includes a temperature detection feature to adjust charging parameters based on ambient conditions, preventing over-charging in hot weather and under-charging in cold weather.
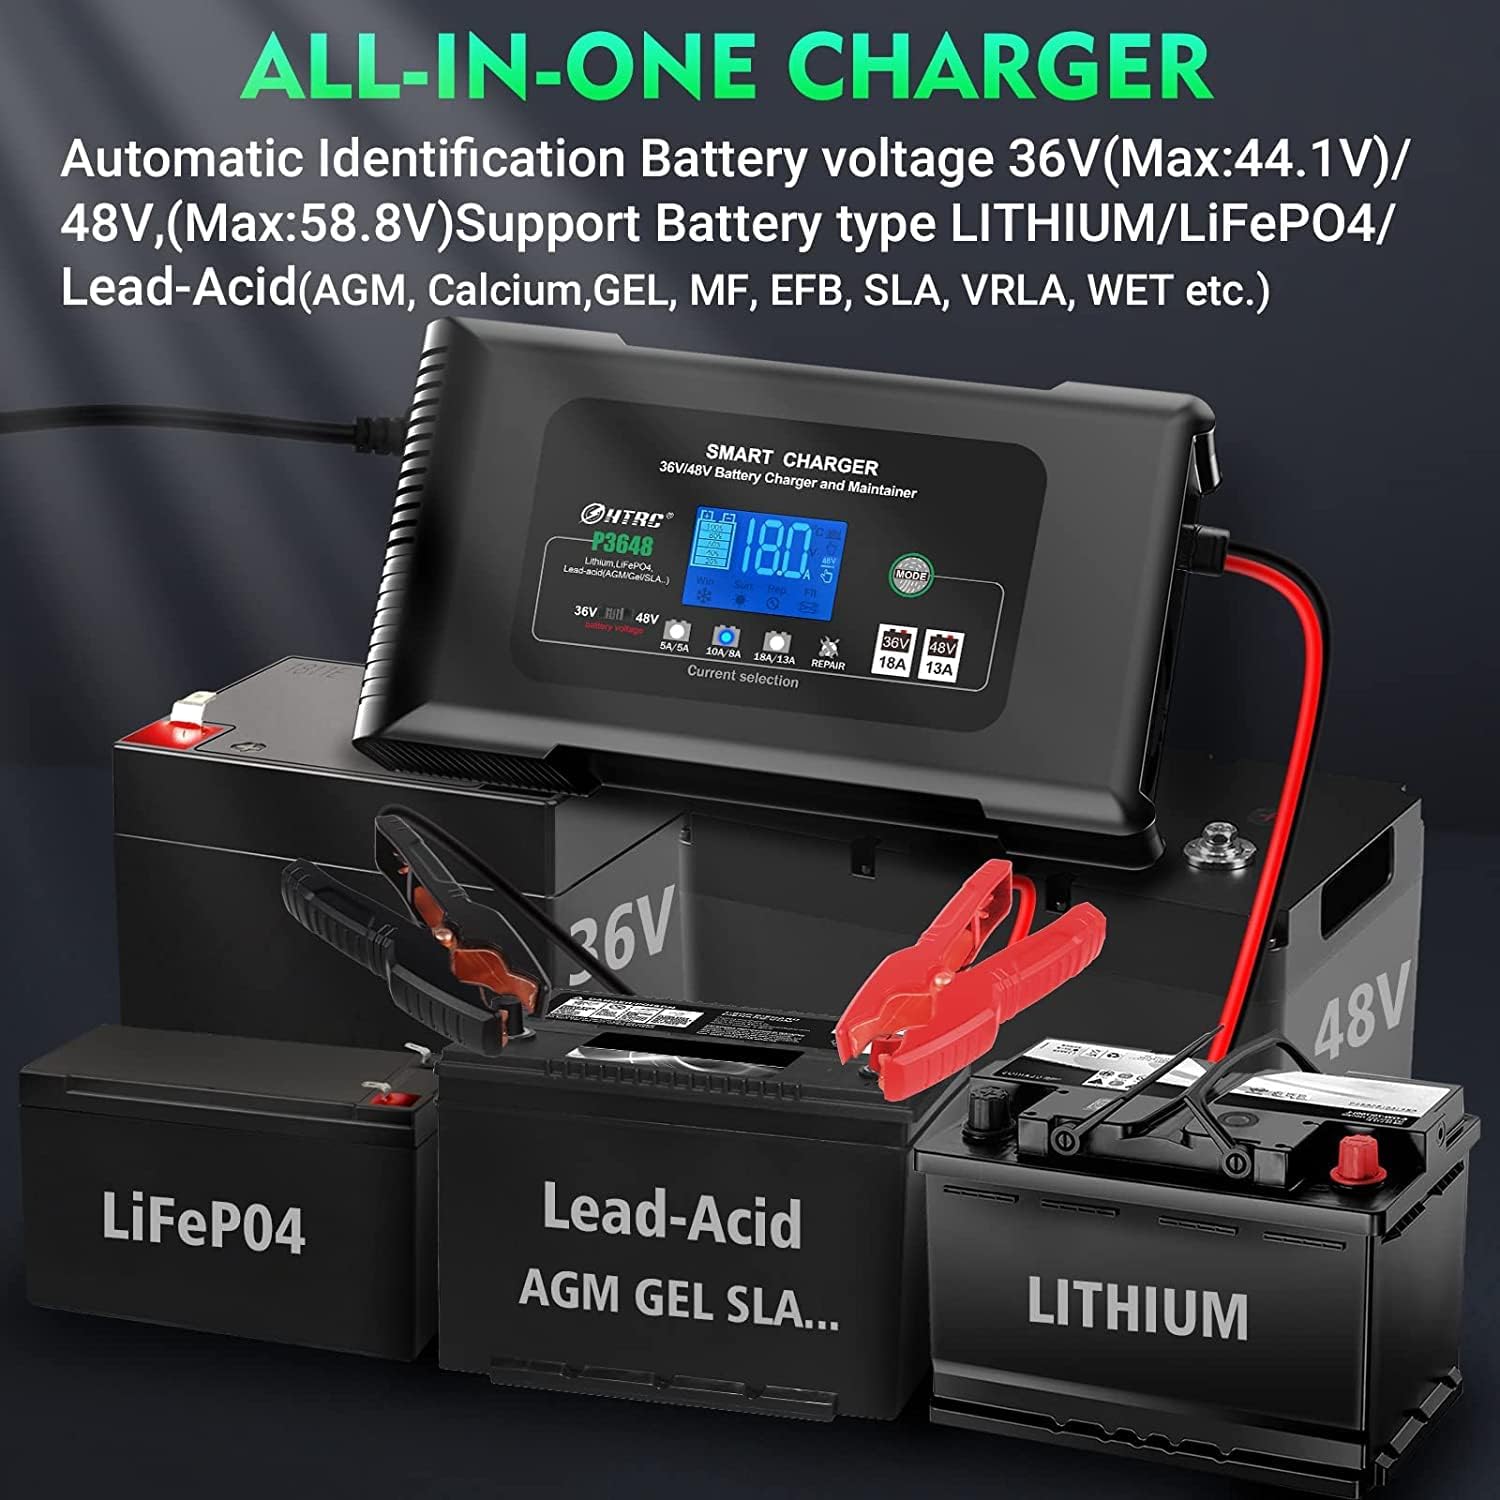
Figure 7: The charger's temperature detection feature ensures optimal charging performance in varying climates.
6. Maintenance
Proper maintenance ensures the longevity and reliable operation of your Haisito charger.
- Cleaning: Disconnect the charger from power and battery. Wipe the casing with a soft, dry cloth. Do not use solvents or abrasive cleaners.
- Storage: Store the charger in a cool, dry place when not in use. Keep cables neatly coiled and avoid sharp bends.
- Inspection: Periodically inspect the power cord, charging cables, and connectors for any signs of damage, wear, or corrosion. Replace damaged components immediately.
- Ventilation: Ensure the charger's ventilation openings are clear of dust and debris to prevent overheating.
7. Troubleshooting
If you encounter issues with your charger, refer to the following common problems and solutions:
| Problem | Possible Cause | Solution |
|---|---|---|
| Charger does not power on. | No AC power; Power switch off; Faulty power cord. | Check AC outlet and power cord connection. Ensure power switch is ON. |
| Charger displays "OFF" or error code. | Incorrect battery connection (reverse polarity); Battery voltage too low/high; Internal fault. | Verify correct polarity (+ to +, - to -). Ensure battery voltage is within 36V/48V range. Disconnect and reconnect. If error persists, contact support. |
| Battery not charging or charging slowly. | Incorrect mode/current selected; Battery severely discharged or damaged; Loose connection. | Select appropriate charging mode and current. Check all connections. For severely discharged Lead-Acid batteries, try Repair Mode (not for Lithium/LiFePO4). |
| Charger gets hot during operation. | Normal operation; Poor ventilation. | Some heat is normal. Ensure adequate ventilation around the charger. If excessively hot, disconnect and allow to cool. |
8. Specifications
| Model | P3648 |
| AC Input | 100V-240V~ 50/60 Hz |
| Output Voltage | 36V / 48V (Normal - Max: 40V-43.8V / 54V-58.4V) |
| Output Current | 36V: 18A; 48V: 13A |
| Supported Battery Types | Lithium, LiFePO4, Lead-Acid (AGM, GEL, EFB, MF, Flooded, VRLA, SLA, WET) |
| Supported Battery Capacity | 20AH-400AH (can support more capacity, but requires longer charging time) |
| Minimum Starting Voltage | > 26V |
| Power and Load (MAX) | 650 W |
| Product Dimensions | 230 x 125 x 70mm (9 x 4.9 x 2.7 inches) |
| Item Weight | 1100g (1.5 pounds) |
| Color | Black |
9. Warranty and Support
For warranty information or technical support, please refer to the documentation included with your purchase or contact Haisito customer service directly. Contact details are typically available on the product packaging or the official Haisito website.


