1. Important Safety Information
Please read all instructions carefully before using this monitor. Keep this manual for future reference.
- Power: Use only the power adapter supplied with the monitor. Ensure the power outlet is properly grounded.
- Ventilation: Do not block ventilation openings. Allow adequate space around the monitor for proper airflow.
- Moisture: Do not expose the monitor to rain, moisture, or excessive humidity. Do not place objects filled with liquids on the monitor.
- Heat: Keep the monitor away from heat sources such as radiators, heat registers, stoves, or other heat-producing appliances.
- Cleaning: Unplug the monitor from the power outlet before cleaning. Use a soft, dry cloth. Do not use liquid or aerosol cleaners.
- Servicing: Do not attempt to service this product yourself. Refer all servicing to qualified service personnel.
2. Package Contents
Verify that all items are present in your package. If any items are missing or damaged, please contact customer support.
- KOORUI 24-inch PC Monitor (Model P01)
- Monitor Stand (Base and Neck)
- Power Adapter
- HDMI Cable
- User Manual

Image: KOORUI 24-inch PC Monitor P01 and its included accessories, including the monitor, stand, power adapter, HDMI cable, and user manual.
3. Setup Instructions
3.1 Assembling the Monitor Stand
- Carefully remove the monitor and stand components from the packaging.
- Attach the stand neck to the monitor panel. Ensure it clicks securely into place or is fastened with screws if provided.
- Attach the stand base to the stand neck. Tighten the thumb screw at the bottom of the base to secure it.

Image: The KOORUI 24-inch PC Monitor P01 fully assembled with its stand, ready for connection.
3.2 Connecting the Monitor
The monitor supports HDMI and VGA connections.
- Power Connection: Connect the power adapter to the monitor's DC input port, then plug the other end into a power outlet.
- Video Connection:
- For HDMI: Connect one end of the HDMI cable to the HDMI port on your computer and the other end to the HDMI port on the monitor.
- For VGA: Connect one end of the VGA cable to the VGA port on your computer and the other end to the VGA port on the monitor.
- Audio (Optional): If your computer supports audio output via HDMI, the monitor's built-in speakers will play audio.

Image: A close-up view of the monitor's rear panel, highlighting the HDMI, VGA, and DC power input ports for easy identification during connection.

Image: The KOORUI 24-inch PC Monitor P01 connected to a laptop, demonstrating a typical setup for extended display use.
4. Operating Instructions
4.1 Powering On/Off
Press the power button located on the bottom right side of the monitor to turn it on or off. The power indicator light will illuminate when the monitor is on.
4.2 On-Screen Display (OSD) Menu
Use the control buttons on the bottom right of the monitor to navigate the OSD menu. These buttons typically include Menu, Up, Down, Select, and Exit.
- Menu: Opens the OSD menu.
- Up/Down: Navigates through menu options.
- Select: Confirms a selection or enters a sub-menu.
- Exit: Exits the current menu or OSD.
4.3 Adjusting Display Settings
Within the OSD menu, you can adjust various settings:
- Brightness/Contrast: Adjust the overall luminance and contrast ratio of the display.
- Color Settings: Modify color temperature, hue, and saturation.
- Input Source: Manually select between HDMI and VGA input.
- Low Blue Light Mode: Activates a filter to reduce blue light emissions, minimizing eye strain during prolonged use.
- Adaptive FreeSync: Enables dynamic refresh rate adjustment for smoother visuals, especially in gaming.
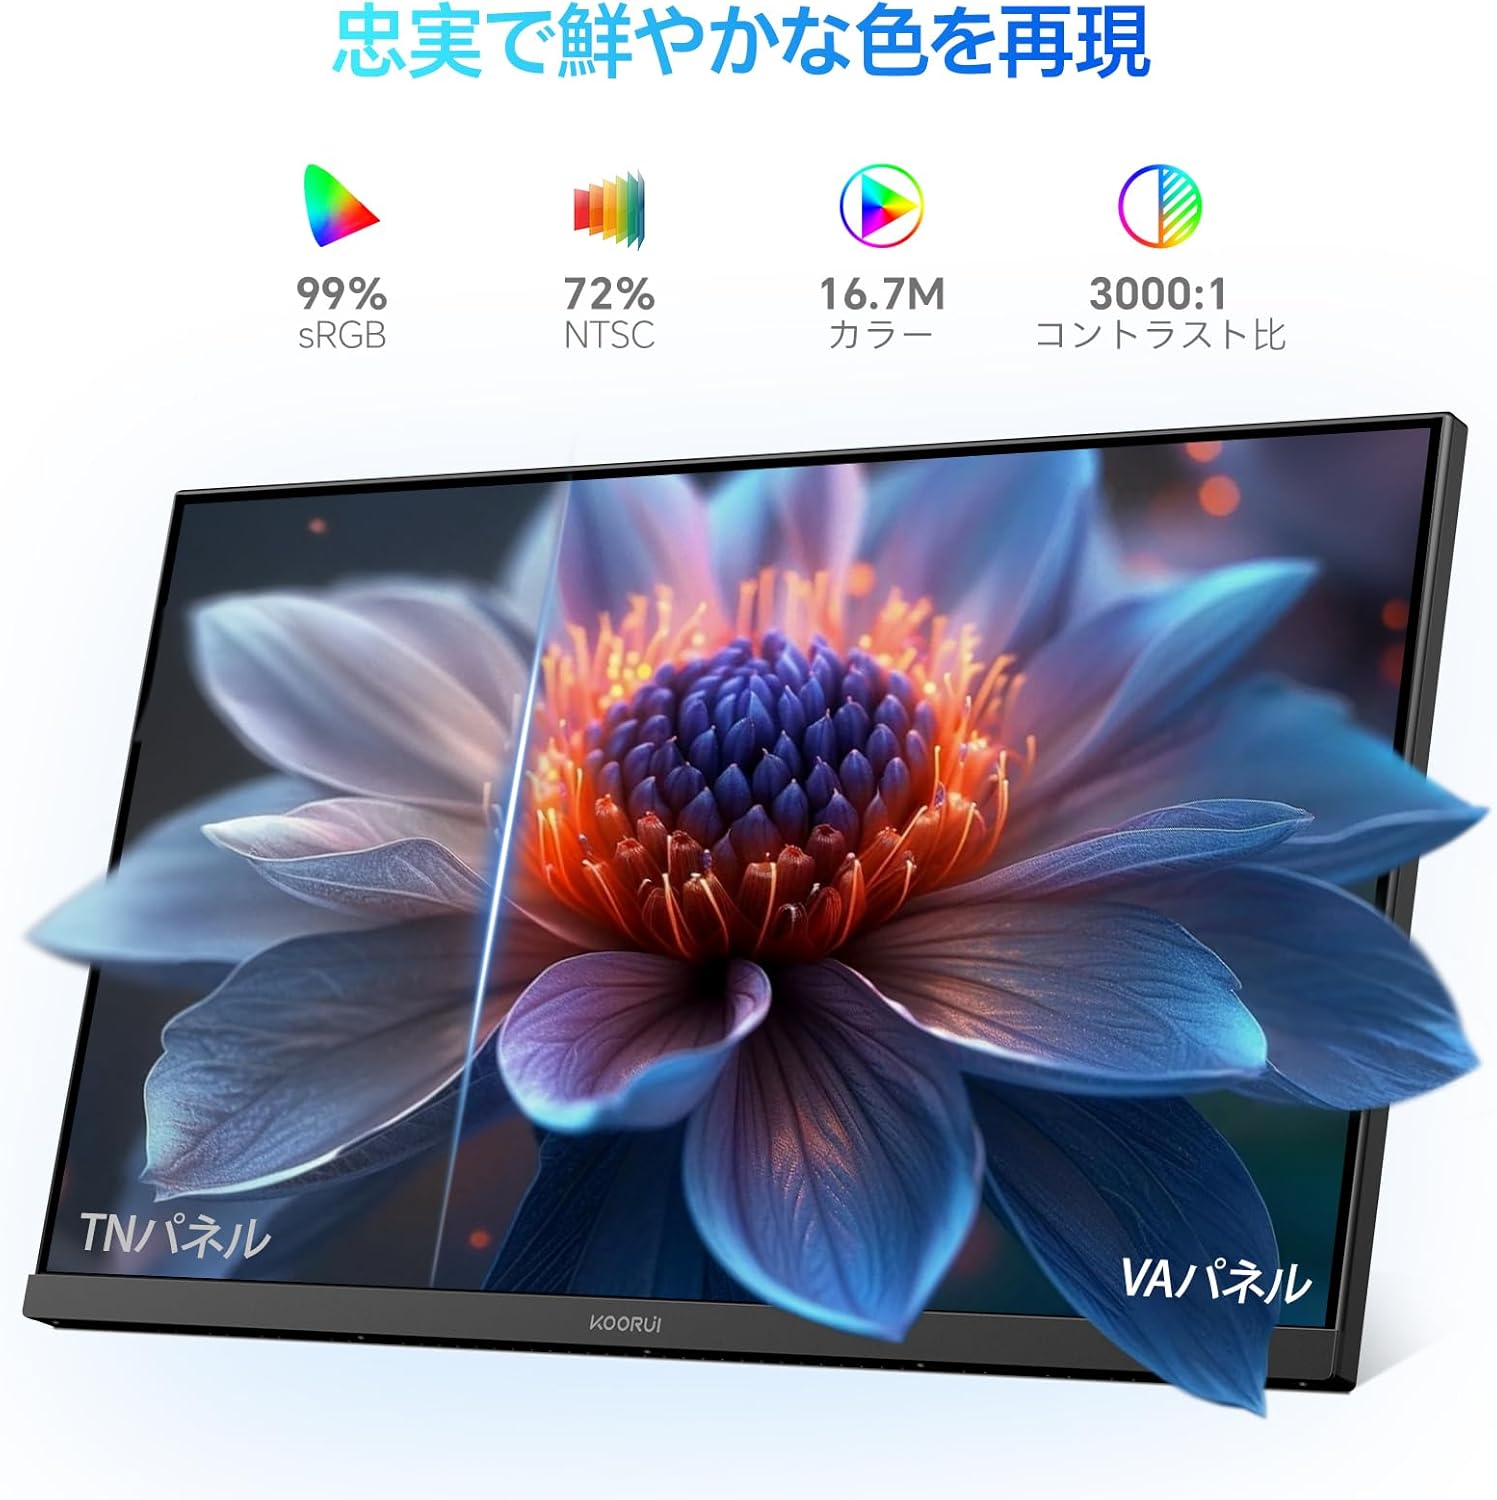
Image: A user working at a desk with the KOORUI 24-inch PC Monitor P01, illustrating the visual comfort provided by the Low Blue Light mode.

Image: A visual comparison demonstrating the benefits of Flicker-free and Low Blue Light technologies in reducing eye strain compared to a conventional display.
4.4 Physical Adjustments
The monitor allows for tilt adjustment to optimize your viewing angle.
- Tilt: Gently tilt the monitor panel forward (up to 5 degrees) or backward (up to 15 degrees) to find your preferred viewing position.

Image: A side profile of the monitor illustrating its adjustable tilt feature, allowing users to angle the screen for optimal comfort.
5. Maintenance
5.1 Cleaning the Monitor
To ensure the longevity and optimal performance of your monitor, follow these cleaning guidelines:
- Always unplug the monitor from the power outlet before cleaning.
- Use a soft, lint-free cloth slightly dampened with water to clean the screen. Avoid applying excessive pressure.
- For the monitor casing, use a soft, dry cloth.
- Do not use alcohol, ammonia-based cleaners, or abrasive cleaning agents, as these can damage the screen or casing.
5.2 General Care
- Avoid placing heavy objects on the monitor or its cables.
- Do not expose the monitor to direct sunlight or extreme temperatures.
- If the monitor will not be used for an extended period, unplug it from the power outlet.
6. Troubleshooting
If you encounter issues with your monitor, refer to the following common problems and solutions:
| Problem | Possible Cause | Solution |
|---|---|---|
| No image on screen | Monitor not powered on; Video cable loose or disconnected; Incorrect input source selected. | Ensure power cable is connected and monitor is on; Check video cable connections; Select correct input source via OSD menu. |
| Image is blurry or distorted | Incorrect resolution; Video cable issue. | Set display resolution to 1920x1080; Try a different video cable. |
| Colors are incorrect | Color settings in OSD; Video cable issue. | Adjust color settings in OSD menu; Check video cable for damage. |
| Monitor flickers | Refresh rate mismatch; Cable issue. | Ensure refresh rate is set to 100Hz (or compatible); Try a different video cable. |
| No sound | Volume too low; Incorrect audio output selected on computer; HDMI cable not transmitting audio. | Increase monitor volume; Check computer's audio output settings; Ensure HDMI cable supports audio. |
If the problem persists after trying these solutions, please contact KOORUI customer support.
7. Specifications
Technical specifications for the KOORUI 24-inch PC Monitor P01:
| Feature | Specification |
|---|---|
| Brand | KOORUI |
| Model Number | P01 |
| Screen Size | 24 Inches |
| Resolution | FHD 1920 x 1080 Pixels |
| Aspect Ratio | 16:9 |
| Panel Type | VA Panel |
| Refresh Rate | 100 Hz |
| Response Time | 5 Milliseconds |
| Contrast Ratio | 3000:1 |
| Viewing Angle | 178° (Horizontal/Vertical) |
| Surface Description | Matte |
| Special Features | Low Blue Light Filter, Tilt Adjustment, Frameless Design, Flicker-Free, Adaptive FreeSync |
| Connectivity | HDMI, VGA |
| Color | Black |

Image: Detailed diagram showing the dimensions and weight of the KOORUI 24-inch PC Monitor P01.
8. Warranty and Support
8.1 Warranty Information
This KOORUI monitor comes with a 3-year manufacturer's warranty. This warranty covers defects in materials and workmanship under normal use. Please retain your proof of purchase for warranty claims.
8.2 Customer Support
KOORUI is committed to providing premium service. If you encounter any damage, malfunctions, or missing accessories, please do not hesitate to contact us. We offer 24-hour assistance and a 12-month replacement service for eligible issues.
For support, please visit the official KOORUI website or contact your retailer.