Introduction
This manual provides instructions for the safe and efficient use of your Kymate NNTN8845A NNTN8860A Adaptive Single Unit Charger. This charger is designed for use with specific Motorola APX series radios and compatible batteries. Please read this manual thoroughly before operating the charger.
Important Safety Information
- Do not disassemble the charger. Disassembly may result in electric shock or fire.
- Do not expose the charger to rain or moisture.
- Use only the power adapter supplied with the charger. Using an incorrect adapter may damage the charger or radio.
- Ensure the charger is placed on a stable, flat surface away from direct sunlight or heat sources.
- Do not charge damaged batteries.
- Keep the charging contacts clean and free from debris.
Package Contents
Verify that all items are present in your package:
- 1 x Desktop Charger Unit
- 1 x Power Adapter
- 1 x AC Power Cord

Image: The complete package contents, including the desktop charger, power adapter, and AC power cord.
Setup
- Connect the AC power cord to the power adapter.
- Plug the power adapter's DC output connector into the DC input port on the back of the desktop charger unit.
- Plug the AC power cord into a standard wall outlet. The charger is now ready for use.
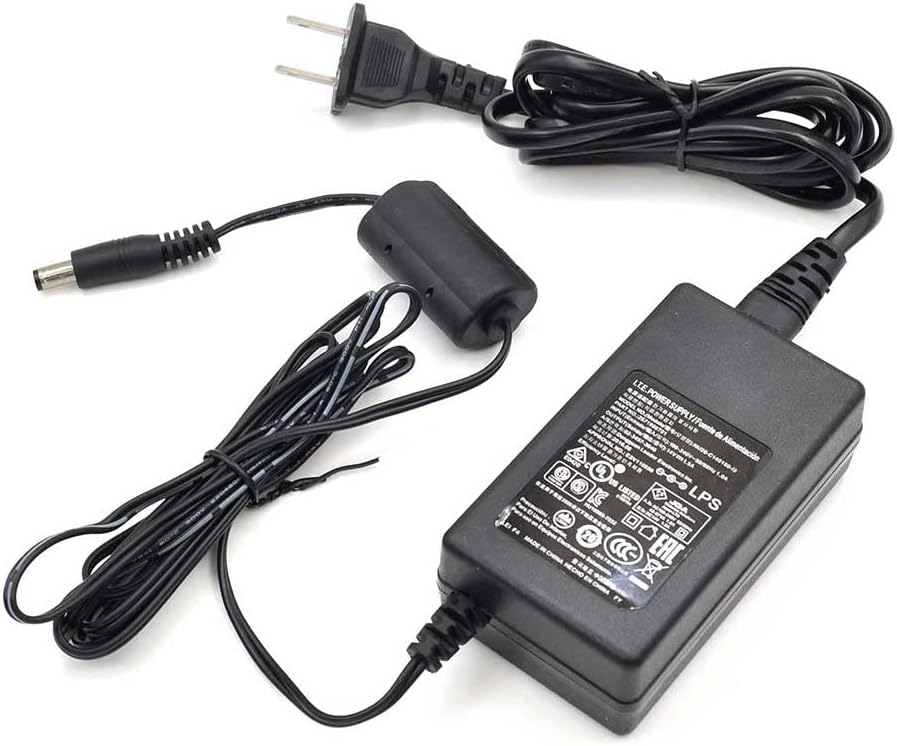
Image: The power adapter and AC power cord, ready for connection to the charger unit.
Operating Instructions
Charging a Battery
- Ensure the charger is properly connected to a power source.
- Insert the battery into the charging slot on the desktop charger. You can charge the battery separately or with the radio attached.
- The LED indicator on the charger will illuminate to show the charging status.
- Once charging is complete, the LED indicator will change status. Remove the battery or radio from the charger.

Image: A radio battery correctly seated in the charger's slot.
LED Indicator Status
| LED Status | Meaning |
|---|---|
| Solid Red | Battery is charging. |
| Solid Green | Charging complete. |
| Flashing Red | Charging error (e.g., battery fault, temperature out of range). |
USB Charging Ports
The charger unit includes two USB Type-A ports on the side. These ports can be used to charge other compatible USB devices while the radio battery is charging.

Image: The side of the charger unit, highlighting the two USB Type-A charging ports.
Compatible Radios and Batteries
Compatible Radio Models
- Motorola APX6000, APX6000LI, APX6000XE
- Motorola APX7000, APX7000XE
- Motorola APX8000, APX8000XE, APX8000H, APX8000HXE
- Motorola SRX2000
Compatible Battery Part Numbers
- NNTN7033, NNTN7034, NNTN7035, NNTN7036, NNTN7037, NNTN7038, NNTN7573
- NNTN8092, NNTN8182, NNTN8921, NNTN8930
- PMNN4403, PMNN4485, PMNN4486, PMNN4487, PMNN4494, PMNN4504, PMNN4505, PMNN4547, PMNN4573
- NNTN9087, NNTN9088, NNTN9089, NNTN9090, NNTN9126, NNTN9127
Maintenance
- Cleaning: Disconnect the charger from the power source before cleaning. Use a soft, dry cloth to wipe the exterior of the charger. Do not use harsh chemicals or abrasive cleaners.
- Storage: Store the charger in a cool, dry place when not in use.
- Contact Pins: Periodically inspect the charging contact pins for any signs of corrosion or damage. Clean gently with a dry cotton swab if necessary.
Troubleshooting
| Problem | Possible Cause | Solution |
|---|---|---|
| LED not illuminating when battery is inserted. | No power to charger; battery not seated correctly; battery fault. | Check power connections; re-seat battery; try a different battery. |
| LED flashing red. | Charging error (e.g., battery temperature too high/low, battery fault). | Remove battery, allow to cool/warm to room temperature, then re-insert. If error persists, the battery may be faulty. |
| Battery not fully charging. | Battery nearing end of life; charger contacts dirty. | Clean charger and battery contacts. Consider replacing the battery if it is old. |
Specifications
- Model Number: NNTN8845A
- Output Voltage: 14 Volts
- Item Weight: 1.61 pounds (0.73 Kilograms)
- Package Dimensions: 8.54 x 6.18 x 3.11 inches
- Color: Black
- Manufacturer: Kymate
- Certifications: UL, CE, FCC
Warranty and Support
For warranty information or technical support, please refer to the documentation provided at the time of purchase or contact your retailer. Keep your purchase receipt as proof of purchase for any warranty claims.