1. Introduction
This manual provides essential information and instructions for the safe and efficient use of your Blackview BV7200 Rugged Smartphone. The BV7200 is designed for durability and performance in challenging environments, featuring advanced water and dust resistance, a powerful processor, and a high-capacity battery.
Key features include:
- IP68 & IP69K Certification: Advanced water and dust resistance for outdoor and demanding conditions.
- MediaTek Helio G85 Processor: Ensures smooth performance for gaming, multitasking, and general use.
- 50MP Dual Camera: Capture high-quality photos, even in low-light conditions.
- 5180mAh Battery: Long-lasting power with 18W fast charging support.
- 6.1-inch HD+ Display: Durable screen with Corning Gorilla Glass 3, optimized for comfortable viewing.
- Glove Mode: Allows screen operation even when wearing gloves.

Image: Overview of the Blackview BV7200 Rugged Smartphone, highlighting its MediaTek Helio G85 processor, 50MP camera, IP68/IP69K ratings, 5180mAh battery, 6.1-inch display, and Glove Mode.
2. Setup
2.1. SIM Card and MicroSD Card Installation
To install your SIM card(s) and/or MicroSD card:
- Locate the SIM tray on the side of the device.
- Use the provided SIM ejector tool to open the tray.
- Carefully place your Nano-SIM card(s) and/or MicroSD card into the designated slots, ensuring correct orientation.
- Gently push the tray back into the device until it clicks into place.
2.2. Initial Charging and Power On
Before first use, it is recommended to fully charge your device.
- Connect the USB Type-C cable to the charging port at the bottom of the phone. Ensure the port cap is securely opened before inserting the cable and closed after charging to maintain water resistance.
- Connect the other end of the cable to a compatible power adapter and plug it into a wall outlet.
- Once sufficiently charged, press and hold the Power button (usually on the right side) for a few seconds until the Blackview logo appears.
- Follow the on-screen prompts to complete the initial setup, including language selection, Wi-Fi connection, and Google account setup.
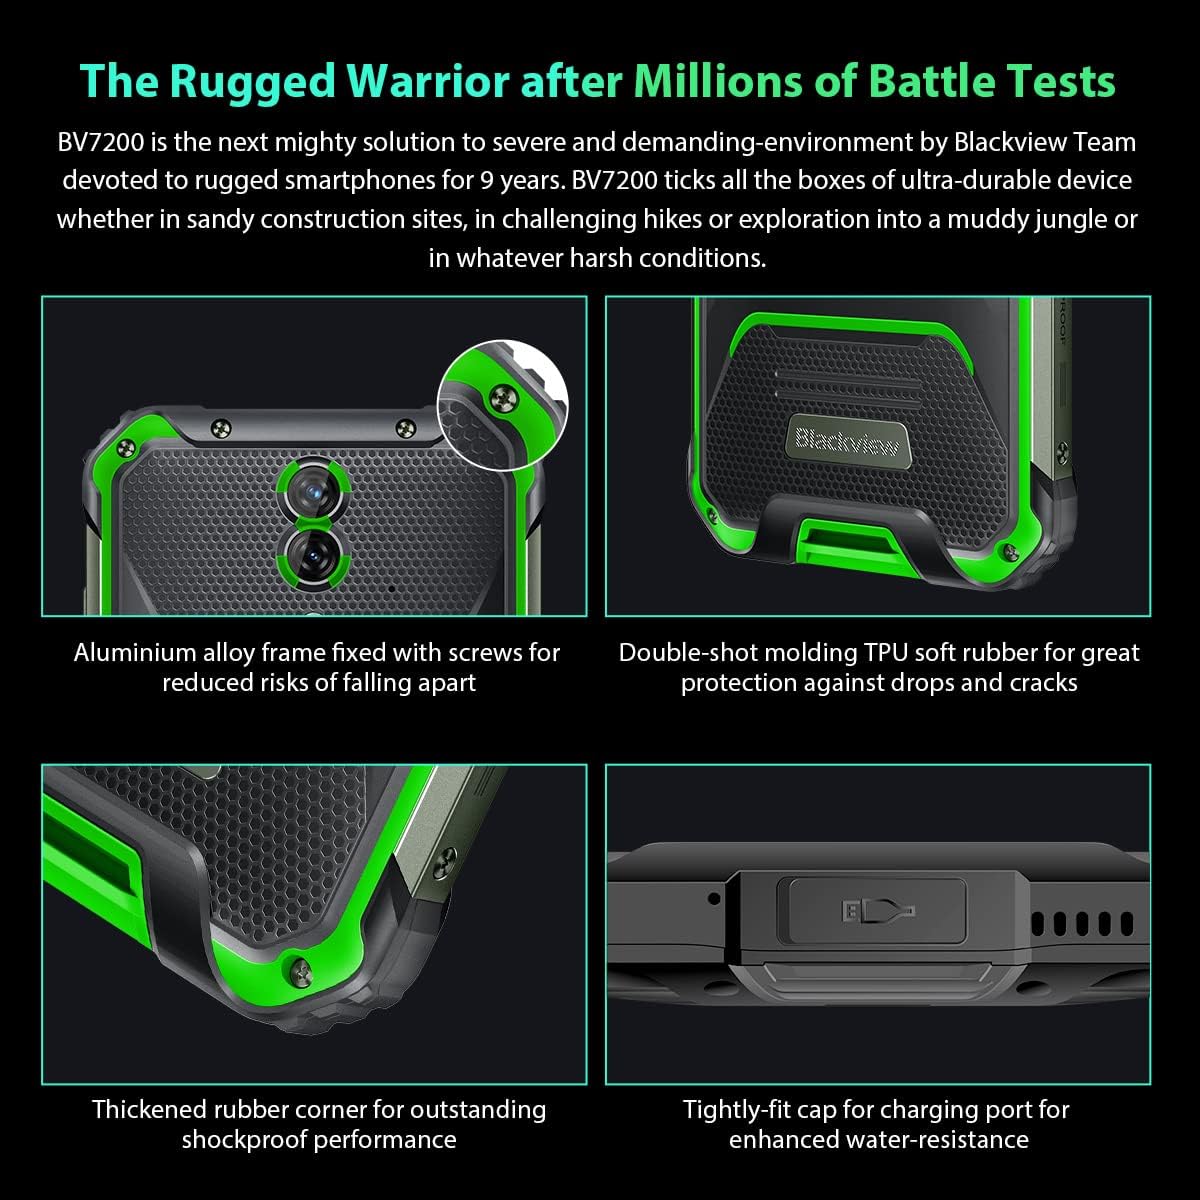
Image: Close-up views of the Blackview BV7200's rugged construction, including aluminum alloy frame, double-shot molding TPU rubber, thickened rubber corners, and the tightly-fit cap for the charging port, emphasizing its durability and water resistance.
3. Operating Instructions
3.1. Basic Navigation
The Blackview BV7200 operates on Doke OS 3.0, based on Android 12. Use touch gestures for navigation:
- Tap: Select an item or open an app.
- Swipe: Scroll through screens or lists.
- Pinch: Zoom in or out on images and web pages.
- Long Press: Access contextual menus or move app icons.
3.2. Camera Usage
The BV7200 features a 50MP main rear camera and an 8MP ultra-wide/macro rear camera.
- Open the Camera app from your home screen or app drawer.
- Select your desired mode (Photo, Video, Portrait, Pro, etc.).
- Tap the screen to focus on a specific area.
- Press the Shutter button to capture a photo or start/stop video recording.

Image: Diagram illustrating the Blackview BV7200's 50MP Samsung ISOCELL JN1 main rear camera, 8MP ultra-wide and ultra-macro rear camera, and rear flash, highlighting its photographic capabilities.
3.3. Glove Mode
The BV7200 supports Glove Mode, allowing you to operate the touchscreen while wearing gloves.
- To activate/deactivate Glove Mode, navigate to Settings > Smart Assistant > Glove Mode.
- Ensure this mode is enabled when using gloves for optimal touch responsiveness.

Image: Collage demonstrating the Blackview BV7200's Glove Mode in various scenarios, showing users operating the phone while wearing different types of gloves, emphasizing its utility in cold or industrial environments.
3.4. Water and Dust Resistance (IP68 & IP69K)
The BV7200 is certified IP68 and IP69K, making it resistant to water immersion and high-pressure water jets. This allows for use in aquatic sports or dusty environments.
- Always ensure all port caps (charging port, SIM tray) are securely closed before exposing the device to water or dust.
- Rinse the phone with clean water after exposure to saltwater or chemicals.
- Do not charge the phone if the charging port is wet. Allow it to dry completely.
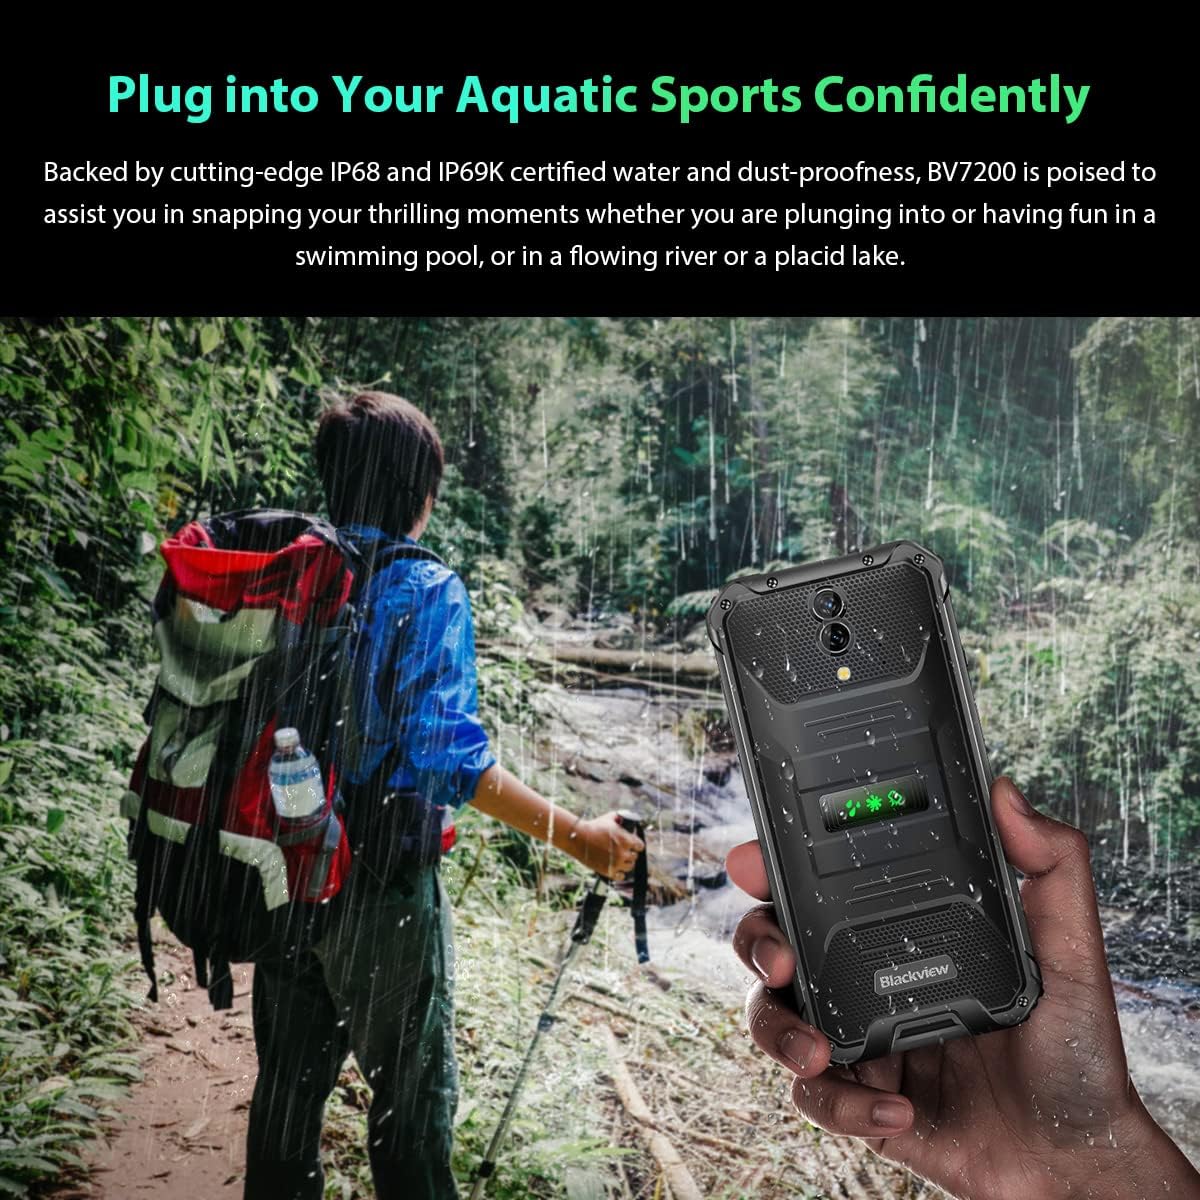
Image: A person holding the Blackview BV7200 near a stream or waterfall, illustrating its water resistance and suitability for outdoor and aquatic activities.
3.5. Battery Management
The 5180mAh battery provides extended usage. The device supports 18W fast charging.
- Use the original charger and cable for optimal charging speed and safety.
- The battery is designed to withstand temperatures down to -10°C.
- To prolong battery life, avoid extreme temperatures and fully discharging the battery regularly.
3.6. Memory Expansion
The BV7200 features 6GB of RAM with an additional 4GB virtual memory expansion, totaling 10GB, for enhanced multitasking and performance.

Image: Graphic illustrating the memory expansion feature of the Blackview BV7200, showing 6GB of physical RAM and an additional 4GB of virtual RAM, combining for a total of 10GB for improved performance.
4. Maintenance
4.1. Cleaning Your Device
To clean your Blackview BV7200:
- Wipe the screen and body with a soft, lint-free cloth.
- For stubborn dirt, use a slightly damp cloth with mild soap, then wipe dry.
- Do not use harsh chemicals, solvents, or abrasive cleaners.
- Ensure all port caps are closed before cleaning with liquids.
4.2. Software Updates
Regularly check for and install software updates to ensure optimal performance, security, and access to new features.
- Go to Settings > System > System update to check for available updates.
- Ensure your device has sufficient battery and a stable Wi-Fi connection before starting an update.
5. Troubleshooting
5.1. Common Issues and Solutions
- Device not turning on: Ensure the battery is charged. Connect to a charger for at least 15 minutes, then try powering on again.
- Screen unresponsive: Restart the device by holding the Power button for about 10-15 seconds. If the issue persists, try a factory reset (data will be lost).
- Connectivity issues (Wi-Fi/Bluetooth/Mobile Data):
- Toggle Wi-Fi/Bluetooth/Mobile Data off and on.
- Restart the device.
- Check router/network settings.
- For mobile data, ensure SIM card is correctly inserted and activated.
- Apps crashing: Clear the app's cache and data (Settings > Apps > [App Name] > Storage > Clear Cache/Clear Data). If the problem continues, uninstall and reinstall the app.
5.2. Factory Reset
A factory reset will erase all data from your phone and restore it to its original factory settings. Back up important data before proceeding.
- Go to Settings > System > Reset options > Erase all data (factory reset).
- Confirm your decision. The device will restart and perform the reset.
6. Specifications
Below are the technical specifications for the Blackview BV7200:
| Feature | Specification |
|---|---|
| Brand | Blackview |
| RAM Size | 6 GB (expandable to 10GB with virtual RAM) |
| CPU Model | MediaTek Helio G85 |
| Storage Capacity | 128 GB (expandable up to 1TB with TF card) |
| Screen Size | 6.1 Inches |
| Resolution | 720 x 1560 HD+ |
| Cellular Technology | 4G |
| Wireless Network Technology | GSM, LTE, Wi-Fi |
| Battery Capacity | 5180 mAh |
| Operating System | Android 12 (Doke OS 3.0) |
| Water/Dust Resistance | IP68, IP69K |

Image: Detailed view of the MediaTek Helio G85 processor, highlighting its specifications including RAM, ROM, GPU, and expandable storage, emphasizing its strong performance capabilities.

Image: Graphic detailing the Blackview BV7200's 6.1-inch HD+ display specifications, including resolution (720x1560), screen-to-body ratio (83%), brightness (380cd/cm2), and PPI (283), emphasizing its visual quality and durability with Corning Gorilla Glass 3.
7. Warranty and Support
For warranty information and technical support, please refer to the warranty card included with your product or visit the official Blackview website. Keep your proof of purchase for warranty claims.
For further assistance, you may contact Blackview customer service through their official channels.