
Introduction
This manual provides detailed instructions for the DreamSky DS2202 Vibrating Alarm Clock. Please read this manual thoroughly before using the product to ensure proper operation and to maximize its features. This device is designed to assist heavy sleepers and individuals with hearing impairment by providing a strong vibration alarm.
Product Overview
Key Features
- Portable Wireless Design: Cordless operation for flexible placement under a pillow, on a nightstand, or in a bed.
- Rechargeable Battery: Built-in rechargeable battery eliminates the need for frequent battery replacement.
- Adjustable Vibration Levels: Five selectable vibration strengths (20%, 40%, 60%, 80%, 100%).
- Dual Wake-up Modes: Choose between vibration only, or vibration combined with an audible alarm.
- Automatic Time Setting: Sets itself upon power-up; simply select your local time zone.
- Automatic Daylight Saving Time (DST): Automatically adjusts for DST when enabled.
- LCD Backlight: Illuminates for 15 seconds when any button is pressed for night viewing.
- Snooze Function: Provides an additional 9 minutes of sleep.
- Alarm Duration: Alarm vibrates for 2 minutes before automatically turning off.
- 12/24 Hour Display: Selectable time format.
What's in the Box
- DreamSky Vibrating Alarm Clock (DS2202)
- Power Adapter
- User Manual
- Lanyard/Rope

Figure 1: Package Contents. The image displays the DreamSky DS2202 alarm clock, a charging adapter, the user manual, and a lanyard/rope.
Device Layout

Figure 2: Front View of the Alarm Clock. This image shows the alarm clock with its protective lid open, revealing the LCD screen, time setting buttons, alarm setting buttons, and the snooze bar.

Figure 3: Power Button and Battery Indicator. This diagram highlights the power saving ON/OFF switch and the low battery indicator lights on the device.
Setup
- Initial Charge: Before first use, fully charge the alarm clock using the provided power adapter. The battery indicator lights will show charging status. A low battery icon will appear on the display when recharging is needed.
- Power On: Locate the power saving ON/OFF switch, usually on the side or back of the device (refer to Figure 3). Slide it to the "ON" position.
- Time Zone Selection: The clock will automatically set the time upon power-up. You only need to select your local time zone.
- Press the TIME ZONE button.
- Use the +/- buttons to cycle through available time zones (e.g., PST, MST, CST, EST).
- Confirm your selection by pressing the TIME ZONE button again or wait a few seconds for it to auto-confirm.

Figure 4: Auto Set and Time Zone. The image illustrates the clock's auto-setting capability and the time zone selection map located on the inside of the lid.
- Daylight Saving Time (DST): To enable or disable automatic DST adjustment:
- Press the DST ON/OFF button.
- The display will indicate if DST is enabled or disabled.

Figure 5: Automatic DST Adjustment. This image shows the alarm clock on a desk, highlighting its ability to automatically adjust for Daylight Saving Time.
Operating Instructions
Setting the Alarm
- Press and hold the ALARM SET button for 2 seconds until the alarm time flashes on the display.
- Use the +/- buttons to adjust the hour. Press ALARM SET to confirm the hour and move to minutes.
- Use the +/- buttons to adjust the minutes. Press ALARM SET to confirm the minutes.
- After setting the time, you can choose the alarm mode:
- Vibration Only: Slide the "Alarm Mode" switch (located on the side, near the alarm icon) to the vibration icon position.
- Beeping + Vibration: Slide the "Alarm Mode" switch to the bell + vibration icon position.

Figure 6: Wake-up Modes. This image illustrates the two available alarm modes: audible beep with vibration, and vibration only.
- To turn off the alarm for the day, press the independent SHAKE-OFF button. The alarm will reactivate the next day at the set time.
Adjusting Vibration Strength
The alarm clock offers five levels of vibration intensity. To adjust:
- Press the SHAKE button.
- Each press will cycle through the vibration levels: 20%, 40%, 60%, 80%, 100%. The current level is displayed on the LCD screen.

Figure 7: Customizable Vibration Levels. This image demonstrates the alarm clock's five adjustable vibration strengths, suitable for various sleep depths.
Using the Snooze Function
When the alarm sounds, press the large SNOOZE bar located on the front of the device. This will pause the alarm for 9 minutes, after which it will sound again.

Figure 8: Snooze Function. This image shows the alarm clock under a pillow, illustrating the 9-minute snooze feature.
12/24 Hour Format
To switch between 12-hour (AM/PM) and 24-hour (military) time formats:
- Press the + / 12/24H button. The display will change accordingly.
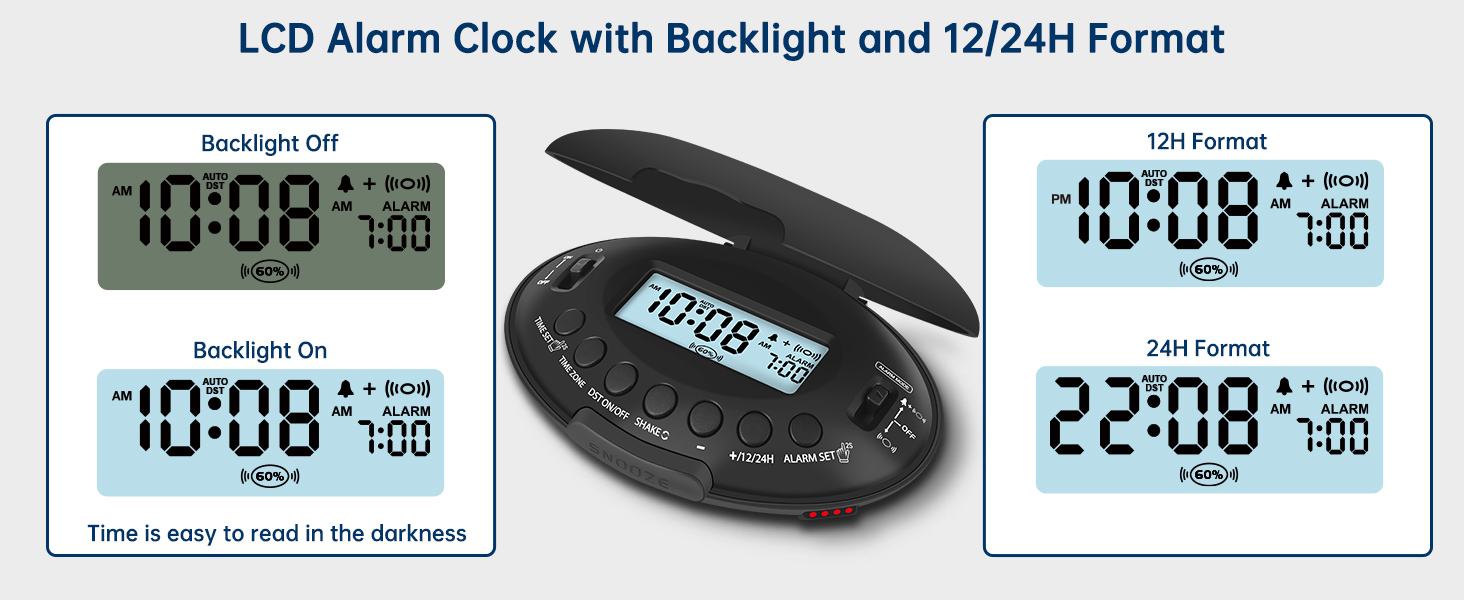
Figure 9: Time Format and Backlight. This image displays the alarm clock's LCD screen, demonstrating the 12-hour and 24-hour time formats, as well as the backlight functionality.
Backlight
To view the time in the dark, press any button. The LCD backlight will illuminate for 15 seconds and then turn off automatically to conserve battery.
Charging and Battery
The DreamSky DS2202 features a built-in rechargeable Lithium Ion battery. Use the provided power adapter to charge the device.
- Connect the power adapter to the charging port on the alarm clock.
- Plug the adapter into a standard wall outlet.
- The battery power indicator lights (red LEDs) will show the charging status.
- A low battery icon will appear on the LCD display when the battery level is low, indicating that recharging is necessary.
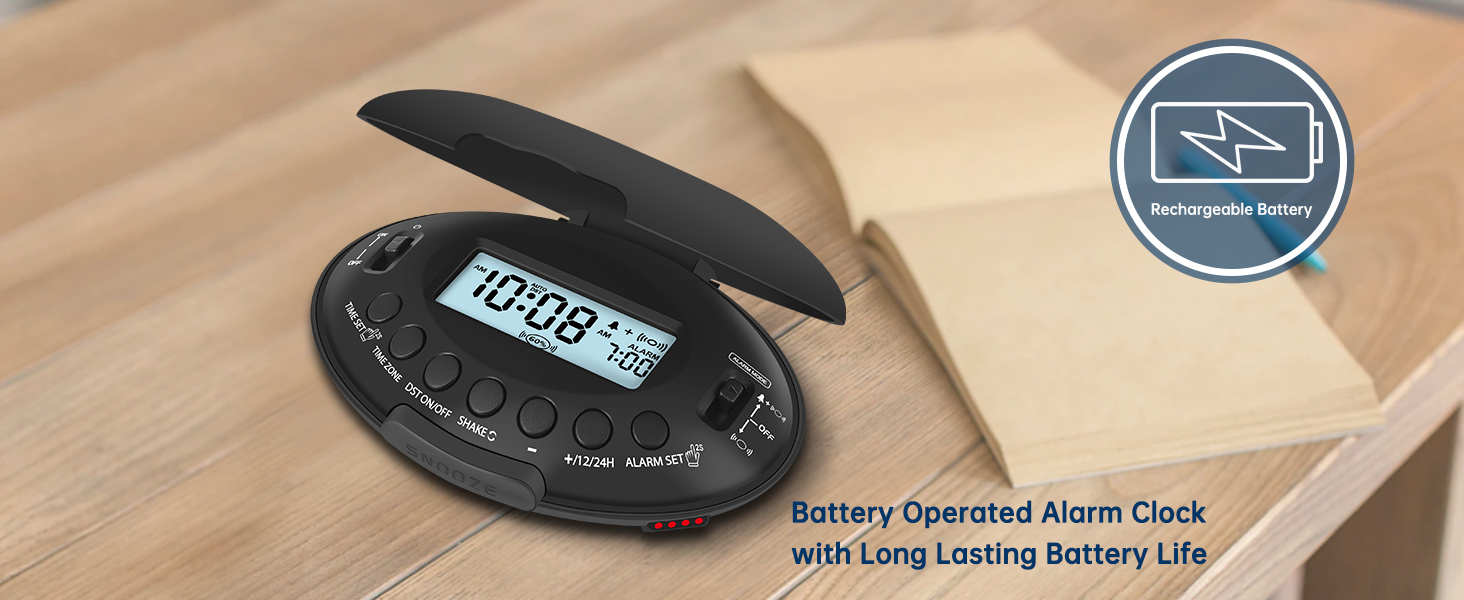
Figure 10: Rechargeable Battery. This image highlights the convenience of the alarm clock's rechargeable battery, ensuring extended use without frequent charging.
Maintenance
- Cleaning: Wipe the device with a soft, dry cloth. Do not use liquid cleaners or abrasive materials.
- Storage: When not in use for extended periods, store the alarm clock in a cool, dry place. Ensure it is fully charged before storing to maintain battery health.
- Lanyard Use: The included lanyard can be used to secure the alarm clock to a bedpost or desk to prevent it from being lost or falling.
Troubleshooting
| Problem | Possible Cause | Solution |
|---|---|---|
| Clock does not turn on. | Battery is depleted or power switch is off. | Ensure the power saving ON/OFF switch is in the "ON" position. Charge the device using the provided power adapter. |
| Alarm does not sound/vibrate. | Alarm is not set, alarm mode is incorrect, or battery is low. | Verify the alarm time is set correctly. Check the alarm mode switch (vibration only or beep + vibration). Ensure the battery is sufficiently charged. |
| Vibration is too weak/strong. | Vibration strength setting is not optimal. | Press the SHAKE button to adjust the vibration intensity to your preference (20%-100%). |
| Time is incorrect. | Incorrect time zone selected or DST setting is wrong. | Re-select the correct time zone using the TIME ZONE button. Check the DST ON/OFF setting. |
| Backlight does not stay on. | Backlight is designed to be temporary. | This is normal operation. The backlight illuminates for 15 seconds after any button press to conserve battery. |
Specifications
| Feature | Detail |
|---|---|
| Model Number | DS2202 |
| Brand | DreamSky |
| Display Type | Digital |
| Style | Bed shaker |
| Product Dimensions | 4.7"W x 1.3"H (approximately 11.9 cm W x 3.3 cm H) |
| Item Weight | 5.1 ounces (approximately 144.6 grams) |
| Power Source | Battery Powered (Rechargeable Lithium Ion) |
| Material | Acrylonitrile Butadiene Styrene (Plastic) |
| Alarm Clock Function | Yes |
| Batteries Required | 1 Lithium Ion battery (included) |
| Manufacturer | ShenZhen litian technology Co.,Ltd |

Figure 11: Product Dimensions. This image provides a visual representation of the alarm clock's width (4.7 inches) and height (1.3 inches).
Warranty and Support
The DreamSky DS2202 Vibrating Alarm Clock comes with a 1-year replacement warranty.
For technical support, warranty claims, or further assistance, please contact DreamSky customer service through their official channels or the retailer where the product was purchased.
Please retain your proof of purchase for warranty purposes.


