
Miofive Dash Cam Dual
Miofive Dash Cam Front and Rear User Manual
Model: Dash Cam Dual
Introduction
The Miofive Dash Cam Front and Rear system provides comprehensive video recording for your vehicle, featuring 4K resolution for the front camera and 2K for the rear. Designed for reliability and ease of use, this dual dash camera system incorporates advanced features such as 5G WiFi connectivity, built-in GPS, motion detection, and G-sensor technology, all powered by a durable super capacitor. This manual provides detailed instructions for setup, operation, maintenance, and troubleshooting to ensure optimal performance of your device.
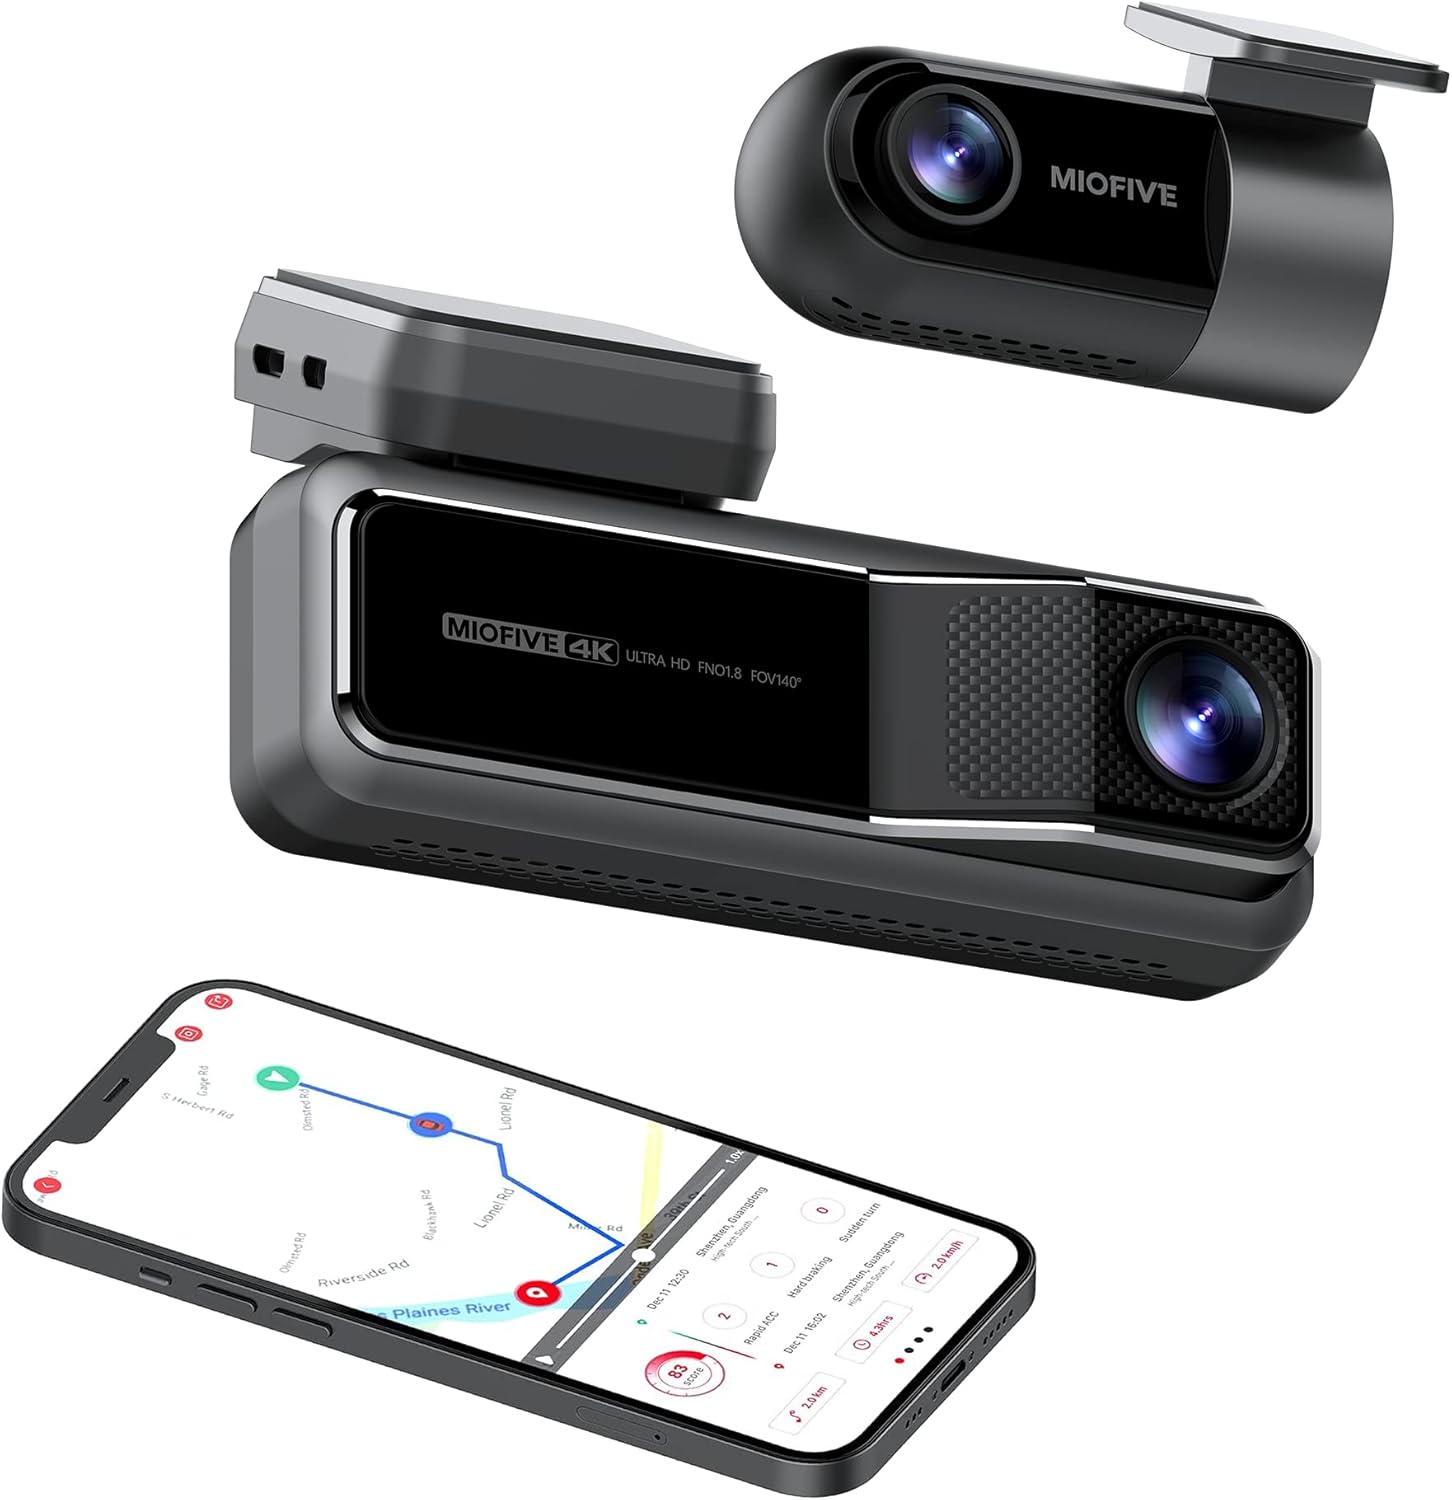
The Miofive Dash Cam system, featuring both front and rear cameras, along with its companion mobile application.
What's in the Box
Please verify that all items listed below are included in your package:
- Miofive 4K Dash Cam x 1
- Car Charger x 1
- Crow Bar x 1
- Charging Cable x 1
- Static Sticker x 4
- User Manual x 1
- A Set of Backup Double-sided Adhesive Tapes x 1
- Data Cable x 1
- Rear Cam x 1
- Rear Cam Cable x 1

All components included in the Miofive Dash Cam Front and Rear package.
Setup and Installation
Mounting the Dash Cam
- Clean the windshield area where the dash cam will be mounted. Ensure it is free of dust and grease.
- Apply one of the static stickers to the cleaned area on the windshield. This helps protect your windshield and makes removal easier.
- Attach the main dash cam unit to the static sticker using the provided adhesive tape. Press firmly for 30 seconds to ensure a secure bond.
- Adjust the camera lens angle to ensure it captures the road ahead clearly, typically centered with the horizon.
Connecting Power
- Connect the provided car charger to the dash cam's power input port.
- Plug the car charger into your vehicle's 12V power outlet (cigarette lighter socket).
- Route the power cable neatly along the edge of the windshield and dashboard using the crow bar to tuck it into crevices, ensuring it does not obstruct your view or vehicle controls.
- For continuous parking monitoring, an optional hardwire kit (sold separately) is required to provide constant power to the dash cam. Refer to the hardwire kit's instructions for installation.
Rear Camera Connection
- Mount the rear camera on your rear windshield, typically at the top center, ensuring a clear view of the road behind. Use a static sticker and adhesive tape as with the front camera.
- Connect the rear camera cable to the rear camera and route it to the main dash cam unit.
- Plug the rear camera cable into the designated rear camera input port on the main dash cam.

Illustration of the Miofive Dash Cam Front and Rear installation process.
Operating Instructions
Power On/Off
The dash cam will automatically power on and begin recording when connected to your vehicle's power supply and the ignition is turned on. It will power off automatically when the vehicle's power is cut.
Basic Recording
Once powered on, the dash cam will automatically start loop recording. This means it continuously records video in segments, overwriting the oldest footage when the storage is full. Important footage can be locked to prevent overwriting.
5G WiFi and App Control
The Miofive Dash Cam features built-in 5G WiFi for seamless connection to the Miofive mobile application. Download the Miofive app from your smartphone's app store. Once connected, you can:
- View live video feed from both cameras.
- Playback recorded footage directly on your phone.
- Download important video clips to your device.
- Adjust camera settings and preferences.
- Receive real-time Over-The-Air (OTA) updates for bug fixes and software enhancements.


The Miofive App provides comprehensive control and access to your dash cam's features and recordings.
G-Sensor and Motion Detection
The built-in G-sensor automatically detects sudden impacts or collisions. When an event is detected, the dash cam will automatically lock the current video segment, preventing it from being overwritten by loop recording. This ensures critical evidence is preserved.

The G-sensor ensures automatic recording and locking of footage during impacts.
Parking Monitor
With the optional hardwire kit, the dash cam can monitor your vehicle even when parked. The 24-hour parking monitor and time-lapse recording features capture disturbances or continuous footage, providing security when you're away from your car.

The parking monitor feature provides continuous surveillance for your vehicle when parked.
Night Vision
Equipped with the Sony Starvis IMX415 sensor and High Dynamic Range (HDR) technology, the Miofive Dash Cam delivers clear and bright video quality in low-light conditions, enhancing visibility during nighttime driving or in dimly lit environments.

Enhanced night vision capabilities for clear recordings in low light.
AI Algorithm and Go Assist
The intelligent AI algorithm monitors road conditions and provides helpful alerts. The Go Assist feature can notify you of sudden turns, braking, and accelerations, and prompt you to proceed when the vehicle ahead moves, improving driving awareness.

AI algorithm for smart driving assistance and alerts.
GPS Tracking
Built-in GPS technology records your driving route, speed, and coordinates, providing detailed information for each journey. This data can be accessed and reviewed through the Miofive app.

Integrated GPS technology records essential driving data.
Maintenance
Regular maintenance helps ensure the longevity and optimal performance of your Miofive Dash Cam:
- Cleaning the Lens: Gently wipe the camera lenses with a soft, lint-free cloth to remove dust or smudges. Avoid using abrasive cleaners that could scratch the lens.
- Firmware Updates: Periodically check the Miofive app for available firmware updates. Keeping your dash cam's firmware up-to-date ensures you have the latest features and bug fixes.
- Checking Connections: Ensure all cables (power, rear camera) are securely connected to prevent intermittent power loss or recording issues.
- Storage Management: While the dash cam uses loop recording, it's good practice to regularly review and back up any important footage. The built-in 128GB eMMC storage is designed for durability, but managing critical files is always recommended.
Troubleshooting
Common Issues and Solutions
- Dash Cam Not Turning On:
- Ensure the car charger is properly plugged into both the dash cam and the vehicle's 12V power outlet.
- Check if the vehicle's 12V power outlet is functioning (e.g., by plugging in another device).
- If using a hardwire kit, verify its installation and power connection.
- App Connectivity Issues (WiFi):
- Ensure the dash cam's WiFi is enabled.
- Confirm your smartphone is connected to the dash cam's WiFi network (SSID and password usually found on the device or in the manual).
- Try restarting both the dash cam and your smartphone.
- Missing or Corrupted Footage:
- Verify that loop recording is enabled in the settings.
- Ensure the built-in 128GB eMMC storage is not full of locked files. Regularly back up and delete unnecessary locked files.
- Check if the G-sensor sensitivity is set appropriately; overly sensitive settings can lead to many locked files filling up storage quickly.
- Poor Video Quality:
- Clean the camera lenses as described in the Maintenance section.
- Ensure the protective film has been removed from the lenses.
- Check video resolution settings in the app; ensure it's set to 4K (front) and 2K (rear) for optimal quality.
- Verify that the dash cam is securely mounted and not vibrating excessively.
Specifications
| Feature | Detail |
|---|---|
| Brand | Miofive |
| Model Name | Dash Cam Dual |
| Product Dimensions | 2.87 x 5.98 x 6.94 inches |
| Item Weight | 1.81 pounds |
| Manufacturer | MIOFIVE Technology Limited Co., Ltd. |
| CPU | Novatek Processor |
| Image Sensor | Sony Starvis |
| Screen | 2.2-inch IPS Display |
| Camera FOV | 140° Horizontal and Vertical Viewing Angles |
| Aperture | F1.8 |
| Image Resolution (Front) | 4K UHD (3840x2160) @30fps |
| Image Resolution (Rear) | 2K QHD (2560x1440) @30fps |
| Storage | Built-in 128GB eMMC |
| G-Sensor | Built-in 6 Gyro sensor |
| Wi-Fi | 2.4 / 5GHz |
| Power Supply | Super Capacitor |
| Power Input | 5V / 2.4A |
| Operating Temperature | -10°C to 45°C (14°F to 113°F) |
| Connectivity Technology | Wi-Fi |
| Vehicle Service Type | Minivan, Bus, Car, Truck |
| Mounting Type | Windshield Mount |
| Color | Black |

Detailed specifications for the Miofive Dash Cam Dual.
Warranty and Support
Miofive is committed to providing excellent customer service and support for its products:
- 30-Day Money Back Guarantee: If you are not satisfied with your purchase, you may be eligible for a refund within 30 days.
- 18-Month Warranty Coverage: Your Miofive Dash Cam is covered by an 18-month warranty from the date of purchase, protecting against manufacturing defects.
- 24/7 Dedicated Customer Support: Assistance is available around the clock for any queries or issues you may encounter.
- Lifetime Technical Solution Support: Miofive provides ongoing technical support for the lifetime of your product.
For support inquiries, please contact:
Email: support@miofive.com

Miofive's commitment to customer satisfaction and product support.
Related documentsDash Cam Dual

Ask a question about this manual
Ask about setup, troubleshooting, compatibility, parts, safety, or missing instructions. Manuals+ will review the question and use this page’s manual context to help answer it.