1. Important Safety Information
Please read all instructions carefully before assembly and use. Retain this manual for future reference.
- Ensure all components are securely fastened before placing items on the rack.
- Do not exceed the maximum weight limit of 50 pounds (approximately 22.7 kg). Overloading may cause instability or damage.
- Place the rack on a stable, level countertop surface. The non-slip suction cups must be firmly attached to prevent movement.
- Keep small children away from the rack during assembly and use to prevent injury from falling items or components.
- Regularly inspect the rack for any signs of wear, damage, or loose connections. Discontinue use if damage is found.
2. Package Contents
Verify that all parts are present before beginning assembly. If any parts are missing or damaged, please contact customer support.

Image: Overview of all included components.
- Main Frame (Adjustable) - 1 set
- Dish Rack - 1 unit
- Large Cutlery Rack - 1 unit
- Sponge Rack - 1 unit
- Cup Holder - 1 unit
- Cutting Board Holder - 1 unit
- Knife Holder - 1 unit (integrated into cutlery rack)
- Hooks - 7 units
- Assembly Hardware (screws, wrench) - 1 set
3. Product Specifications
| Feature | Detail |
|---|---|
| Material | Iron (Triple-layer rust-resistant coating) |
| Color | Black |
| Overall Dimensions (Max) | 35.4" L x 12.2" D x 20.5" H (90 cm L x 31 cm D x 52 cm H) |
| Adjustable Length Range | 24.8" to 35.4" (63 cm to 90 cm) |
| Item Weight | 7 pounds (3.17 kg) |
| Weight Limit | 50 pounds (22.7 kg) |
| Faucet Height Clearance | Must be under 16.1" (41 cm) |
| Cabinet to Countertop Height Clearance | Must be at least 25.6" (65 cm) |
| Mounting Type | Countertop Mount |

Image: Adjustable length feature of the rack.
4. Setup and Assembly Instructions
Assembly typically takes 15-20 minutes. A Phillips head screwdriver may be required (not included) in addition to the provided wrench.
- Unpack Components: Carefully remove all parts from the packaging and verify against the "Package Contents" list.
- Assemble Main Frame:
- Connect the two H-shaped support bases to the main horizontal bars using the provided screws and wrench. Ensure the H-brace is oriented correctly for stability.
- Adjust the main horizontal bars to the desired width to fit over your sink. The rack is adjustable from 24.8" to 35.4". Tighten the screws to secure the chosen length.
- Ensure the non-slip suction cups on the base are clean and dry, then press them firmly onto the countertop for maximum stability.

Image: Key structural features for assembly.
- Attach Baskets and Holders:
- Hang the Dish Rack and Large Cutlery Rack onto the upper tier of the main frame using their integrated hooks. Position them as desired.
- Attach the Sponge Rack to the lower tier of the main frame.
- Mount the Cup Holder and Cutting Board Holder to the sides of the main frame or baskets using their snap-on design.
- Distribute the 7 individual Hooks along the lower bar of the main frame for hanging utensils.
- Final Check: Gently shake the assembled rack to ensure it is stable and all connections are tight. Confirm it clears your faucet and cabinet.
5. Operating Instructions
The SNSLXH 2-Tier Over The Sink Dish Drying Rack is designed for efficient dish drying and kitchen organization.
- Dish Placement: Place plates upright in the designated slots of the Dish Rack for optimal air circulation and quick drying. Bowls and other items can be placed in the Large Cutlery Rack or other flat basket areas.
- Utensil Organization: Use the Knife Holder for knives and the Large Cutlery Rack for forks, spoons, and other utensils. The additional hooks are suitable for hanging larger kitchen tools like ladles, spatulas, or whisks.
- Accessory Use: Utilize the Sponge Rack for sponges, dish soap, or brushes. The Cup Holder is designed for drying cups and mugs. The Cutting Board Holder keeps your cutting boards upright and accessible.
- Direct Drainage: Position the rack directly over your sink to allow water to drip into the sink basin, keeping your countertop dry and clean.
- Adjustable Width: If your sink size changes or you move the rack, you can easily adjust its width by loosening the main frame screws, extending or retracting, and then re-tightening.
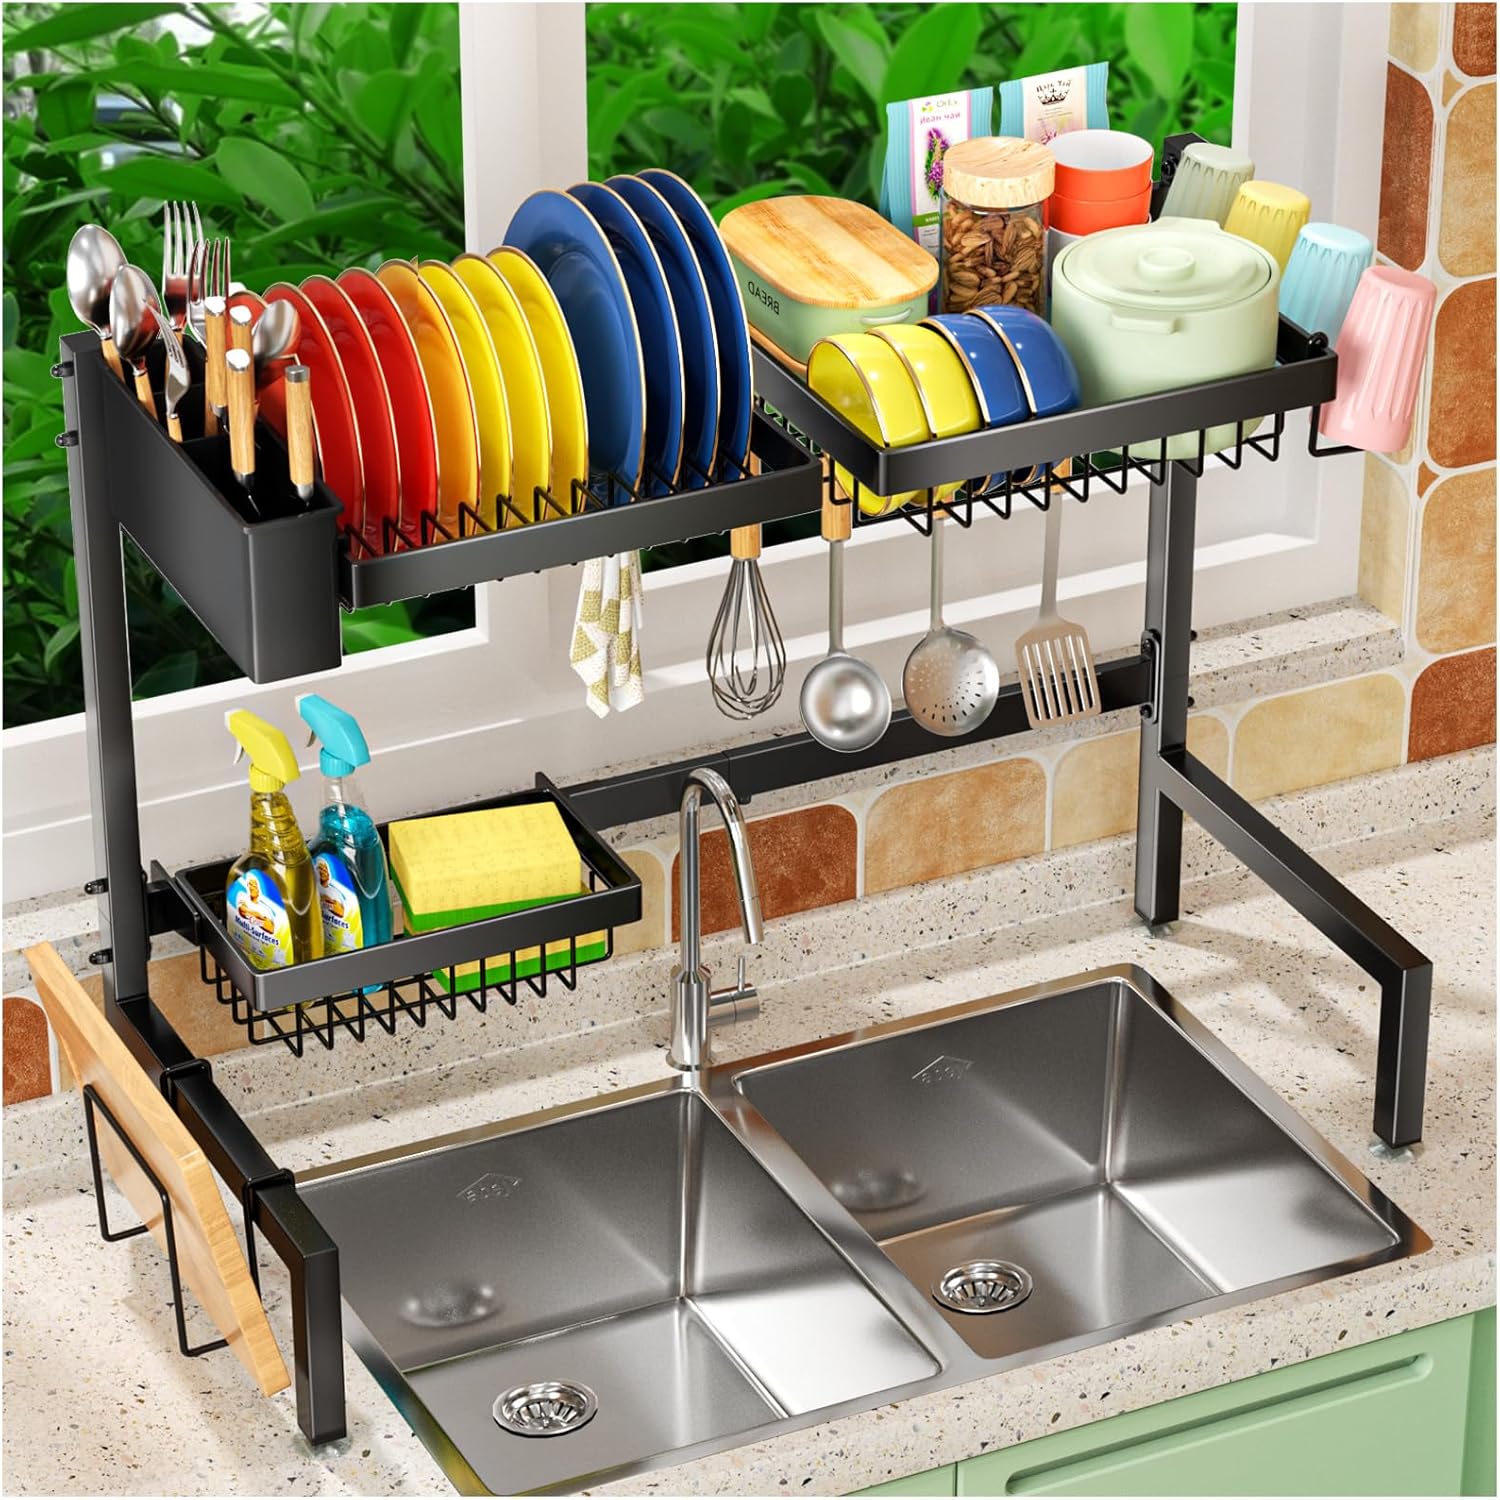
Image: The dish drying rack in typical use.
6. Maintenance
Proper care will ensure the longevity and appearance of your dish drying rack.
- Cleaning: Wipe the rack regularly with a soft, damp cloth and mild detergent. Avoid abrasive cleaners or scouring pads, as these can damage the finish. Rinse thoroughly and dry immediately to prevent water spots.
- Rust Prevention: The rack features a triple-layer rust-resistant coating. While designed to resist rust, prolonged exposure to standing water or harsh chemicals can compromise the finish. Ensure good ventilation and dry the rack after cleaning.
- Inspection: Periodically check all screws and connections to ensure they remain tight. Re-tighten if necessary.
7. Troubleshooting
If you encounter any issues with your dish drying rack, refer to the following common problems and solutions:
- Issue: Rack feels unstable or wobbly.
- Solution: Ensure all assembly screws are fully tightened. Check that the non-slip suction cups are clean, dry, and firmly pressed onto a smooth, level countertop surface. Redistribute items on the rack to ensure even weight distribution.
- Issue: Rack does not fit over the sink or under the cabinet.
- Solution: Re-measure your sink width, faucet height, and cabinet clearance. The rack's length is adjustable from 24.8" to 35.4". Ensure your faucet is under 16.1" high and cabinet clearance is at least 25.6". Adjust the rack's width as needed.
- Issue: Baskets or accessories seem to sag.
- Solution: Ensure baskets are correctly hooked onto the main frame. Avoid overloading individual baskets; distribute weight across the rack. The maximum weight limit is 50 pounds for the entire unit.
- Issue: Rust spots appear.
- Solution: While the rack is rust-resistant, prolonged moisture can affect it. Ensure the rack is regularly dried after use and cleaned. Avoid harsh chemicals. If minor rust appears, it can sometimes be removed with a mild rust remover and then thoroughly dried.
8. Warranty and Customer Support
This product is manufactured by SNSLXH. For any questions, concerns, or assistance with your product, please contact SNSLXH customer support through the retailer where the product was purchased. Please have your purchase details and product model number (2 tiers 3 baskets) ready when contacting support.
While specific warranty details are not provided in this manual, standard consumer rights apply. Please refer to your purchase documentation for any applicable warranty information.


