
1. Introduction
This manual provides detailed instructions for the assembly, operation, maintenance, and troubleshooting of your WLIVE End Table with Charging Station, Model ABZ017ZX. This versatile furniture piece is designed to offer convenient storage and integrated power solutions for your electronic devices.

Image 1.1: WLIVE End Table with Charging Station (Espresso)
2. Safety Information
Please read and understand all safety warnings before assembly and use.
- Do not exceed the recommended weight limit for the tabletop (44 pounds) or the internal storage shelf (22 pounds).
- Secure the table to prevent tipping, especially if placed on uneven surfaces or in areas with children or pets.
- Keep liquids away from the charging area to prevent electrical hazards.
- Properly manage all power cables to avoid tripping hazards and ensure they are not pinched or damaged.
- Ensure the power cord is fully inserted into a grounded electrical outlet.
- Do not attempt to modify the charging station or any electrical components.
3. Package Contents
Before beginning assembly, verify that all components are present and undamaged. If any parts are missing or damaged, please contact WLIVE customer support.
- Table Panels (various sizes)
- Hardware Pack (screws, dowels, cam locks, etc.)
- Integrated Charging Station (with 2 AC outlets, 2 USB ports, and 5-foot power cord)
- Door Handle
- Assembly Guide
- Installation Tool (screwdriver)
4. Assembly Instructions
Assembly typically requires one person and approximately 30-60 minutes. Follow the included Assembly Guide carefully. Each component is marked with a number for easy identification.
- Unpack and Identify Parts: Lay out all components on a clean, soft surface to prevent scratches. Refer to the Assembly Guide to identify each part.
- Assemble the Frame: Connect the side panels and base using the provided hardware (dowels, screws, cam locks). Ensure all connections are secure.
- Install Shelves: Insert the open shelf and the internal cabinet shelf according to the guide.
- Attach Charging Station: Carefully place the integrated charging station into its designated slot on the tabletop. Ensure the flip-top cover mechanism functions smoothly.
- Install Cabinet Door: Attach the cabinet door and handle. Verify that the door opens and closes properly.
- Final Checks: Ensure all screws are tightened and the table is stable.
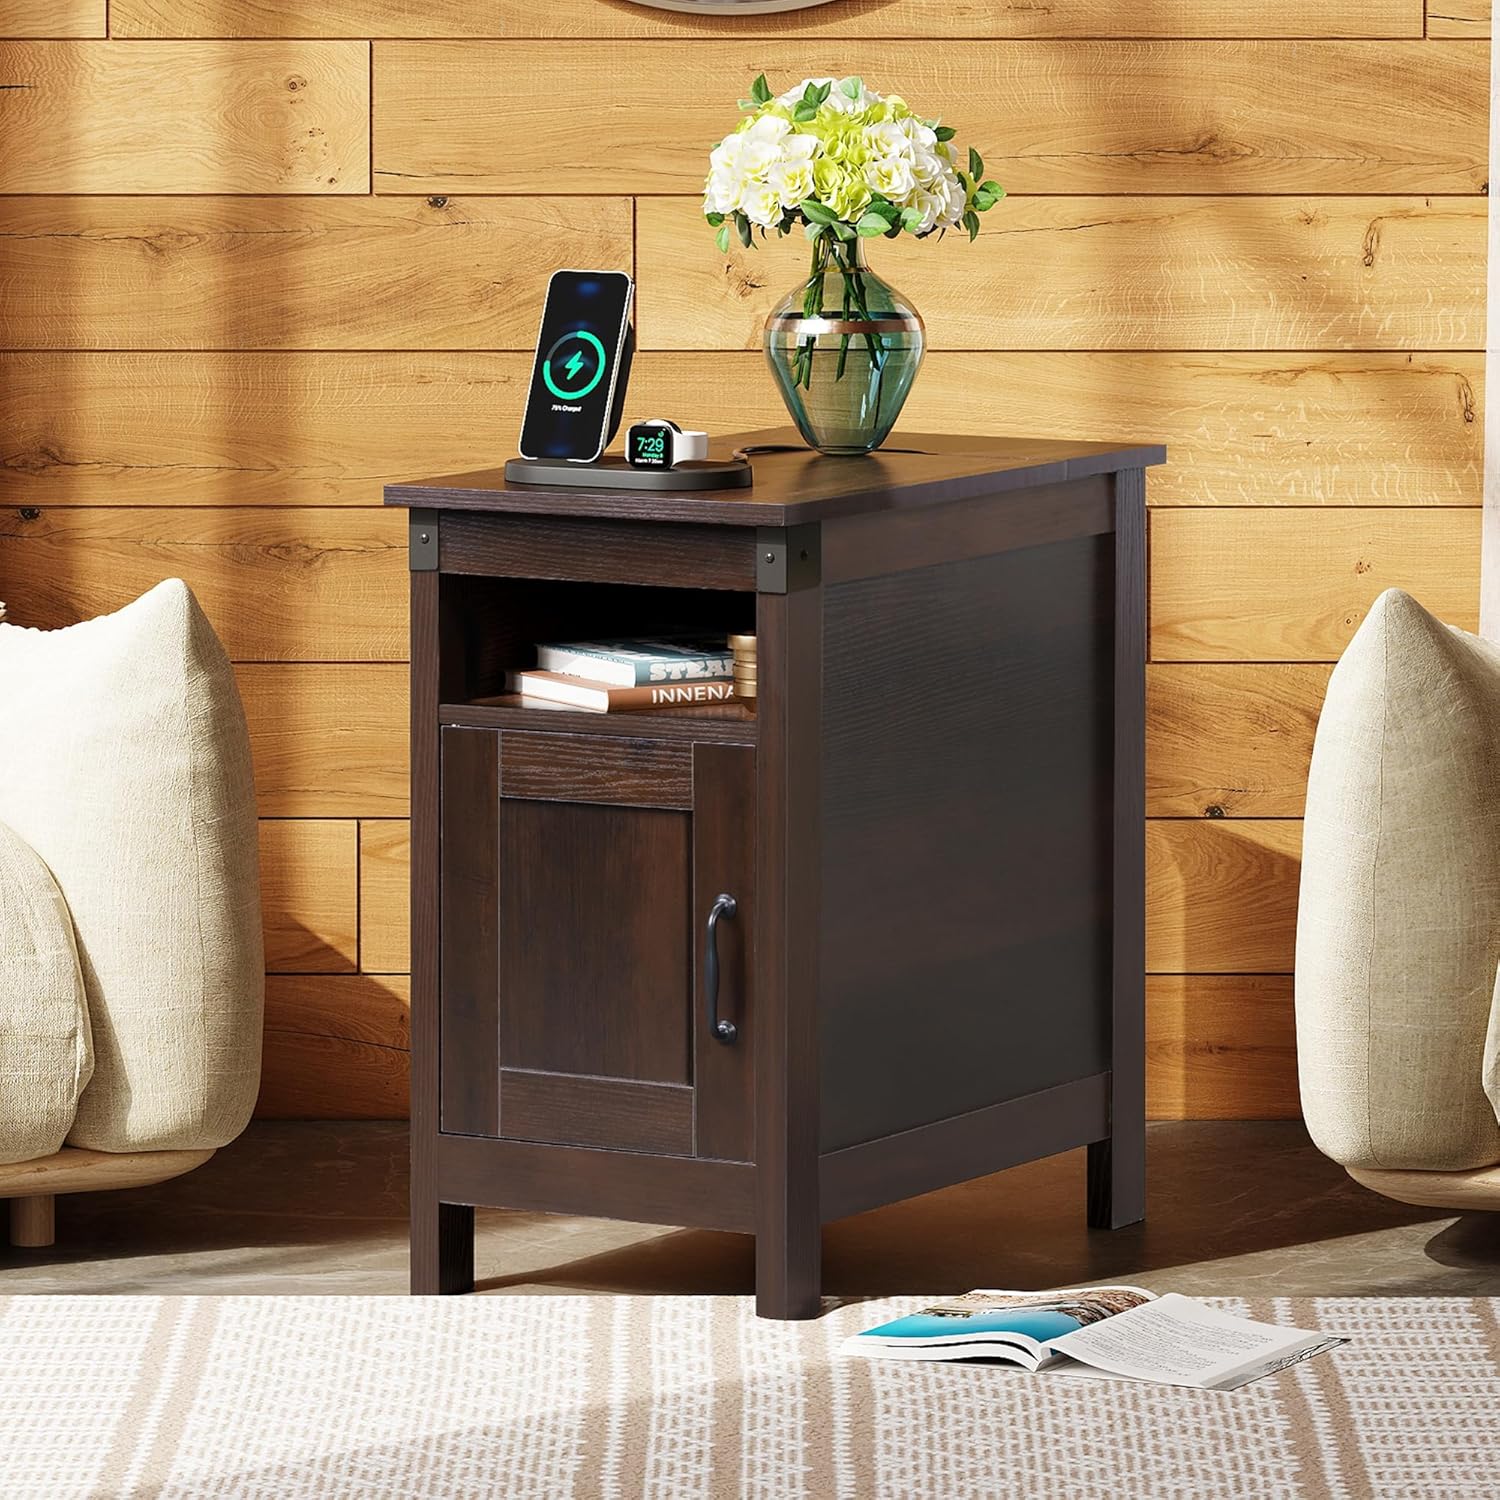
Image 4.1: Front view of the assembled end table.

Image 4.2: Detailed view of the charging station and internal storage.
5. Operating Instructions
5.1. Charging Station
The integrated charging station provides convenient power access for your electronic devices.
- Power Connection: Plug the 5-foot power cord from the back of the table into a standard 120V AC wall outlet.
- Accessing Ports: The charging station is located under a flip-top cover on the tabletop. Lift the cover to access the 2 AC outlets (120V/12A) and 2 USB ports (5V/2A).
- Charging Devices: Connect your devices to the appropriate AC or USB ports. The flip-top cover can be closed while devices are charging, with a small notch allowing cables to pass through, helping to prevent spills and maintain a tidy appearance.

Image 5.1: Charging station with devices connected.
5.2. Storage
The end table offers multiple storage options:
- Open Shelf: A convenient open shelf is located below the tabletop, ideal for frequently accessed items like books, remote controls, or small decorative items.
- Hidden Cabinet: A cabinet with a door provides concealed storage for larger items, helping to keep your living space tidy and dust-free.

Image 5.2: Open shelf and cabinet storage.
5.3. Cable Management
A dedicated hole on the back of the table allows for organized routing of power cables from devices placed on the shelves or inside the cabinet to the charging station, reducing clutter.
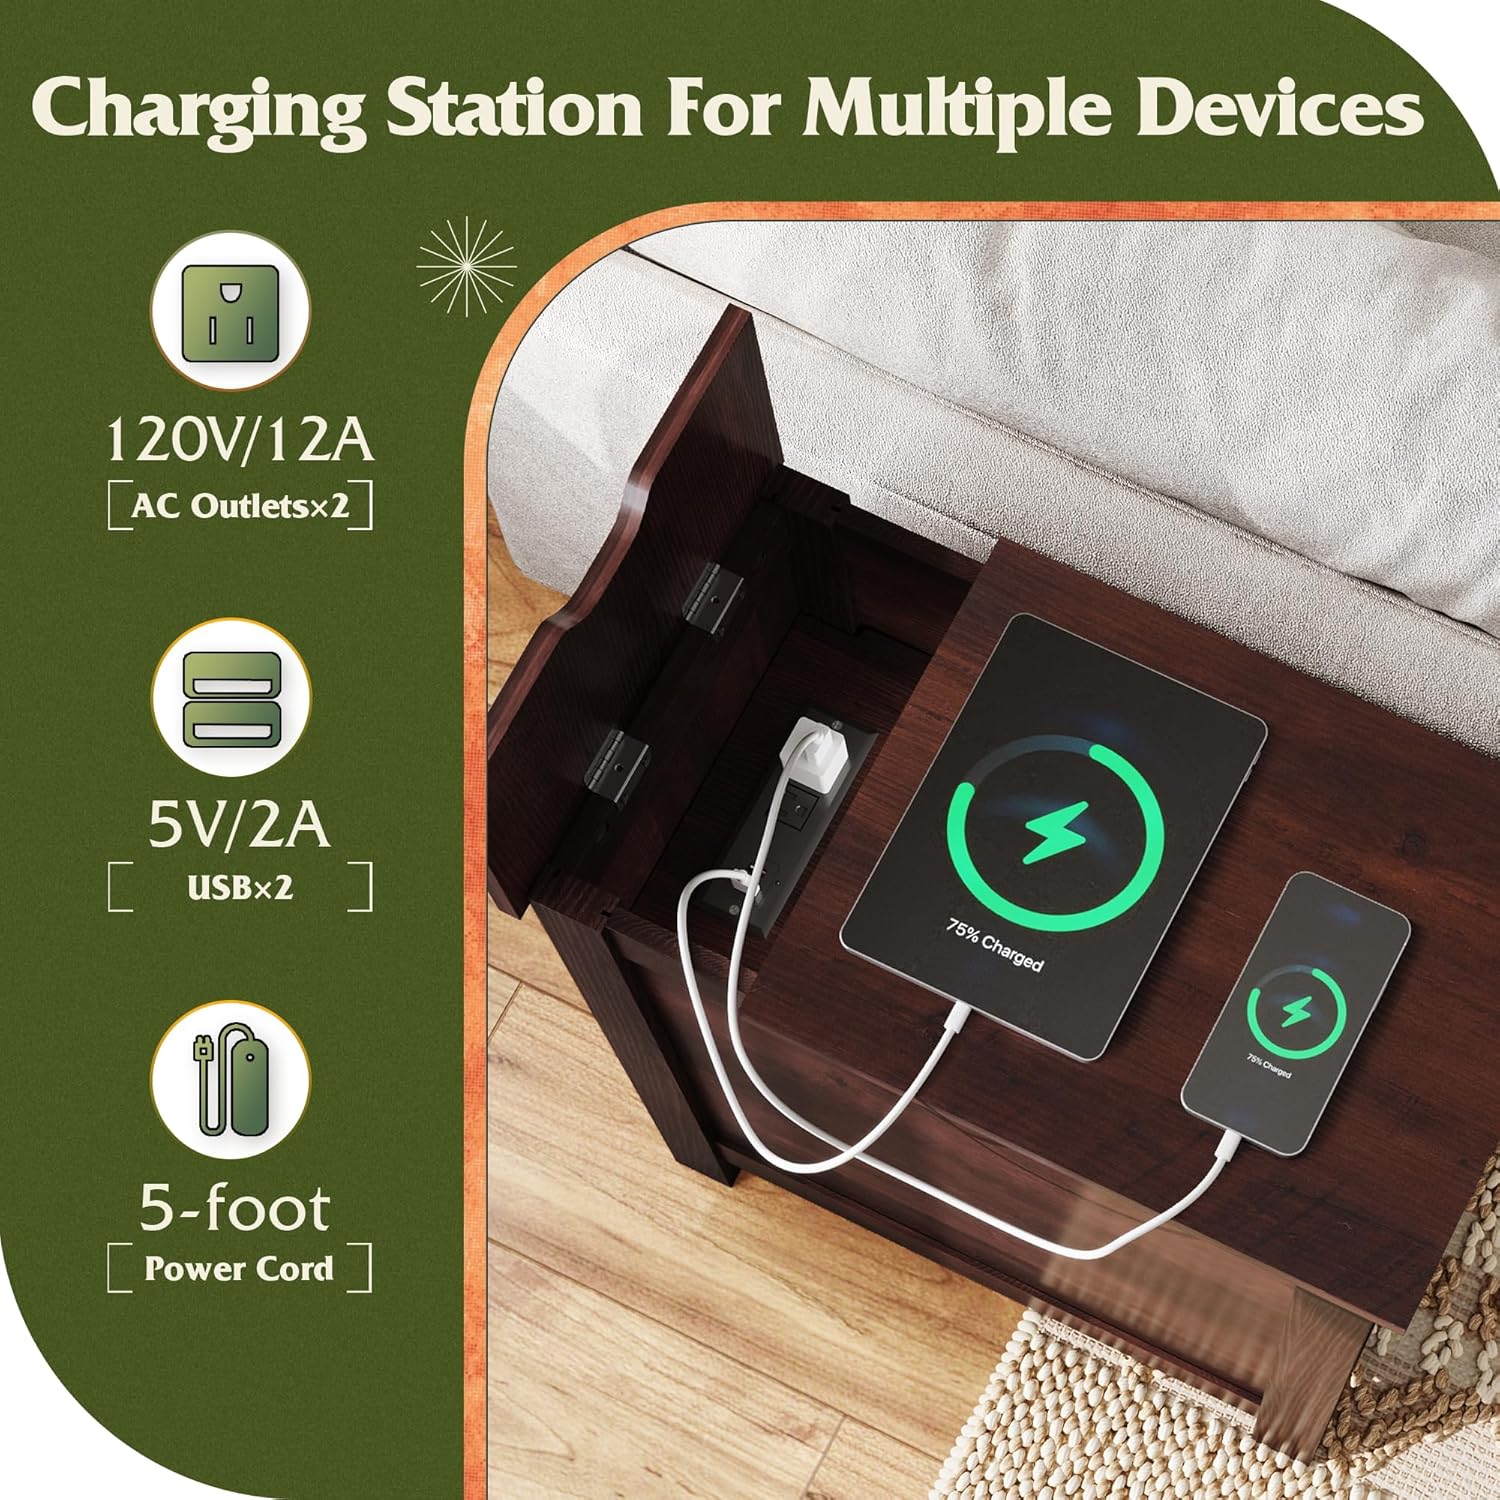
Image 5.3: Cable management hole on the back panel.
6. Maintenance and Care
- Cleaning: Wipe the table surfaces with a soft, damp cloth. Avoid harsh chemicals or abrasive cleaners that may damage the finish.
- Spills: Immediately wipe up any spills, especially near the charging station, to prevent damage to the electronics and the wood finish.
- Weight Distribution: Distribute weight evenly on the tabletop and shelves to maintain stability and prevent structural stress.
- Environmental Conditions: Avoid placing the table in direct sunlight or near heat sources, as this can cause fading or warping. Maintain a stable humidity level.
7. Troubleshooting
- Issue: Charging station is not working.
- Solution: Ensure the main power cord is securely plugged into a functional wall outlet. Check if the wall outlet itself is receiving power by testing it with another device. Verify that devices are correctly connected to the AC outlets or USB ports.
- Issue: Table feels unstable or wobbly.
- Solution: Check all assembly hardware (screws, cam locks) to ensure they are fully tightened. Ensure the table is placed on a flat, level surface. If necessary, use furniture levelers (not included) under the legs.
- Issue: Missing or damaged parts during assembly.
- Solution: Do not proceed with assembly. Contact WLIVE customer support immediately with your product model number and a description of the issue for assistance.
8. Specifications
| Feature | Specification |
|---|---|
| Brand | WLIVE |
| Model Number | ABZ017ZX |
| Product Dimensions (D x W x H) | 23.5" x 13.39" x 23.66" |
| Item Weight | 23 Pounds |
| Maximum Tabletop Weight Recommendation | 44 Pounds |
| Maximum Shelf Weight Recommendation | 22 Pounds |
| Color | Espresso |
| Material Type | Engineered Wood, Wood, Particleboard, Steel |
| AC Outlets | 2 (120V/12A) |
| USB Ports | 2 (5V/2A) |
| Power Cord Length | 5 feet |

Image 8.1: Product dimensions and weight capacities.
9. Warranty and Support
WLIVE products are designed for quality and durability. For specific warranty information, please refer to the documentation included with your purchase or visit the official WLIVE website.
If you encounter any issues or have questions regarding your WLIVE End Table with Charging Station, please contact WLIVE customer support for assistance. Have your model number (ABZ017ZX) and purchase details ready when contacting support.
Contact Information: Please refer to your purchase receipt or the WLIVE official website for the most current customer service contact details.