
Olakids B0BJ1KGXP6
Contents
OLAKIDS 12V 2-Seater Kids Ride-on Truck Instruction Manual
Model: B0BJ1KGXP6
Introduction
This manual provides essential information for the safe assembly, operation, and maintenance of your OLAKIDS 12V 2-Seater Kids Ride-on Truck. Please read all instructions carefully before use and retain this manual for future reference.
The OLAKIDS 2-Seater Ride-on Truck is designed for children aged 3 years and older, offering a realistic driving experience with features such as LED lights, music, and parental remote control. It is constructed from durable PP and steel materials, supporting a maximum weight of 110 lbs.
Safety Information
WARNING: Adult assembly required. Keep small parts away from children during assembly. Always supervise children during operation.
- Ensure all fasteners are securely tightened before each use.
- Always use the safety belt provided.
- Operate the vehicle on flat, dry surfaces away from traffic, pools, or steep inclines.
- Do not allow children to operate the vehicle near stairs, hills, or roads.
- The maximum weight capacity is 110 lbs. Do not overload the vehicle.
- This product complies with US CPSIA and ASTM requirements, made from safe materials free from BPA, PVC, Phthalates, Lead, Latex, and Formaldehyde.
- DOE & CEC Certification Approved for electrical energy efficiency.
Package Contents
Your OLAKIDS 2-Seater Kids Ride-on Truck package includes the following items:
- 1 x Kids Ride-on Car
- 1 x Remote Control (1.5V AAA battery not included)
- 1 x Charger
- 1 x User Guide (this manual)
Note: This kids car will come in two packages.
Setup and Assembly
Follow these steps for proper assembly of your ride-on truck. Refer to the assembly video for visual guidance.
Video: How to install OLAKIDS 2 Seat Ride on Truck. This video demonstrates the step-by-step assembly process for the ride-on truck, including attaching components and connecting wiring.
Step-by-Step Assembly:
- Attach Side Panels: Secure the side panels to the main body of the truck using the provided screws. Ensure a snug fit.
- Install Front Bumper Assembly: Attach the front bumper, including the lights and bull bar, to the front of the vehicle. Use the designated screws for a secure connection.

Image: Front view of the ride-on truck, highlighting the bright LED lights and the robust front bumper assembly.
- Install Rear Bumper and Handle: Attach the rear bumper and the portable handle. The handle is designed for easy transportation of the vehicle.
- Connect Battery: Locate the battery compartment. Connect the red wire to the positive terminal and the black wire to the negative terminal. Ensure connections are firm.
- Attach Wheels: Slide the wheels onto the axles. Secure them with the washers and pins provided. Attach the hubcaps.

Image: A detailed view showing the dimensions of the ride-on truck and the sturdy wheels, indicating their robust design for various terrains.
- Install Steering Wheel: Connect the steering wheel wiring to the dashboard. Secure the steering wheel in place with the screw.
- Attach Windshield and Side Mirrors: Insert the windshield into its designated slots. Attach the side mirrors.
- Install Seats: Place the seats into the vehicle and secure them. Ensure the safety belt is accessible and properly installed.

Image: Close-up of the truck's interior, highlighting the two seats equipped with safety belts and a convenient back storage box.
- Install Roll Bar and Overhead Lights: Attach the roll bar to the rear of the seating area. Secure the overhead LED lights to the roll bar.
Operating Instructions
Starting the Vehicle:
- Press the power button on the dashboard to turn on the vehicle.
- The dashboard lights will illuminate, and a startup sound may play.
Driving Modes:
The OLAKIDS Ride-on Truck offers two driving modes:
- Child Operated Mode: Children can drive the car using the foot pedal and steering wheel.
- Use the forward/reverse switch to select direction.
- Press the foot pedal to accelerate. Release to brake.
- Use the high/low speed switch to adjust driving speed.
- Parental Remote Control Mode: Parents can control the vehicle using the 2.4GHz remote control.
- The remote allows for forward, reverse, left, right steering, and speed selection (3 speeds).
- The remote control overrides child input for safety.
- Insert 1.5V AAA batteries into the remote control (not included).
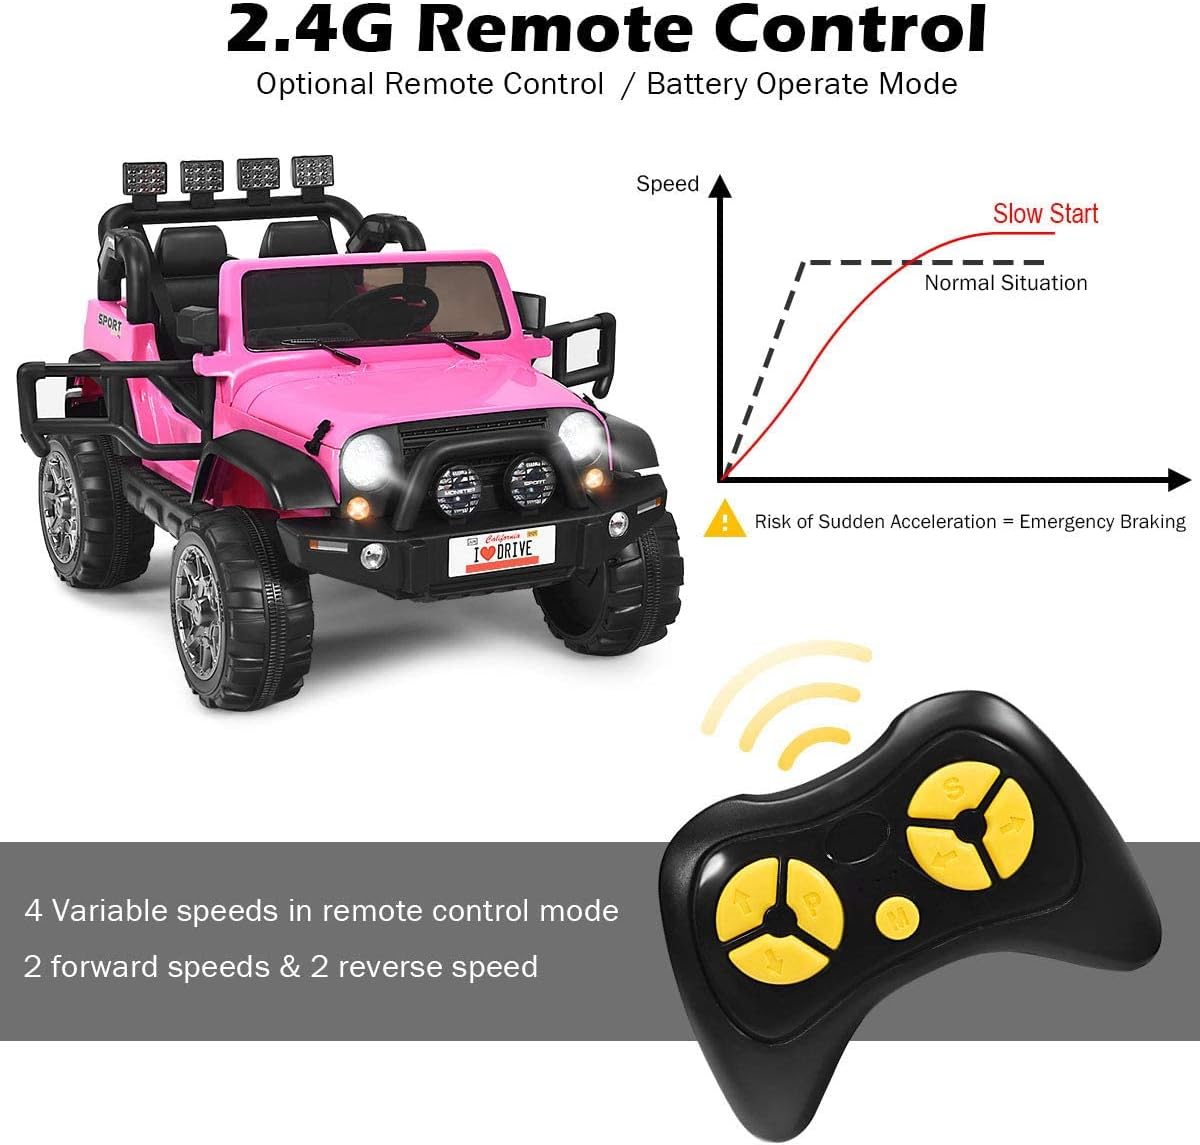
Image: The 2.4G remote control for parental supervision, alongside a graph demonstrating the slow start function which prevents sudden acceleration.
Multimedia Functions:
The truck features built-in music, a horn, and options for external audio:
- Music/Horn Buttons: Located on the steering wheel for easy access.
- USB Port: Insert a USB drive to play your own music.
- Built-in Music: Pre-loaded songs for entertainment.
- Power Display: Check the battery level on the dashboard.

Image: A detailed view of the truck's dashboard, illustrating the various switches for speed, direction, lights, power, and the multimedia console with USB and built-in music options.
Maintenance
Charging the Battery:
- Locate the charging port, typically under the seat.
- Connect the charger to the port and plug it into a standard wall outlet.
- Charge the battery for 8-12 hours before first use, and for 8-12 hours after each use. Do not overcharge.
- The charger is a 12V charger.
Cleaning and Storage:
- Wipe the vehicle with a damp cloth. Do not use abrasive cleaners.
- Store the vehicle in a dry, covered area when not in use.
- Avoid prolonged exposure to direct sunlight or rain to prevent damage to electrical components and plastic parts.
Troubleshooting
| Problem | Possible Cause | Solution |
|---|---|---|
| Vehicle does not move. | Battery is low or disconnected. | Charge the battery. Check battery connections. |
| Vehicle moves slowly. | Low battery, overloaded, or operating on rough terrain. | Charge the battery. Reduce load. Operate on smoother surfaces. |
| Remote control not working. | Remote batteries are dead or not paired. | Replace remote batteries. Refer to remote pairing instructions (if applicable, usually in a separate remote manual). |
| Lights or music not working. | Loose wiring or component failure. | Check all wiring connections. Contact customer support if issue persists. |
Specifications
- Battery: 12 V
- Net Weight: 53 lbs
- Material: PP + Steel
- Speed: 2.5-4 KM/HV (approximately 1.5-2.5 MPH)
- Maximum Weight Capacity: 110 lbs
- Recommended Age: 3+ Years Old
- Product Dimensions: 48.5” x 31.5” x 31.5” (L x W x H)
- Color: Pink (as per current model)
Warranty and Support
For warranty information, replacement parts, or technical support, please contact Olakids customer service. Refer to your purchase documentation for specific warranty terms and contact details.
You can also visit the Olakids Store on Amazon for more products and support resources.
Ask a question about this manual
Ask about setup, troubleshooting, compatibility, parts, safety, or missing instructions. Manuals+ will review the question and use this page’s manual context to help answer it.