1. Introduction
The HFBTE Multi-Tube Vortexer is a microprocessor-controlled, pulsed vortex mixer designed for scientific laboratory applications. It is engineered for experiments requiring high mixing intensity and is capable of processing up to 50 samples simultaneously, significantly saving time and effort. This instrument is primarily utilized in fields such as food safety, residue and food additive testing, drug analysis, and drug development. Its automated mixing capabilities enhance the reproducibility of experimental methods and improve sample recovery rates.
The unique knob operation mode ensures ease of use, and the ability to change different tube fixing sponges allows for mixing and incubation of various common tube types.
2. Key Features
- LED Display: Real-time display of time and shaking speed for clear monitoring.
- Easy Operation: Features a one-touch knob for simple and intuitive control.
- Wide Time Range: Adjustable time setting from 1 minute to 99 hours and 59 minutes, with an automatic warning sound upon completion.
- Versatile Tube Racks: Compatible with a variety of test tube foam racks to accommodate different test tube sizes and mixing requirements.
- Soft Start Function: Ensures uniform acceleration and effectively prevents sample splashing.
- Brushless DC Motor: Provides precise shaking speed, long service life, and is maintenance-free.
- High Capacity: Capable of processing up to 50 samples at a time, enhancing experimental convenience and efficiency.
- Microprocessor Control: Equipped with a simple operation panel and LED displays for speed and time.
- Humanized Program Design: Includes built-in short mix and timing operation modes.
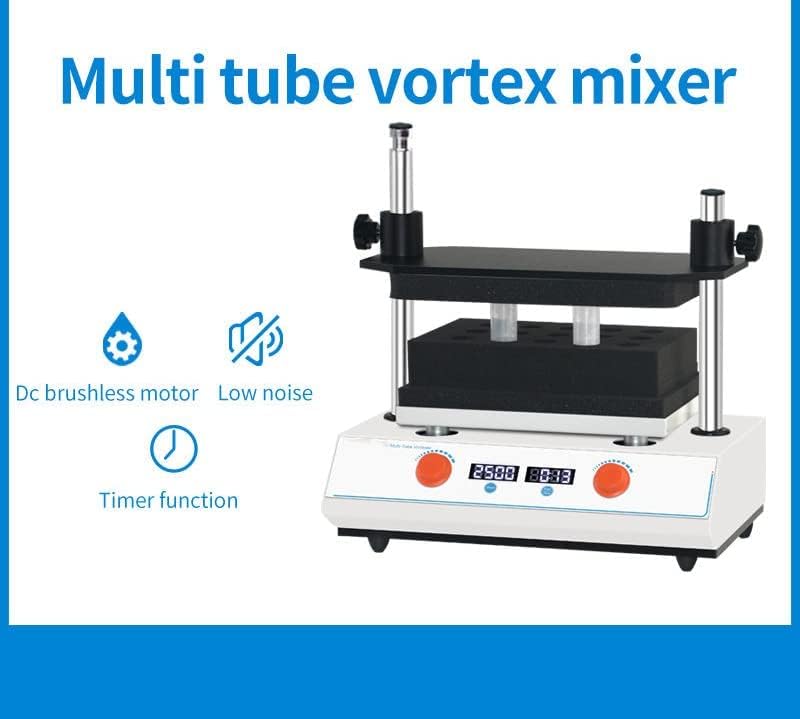
Image: The Multi-Tube Vortexer highlighting its brushless motor, low noise, and timer function.
3. Components and What's in the Box
The standard package includes the Multi-Tube Vortexer unit. Please note that test tubes are not included and are shown for demonstration purposes only.
Main Components:
- Main Vortexer Unit
- Upper Tray Sponge Pad
- Lower Tray Sponge Pad
- Sponge Test Tube Rack (15 holes, φ26mm)
- Operation Panel with LED Displays and Control Knobs
- Power Socket and Switch
- Fuses (3 included for replacement)
- Adjustable Support Rods

Image: Detailed view of the Multi-Tube Vortexer highlighting its main accessories and their locations.

Image: Close-up details of the control panel, power input, and base features.
4. Setup
- Unpacking: Carefully remove the Multi-Tube Vortexer from its packaging. Inspect the unit for any signs of damage during transit.
- Placement: Place the vortexer on a stable, level surface in a laboratory environment. Ensure adequate clearance around the unit for ventilation and operation.
- Assemble Fittings: Insert the sponge test tube rack into the lower tray. Place your test tubes into the rack. Position the upper tray sponge pad over the test tubes.
- Secure the Upper Cover: Press the upper cover tightly down onto the support rods and fix it in place using the adjustment knobs on the sides. Ensure the test tubes are securely held between the upper and lower sponge pads.
- Power Connection: Connect the power cord to the power socket located on the back of the instrument. Plug the other end into a suitable AC power outlet (AC110~220V, 50/60Hz).
- Power On: Flip the power switch to the 'ON' position. The LED displays on the control panel should illuminate.
Video: This video demonstrates the assembly of the vortexer's components, including placing test tubes, securing the upper cover, and connecting the power. It also shows the initial power-on sequence.
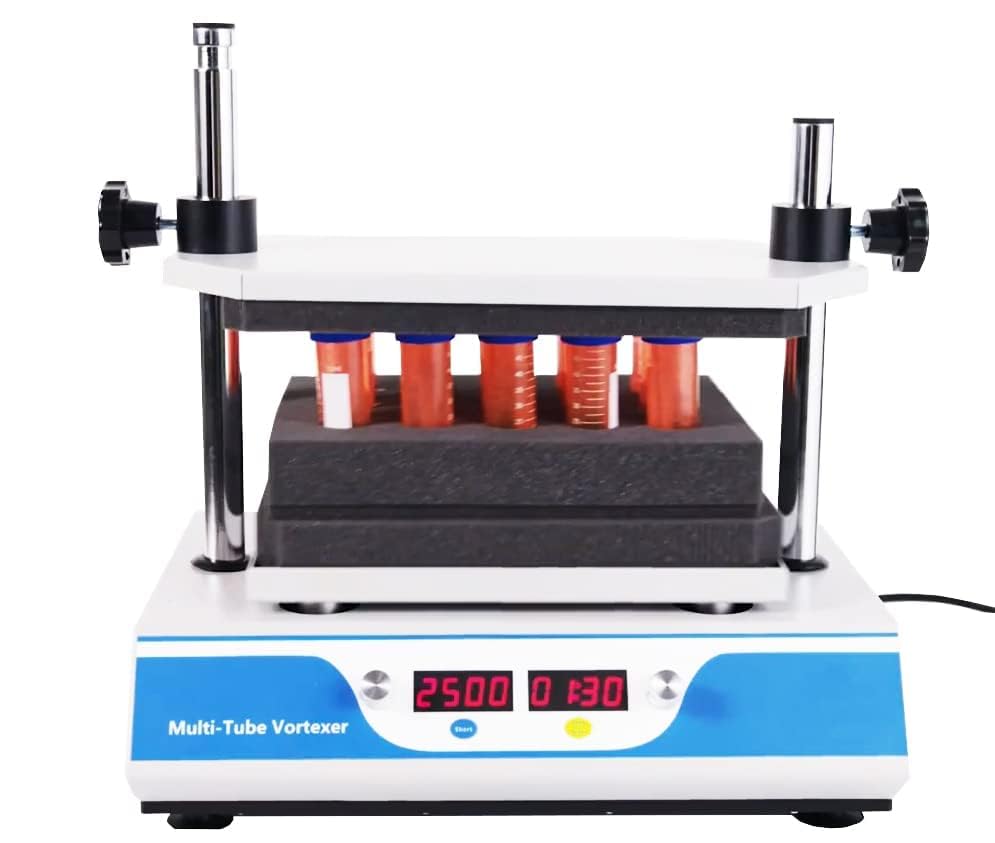
Image: The Multi-Tube Vortexer ready for operation with test tubes loaded.
5. Operation
The Multi-Tube Vortexer offers several operation modes: Continuous, Inching (Short Mix), and Pulse (Programmed).
5.1 Continuous Operation Mode
- Ensure the unit is powered on and test tubes are securely loaded.
- Use the speed control knob to set the desired RPM (100-2500 RPM). The speed will be displayed on the left LED screen.
- Use the time setting knob to set the desired operation duration (1 min to 99h 59min). The time will be displayed on the right LED screen.
- Press the "Start/Stop" key to begin continuous mixing. The unit will operate for the set duration and automatically stop.
- To stop operation manually before the set time, press the "Start/Stop" key again.
5.2 Inching (Short Mix) Mode
This mode is suitable for quick, short bursts of mixing.
- Ensure the unit is powered on and test tubes are securely loaded.
- Press and hold the "Inching key" (Short key) to activate the short mix function. The vortexer will operate only while the key is pressed.
- Release the "Inching key" to stop mixing.
5.3 Pulse (Programmed) Mode
The pulse mode allows for setting up to 10 program segments for more complex mixing protocols.
- Refer to the detailed programming instructions in the full user manual for setting specific pulse parameters (speed, duration, and number of cycles for each segment).
- Once programmed, press the "Start/Stop" key to initiate the programmed pulse sequence.
Video: This video demonstrates the continuous operation mode, setting speed and time, and the inching (short mix) mode. It also briefly mentions the pulse mode.
6. Maintenance
- Cleaning: Regularly wipe the exterior surfaces of the vortexer with a soft, damp cloth. For spills, use a mild detergent solution. Ensure the unit is unplugged before cleaning. Avoid using abrasive cleaners or solvents that could damage the surface.
- Sponge Racks: The foam racks can be removed and cleaned with water and mild soap. Ensure they are completely dry before re-inserting them into the unit.
- Motor: The brushless DC motor is designed for long service life and is maintenance-free. No lubrication or internal cleaning is required.
- Storage: When not in use for extended periods, store the vortexer in a clean, dry environment away from direct sunlight and extreme temperatures.
- Fuse Replacement: The instrument is equipped with fuses for protection. If the unit fails to power on, check the fuse located near the power socket. Replace with a fuse of the same rating if necessary. (The product details mention 3 fuses are included).
7. Troubleshooting
| Problem | Possible Cause | Solution |
|---|---|---|
| Unit does not power on. | No power supply; Power cord loose; Blown fuse. | Check power outlet; Ensure power cord is securely connected; Replace fuse (refer to Maintenance section). |
| Vortexer not mixing or shaking weakly. | Incorrect speed setting; Overload; Test tubes not properly secured. | Adjust speed setting; Reduce sample load; Ensure upper cover is tightly fixed and test tubes are snug in the rack. |
| Excessive noise or vibration. | Uneven surface; Unbalanced load; Loose components. | Place unit on a level surface; Distribute test tubes evenly; Check that all adjustable knobs are tightened. |
| LED display not working correctly. | Internal electronic issue. | Contact customer support for assistance. Do not attempt internal repairs. |
8. Technical Specifications
| Parameter | Value |
|---|---|
| Rotational Speed Range | 100 - 2500 RPM |
| Amplitude | 4mm horizontal rotation |
| Time Setting Range | 1 min - 99 hours 59 minutes |
| Sample Capacity (Standard Rack) | 15 holes (φ26mm test tubes) |
| Applicable Test Tube Specifications (Outer Diameter) | φ26-32mm (e.g., 50ml test tubes) |
| Maximum Load | 5.5 kg |
| Input Power | 70W |
| Voltage | AC110~220V, 50/60Hz |
| Dimensions (L x W x H) | 410 x 276 x 432 mm |
| Weight | 20 kg (approx. 50.71 Pounds) |
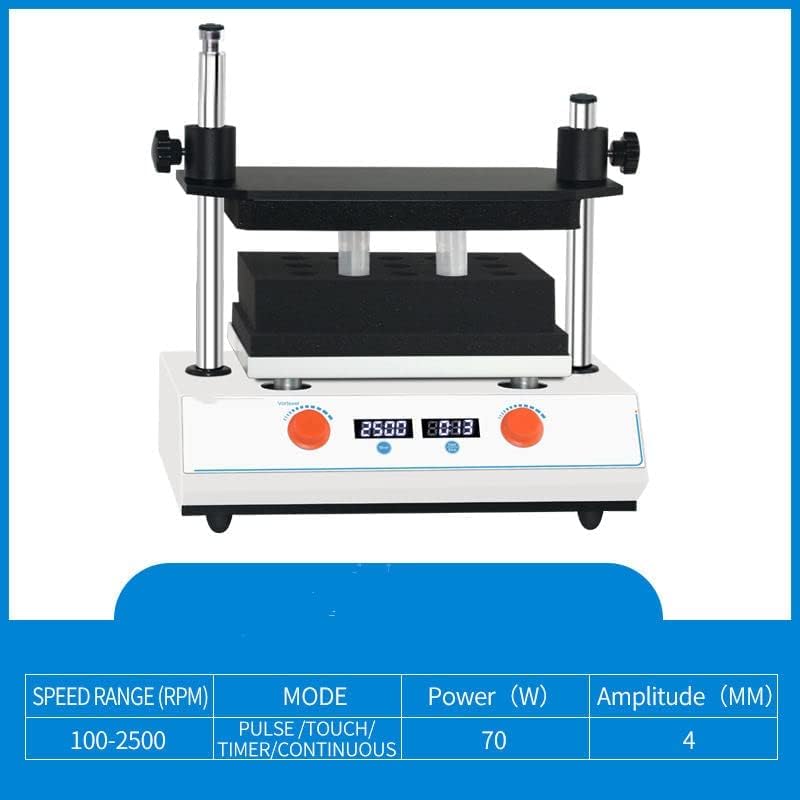
Image: Summary of key technical specifications.
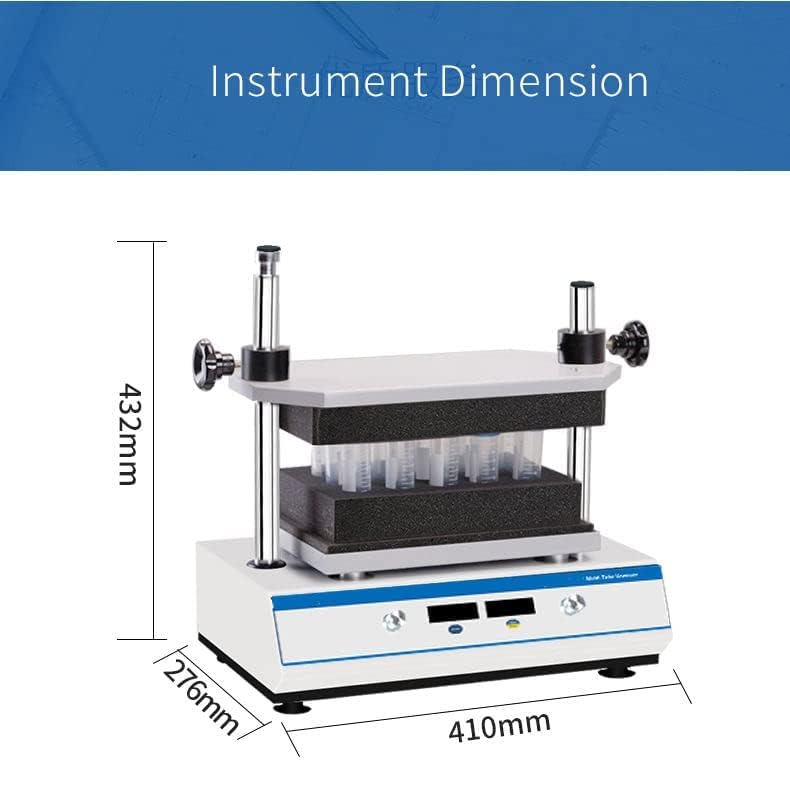
Image: Dimensional drawing of the Multi-Tube Vortexer.
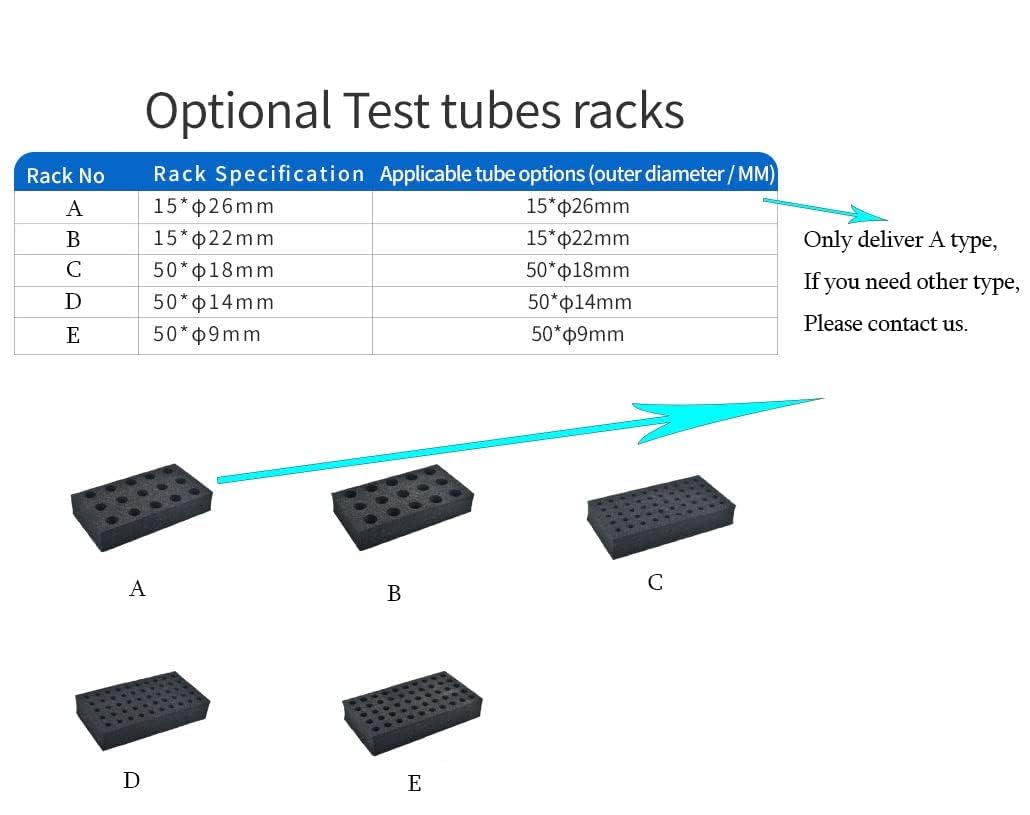
Image: Information on optional test tube racks and their specifications.
9. Warranty and Support
This HFBTE Multi-Tube Vortexer comes with a standard 30-day easy return policy. For any technical assistance, troubleshooting beyond this manual, or warranty claims, please contact HFBTE-US customer support. Refer to your purchase documentation for specific contact details or visit the official HFBTE store on Amazon.
HFBTE Store Link: Visit the HFBTE Store
