1. Introduction
This manual provides essential instructions for the safe operation, setup, maintenance, and troubleshooting of your Bucktool 250mm Wet Grinder Sharpening System, Model SCM8101-DE. Please read this manual thoroughly before operating the machine to ensure proper use and to prevent injury or damage.
The Bucktool Wet Grinder is designed for precise and efficient sharpening of various tools, utilizing a water-cooled grinding stone to prevent overheating and maintain the temper of your tools.
2. Safety Instructions
WARNING: Read all safety warnings and instructions. Failure to follow the warnings and instructions may result in electric shock, fire, and/or serious injury.
General Safety
- Always wear appropriate personal protective equipment (PPE), including safety glasses, hearing protection, and gloves.
- Keep the work area clean and well-lit. Cluttered or dark areas invite accidents.
- Do not operate power tools in explosive atmospheres, such as in the presence of flammable liquids, gases, or dust.
- Keep children and bystanders away while operating a power tool. Distractions can cause you to lose control.
Electrical Safety
- Power tool plugs must match the outlet. Never modify the plug in any way.
- Avoid body contact with earthed or grounded surfaces, such as pipes, radiators, ranges, and refrigerators.
- Do not expose power tools to rain or wet conditions. Water entering a power tool will increase the risk of electric shock.
- Do not abuse the cord. Never use the cord for carrying, pulling, or unplugging the power tool.
Wet Grinder Specific Safety
- Ensure the water tank is filled to the appropriate level before starting operation to ensure proper cooling of the grinding stone.
- Never operate the machine without water in the tank when using the wet grinding wheel.
- Do not force the tool. Allow the grinding wheel to do the work.
- Always secure the tool rest and jigs firmly before sharpening.
- Regularly check the grinding wheel for damage or wear. Replace damaged wheels immediately.
- Disconnect the power plug from the power source before making any adjustments, changing accessories, or storing the tool.
3. Product Overview
Components
The Bucktool Wet Grinder Sharpening System includes the following main components:
- Wet Grinding Wheel (250mm diameter, 220 grit)
- Leather Honing Wheel (200mm diameter)
- Motor Housing with Power Switch and Direction Control
- Water Tank (Anti-break)
- Universal Support Arm
- Adjustable Knobs for Support Arm

Figure 3.1: Overview of the Bucktool 250mm Wet Grinder Sharpening System.

Figure 3.2: Key components of the wet grinder. (1) Locking screw for vertical support arm, (2) Support arm, (3) On/Off switch with direction indicator, (4) Honing wheel.
Included Accessories
The following accessories are typically included with your Bucktool Wet Grinder:
- Clamping Jig
- Knife Sharpening Jig
- Wrench
- Angle Guide
- Sharpening Stone (Dressing Stone)
- Honing Compound
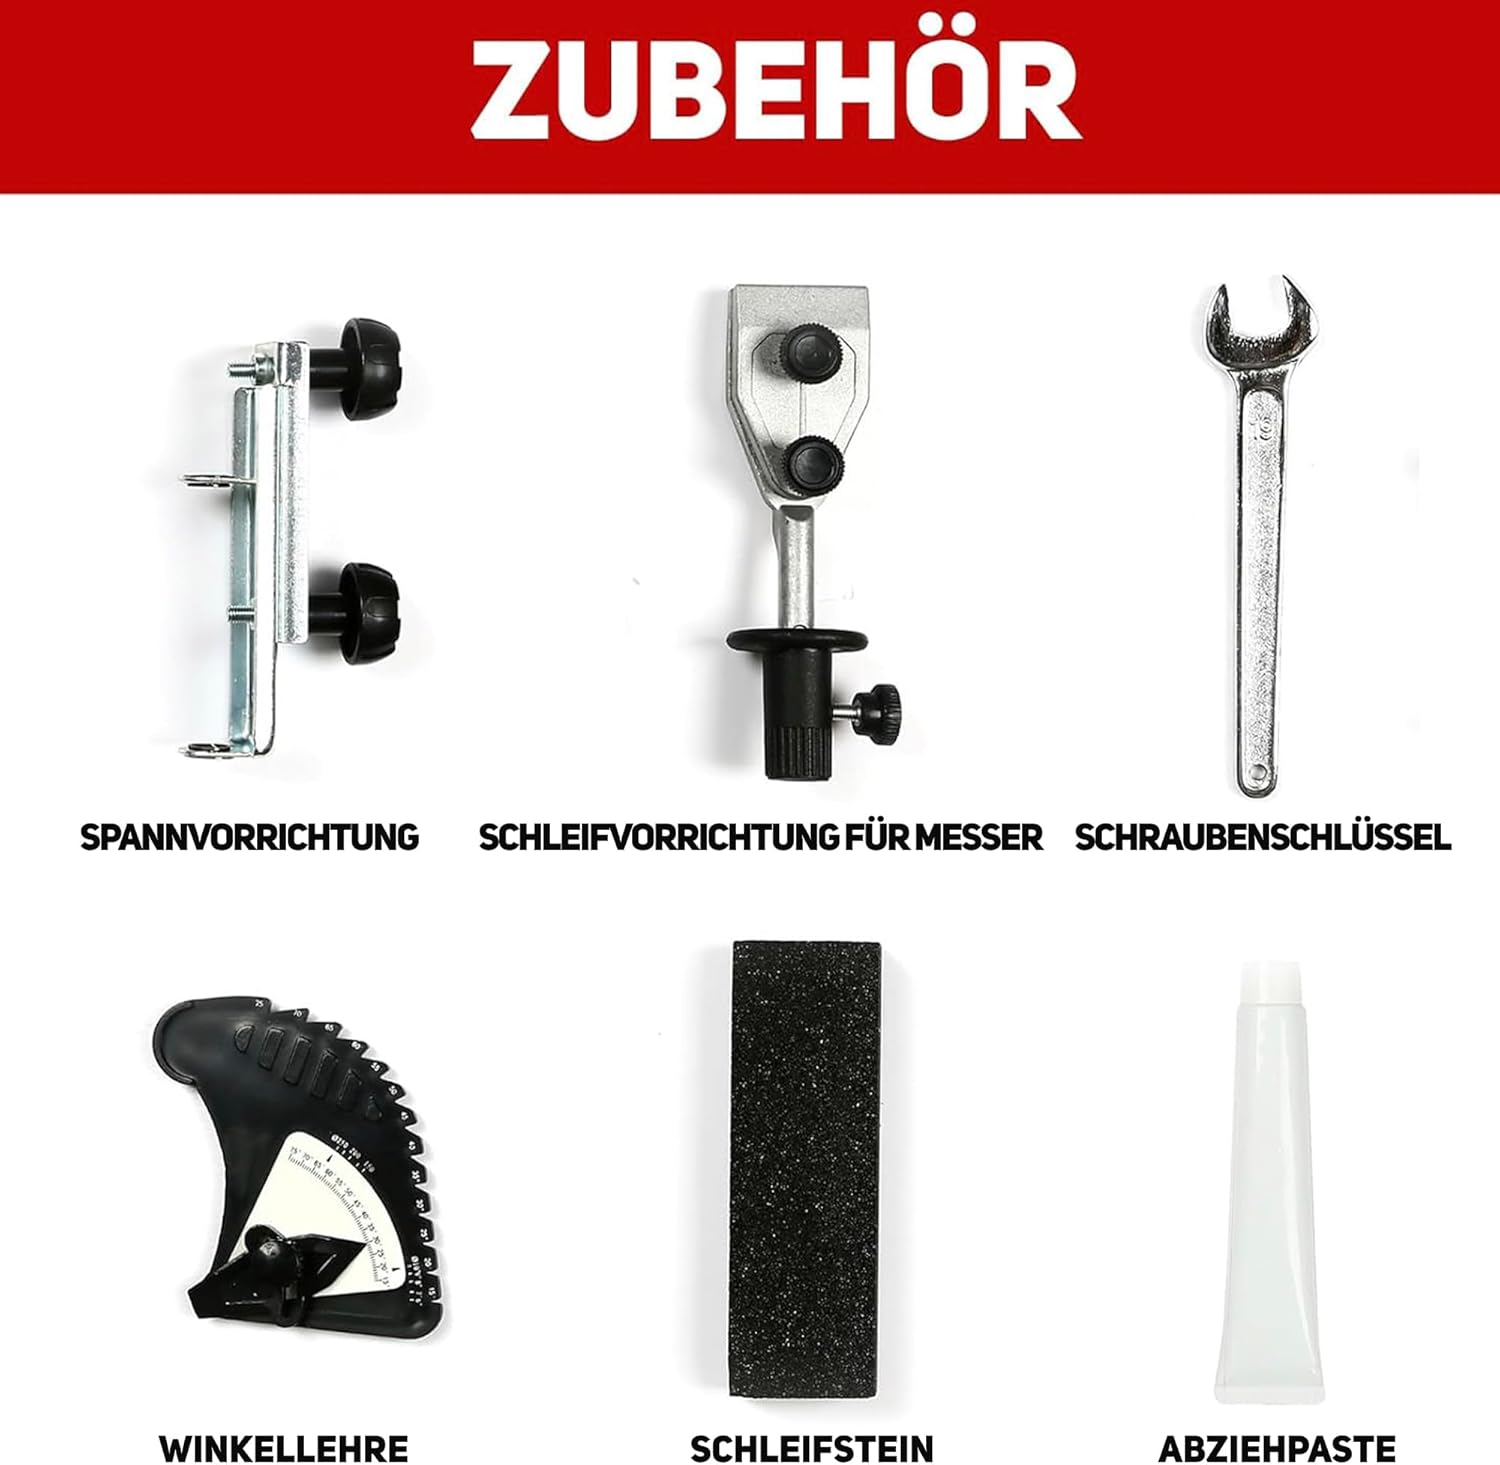
Figure 3.3: Standard accessories: Clamping Jig, Knife Sharpening Jig, Wrench, Angle Guide, Sharpening Stone, Honing Compound.
Specifications
| Feature | Specification |
|---|---|
| Model | SCM8101-DE |
| Power | 180 Watts |
| Voltage | 230-240 Volts |
| Wet Grinding Wheel Size | 250 x 50 x 12 mm |
| Wet Grinding Wheel Grit | 220 |
| Wet Grinding Wheel Speed | 95 RPM |
| Leather Honing Wheel Size | 200 x 30 x 12.5 mm |
| Material | Aluminum Metal |
| Weight | Approximately 17.62 kg |

Figure 3.4: Product label showing key specifications.
4. Setup
4.1 Unpacking and Inspection
- Carefully remove all components from the packaging.
- Inspect the machine for any signs of damage during transit. If damage is found, do not operate the machine and contact customer support.
- Ensure all listed accessories are present.
4.2 Placement
- Place the wet grinder on a stable, level, and sturdy workbench or surface capable of supporting its weight.
- Ensure adequate clearance around the machine for safe operation and to prevent water splashes from affecting other equipment.
4.3 Filling the Water Tank
- Locate the water tank beneath the grinding wheel.
- Fill the tank with clean water until the grinding wheel is submerged approximately 1-2 cm (0.4-0.8 inches). Do not overfill.
- Regularly check the water level during operation and refill as needed.
4.4 Attaching and Adjusting the Support Arm
- Insert the universal support arm into the designated mounting holes on the machine.
- Secure the support arm using the locking screws. The arm can be positioned horizontally or vertically depending on the sharpening task.
- Adjust the height and angle of the support arm to achieve the desired sharpening angle for your tool. Use the angle guide for precision.

Figure 4.1: The universal holder can be used horizontally or vertically, secured by locking screws.
5. Operating Instructions
5.1 Powering On and Direction Control
- Ensure the machine is properly set up and the water tank is filled.
- Plug the power cord into a suitable 230-240V electrical outlet.
- Use the ON/OFF switch to start the machine. The switch also allows you to select the rotation direction (Forward or Reverse) of the grinding wheel.
- Allow the wheel to reach full speed (95 RPM) before beginning to sharpen.

Figure 5.1: Front view showing the power switch and direction control.
5.2 General Sharpening Procedure
- Prepare the Tool: Clean the tool to be sharpened.
- Set the Angle: Use the angle guide and the universal support arm to set the correct sharpening angle for your tool.
- Mount the Tool: Secure the tool in the appropriate jig (e.g., clamping jig for chisels, knife sharpening jig for knives).
- Grinding: Gently bring the tool's edge into contact with the rotating wet grinding wheel. Apply light, consistent pressure. Move the tool smoothly across the wheel to ensure even sharpening. The water will keep the tool cool and prevent bluing of the edge.
- Check Progress: Periodically check the edge for sharpness and consistency. Continue grinding until a burr forms on the opposite side of the edge.
- Deburring/Honing: Once the burr is formed, switch to the leather honing wheel. Apply a small amount of honing compound to the leather wheel. Gently run the tool's edge against the honing wheel to remove the burr and polish the edge.
- Final Check: Inspect the sharpened edge. It should be clean, sharp, and free of burrs.
5.3 Applications
The Bucktool Wet Grinder is suitable for sharpening a wide range of metal tools, including but not limited to:
- Chisels
- Axes
- Gouges
- Butcher Knives
- Scrapers
- Scissors
- Cutters
- Scythes

Figure 5.2: The wet grinder meets most metal tool sharpening requirements for various tools.
6. Maintenance
Regular maintenance ensures the longevity and optimal performance of your Bucktool Wet Grinder.
6.1 Cleaning
- After each use, disconnect the power.
- Empty and clean the water tank to prevent algae growth and accumulation of grinding sludge.
- Wipe down the machine with a damp cloth to remove any grinding residue.
- Ensure all parts are dry before storage to prevent rust.
6.2 Grinding Wheel Dressing
- Over time, the grinding wheel may become uneven or clogged. Use the included sharpening stone (dressing stone) to true and clean the surface of the grinding wheel.
- Follow the instructions provided with the dressing stone for proper use.
6.3 Honing Wheel Care
- Periodically apply fresh honing compound to the leather honing wheel to maintain its effectiveness.
- If the leather wheel becomes excessively worn or damaged, it may need to be replaced.
7. Troubleshooting
| Problem | Possible Cause | Solution |
|---|---|---|
| Machine does not start | No power supply; Faulty switch; Power cord damaged | Check power connection and outlet; Inspect power cord for damage; Contact customer support if switch is faulty. |
| Grinding wheel not rotating smoothly | Obstruction; Damaged wheel; Motor issue | Disconnect power and check for obstructions; Inspect wheel for damage and replace if necessary; Contact customer support. |
| Poor sharpening results | Incorrect angle; Worn grinding wheel; Insufficient water; Improper technique | Verify sharpening angle with angle guide; Dress or replace grinding wheel; Ensure adequate water level; Review operating instructions and practice technique. |
| Excessive vibration | Unbalanced wheel; Loose components; Uneven surface | Dress the grinding wheel to true its surface; Tighten all screws and fasteners; Ensure machine is on a stable, level surface. |
If you encounter problems not listed here or if the suggested solutions do not resolve the issue, please contact Bucktool customer support for assistance.
8. Warranty and Support
Bucktool products are manufactured to high-quality standards. For information regarding warranty coverage, terms, and conditions, please refer to the warranty card included with your purchase or visit the official Bucktool website.
For technical support, spare parts, or any other inquiries, please contact Bucktool customer service through the contact information provided in your product documentation or on the official Bucktool website. When contacting support, please have your model number (SCM8101-DE) and purchase details ready.


