
Introduction
This manual provides detailed instructions for the setup, operation, and maintenance of your AOpen QF23s LCD LED Projector. Please read this manual thoroughly before using the product to ensure proper functionality and to prevent damage.
Package Contents
Verify that all items listed below are included in your package. If any items are missing or damaged, please contact customer support.
- AOpen QF23s Projector
- Power Cable
- HDMI Cable
- IR Remote Control (batteries not included)
- Quick Start Guide
Product Overview
Familiarize yourself with the components of your AOpen QF23s Projector.

Figure 1: Front view of the AOpen QF23s Projector, showcasing the lens and light output.

Figure 2: The AOpen QF23s Projector alongside its infrared remote control.
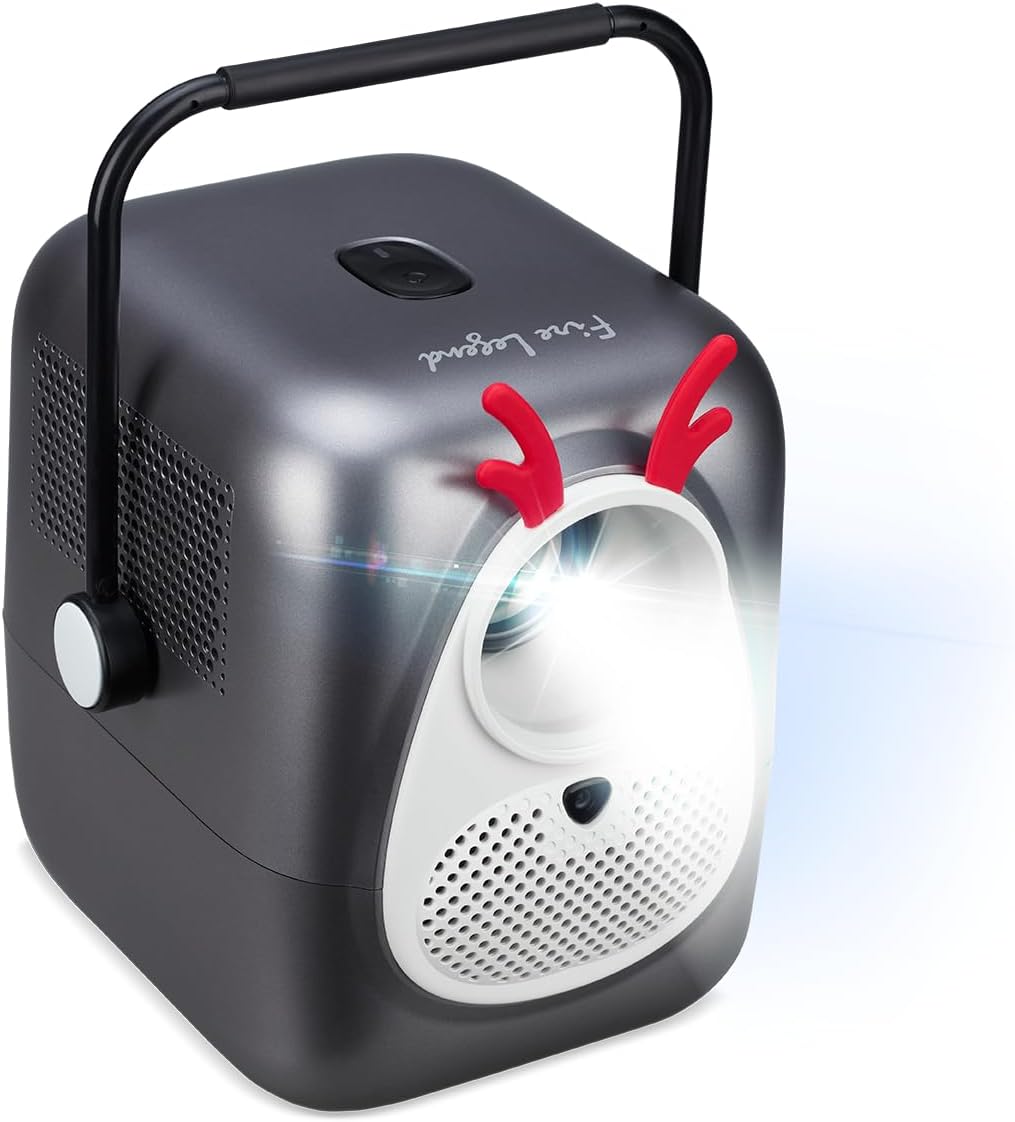
Figure 3: Rear panel of the projector, highlighting the HDMI, USB, and audio output ports, along with the power input.

Figure 4: Top view of the AOpen QF23s Projector, showing the integrated power button and control interface.
Setup
1. Power Connection
- Connect the provided power cable to the power input port on the rear of the projector.
- Plug the other end of the power cable into a standard electrical outlet.
- The power indicator light should illuminate, indicating the projector is receiving power.
2. Connecting Devices
- HDMI: Use the supplied HDMI cable to connect your video source (e.g., laptop, Blu-ray player, gaming console) to the HDMI port on the projector. The projector supports HDCP.
- USB (DC out 5V Type A): This port is primarily for powering external devices or for firmware updates. It is not for direct video input.
- Audio Output (Headphone Out): Connect external speakers or headphones to this 3.5mm jack for enhanced audio.
3. Placement and Focus
- Place the projector on a stable, flat surface. Ensure adequate ventilation around the projector.
- Position the projector at a distance between 1.15 meters and 3.35 meters from the projection surface to achieve a screen size between 1.02 meters and 3.045 meters.
- Adjust the focus ring on the projector lens until the projected image is clear and sharp.
Operating Instructions
1. Power On/Off
- Power On: Press the power button on the projector or the remote control. The projector will start up, and the light source will activate.
- Power Off: Press the power button again. A confirmation message may appear; confirm to shut down the projector. Allow the projector to cool down before unplugging it.
2. Remote Control Functions
Insert two AAA batteries (not included) into the remote control. The remote allows for convenient control of various projector functions, including power, input selection, volume, and menu navigation.
3. Image Adjustment
- Keystone Correction: If the projected image appears trapezoidal, use the keystone correction function (accessible via the remote or on-screen menu) to adjust the image vertically and horizontally until it is rectangular.
- 4-Corner Correction: For more precise image shaping, especially when projecting from an angle, utilize the 4-corner correction feature to individually adjust each corner of the image.
4. Wireless Projection and App TV
The AOpen QF23s supports wireless projection, allowing you to cast content from compatible devices without cables. Refer to the on-screen menu for instructions on connecting to a Wi-Fi network and utilizing the integrated app TV features for streaming content.
Maintenance
- Cleaning the Lens: Gently wipe the projector lens with a soft, lint-free cloth specifically designed for optical surfaces. Avoid using abrasive cleaners or excessive force.
- Cleaning the Casing: Use a soft, dry cloth to clean the exterior casing of the projector. Do not use liquid or aerosol cleaners directly on the unit.
- Ventilation: Ensure that the projector's ventilation openings are clear of dust and obstructions to prevent overheating.
- Lamp Lifetime: The LED light source has an estimated lifetime of up to 30,000 hours under standard usage conditions. No lamp replacement is typically required during the product's lifespan.
Troubleshooting
| Problem | Possible Solution |
|---|---|
| No image projected |
|
| Image is blurry |
|
| Image is distorted (trapezoidal) |
|
| No sound |
|
Specifications
| Feature | Detail |
|---|---|
| Brand | acer (AOpen) |
| Model Number | MR.JXC11.005 |
| Projection Technology | LCD |
| Light Source | LED |
| Brightness | 250 ANSI Lumens (default), 6500 LED Lumens |
| Native Resolution | 1920 x 1080 (Full HD) |
| Lamp Lifetime | Up to 30,000 hours (standard) |
| Projection Distance | 1.15 m - 3.35 m |
| Projection Size | 1.02 m - 3.045 m |
| Connectivity | 1x HDMI (with HDCP), 1x DC out 5V USB Type A, 1x Audio Output (Headphone Out), WLAN |
| Image Adjustment | Vertical and Horizontal Keystone Correction, 4-Corner Correction |
| Product Dimensions | 6.1 x 5.12 x 6.69 inches |
| Item Weight | 4.18 pounds |
| Special Feature | Portable |
Warranty Information
This AOpen QF23s Projector comes with a 2-Year Bring-in Service Warranty. Please retain your proof of purchase for warranty claims. For detailed terms and conditions, refer to the warranty card included in your package or contact acer customer support.
Support
For technical assistance, troubleshooting beyond this manual, or warranty inquiries, please contact acer customer support. Visit the official acer website for contact information and additional resources.
Online Resources: www.acer.com/support