
1. Introduction
This instruction manual provides essential information for the proper installation, operation, and maintenance of your Yavor C-A7 Radio CD Player Laser Lens Optical Pickup. Please read this manual thoroughly before attempting any installation or repair to ensure correct usage and to prevent damage to the unit or the CD player.
1.1 Product Overview
The Yavor C-A7 is a high-quality replacement laser lens optical pickup unit designed for compatible radio CD players. This component is crucial for reading data from CDs, ensuring clear audio playback and proper disc recognition.
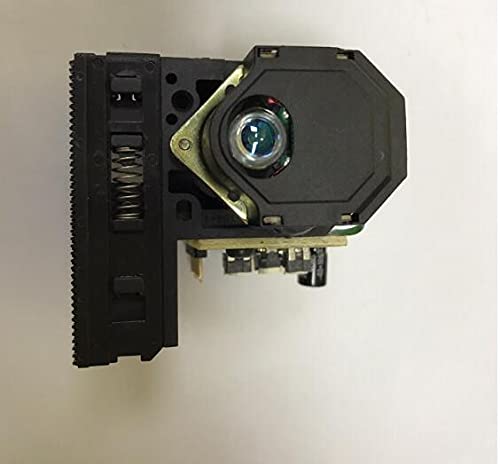
Figure 1.1: Yavor C-A7 Laser Lens Optical Pickup Unit. This image displays the compact electronic component, featuring a laser diode, lens assembly, and associated circuitry mounted on a small green printed circuit board, designed for reading optical discs.
1.2 Package Contents
- Yavor C-A7 Laser Lens Optical Pickup Unit (1x)
- Instruction Manual (this document)
2. Safety Information
Please observe the following safety precautions to prevent injury or damage to the product and your equipment.
- Laser Radiation: This product contains a laser diode. Do not look directly into the laser beam. Exposure to the laser beam may cause eye damage.
- Static Electricity: Electronic components are sensitive to static electricity. Always use proper anti-static precautions (e.g., anti-static wrist strap) when handling the optical pickup unit.
- Power Disconnection: Always disconnect the power from the CD player before attempting any installation or removal of components.
- Professional Installation: Installation of this component requires technical knowledge and experience with electronic repairs. If you are unsure, seek assistance from a qualified technician.
- Small Parts: Keep small parts away from children to prevent choking hazards.
3. Installation
This section outlines the general steps for replacing a laser lens optical pickup unit. Specific steps may vary depending on your CD player model. Refer to your CD player's service manual for detailed disassembly instructions.
3.1 Tools Required
- Small Phillips head screwdriver
- Flathead screwdriver (for prying, if necessary)
- Anti-static wrist strap
- Clean, lint-free cloth
- Isopropyl alcohol (optional, for cleaning)
3.2 Installation Procedure
- Prepare the Work Area: Ensure your workspace is clean, well-lit, and free of static electricity. Wear an anti-static wrist strap.
- Disconnect Power: Unplug the CD player from the power outlet and disconnect any other cables.
- Disassemble CD Player: Carefully open the CD player casing according to its service manual. Locate the CD mechanism and the existing optical pickup unit.
- Remove Old Optical Pickup:
- Disconnect any ribbon cables or wires connected to the old optical pickup.
- Unscrew any mounting screws securing the old unit to the CD mechanism.
- Gently remove the old optical pickup unit.
- Prepare New Optical Pickup:
- Many new optical pickups come with a solder shorting point (anti-static point) to protect the laser diode during shipping. This solder point MUST be desoldered before installation. Failure to do so will prevent the unit from functioning. Consult the product image or a technician if unsure.
- Handle the new unit by its edges to avoid touching the lens or circuit board.
- Install New Optical Pickup:
- Carefully place the new Yavor C-A7 optical pickup into position on the CD mechanism.
- Secure it with the mounting screws.
- Reconnect all ribbon cables and wires, ensuring they are properly seated and oriented.
- Reassemble CD Player: Carefully reassemble the CD player casing. Do not apply power until the casing is fully secured.
4. Operation & Testing
After successful installation, perform the following steps to test the functionality of the new optical pickup unit.
- Connect Power: Plug the CD player back into the power outlet.
- Insert a CD: Place a known good audio CD into the CD player's tray.
- Power On: Turn on the CD player.
- Test Playback:
- Observe if the CD player recognizes the disc.
- Attempt to play a track. Listen for clear audio playback without skipping or distortion.
- Test track skipping and fast-forward/rewind functions.
- Troubleshooting: If the CD player does not recognize the disc or playback is faulty, refer to the Troubleshooting section of this manual.
5. Maintenance
The Yavor C-A7 optical pickup unit is a delicate component and generally requires minimal maintenance once installed. However, proper care of your CD player can extend its lifespan.
- Keep Clean: Ensure the CD player's environment is clean and dust-free. Dust can accumulate on the lens and affect performance.
- Lens Cleaning (Advanced): If disc reading issues persist and you suspect a dirty lens, a specialized CD lens cleaner disc can be used. For manual cleaning, this should only be attempted by experienced technicians using appropriate tools and solutions (e.g., isopropyl alcohol and a lint-free swab). Improper cleaning can permanently damage the lens.
- Avoid Physical Shock: Protect the CD player from impacts or vibrations, which can misalign the optical pickup.
6. Troubleshooting
If you encounter issues after installing the Yavor C-A7 optical pickup, refer to the following common problems and solutions.
| Problem | Possible Cause | Solution |
|---|---|---|
| CD player does not recognize discs. |
|
|
| Disc skips or audio distorts. |
|
|
| No power to the CD player after installation. |
|
|
7. Specifications
| Feature | Detail |
|---|---|
| Model | C-A7 |
| Type | Laser Lens Optical Pickup Unit |
| Brand | Yavor |
| Color | OneColor (as per manufacturer) |
| Item Weight | Approximately 200 grams |
| ASIN | B0BHQLSR6M |
| First Available Date | June 5, 2022 |
8. Warranty and Support
For warranty information and technical support, please refer to the documentation provided with your original purchase or contact your retailer. As this is a replacement component, warranty terms may vary.
For further assistance, please visit the manufacturer's website or contact their customer service department.