
Bmax B1 Plus
Bmax B1 Plus Mini PC User Manual
Model: B1 Plus
1. Introduction
This user manual provides detailed instructions for setting up, operating, maintaining, and troubleshooting your Bmax B1 Plus Mini PC. Please read this manual thoroughly before using the device to ensure proper functionality and longevity.
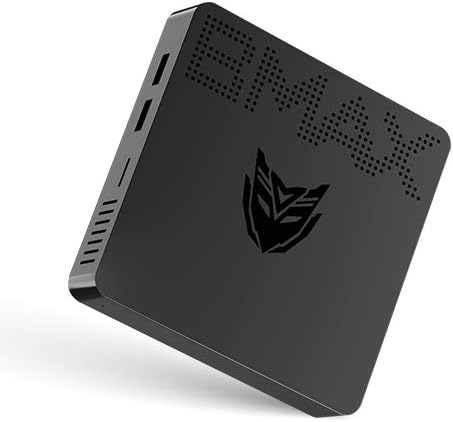
Image: Bmax B1 Plus Mini PC, showcasing its compact design.
2. Product Overview
The Bmax B1 Plus is a compact and versatile mini PC designed for various computing needs, from daily tasks to 4K media playback. It features an Intel Celeron N3350 processor, 6GB DDR3 RAM, and 64GB eMMC storage.
2.1. Package Contents

Image: Contents of the Bmax B1 Plus Mini PC retail box, including the mini PC, user guide, power adapter, HDMI cable, metal bracket, and screws.
- Bmax B1 Plus Mini PC
- Power Adapter
- HDMI Cable
- Metal Bracket
- Screws
- User Guide (this manual)
2.2. Device Layout and Ports
Familiarize yourself with the various ports and buttons on your Bmax B1 Plus Mini PC:

Image: Detailed diagram of the Bmax B1 Plus Mini PC's ports, including VGA, HDMI, USB 3.0, USB 2.0, RJ45 Gigabit Ethernet, 3.5mm Audio/Mic, Power In, Power Button, and Reset Button.
- VGA Port: For connecting to displays with VGA input (up to 1920x1080P@60Hz).
- HDMI Port: For connecting to displays with HDMI input (up to 4K Resolution & 2560*1600P@60Hz).
- USB 3.0 Data Ports (x2): For high-speed data transfer (Super Speed | 5Gbps).
- USB 2.0 Data Ports (x2): For standard data transfer (480Mbps).
- RJ45 Gigabit Ethernet Port: For wired network connection (10/100/1000 Mbps).
- 3.5mm Audio/Mic (2-in-1): For connecting headphones or external speakers with microphone functionality.
- Power In (12V): Connect the provided power adapter here.
- Power Button: To turn the device on or off.
- Reset Button: To reset the device (often requires a pin).
3. Setup
3.1. Initial Connection
- Connect your monitor(s) to the HDMI and/or VGA ports on the Bmax B1 Plus.
- Connect your keyboard and mouse to the available USB ports.
- For wired internet, connect an Ethernet cable to the RJ45 port. For wireless, ensure your Wi-Fi network is available.
- Connect the power adapter to the 'Power In' port and then plug it into a power outlet.
- Press the Power Button to turn on the Mini PC.
3.2. Dual Screen Display Setup
The Bmax B1 Plus supports dual-screen display, allowing you to extend your desktop across two monitors for increased productivity or enhanced media viewing.

Image: Illustration of the Bmax B1 Plus Mini PC connected to two monitors for a dual-screen display setup.
For a visual guide on setting up dual screens, please refer to the official video below:
Video: Official guide demonstrating the dual-screen display operation of the Bmax B1 Plus Mini PC.
3.3. VESA Mount Installation
The Bmax B1 Plus can be mounted on the back of a VESA-compatible monitor or TV, transforming it into an all-in-one PC solution and saving desk space.

Image: Step-by-step illustration of installing the Bmax B1 Plus Mini PC using the included VESA mount bracket on the back of a monitor.
3.4. Storage Expansion
You can expand the storage of your Bmax B1 Plus Mini PC by adding an M.2-2280 SATA SSD (up to 1TB) or connecting an external hard drive via USB 3.0.

Image: Diagram showing how to install an M.2-2280 SATA SSD into the Bmax B1 Plus Mini PC for storage expansion.
To install an M.2-2280 SATA SSD:
- Ensure the Mini PC is powered off and unplugged.
- Locate the M.2 SSD slot cover on the bottom of the device.
- Remove the screw securing the cover and gently open it.
- Insert the M.2 SSD into the slot at an angle and press down to secure it.
- Replace the screw to hold the SSD in place and close the cover.
4. Operating Instructions
4.1. Power On/Off
- Power On: Press the Power Button once. The power indicator light will illuminate.
- Power Off: From the operating system, select 'Shut down'. Alternatively, press and hold the Power Button for a few seconds to force a shutdown (not recommended for regular use).
4.2. Connectivity
The Bmax B1 Plus offers robust connectivity options:
- Wi-Fi: Supports 2.4GHz/5GHz Dual Band Wi-Fi (802.11ac) for fast wireless internet access.
- Bluetooth: Integrated Bluetooth 4.2 for connecting wireless peripherals like keyboards, mice, and headphones.
- Ethernet: Gigabit Ethernet port for stable and high-speed wired network connections.

Image: Visual representation of the Bmax B1 Plus Mini PC's dual-band Wi-Fi capabilities and integrated Intel HD Graphics 500 supporting 4K UHD output.
4.3. Portability and Use Cases
The compact size and lightweight design of the Bmax B1 Plus make it highly portable and suitable for various environments:

Image: Collage demonstrating the portability of the Bmax B1 Plus Mini PC, showing it being carried in a pocket and used in various settings such as an office, home theater, and conference room.
- Personal Office: Ideal for daily productivity tasks.
- Education: Suitable for learning environments.
- Home Theater: Supports 4K video playback for entertainment.
- Conference Projection: Easily connect to projectors for presentations.
5. Maintenance
To ensure optimal performance and extend the lifespan of your Bmax B1 Plus Mini PC, follow these maintenance guidelines:
- Keep it Clean: Regularly wipe the exterior with a soft, dry cloth. Avoid using liquid cleaners directly on the device.
- Ensure Ventilation: Do not block the ventilation holes. Ensure adequate airflow around the device to prevent overheating.
- Software Updates: Keep your operating system and drivers updated to the latest versions for security and performance improvements.
- Quiet Operation: The Bmax B1 Plus is designed for quiet operation. If you notice unusual fan noise (though it's fanless, some internal components might generate minimal sound or external fans might be used), ensure it's not obstructed.
- Safe Shutdown: Always shut down the Mini PC properly through the operating system to prevent data corruption.
6. Troubleshooting
If you encounter issues with your Bmax B1 Plus Mini PC, refer to the following common troubleshooting steps:
| Problem | Possible Solution |
|---|---|
| No display on monitor |
|
| No internet connection |
|
| Device is slow or unresponsive |
|
| USB devices not recognized |
|
If the problem persists after trying these steps, please contact Bmax customer support for further assistance.
7. Specifications
| Feature | Detail |
|---|---|
| Brand | Bmax |
| Model Number | B1 Plus |
| Processor | Intel Celeron N3350 (1.1 GHz, up to 2.4 GHz) |
| RAM | 6 GB DDR3 SDRAM |
| Storage | 64 GB eMMC (expandable with M.2-2280 SATA SSD up to 1TB) |
| Graphics Coprocessor | Intel HD Graphics 500 |
| Max Screen Resolution | 3840 x 2160 pixels (4K) |
| Wireless Type | 802.11ac (2.4GHz/5GHz Dual WiFi), Bluetooth 4.2 |
| Ethernet | Gigabit Ethernet (10/100/1000 Mbps) |
| Ports | HDMI, VGA, 2x USB 3.0, 2x USB 2.0, RJ45, 3.5mm Audio/Mic, Power In |
| Operating System | OS (Typically Windows 10 Pro) |
| Item Weight | 1.37 pounds |
| Color | Black |
8. Warranty and Support
For warranty information and technical support, please refer to the documentation included with your product or visit the official Bmax website. Keep your purchase receipt as proof of purchase for warranty claims.
You can also visit the Bmax Store on Amazon for additional product information and support resources.
Ask a question about this manual
Ask about setup, troubleshooting, compatibility, parts, safety, or missing instructions. Manuals+ will review the question and use this page’s manual context to help answer it.