1. Safety Instructions
Always read and understand all safety warnings and instructions before operating the generator. Failure to follow the warnings and instructions may result in electric shock, fire, and/or serious injury.
General Safety Guidelines
- Carbon Monoxide Hazard: Never operate the generator indoors or in poorly ventilated areas. Exhaust contains carbon monoxide, a colorless, odorless, poisonous gas that can kill you.
- Fire Hazard: Gasoline is highly flammable. Refuel in a well-ventilated area with the engine off and cool. Do not smoke or allow flames or sparks near the generator.
- Electrical Shock Hazard: Do not operate the generator in wet conditions. Ensure all electrical connections are secure and properly grounded. Never touch live electrical parts.
- Moving Parts: Keep hands, feet, hair, and clothing away from moving parts to prevent injury.
- Children and Pets: Keep children and pets away from the generator, especially when it is operating.
- Proper Grounding: Always ensure the generator is properly grounded before use to prevent electric shock.
2. Product Overview
The Scheppach SG7100x is a powerful and reliable gasoline generator designed for various applications, from home backup to construction sites. It features a robust 4-stroke engine, multiple output options, and AVR technology for stable power delivery.
Key Features:
- 12.2 HP gasoline engine with electric start or alternative recoil starter.
- Powerful and air-cooled 4-stroke gasoline engine with 420 cm³ displacement.
- Max. 5400 W output power, 5000 W rated power at 400 V~.
- One 400 V~ connection, two 230 V~ connections, and one 12 V DC connector for maximum flexibility.
- Stable and robust steel frame with transport wheels and foldable handles.
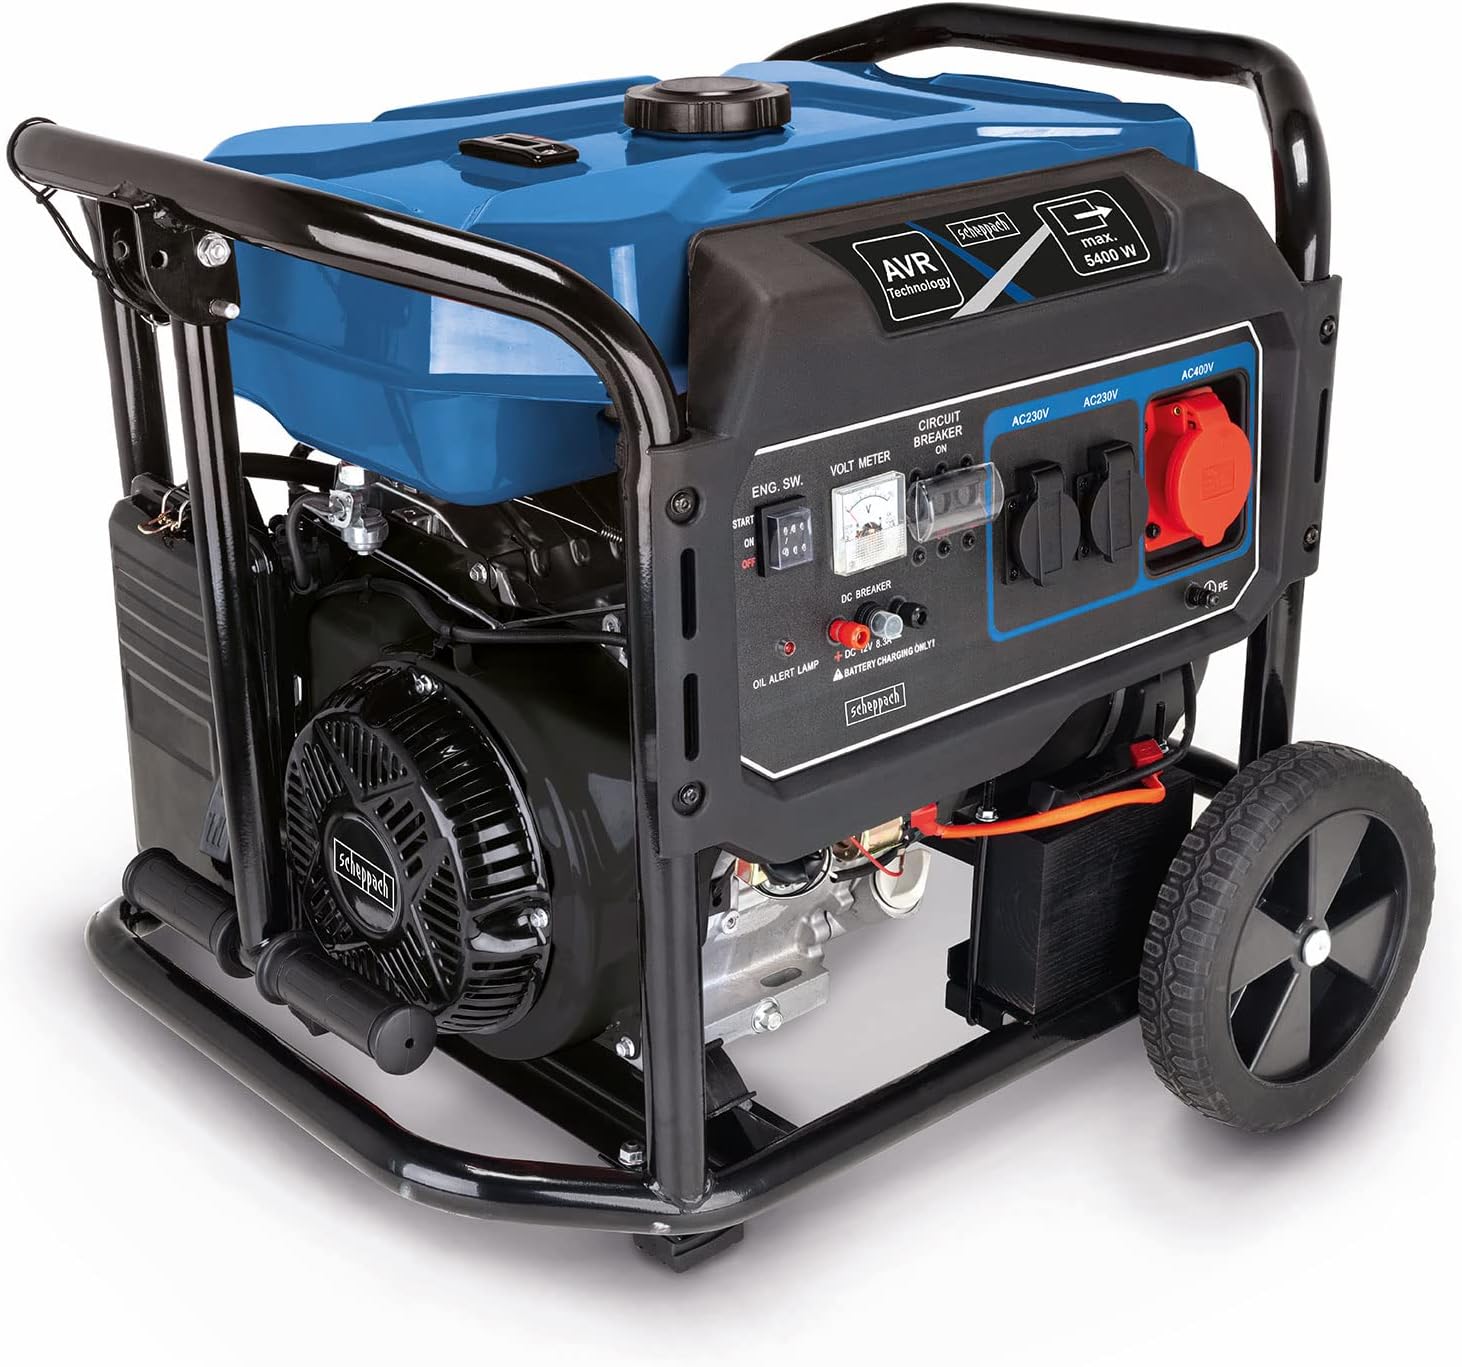
Figure 2.1: The Scheppach SG7100x gasoline generator, featuring a robust frame and integrated wheels for portability.
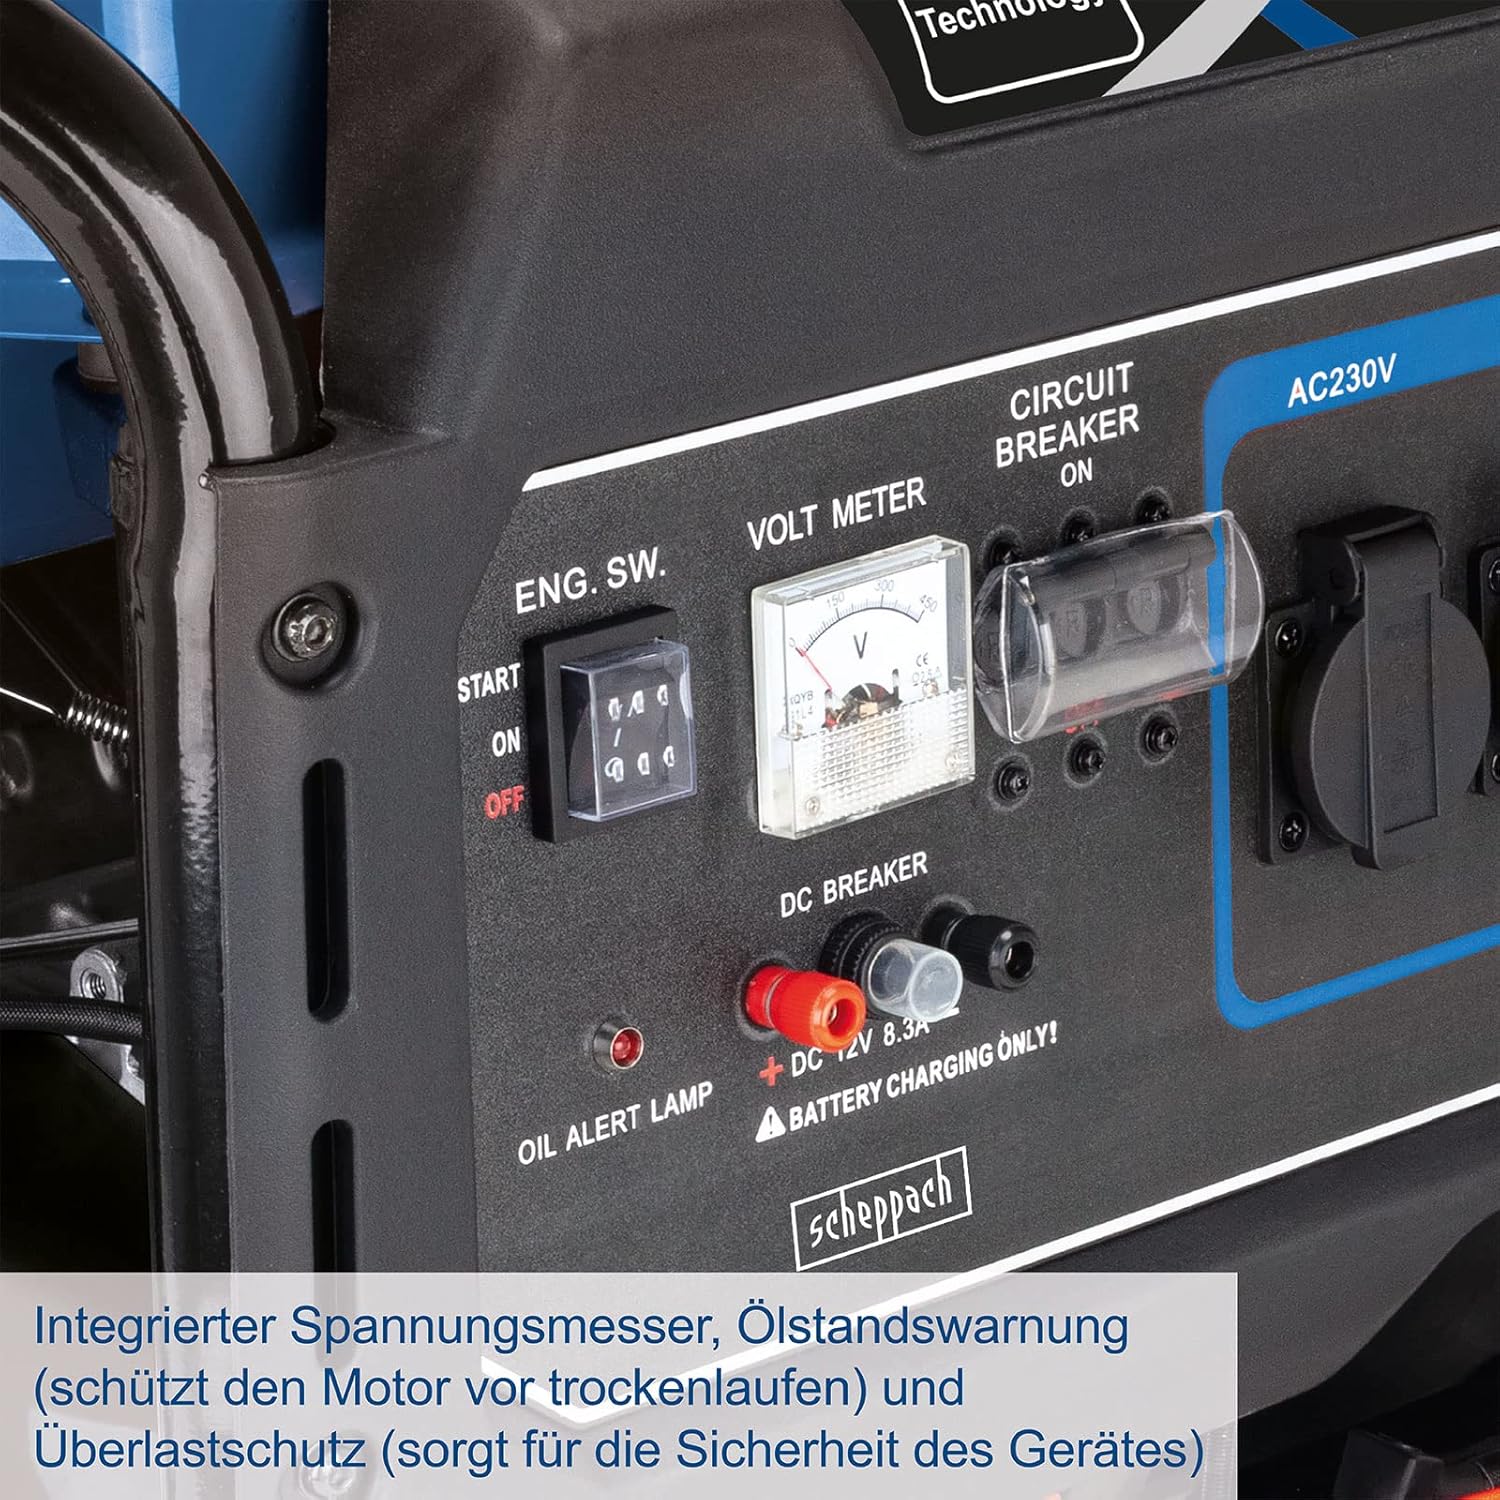
Figure 2.2: Close-up of the control panel with electric start switch, voltmeter, circuit breaker, oil alert lamp, and DC 12V connector.

Figure 2.3: Diagram showing the 400V and 230V outlets, oil warning indicator, and robust construction.

Figure 2.4: Illustration highlighting the electric start capability of the generator.
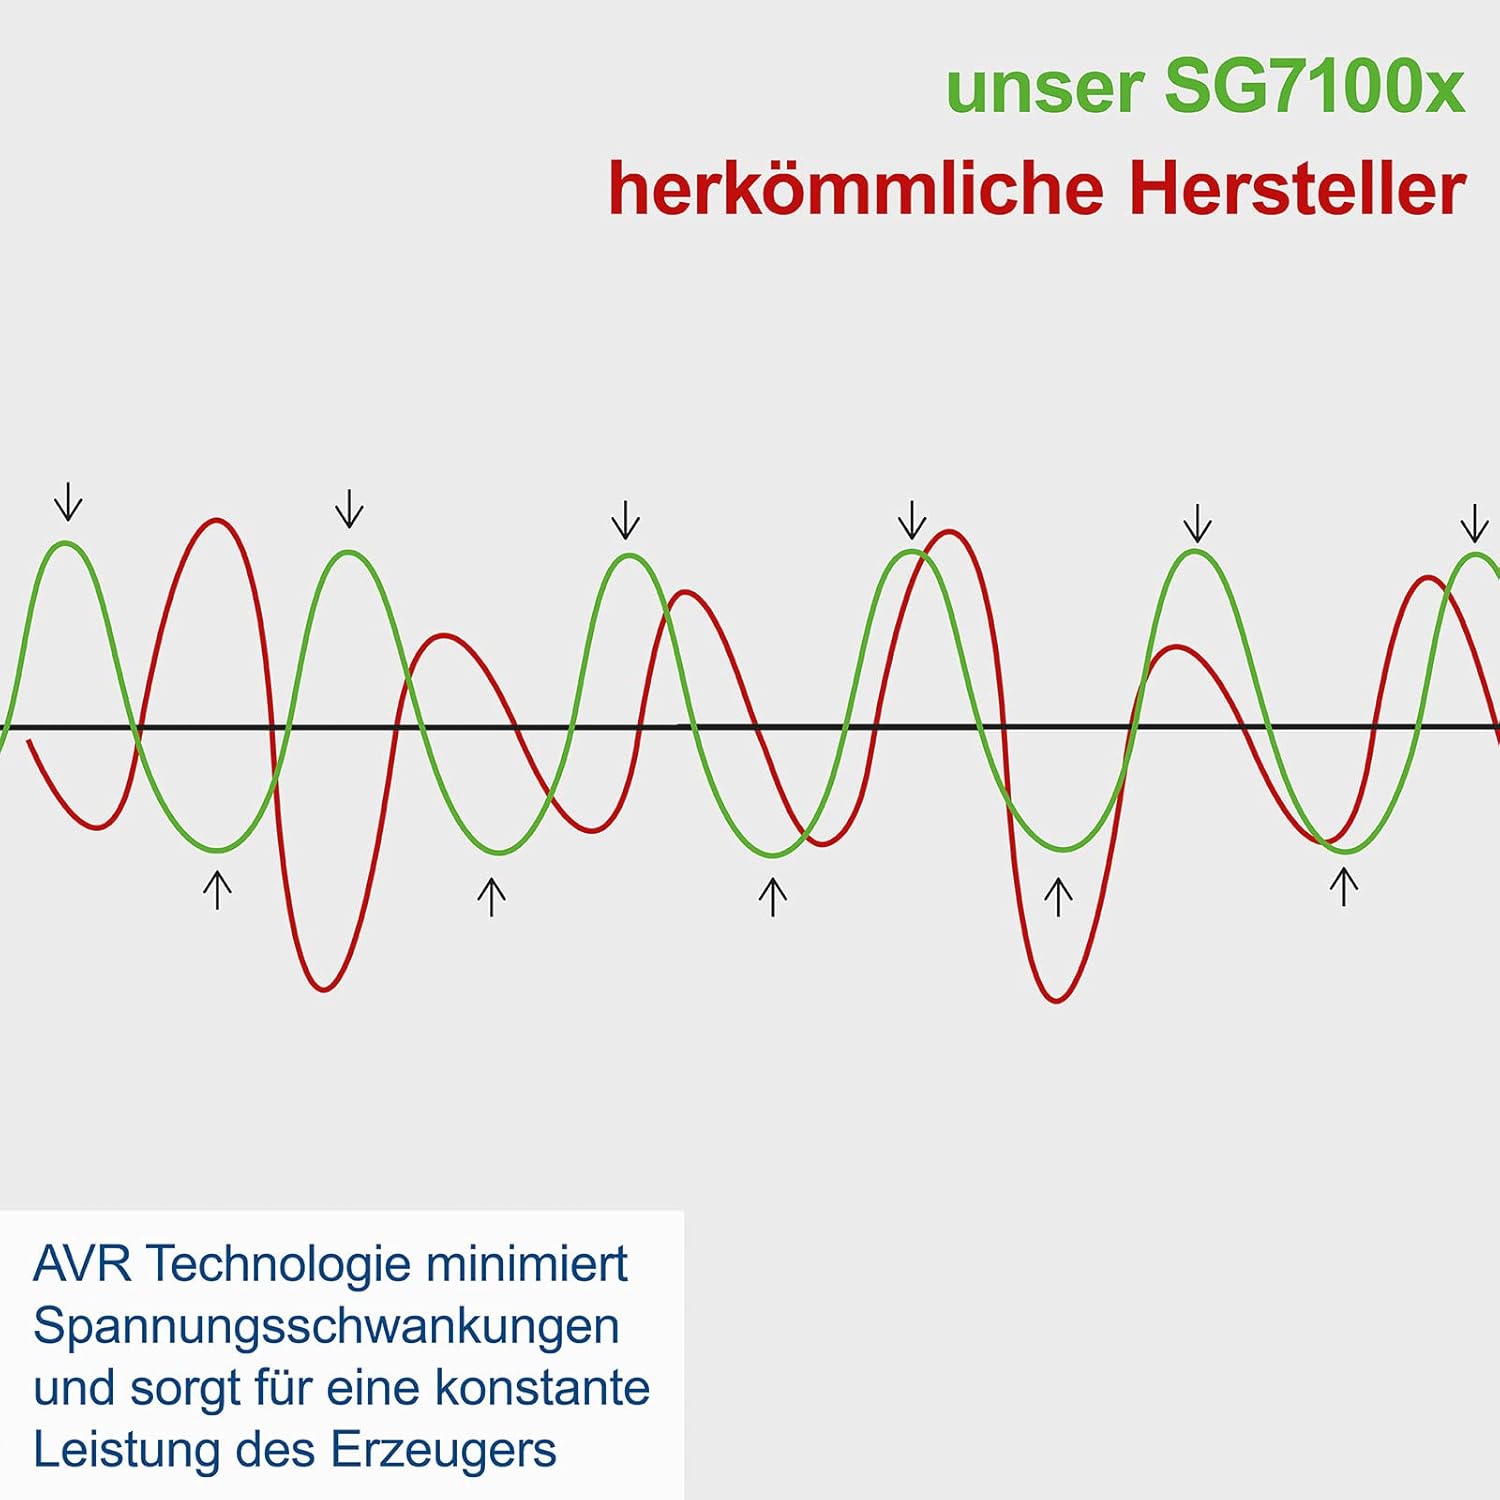
Figure 2.5: Graph illustrating how AVR technology minimizes voltage fluctuations for stable power output compared to conventional generators.
3. Setup and Assembly
3.1 Unpacking and Inspection
Carefully remove the generator from its packaging. Inspect for any damage that may have occurred during shipping. Report any damage to your dealer immediately. Ensure all components listed in the packing list are present.
3.2 Wheel and Handle Assembly
The transport wheels and foldable handles need to be assembled. Use the provided hardware and tools (or your own if better suited) to securely attach them. Refer to the assembly diagrams in the separate assembly guide if provided.
3.3 Adding Engine Oil
The generator is shipped without engine oil. Before first use, you must add the correct type and amount of oil. Locate the oil fill cap/dipstick. Fill with approximately 1.1 liters of SAE 10W-30 or 10W-40 engine oil (check manual for exact specification and capacity). Do not overfill. The oil alert lamp will prevent the engine from starting if the oil level is too low.
3.4 Adding Fuel
Use only fresh, unleaded gasoline with an octane rating of 87 or higher. The fuel tank capacity is 25 liters. Fill the tank slowly to avoid spills, leaving a small air gap at the top. Do not overfill. Ensure the fuel cap is securely tightened after refueling.
4. Operating Instructions
4.1 Starting the Generator
Before starting, ensure the generator is on a level surface, away from combustible materials, and in a well-ventilated area.
- Ensure the circuit breakers are in the 'OFF' position.
- Turn the fuel valve to the 'ON' position.
- If the engine is cold, move the choke lever to the 'CHOKE' position.
- Electric Start: Insert the key into the ignition switch and turn it to the 'START' position. Release the key once the engine starts.
- Recoil Start: Pull the recoil starter handle slowly until resistance is felt, then pull quickly and firmly. Repeat if necessary until the engine starts.
- Once the engine starts, slowly move the choke lever to the 'RUN' position. Allow the engine to warm up for a few minutes before connecting any loads.
4.2 Connecting Electrical Devices
Once the generator is running smoothly, you can connect your electrical devices. Ensure the total wattage of connected devices does not exceed the generator's rated output.
- For 230V devices, plug them into the 230V AC outlets.
- For 400V devices, plug them into the 400V AC outlet.
- For 12V DC devices, use the 12V DC connector. This is typically used for battery charging.
- Flip the circuit breakers to the 'ON' position to supply power to the outlets.
4.3 Shutting Down
- Disconnect all electrical loads from the generator.
- Turn the circuit breakers to the 'OFF' position.
- Turn the engine switch to the 'OFF' position.
- Turn the fuel valve to the 'OFF' position to prevent fuel flow to the carburetor.
5. Maintenance
Regular maintenance is crucial for the longevity and optimal performance of your generator. Always perform maintenance with the engine off and cool, and disconnect the spark plug cap to prevent accidental starting.
Regular Maintenance Schedule:
- Before Each Use: Check engine oil level, check fuel level, inspect for any visible damage or leaks.
- Every 25 Hours or Annually (whichever comes first): Change engine oil.
- Every 50 Hours or Annually: Clean/inspect air filter, inspect spark plug.
- Every 100 Hours or Annually: Replace spark plug, inspect fuel filter (replace if necessary), inspect fuel lines.
- Storage: For long-term storage, drain the fuel tank and carburetor, or use a fuel stabilizer. Store in a dry, well-ventilated area.
6. Troubleshooting
This section provides solutions to common operational issues. For problems not listed here, contact qualified service personnel.
| Problem | Possible Cause | Solution |
|---|---|---|
| Engine does not start | No fuel / Low fuel Low engine oil Choke in wrong position Spark plug issue Engine switch OFF | Add fresh fuel Add engine oil (oil alert lamp) Adjust choke Inspect/clean/replace spark plug Turn engine switch ON |
| No power output | Circuit breaker tripped Overload Loose connections | Reset circuit breaker Reduce load Check all electrical connections |
| Engine runs rough | Stale fuel Dirty air filter Spark plug fouled | Drain and refill with fresh fuel Clean/replace air filter Clean/replace spark plug |
7. Technical Specifications
Detailed specifications for the Scheppach SG7100x Gasoline Generator:
| Specification | Value |
|---|---|
| Model Number | 17304 |
| Engine Type | 4-stroke gasoline engine |
| Engine Displacement | 420 cm³ |
| Horsepower (PS) | 12.2 PS |
| Max. Output Power | 5400 W |
| Rated Power (400V) | 5000 W |
| Voltage Output | 2x 230V~, 1x 400V~, 1x 12V DC |
| Fuel Type | Gasoline |
| Fuel Tank Capacity | 25 Liters |
| Starting System | Electric Start, Recoil Start |
| Dimensions (L x W x H) | 76 x 70 x 65 cm |
| Weight | 91 Kilograms |
| Special Features | AVR Technology, Overload Protection, Oil Alert Lamp |

Figure 7.1: Diagram showing the overall dimensions of the generator: 76 cm length, 70 cm width, 65 cm height.
8. Warranty and Support
8.1 Warranty Information
This Scheppach product is covered by a manufacturer's warranty against defects in materials and workmanship. The warranty period typically begins from the date of purchase. Please retain your proof of purchase for warranty claims. For specific warranty terms and conditions, refer to the warranty card included with your product or visit the official Scheppach website.
8.2 Customer Support
Should you require technical assistance, spare parts, or have any questions regarding your Scheppach SG7100x generator, please contact Scheppach customer service. Contact details can usually be found on the official Scheppach website or in the product packaging. When contacting support, please have your model number (SG7100x) and serial number (if applicable) ready.
For more information, visit the Scheppach Store on Amazon.


