
GIGABYTE B650M AORUS ELITE AX
Contents
GIGABYTE B650M AORUS Elite AX Motherboard Instruction Manual
Model: B650M AORUS ELITE AX | Brand: GIGABYTE
Product Overview
The GIGABYTE B650M AORUS Elite AX is a high-performance gaming motherboard designed for AMD Ryzen 7000, 8000, and 9000 Series Processors with the AM5 Socket. It features DDR5 compatibility with 4 DIMMs supporting AMD EXPO & Intel XMP, a robust Twin 12+2+2 Phases Digital VRM Solution, and an 8-Layer 2X Copper PCB for commanding power delivery. Its cutting-edge thermal design includes a 6mm Heatpipe, Fully Covered MOSFET Heatsinks, M.2 Thermal Guard, and PCIe Ultra Durable Armor, ensuring optimal performance under load. Advanced connectivity options include PCIe 5.0, PCIe 5.0 NVMe x4 M.2, Front and rear USB-C, and Intel 2.5GbE LAN. The EZ-Latch design simplifies installation with quick release and screwless features for PCIe 5.0 & M.2 Connectors. Dynamic Audio with Hi-Fi Audio Capacitors and Fine Tuning Features like RGB FUSION, Smart Fan 6, and Multi-key enhance the user experience. This motherboard is built for stability and performance, backed by a 5-Year Warranty.

Figure 1: GIGABYTE B650M AORUS Elite AX Motherboard and its retail packaging.
Video 1: Official B650 Trailer (2022) highlighting key features and capabilities of the motherboard series.
Setup and Installation
Follow these steps for proper installation of your GIGABYTE B650M AORUS Elite AX motherboard and its components.
1. Processor Installation
This motherboard supports AMD Ryzen 7000, 8000, and 9000 Series Processors with the AM5 Socket. Carefully align your CPU with the socket, ensuring the triangular markers on the CPU and socket match. Gently lower the CPU into place without forcing it. Close the retention arm to secure the processor.

Figure 2: Top-down view of the motherboard, highlighting the AM5 CPU socket ready for processor installation.
2. Memory (RAM) Installation
The motherboard features 4 DIMM slots for DDR5 memory modules. Open the clips on both ends of the DIMM slot. Align the memory module with the slot, ensuring the notch on the module matches the key in the slot. Press down firmly on both ends of the memory module until the clips snap into place, securing the RAM.
3. M.2 SSD Installation
Utilize the PCIe 5.0 NVMe x4 M.2 slots for ultra-fast storage. The EZ-Latch design allows for screwless installation. Simply insert the M.2 SSD into the slot at an angle, then gently push down until it clicks into place with the EZ-Latch mechanism. Ensure the M.2 Thermal Guard is properly installed over the SSD for optimal cooling.
4. Graphics Card Installation
Insert your PCIe 5.0 graphics card into the primary PCIe x16 slot. The EZ-Latch feature simplifies removal and installation. Ensure the card is seated firmly and secured with the case's retention mechanism.
5. Connecting Peripherals
Connect your display, USB devices, and network cables to the rear I/O panel. The motherboard provides a variety of ports including USB 3.2 Gen2X2 Type-C, multiple USB 3.2 Gen2 and Gen1 ports, HDMI, DisplayPort, and Intel 2.5GbE LAN for high-speed networking. Ensure all connections are secure.

Figure 3: Detailed view of the rear I/O panel, showing various connectivity options including USB, HDMI, DisplayPort, and LAN.
Operating Instructions
Once all components are installed and connected, you can power on your system.
1. Initial Boot and BIOS Setup
Upon first boot, enter the UEFI BIOS by pressing the designated key (usually DEL or F2) during startup. Here you can configure system settings, boot order, and enable features like AMD EXPO or Intel XMP for memory optimization. The Multi-key feature allows quick access to BIOS or safe mode.
2. Driver Installation
After installing your operating system, install the latest drivers for the chipset, LAN, audio, and other components from the GIGABYTE official website to ensure full functionality and optimal performance.
3. Software Utilities
GIGABYTE motherboards include useful software such as RGB FUSION for customizable lighting effects and Smart Fan 6 for advanced fan control and temperature monitoring. Install these utilities to personalize and optimize your system.
Maintenance
Regular maintenance helps ensure the longevity and stable performance of your motherboard.
1. Thermal Management
The B650M AORUS Elite AX features an Outstanding Thermal Design with a 6mm Heatpipe, Fully Covered MOSFET Heatsinks, and M.2 Thermal Guard. Ensure proper airflow within your PC case and regularly clean dust from fans and heatsinks to maintain optimal temperatures.
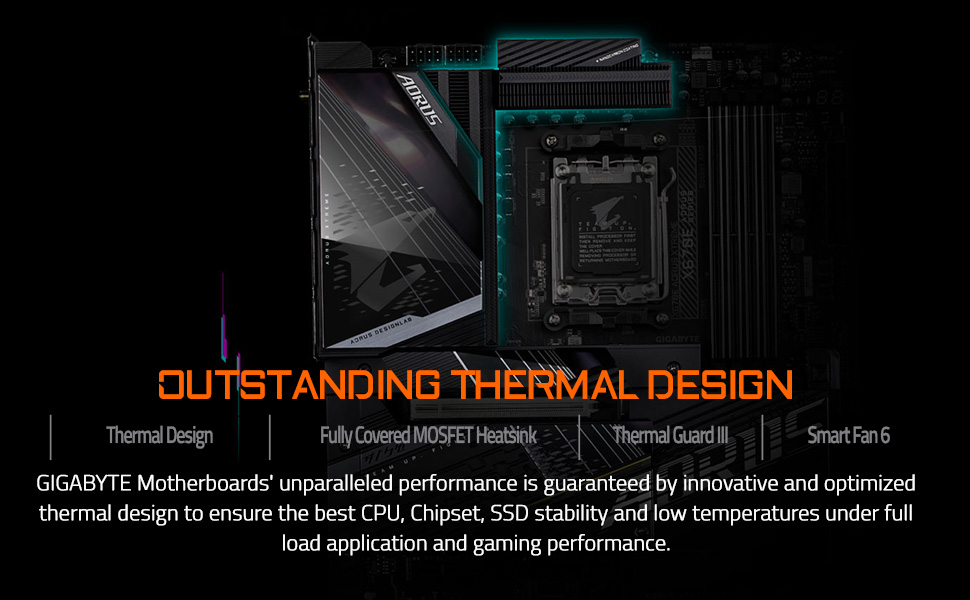
Figure 4: Illustration of the motherboard's advanced thermal design, including heatsinks and heatpipes.
2. BIOS Updates
Periodically check the GIGABYTE support website for the latest BIOS updates. The Q-Flash Plus feature allows you to update the BIOS without installing the CPU, memory, or graphics card, simplifying the process.
Troubleshooting
If you encounter issues with your motherboard, consider the following common troubleshooting steps:
- No Display/Boot Issues: Ensure all power cables are securely connected, especially the 24-pin ATX and 8-pin CPU power connectors. Verify that RAM modules are properly seated in their slots. If using a dedicated graphics card, ensure it is fully inserted into the PCIe slot and has adequate power.
- BIOS/UEFI Access Problems: Try clearing the CMOS (Complementary Metal-Oxide-Semiconductor) by removing the CMOS battery for a few minutes or using the dedicated Clear CMOS jumper/button if available.
- System Instability/Crashes: Check for overheating using monitoring software (e.g., Smart Fan 6). Ensure drivers are up-to-date. Test memory modules individually if you suspect RAM issues.
- Peripheral Recognition: Verify that USB devices are connected to the correct ports. For network issues, check LAN cable connection and driver installation.
- BIOS Update Failures: Use the Q-Flash Plus feature as described in the manual, ensuring the correct BIOS file is used and the USB drive is formatted correctly.
For more complex issues, refer to the detailed user manual (PDF) or contact GIGABYTE customer support.
Product Specifications
| Feature | Detail |
|---|---|
| Brand | GIGABYTE |
| Model Name | B650M AORUS ELITE AX |
| CPU Socket | Socket AM5 |
| Compatible Processors | AMD Ryzen™ 7000 Series Processors, AMD Ryzen™ 8000 Series Processors, AMD Ryzen™ 9000 Series Processors |
| Chipset Type | AMD B650 |
| RAM Memory Technology | DDR5 |
| Memory DIMMs | 4 |
| Memory Storage Capacity | 128 GB |
| Memory Clock Speed | 4800 MHz |
| Graphics Interface | 1*PCIe 4.0 x16 |
| Display Interface | HDMI, DisplayPort |
| SATA / M.2 | 4*SATA3 / 2*M.2 Gen 4 |
| LAN | 2.5GbE LAN |
| USB | 2*USB 3.2 Gen 2 USB Type-C + 1*USB 3.2 Gen 2 Type-A + 4*USB 3.2 Gen 1 + 8*USB 2.0 |
| Product Dimensions | 10.55 x 2.67 x 10.62 inches |
| Item Weight | 3.7 pounds |
| Platform | Windows 11 |
Warranty Information
The GIGABYTE B650M AORUS Elite AX motherboard comes with a 5-Year Warranty from the manufacturer. Please retain your proof of purchase for warranty claims. For detailed terms and conditions, refer to the official GIGABYTE warranty policy.
Additional Support and Resources
- Official User Manual (PDF): Download Here
- Official User Guide (PDF): Download Here
- Safety Information (PDF): Download Here
- GIGABYTE Official Store: Visit Store
Ask a question about this manual
Ask about setup, troubleshooting, compatibility, parts, safety, or missing instructions. Manuals+ will review the question and use this page’s manual context to help answer it.