
1. Introduction
Thank you for choosing the PULIVIA Waterproof Stopwatch Timer YS-803. This manual provides essential instructions for the proper setup, operation, and maintenance of your stopwatch. Designed for simplicity and durability, this device is ideal for sports, coaching, running, and swimming activities.
Key features include its waterproof design, basic stopwatch functionality (without clock, date, or countdown), silent operation, and an ON/OFF function to conserve battery life.
2. Product Overview
The PULIVIA YS-803 stopwatch features a clear digital display and three primary control buttons for easy operation.

Figure 2.1: Front view of the PULIVIA YS-803 Stopwatch with button labels.
Button Functions:
- ON/OFF Button: Powers the stopwatch on or off. Press and hold for approximately 3 seconds to activate or deactivate the device.
- START/STOP Button: Initiates and pauses the timing function.
- SPLIT/RESET Button: Records split times during an ongoing measurement. When the stopwatch is stopped, this button resets the timer to zero.

Figure 2.2: Main product view of the PULIVIA YS-803 Stopwatch.
3. Setup
3.1 Battery Installation / Replacement
The PULIVIA YS-803 stopwatch uses a CR2032 button cell battery. The battery is typically pre-installed. If replacement is needed:
- Locate the battery compartment on the back of the stopwatch.
- Carefully open the compartment using a small screwdriver or coin.
- Remove the old CR2032 battery and insert a new one, ensuring the positive (+) side faces upwards.
- Securely close the battery compartment.
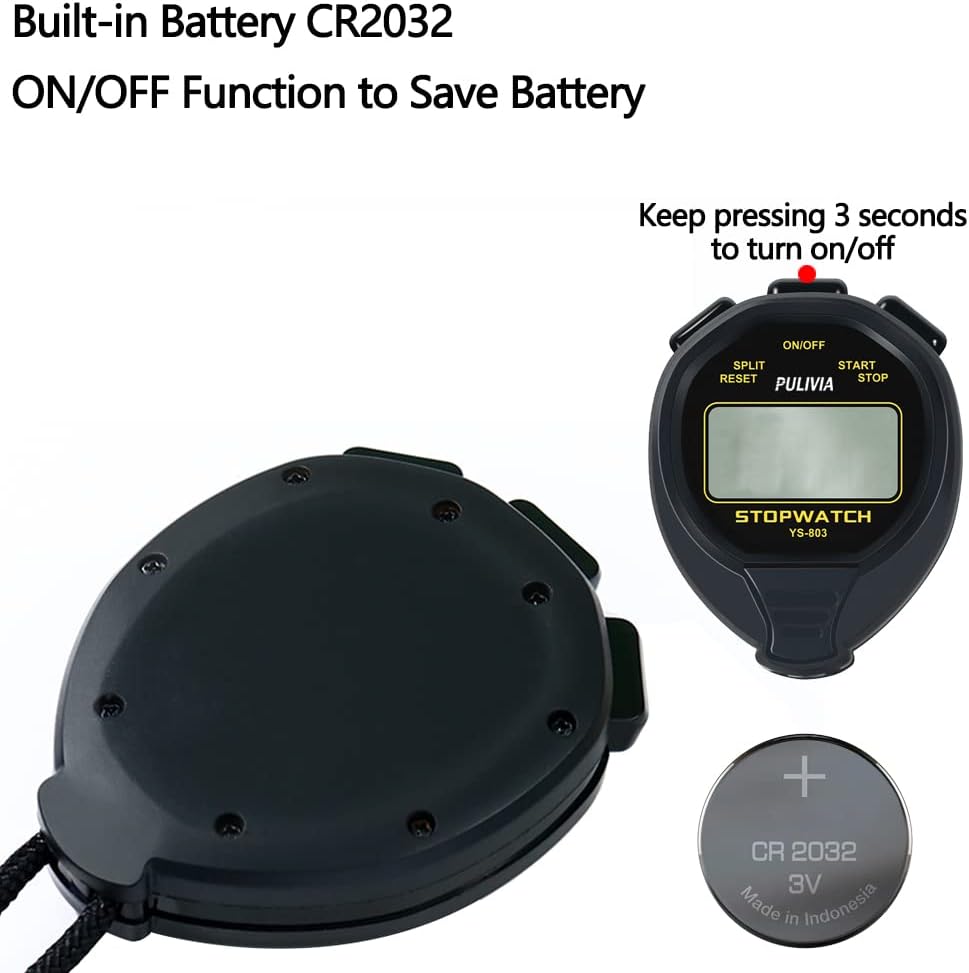
Figure 3.1: Rear view of the stopwatch indicating the CR2032 battery.
3.2 Initial Power On
To turn on the stopwatch for the first time or after battery replacement, press and hold the ON/OFF button for approximately 3 seconds until the display illuminates.

Figure 3.2: Instructions for powering the stopwatch on/off.
4. Operating Instructions
4.1 Power On/Off
- To Turn On: Press and hold the ON/OFF button for 3 seconds.
- To Turn Off: Press and hold the ON/OFF button for 3 seconds. This feature helps conserve battery life.
4.2 Basic Stopwatch Function
This stopwatch operates in a straightforward manner, focusing solely on timing events.
- Ensure the stopwatch is powered on and the display shows "00:00:00". If not, press the SPLIT/RESET button to reset.
- Press the START/STOP button to begin timing. The display will show the elapsed time.
- To pause the timing, press the START/STOP button again. The display will hold the current time.
- To resume timing from the paused point, press the START/STOP button once more.
- To stop the timing completely, press the START/STOP button.
- To clear the display and reset the stopwatch to zero, press the SPLIT/RESET button while the stopwatch is stopped.
4.3 Split/Lap Timing
The stopwatch can record split times, allowing you to measure intermediate segments of an event without stopping the main timer.
- Start the stopwatch by pressing the START/STOP button.
- While the stopwatch is running, press the SPLIT/RESET button to record a split time. The display will momentarily show the split time, while the main timer continues to run in the background.
- Press the SPLIT/RESET button again to return to the running total time display. You can record multiple split times this way.
- To stop the overall timing, press the START/STOP button. The final time will be displayed.
- To reset the stopwatch to zero, press the SPLIT/RESET button while the stopwatch is stopped.

Figure 4.1: Stopwatch in use during swimming, highlighting its waterproof capability.

Figure 4.2: Stopwatch being used by a coach.
5. Maintenance
5.1 Water Resistance
The PULIVIA YS-803 stopwatch is designed to be waterproof, making it suitable for use in rain and during swimming activities. It can be fully submerged in water. However, to ensure longevity, avoid pressing buttons repeatedly while submerged unless absolutely necessary, and rinse with fresh water after use in chlorinated or saltwater environments.

Figure 5.1: Stopwatch demonstrating its waterproof capability.
5.2 Cleaning
Clean the stopwatch with a soft, damp cloth. Do not use harsh chemicals or abrasive cleaners, as these may damage the casing or display.
5.3 Battery Life
The ON/OFF function helps extend battery life. Replace the CR2032 battery when the display becomes dim or unresponsive.
6. Troubleshooting
- Stopwatch does not turn on: Ensure the battery is correctly installed and has sufficient charge. Try replacing the CR2032 battery. Press and hold the ON/OFF button for 3 seconds.
- Display is blank or dim: This usually indicates a low battery. Replace the CR2032 battery.
- Buttons are unresponsive: Check if the stopwatch is powered on. If the issue persists after a battery change, contact customer support.
7. Specifications
| Feature | Description |
|---|---|
| Model Name | YS-803 |
| Brand | PULIVIA |
| Color | Black |
| Material | Acrylonitrile Butadiene Styrene (ABS) |
| Battery Type | CR2032 (Built-in) |
| Water Resistance | Waterproof (suitable for rain and swimming) |
| Functions | Stopwatch (single split/lap), ON/OFF |
| Display | Large and clear digit display |
| Item Package Dimensions | 3.78 x 2.8 x 0.87 inches |
| Package Weight | 0.06 Kilograms |

Figure 7.1: Examples of stopwatch usage in various sports.
8. Safety Information and Warnings
Please read and adhere to the following safety guidelines:
- INGESTION HAZARD: This product contains a button cell or coin battery. A button cell battery can cause severe internal chemical burns in as little as 2 hours if swallowed and can lead to death.
- KEEP BATTERIES OUT OF REACH OF CHILDREN.
- Seek immediate medical attention if a battery is suspected to be swallowed or inserted inside any part of the body.
- Do not use in a humid environment. There is a risk of flammability and explosion when used under high temperature and high pressure.

Figure 8.1: Safety warnings as displayed on product packaging.
9. Warranty and Support
For warranty information or technical support, please refer to the product packaging or contact the seller directly through your purchase platform. Keep your proof of purchase for any warranty claims.