
Introduction
This manual provides detailed instructions for the installation, operation, and maintenance of your ocioc 18-inch Flush Mount LED Ceiling Light Fixture. Please read this manual thoroughly before installation and use to ensure proper function and safety. Keep this manual for future reference.
Safety Information
- Always turn off the power at the circuit breaker before beginning installation or maintenance.
- Consult a qualified electrician if you are unsure about the installation process.
- Do not use this fixture with a dimmer switch. It is designed to be dimmed only with the provided remote control.
- Ensure all electrical connections are secure and comply with local codes and ordinances.
- Do not attempt to modify the fixture in any way.
Package Contents
Verify that all components are present before installation:
- LED Ceiling Light Fixture
- Mounting Accessories (screws, wire nuts)
- Safety Wire Rope
- 2.4G Remote Controller (AAA batteries not included)
Specifications
| Brand | ocioc |
| Model Number | OSK460-40W-T-WEJ1 |
| Color | White |
| Material | Plastic |
| Dimensions (L x W x H) | 18.11" x 18.11" x 1.4" (460mm x 460mm x 35.6mm) |
| Wattage | 40W (Main Light), 4W (Night Light) |
| Brightness | 3600 Lumens (Main Light), 400 Lumens (Night Light) |
| Color Temperature | 3000K-6500K (Adjustable), 2000K (Night Light) |
| Control Method | Remote Control |
| Voltage | 120 Volts (AC) |
| Installation Type | Flush Mount |
Dimensions

The fixture features an ultra-slim design with a thickness of 1.4 inches (35.6 mm) and a diameter of 18 inches (460 mm). It is compatible with most standard junction boxes.
Installation
Before starting, ensure the power is turned off at the circuit breaker. The fixture includes a safety wire rope to assist with installation, allowing one person to install it easily.
- Secure Base Plate: Attach the mounting base plate to the ceiling junction box using the provided screws.
- Hang the Lamp: Use the safety wire rope to temporarily hang the lamp from the base plate, freeing your hands for wiring.
- Connect AC Cables: Connect the AC power cables (Live/Neutral) from your ceiling to the corresponding wires on the light fixture using the provided wire nuts.
- Rotate and Finish: Rotate the lamp clockwise onto the base plate until it is securely locked in place.

After installation, restore power and test the light fixture.
Operating Instructions
Remote Control Overview
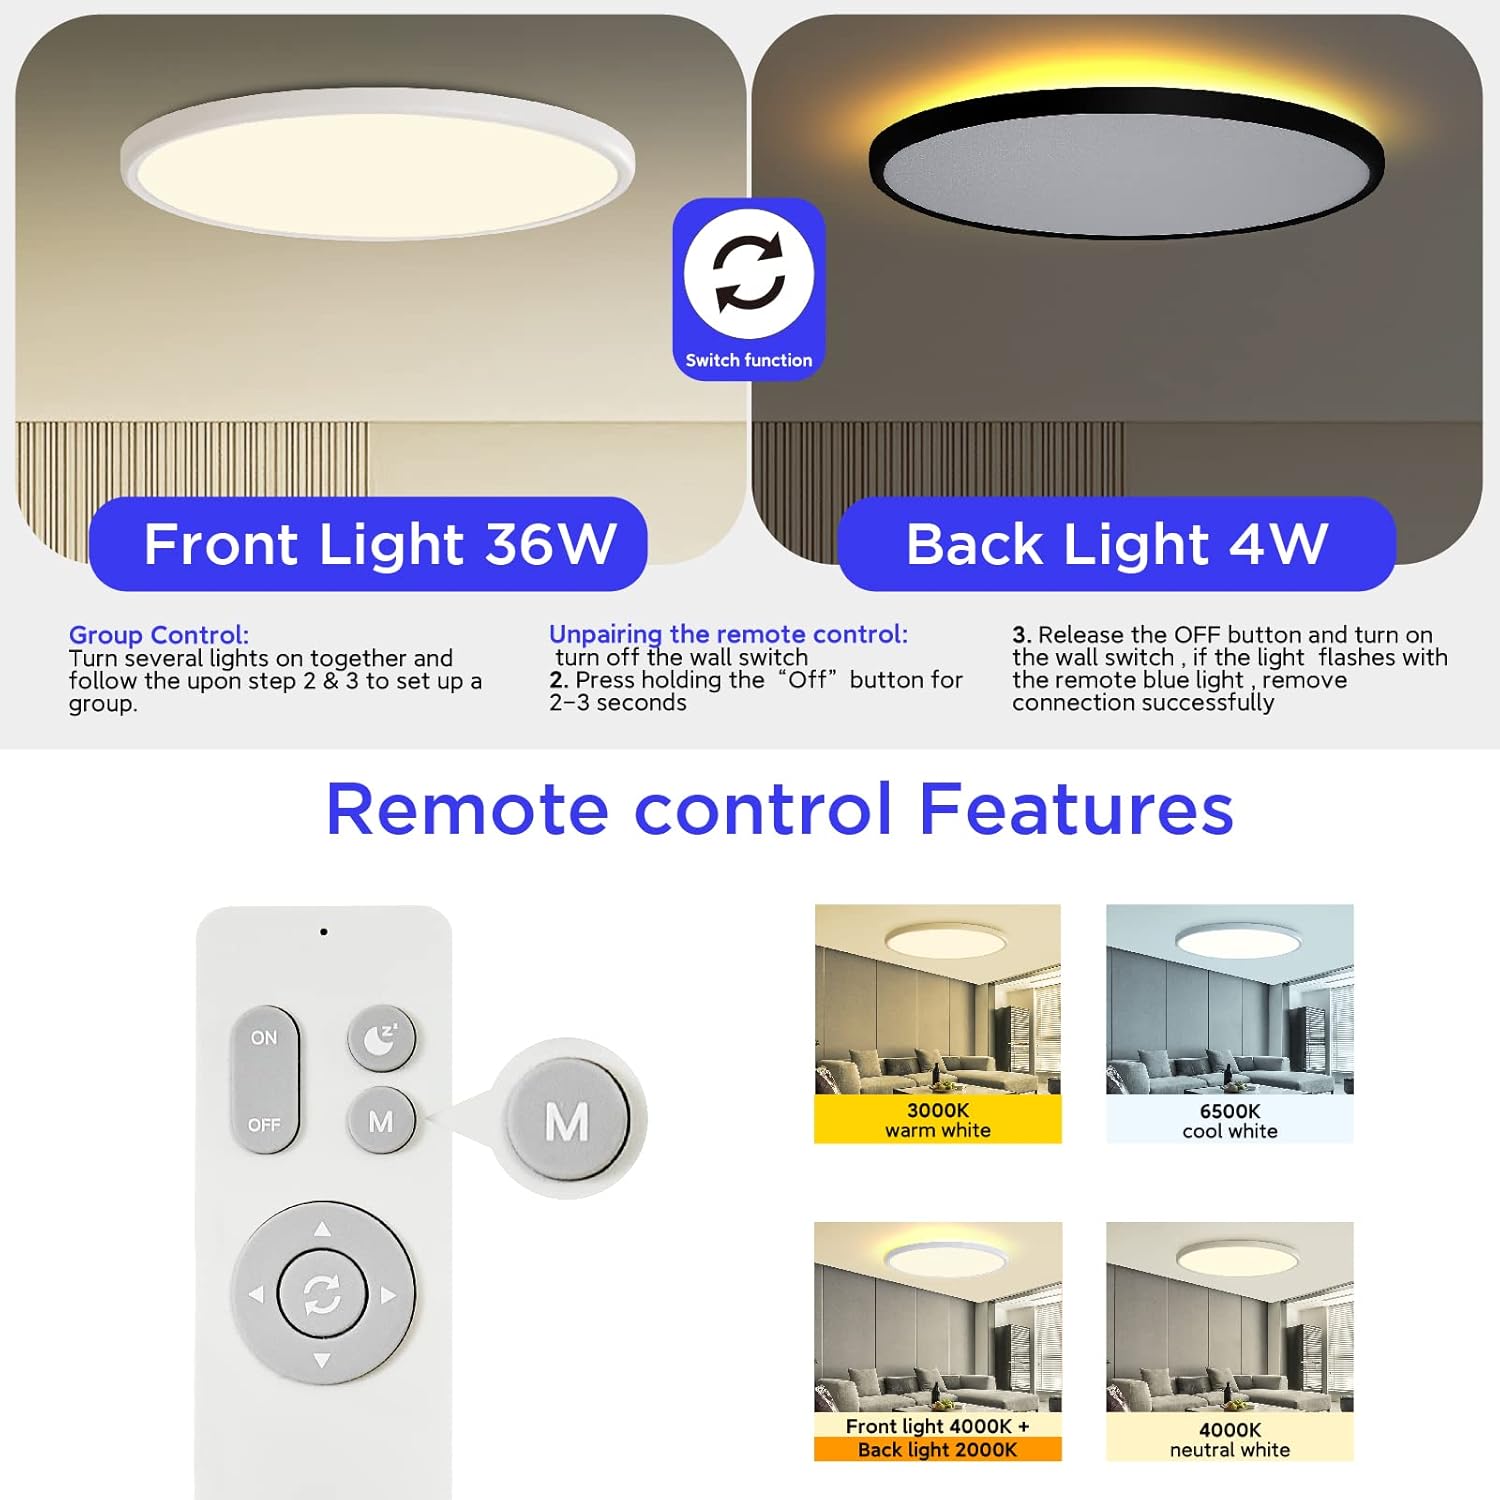
The light fixture is controlled by the included 2.4G remote control. Insert two AAA batteries (not included) into the remote before use. The remote does not require direct aiming at the light fixture.

The remote features dedicated buttons for ON/OFF, Night Light mode, Mode selection (M), and directional arrows for adjusting brightness and color temperature.
Color Temperature and Brightness Adjustment
The light fixture offers continuous adjustment of both color temperature and brightness using the remote control. It is not compatible with standard dimmer switches.
- Brightness Adjustment: Use the 'Brightness+' and 'Brightness-' arrows on the remote to adjust the light intensity from 10% to 100%.
- Color Temperature Adjustment: Use the 'Color Temperature+' (Warm white to Cool white) and 'Color Temperature-' (Cool white to Warm white) arrows to change the color temperature from 3000K (warm light) to 6500K (daylight).
- Mode (M) Button: Press the 'M' button to cycle through preset color temperatures: 3000K (warm white), 4000K (natural white), 6500K (daylight white), and all lights on.

The fixture provides both a main light (36W) and a back light (4W). The 'Switch function' button on the remote allows you to toggle between the front light, back light, or both.
Night Light Feature and 30-Minute Timer
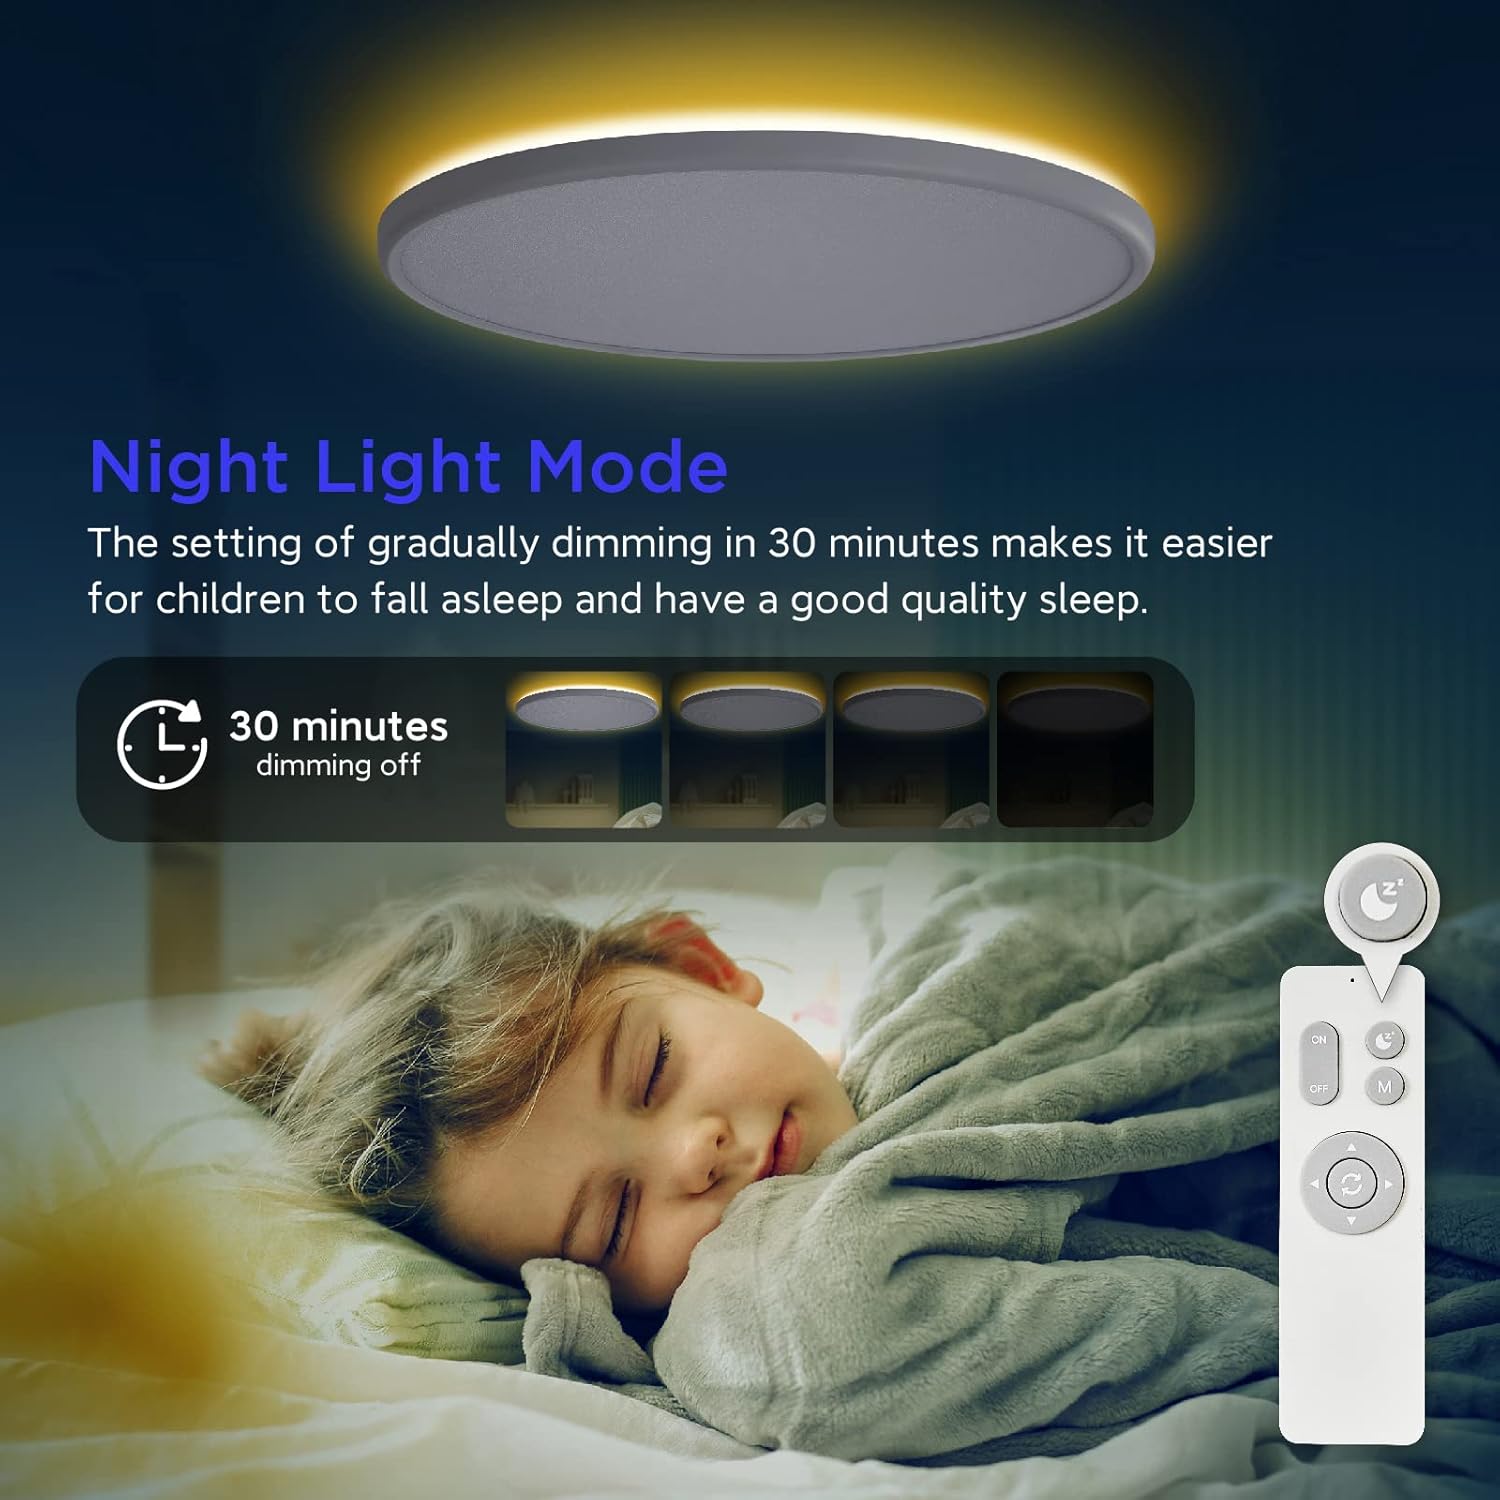
The night light mode provides a soft 4W, 2000K backlight, ideal for minimal illumination without disturbing sleep.
- Night Light Mode: Press the dedicated night light button on the remote to activate the 2000K backlight.
- 30-Minute Timer: While in night light mode, press the timer button on the remote. The backlight will gradually dim and turn off over 30 minutes.
Maintenance
To maintain the appearance and performance of your light fixture:
- Ensure power is off before cleaning.
- Wipe the fixture with a soft, dry cloth.
- Do not use abrasive cleaners or solvents, as they may damage the finish.
Troubleshooting
| Problem | Possible Cause | Solution |
|---|---|---|
| Light does not turn on. | No power, loose wiring, remote control battery dead. | Check circuit breaker. Ensure wiring is secure. Replace remote control batteries. |
| Light flickers or dims unexpectedly. | Incompatible dimmer switch, unstable power supply. | Ensure no external dimmer switch is used. Check power supply stability. |
| Remote control not responding. | Dead batteries, remote unpairing. | Replace AAA batteries. If still unresponsive, try unpairing and re-pairing the remote (refer to 'Remote Control Features' image for unpairing steps). |
Warranty and Support
This ocioc LED Ceiling Light Fixture comes with a 2-year limited warranty from the date of purchase. For warranty claims or technical support, please contact ocioc customer service through your retailer or the official ocioc website.


