
Chef'sChoice SHC32BGY11
Chef'sChoice Electric Knife Sharpener User Manual
Model: SHC32BGY11
Introduction
The Chef’sChoice Electric Knife Sharpener with Rechargeable Battery (Model SHC32BGY11) is designed to provide precise and efficient sharpening for both straight-edge and serrated knives. This compact and portable sharpener features a three-stage sharpening system utilizing 100-percent diamond abrasives and is powered by an integrated USB-C rechargeable lithium battery, offering cordless operation for up to 45 minutes.
This manual provides detailed instructions for the safe and effective use, maintenance, and troubleshooting of your Chef'sChoice Electric Knife Sharpener.

Figure 1: Chef'sChoice Electric Knife Sharpener, Model SHC32BGY11.
Key Features
- Rechargeable Battery: Integrated USB-C rechargeable lithium battery provides up to 45 minutes of continual sharpening and charges in under an hour.
- Three-Stage Sharpening: Applies a triple-bevel edge by sharpening and polishing most 20-degree knives.
- Diamond Abrasives: Signature diamond-coated disks sharpen edges faster and easier.
- Precise Guides: Precision angle guides ensure easy, accurate sharpening every time.
- Versatile Use: Sharpens both straight and serrated knives in just minutes.
Setup
- Unboxing: Carefully remove the sharpener and all included components from the packaging. Ensure all parts listed in the "Included Components" section are present.
- Placement: Place the sharpener on a stable, flat surface. Ensure there is adequate space around the unit for safe operation.
- Initial Charge: Before first use, fully charge the sharpener's internal lithium battery using the provided USB-C cable. Connect the USB-C cable to the sharpener's charging port and the other end to a compatible USB power adapter (not included). The charging indicator light will illuminate during charging and change color or turn off when fully charged.
- Familiarization: Observe the sharpening slots. The sharpener features three stages: Stage 1 for sharpening/reshaping, Stage 2 for honing, and Stage 3 for polishing and serrated knives.

Figure 2: USB-C Charging Port. Ensure the unit is fully charged before use for optimal performance.
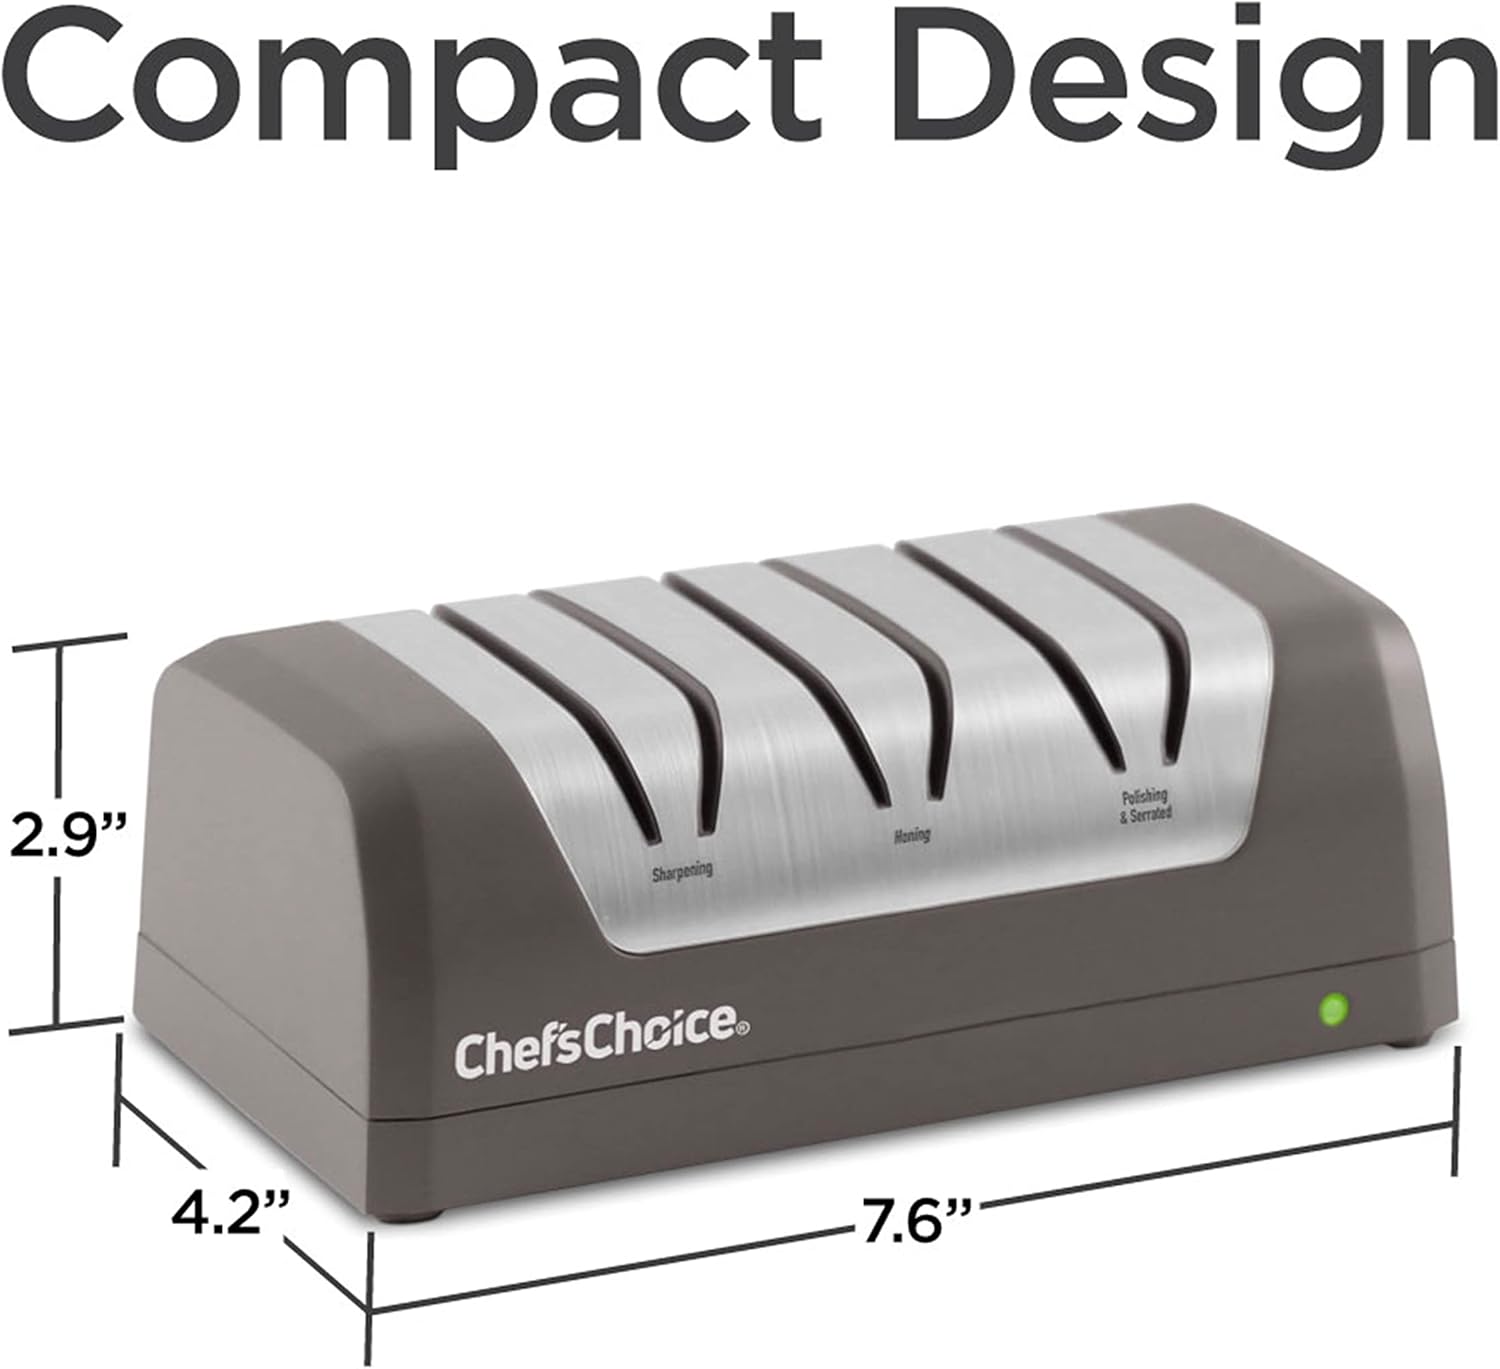
Figure 3: Compact Design and Dimensions. The sharpener measures approximately 7.57"L x 4.39"W x 2.89"H.
Operating Instructions
General Sharpening Tips:
- Always ensure the sharpener is on a stable surface.
- Hold the knife firmly by the handle.
- Apply only light downward pressure when sharpening. Let the abrasives do the work.
- Pull the knife through the slots at a consistent, moderate speed.
- Clean the knife blade thoroughly after sharpening to remove any metal dust.
Sharpening Straight-Edge Knives (Stages 1, 2, and 3):

Figure 4: Three-Stage Sharpening Process. Each stage contributes to a refined, durable edge.
- Stage 1 (Sharpening/Reshaping): This stage uses coarse diamond abrasives to create the initial bevel and restore a dull or damaged edge.
- Turn on the sharpener.
- Insert the heel of the knife blade into the left slot of Stage 1.
- Pull the knife slowly and steadily towards you, allowing the blade to be guided by the slot. Pull the entire length of the blade through, from heel to tip.
- Repeat this process in the right slot of Stage 1.
- Alternate between the left and right slots, performing 3-5 pairs of pulls (one pull in left, one in right) until a burr is formed along the edge.
- Stage 2 (Honing): This stage uses finer diamond abrasives to create the second bevel and refine the edge.
- Move to Stage 2. Insert the heel of the knife blade into the left slot.
- Pull the knife slowly and steadily towards you, through the entire length of the blade.
- Repeat in the right slot of Stage 2.
- Perform 2-3 pairs of pulls, alternating between left and right slots.
- Stage 3 (Polishing): This stage uses ultra-fine stropping disks to polish the edge and create the final, microscopic third bevel, resulting in a razor-sharp finish.
- Move to Stage 3. Insert the heel of the knife blade into the left slot.
- Pull the knife slowly and steadily towards you, through the entire length of the blade.
- Repeat in the right slot of Stage 3.
- Perform 1-2 pairs of pulls, alternating between left and right slots.
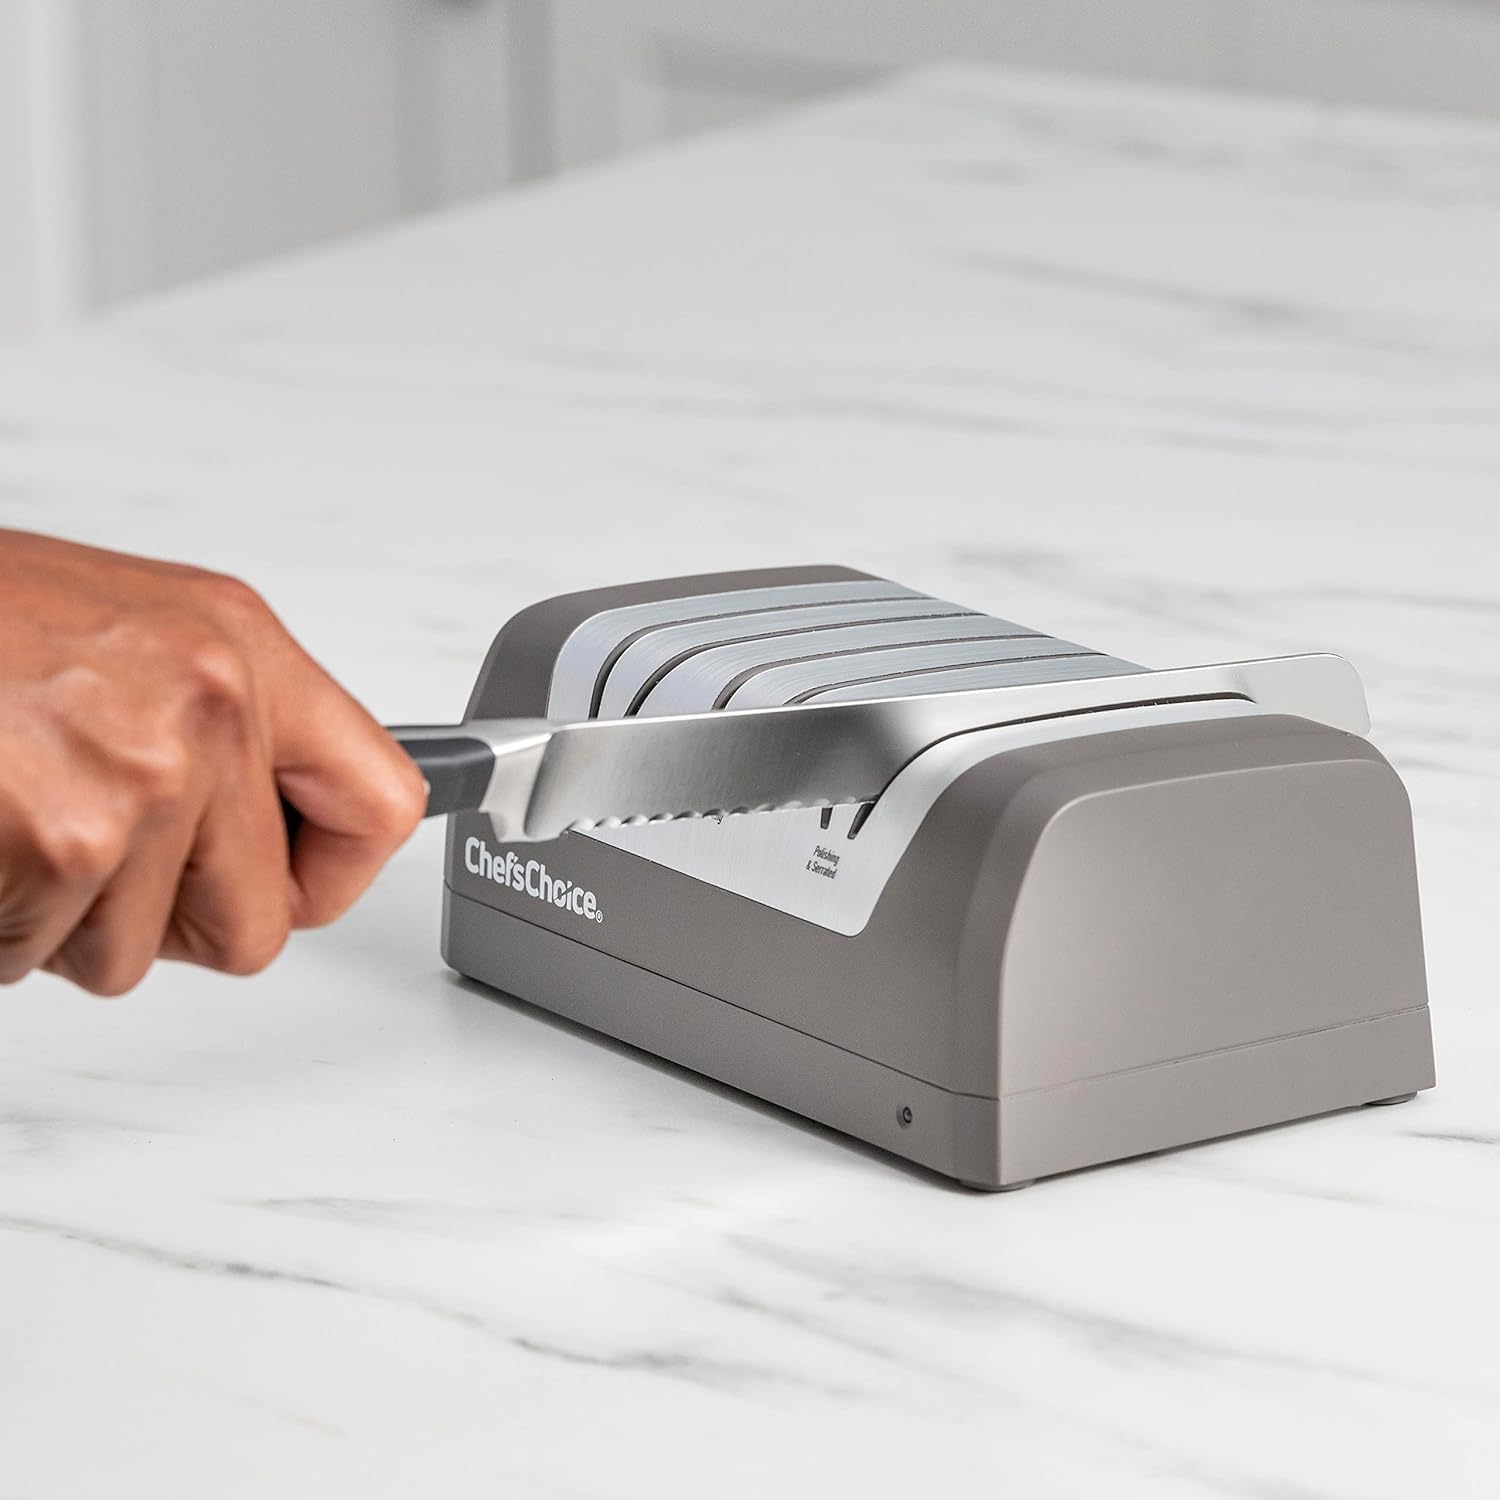
Figure 5: Sharpening a Serrated Knife. The sharpener's guides ensure proper angle.

Figure 6: Demonstrating Sharpness. A properly sharpened knife will slice effortlessly.
Sharpening Serrated Knives (Stage 3 Only):
Serrated knives should only be sharpened in Stage 3. This stage polishes the serrations and sharpens the tips of the teeth.
- Turn on the sharpener.
- Insert the heel of the serrated knife blade into the left slot of Stage 3.
- Pull the knife slowly and steadily towards you, through the entire length of the blade.
- Repeat in the right slot of Stage 3.
- Perform 5-10 pairs of pulls, alternating between left and right slots, until the serrations feel sharp.
Maintenance
Proper maintenance ensures the longevity and optimal performance of your Chef'sChoice Electric Knife Sharpener.
- Cleaning the Exterior: The exterior of the sharpener can be cleaned with a damp, soft cloth. Do not immerse the sharpener in water or any other liquid.
- Removing Metal Dust: Periodically shake out and dispose of the metal sharpening dust. Invert the sharpener and lightly tap it onto a newspaper, paper towel, or other paper sheet to dislodge accumulated dust.
- Lubrication: No oils or other lubricating liquids are necessary with this sharpener.
- Storage: Store the sharpener in a dry place away from extreme temperatures.
Troubleshooting
| Problem | Possible Cause | Solution |
|---|---|---|
| Sharpener does not turn on. | Battery is depleted. | Charge the sharpener using the USB-C cable until the indicator light shows a full charge. |
| Knives are not getting sharp. | Insufficient passes through stages; incorrect technique (too much pressure, too fast); heavily dull or damaged blade. | Ensure you are following the recommended number of pulls per stage. Apply light, consistent pressure. Pull at a moderate, steady speed. For very dull knives, more passes in Stage 1 may be required. |
| Excessive metal dust. | Normal operation, or too much pressure applied. | Periodically clean out metal dust as described in the Maintenance section. Reduce downward pressure when sharpening. |
| Sharpener makes unusual noise. | Foreign object in slot; internal issue. | Turn off and unplug the sharpener. Inspect slots for obstructions. If noise persists, contact customer support. |
Specifications
| Brand | Chef'sChoice |
| Model Number | SHC32BGY11 |
| Material | Plastic |
| Color | Gray |
| Product Dimensions (L x W x H) | 7.57" x 4.39" x 2.89" |
| Item Weight | 1.8 Pounds |
| Grit Type | Fine (across stages) |
| Number of Items | 1 (Sharpener) |
| Manufacturer | Chef'sChoice |
| Manufacture Year | 2022 |
| UPC | 087877017539 |
| Batteries | 2 Lithium Ion batteries required (included) |
| Assembly Required | No |
| Included Components | Knife Sharpener, Battery |
Warranty and Support
Warranty Information:
This Chef'sChoice Electric Knife Sharpener is covered by a 1 Year Manufacturer Limited Warranty. Please refer to the warranty card included with your product for full terms and conditions. Keep your proof of purchase for warranty claims.
Customer Support:
For technical assistance, replacement parts, or warranty inquiries, please contact Chef'sChoice customer support. Contact information can typically be found on the manufacturer's website or on the product packaging.
For more information and product registration, visit the official Chef'sChoice website: www.chefschoice.com
Related documentsSHC32BGY11


Ask a question about this manual
Ask about setup, troubleshooting, compatibility, parts, safety, or missing instructions. Manuals+ will review the question and use this page’s manual context to help answer it.