
GYMAX CA-GM1417
GYMAX Bike Rack Instruction Manual
Brand: GYMAX | Model: CA-GM1417
1. Introduction
Thank you for choosing the GYMAX Trunk Mounted 3 Bike Hitch Rack. This heavy-duty, adjustable bicycle rack is designed to securely transport up to three bikes on cars, trucks, and minivans. Constructed from robust steel with a coated surface, it offers durability and resistance to rust. Its adjustable features ensure compatibility with a wide range of vehicles and bikes, providing a safe and convenient solution for your cycling adventures.
Please read this manual thoroughly before installation and use to ensure proper operation and safety. Keep this manual for future reference.
Important Safety Information
- Ensure all straps and fasteners are securely tightened before each use.
- Do not exceed the maximum weight capacity of 99 lbs (45 kg).
- This bike rack is designed for vehicles without rear spoilers.
- Only suitable for bikes possessing cross bars.
- Regularly inspect the rack for any signs of wear or damage.
2. Package Contents
Verify that all components are present before beginning assembly:
- 1 x 3-bike Trunk Rack
- 1 x Strap (Additional Safety Strap)
- 1 x Instruction Manual
- Necessary hardware for assembly (bolts, knobs, springs, snaps, screws, plugs, wrench)
3. Setup and Installation
Follow these steps for proper assembly and installation of your GYMAX Bike Rack. For a visual guide, please refer to the official installation video below.
3.1 Assembly of the Rack
- Connect the two main tubes: Assemble the two primary frame tubes using the provided bolts, toothed knobs, springs, and snaps. Ensure all connections are secure.
- Install the straps to the iron buckle: Attach the various straps to their designated iron buckles on the rack frame. These straps will be used to secure the rack to your vehicle.
- Install the plugs on the tubes: Insert the protective plugs into the ends of the tubes and secure them with the provided wrench.

Image: The GYMAX Trunk Mounted 3 Bike Rack securely attached to the rear trunk of a white sedan, ready for transport.
3.2 Mounting the Rack onto Your Vehicle
- Loosen all straps: Before positioning, ensure all straps are fully loosened for ease of adjustment.
- Position the carrier: Carefully place the bike rack onto the rear trunk or hatchback of your vehicle. The padded contact points should rest firmly against the vehicle's surface.
- Tighten hand knobs: Adjust and tighten the hand knobs on the rack to secure its position on the vehicle.
- Attach and tighten straps: Attach the straps with clips to your car's trunk lid or hatchback edges. Systematically tighten all straps, ensuring the rack is firmly and stably attached to the vehicle. Double-check all connections for security.
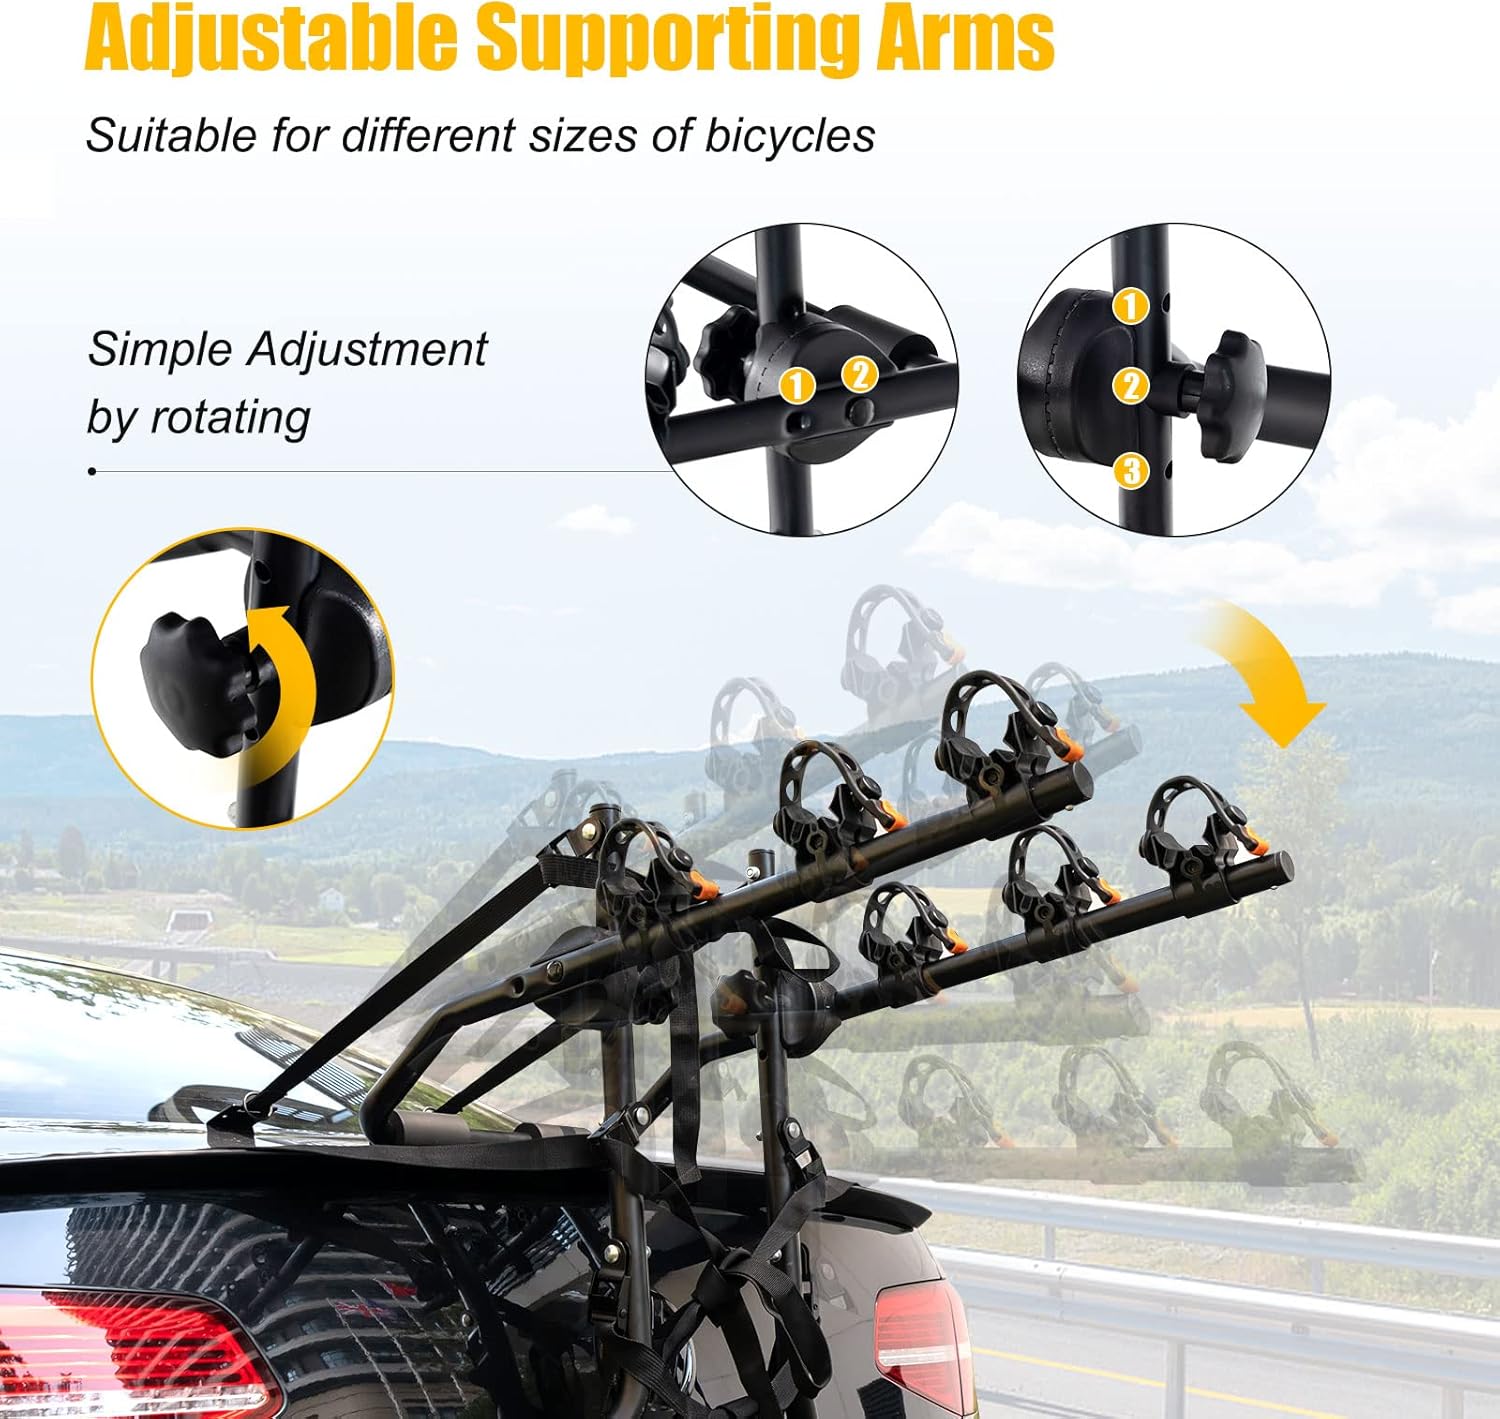
Image: This image illustrates the adjustable supporting arms of the bike rack, which can be rotated 180 degrees to accommodate various bicycle frame types and vehicle trunk shapes.
3.3 Official Installation Video
Video: Official installation video for the GYMAX 3-Bike Trunk Rack, demonstrating step-by-step assembly and mounting procedures.
4. Operating Instructions
Once the rack is securely installed on your vehicle, you can proceed to load your bicycles.
- Load Bikes: Lift each bicycle and place its crossbar onto the cradles of the carrier arms. The rack is designed to hold up to 3 bikes simultaneously, with a total weight capacity of 99 lbs.
- Secure Bikes with Rubber Straps: Use the provided rubber straps to firmly secure the bike frames to the cradles. These straps help prevent movement and provide stability during transport.
- Attach Additional Safety Strap: For enhanced safety, attach the additional safety strap around the bikes and the rack, ensuring everything is tightly bound and stable. This strap provides extra protection against shifting or detachment.
- Verify Stability: Before driving, gently shake the bikes and the rack to ensure there is no excessive movement. All components should feel solid and secure.
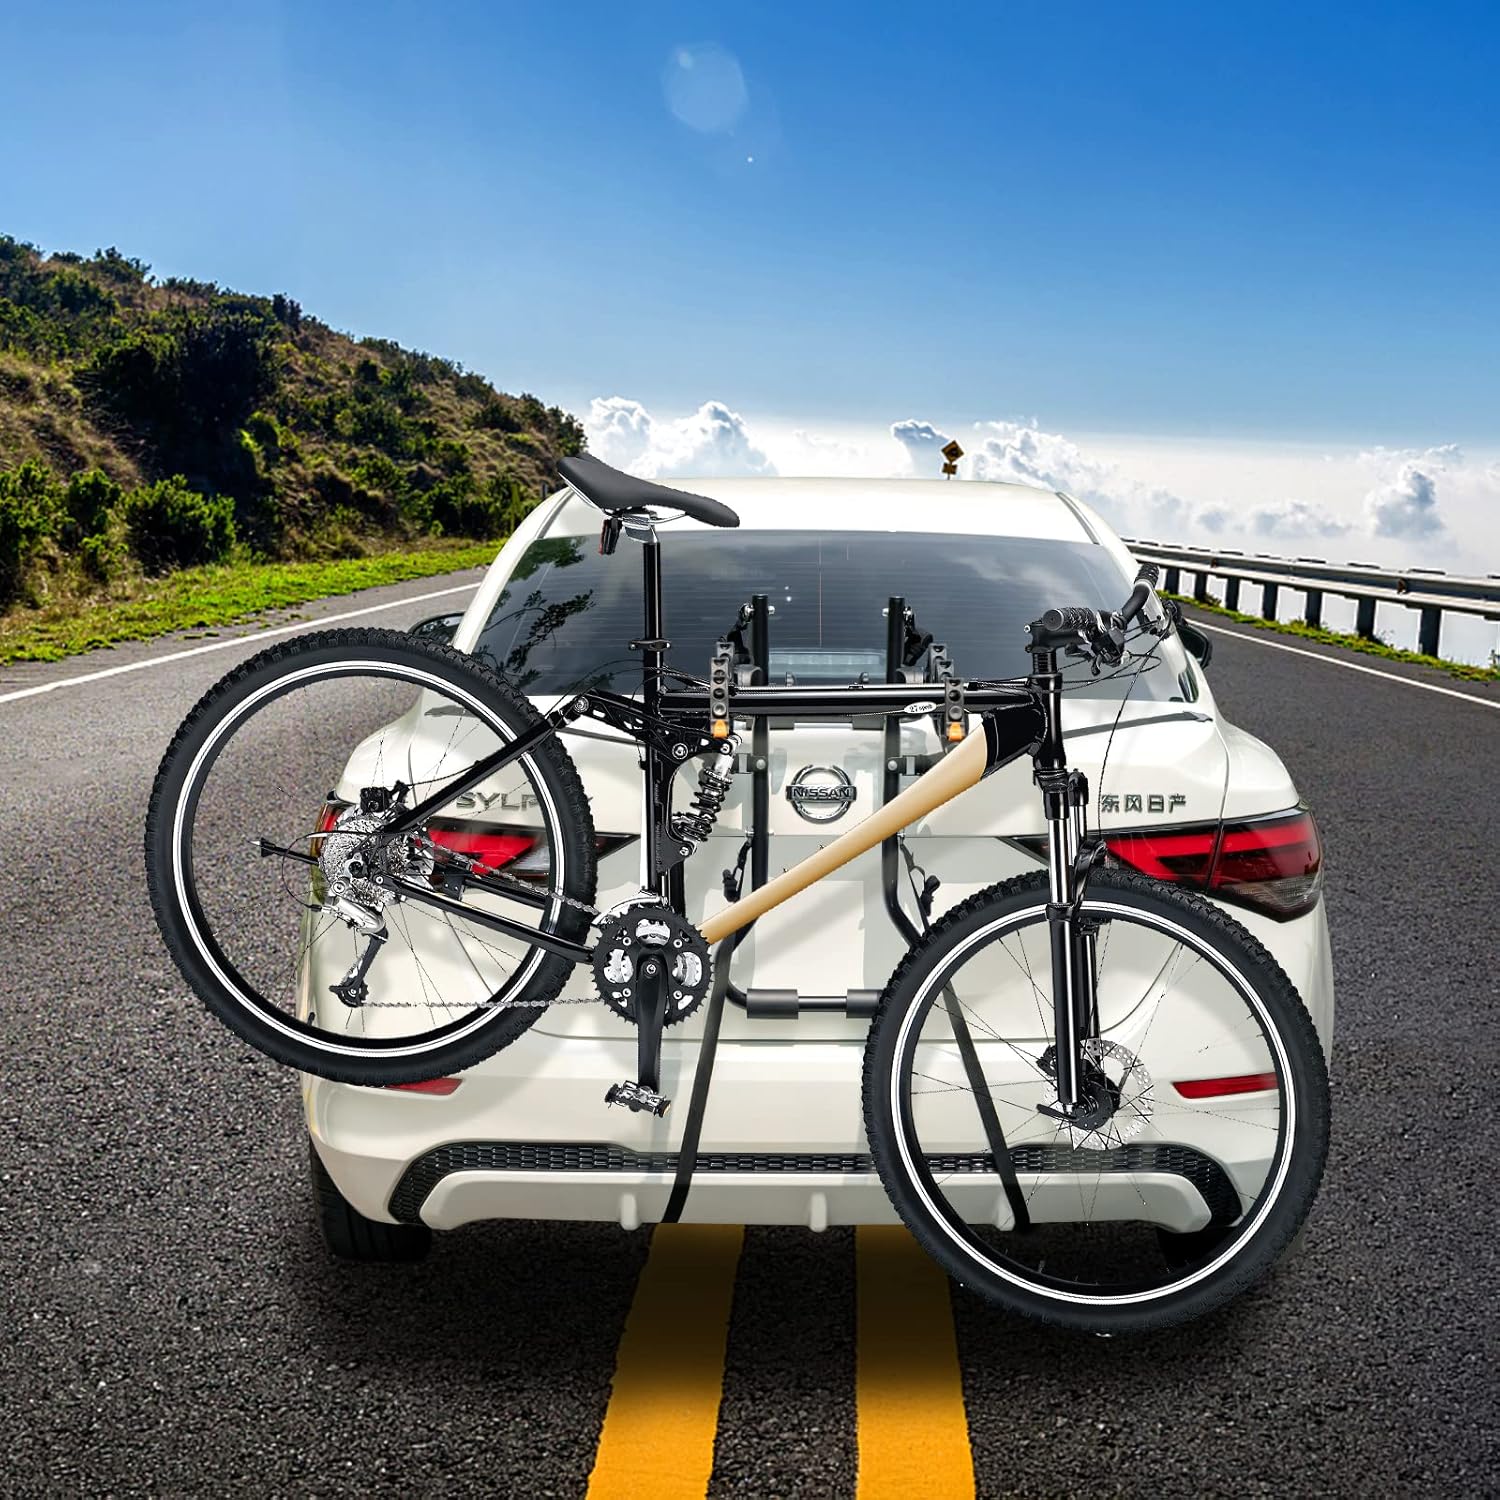
Image: A rear perspective of the bike rack mounted on a white car, demonstrating how two bicycles are securely transported.
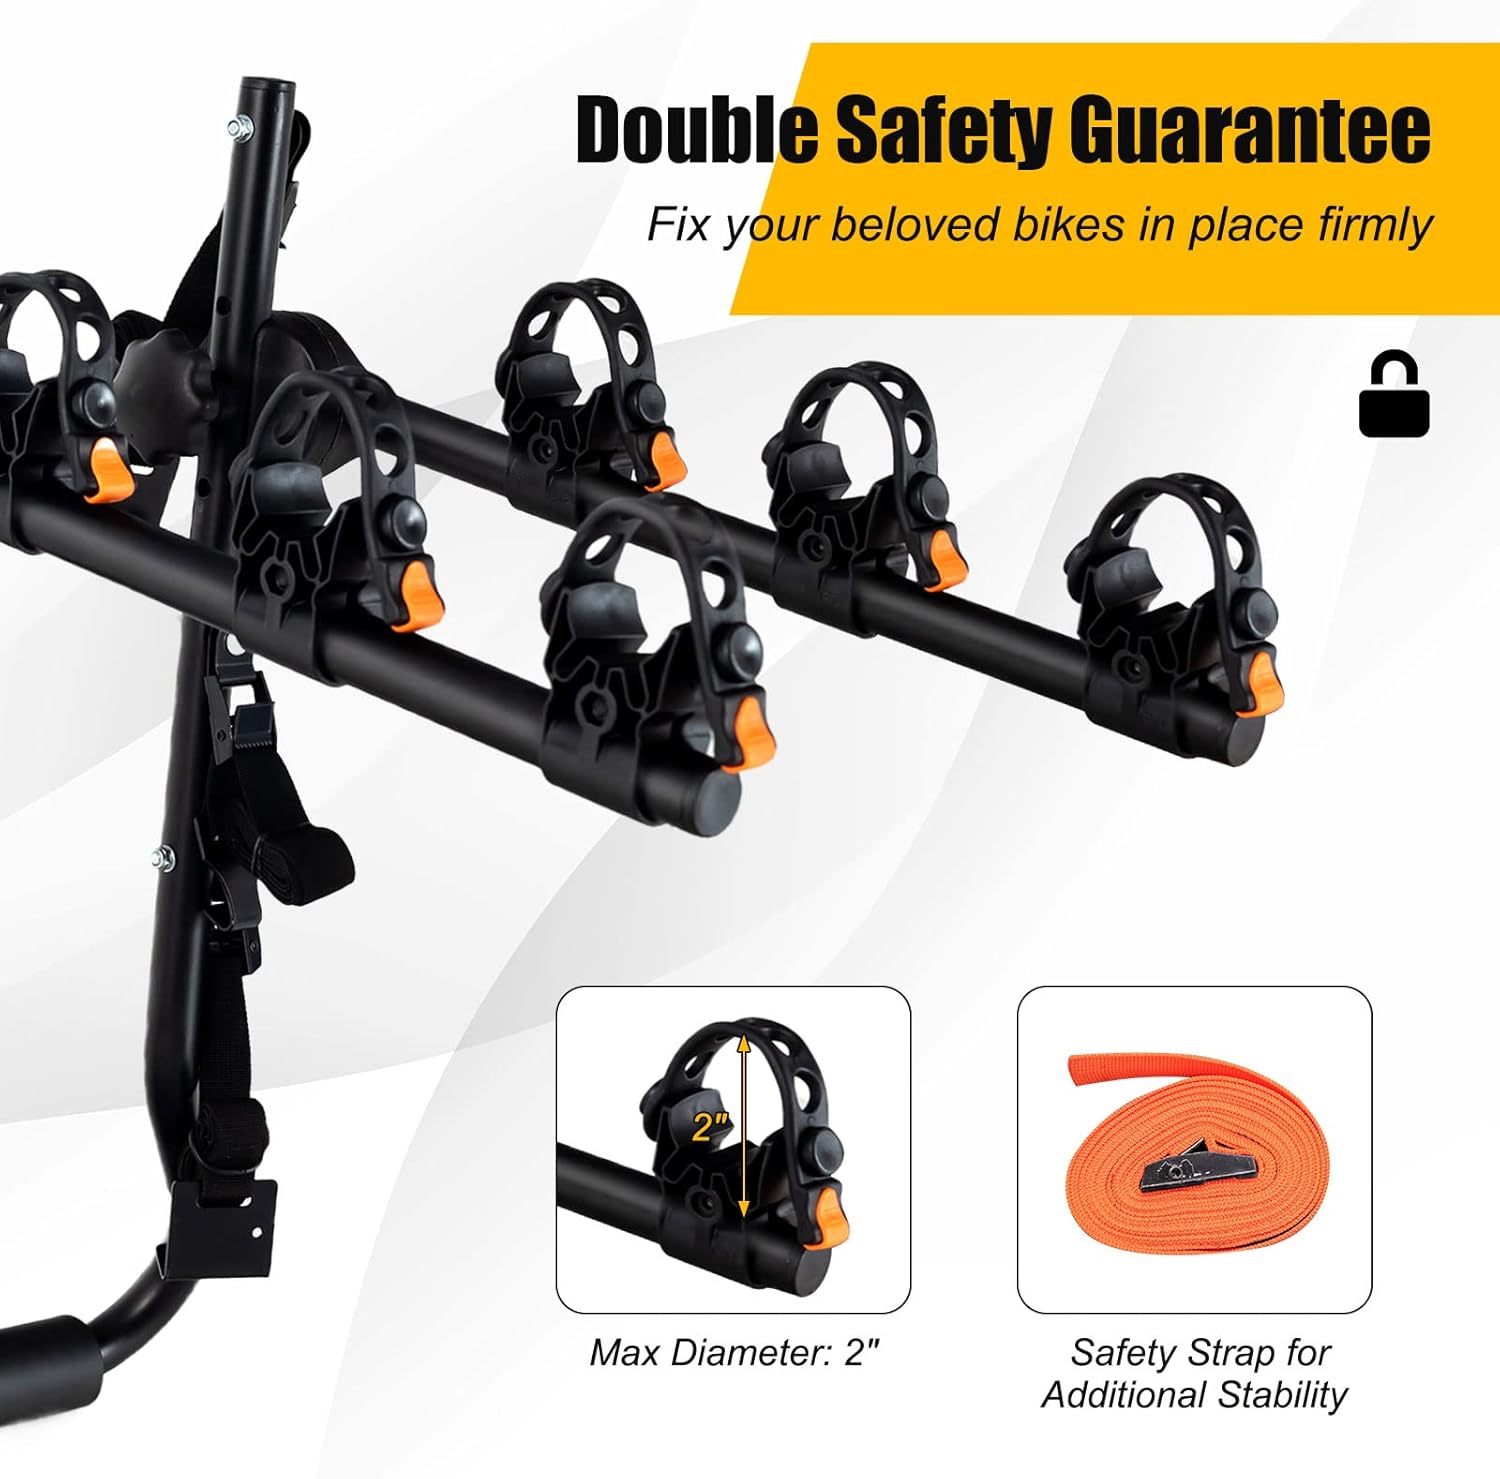
Image: Detail view highlighting the double safety features of the bike rack, including the secure cradles designed for bike frames up to 2 inches in diameter and an additional safety strap for enhanced stability.
5. Maintenance
Proper maintenance will extend the life of your GYMAX Bike Rack:
- Cleaning: Clean the rack with a damp cloth and mild soap. Avoid abrasive cleaners that could damage the finish.
- Inspection: Periodically inspect all bolts, straps, and plastic components for wear, cracks, or damage. Replace any worn or damaged parts immediately.
- Storage: When not in use, store the rack in a dry, protected area. The folding design allows for compact storage.
- Lubrication: Lightly lubricate moving parts and threads of the hand knobs annually to ensure smooth operation.

Image: The bike rack features a convenient folding design, allowing it to be collapsed into a compact size for easy storage in a vehicle's trunk when not in use.
6. Troubleshooting
If you encounter issues with your bike rack, refer to the following common problems and solutions:
| Problem | Possible Cause | Solution |
|---|---|---|
| Rack feels unstable on vehicle. | Straps are not tight enough; rack not positioned correctly; vehicle not compatible. | Ensure all six straps are fully tightened. Reposition the rack for optimal fit. Confirm your vehicle is compatible (no rear spoiler, sedan/hatchback/minivan). |
| Bikes are swaying or moving. | Rubber straps not secure; additional safety strap not used or loose; bike frame not suitable. | Ensure rubber straps are tightly wrapped around bike frames and cradles. Use the additional safety strap to bind all bikes and the rack. Confirm bikes have a crossbar for proper mounting. |
| Rack is scratching vehicle paint. | Protective pads are missing or misaligned; dirt/debris under pads. | Verify all protective sponge pads are in place and correctly positioned. Clean the vehicle surface and pads before installation. |
7. Specifications
| Feature | Detail |
|---|---|
| Brand | GYMAX |
| Model | 3 Bike Hitch Rack |
| Item Model Number | CA-GM1417 |
| Material | Steel, Sponge, PP |
| Color | Black |
| Overall Dimension (Unfolding) | 28" x 13" x 25" (L x W x H) / 72 x 33 x 63 cm |
| Overall Dimension (Folding) | 28" x 13" x 8" (L x W x H) / 72 x 33 x 21.5 cm |
| Net Weight | 9 lbs / 4 kg |
| Weight Capacity | 99 lbs / 45 kg |
| Mounting Type | Strap |
| Compatibility | Most Sedans, Hatchbacks, Minivans (without rear spoilers). Bikes with cross bars. |
8. Warranty and Support
For specific warranty information and customer support, please refer to the documentation included with your purchase or contact GYMAX customer service directly. You can often find contact details on the manufacturer's official website or through the retailer where the product was purchased.
For online support, visit the official GYMAX store: GYMAX Store on Amazon
Ask a question about this manual
Ask about setup, troubleshooting, compatibility, parts, safety, or missing instructions. Manuals+ will review the question and use this page’s manual context to help answer it.