
1. Safety Information
Please read this manual carefully before installation and use. Keep this manual for future reference.
- Ensure your desk surface is strong enough to support the combined weight of the stand and two monitors.
- Do not exceed the maximum weight capacity of 17.6 lbs (8 kg) per arm.
- Ensure all screws are tightened securely during installation. Loose connections may cause instability.
- Keep children and pets away during installation. Small parts may be a choking hazard.
- If any parts are missing or defective, do not attempt to install. Contact customer support for assistance.
2. Package Contents
Verify that all components are present before beginning installation:
- Main Pole (31" height)
- Monitor Arms (2 units)
- C-Clamp Assembly
- Grommet Base Assembly
- VESA Plates (2 units)
- Cable Management Clips
- Hardware Kit (various screws, washers, Allen keys)
- Instruction Manual
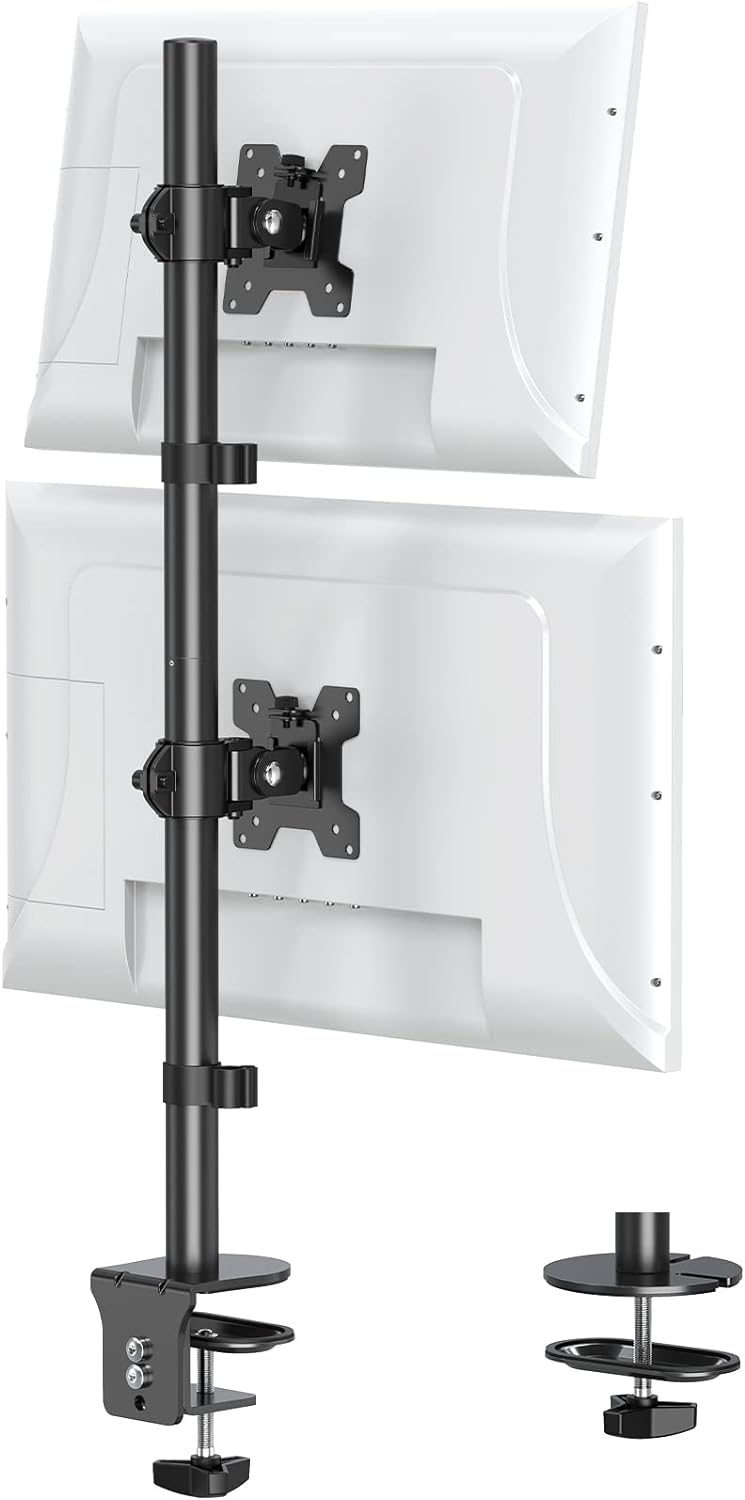
Image: Overview of the MOUNT PRO Vertical Dual Monitor Stand, illustrating its components and dual mounting options.
3. Setup Instructions
Follow these steps to assemble and install your monitor stand:
3.1 Choose Your Mounting Option
The stand supports both C-clamp and Grommet mounting. Select the option best suited for your desk.
- C-Clamp: Ideal for desks with edges. Fits desk thicknesses up to 3.15 inches (80mm).
- Grommet: Requires a hole in your desk. Works with desk thicknesses up to 1.57 inches (40mm).

Image: Detailed view of the C-clamp and grommet mounting mechanisms, highlighting their compatibility with different desk types and thicknesses.
3.2 Install the Pole to Your Desk
- Assemble your chosen mounting option (C-clamp or Grommet base) to the bottom of the main pole.
- Securely attach the pole to your desk. For C-clamp, tighten the knob until the stand is firm. For grommet, insert the pole through the desk hole and secure it from underneath with the provided plate and nut.
3.3 Attach Monitor Arms to the Pole
- Slide the monitor arms onto the main pole. The arms can be positioned at any height along the pole.
- Tighten the set screws on the monitor arms to temporarily hold them in place. Final height adjustments will be made after monitors are attached.
3.4 Attach Monitors to VESA Plates
- Remove the VESA plates from the monitor arms by loosening the quick-release screws.
- Align the VESA plate with the mounting holes on the back of your monitor (compatible with VESA 75x75mm or 100x100mm).
- Secure the VESA plate to your monitor using the appropriate screws from the hardware kit.
- Carefully slide the monitor (with attached VESA plate) back onto the monitor arm and secure it with the quick-release screws.
3.5 Cable Management
Use the included cable management clips to route your monitor cables neatly along the pole, reducing clutter and improving aesthetics.

Image: Illustration of effective cable management using the integrated clips on the monitor stand, keeping cables organized and out of sight.
4. Operating Instructions
The MOUNT PRO Vertical Dual Monitor Stand offers extensive adjustability for optimal viewing comfort and productivity.
4.1 Height Adjustment
The 31.7-inch center pole allows for significant height adjustment, enabling you to position your monitors at an ergonomic level whether sitting or standing.
- Loosen the set screw on the monitor arm clamp.
- Slide the monitor arm up or down the pole to the desired height.
- Tighten the set screw firmly to secure the arm in place.

Image: Visual representation of the 31.7-inch height adjustment capability of the stand, allowing for flexible monitor positioning.

Image: Two distinct workstation setups, one for sitting and one for standing, showcasing how the monitor stand adapts to different ergonomic needs.
4.2 Tilt Adjustment
Adjust the monitor's vertical angle to reduce glare and optimize viewing comfort. The stand allows for a tilt range of +30° to -30°.
- Gently push or pull the top or bottom of your monitor to achieve the desired tilt angle.
- If the monitor does not hold its position, tighten the tilt mechanism screw on the VESA plate.

Image: Visual guide demonstrating the monitor's tilt range, allowing adjustment from +30 degrees upwards to -30 degrees downwards for optimal viewing.
4.3 Swivel Adjustment
Swivel your monitors left or right up to 90° to share your screen or adjust your viewing angle without moving your chair.
- Gently rotate the monitor horizontally to the desired swivel angle.

Image: Illustration of the monitor's swivel capability, allowing for a 90-degree rotation to the left or right for flexible screen positioning.
4.4 Rotation (Portrait/Landscape)
Rotate your monitors 180° for portrait or landscape orientation, independently for each screen. This is particularly useful for coding, document review, or data analysis.
- Gently rotate the monitor clockwise or counter-clockwise until it reaches the desired orientation.

Image: Depiction of the 360-degree rotation feature, enabling seamless switching between landscape and portrait modes for a stacked dual monitor setup.
5. Maintenance
Regular maintenance ensures the longevity and optimal performance of your monitor stand:
- Cleaning: Wipe the stand with a soft, damp cloth. Avoid abrasive cleaners or solvents.
- Check Connections: Periodically check all screws and bolts to ensure they remain tight, especially after adjusting monitor positions.
- Cable Management: Re-route cables as needed to prevent tangles or strain.
6. Troubleshooting
If you encounter issues, refer to the following common problems and solutions:
| Problem | Possible Cause | Solution |
|---|---|---|
| Stand is wobbly or unstable. | Mounting screws are loose; desk surface is uneven or too thin. | Ensure C-clamp or grommet base is tightened securely. Add a protective pad if the desk is too thin. |
| Monitor sags or does not hold tilt position. | Tilt mechanism screw is loose; monitor weight exceeds capacity. | Tighten the tilt adjustment screw on the VESA plate. Verify monitor weight is within 17.6 lbs per arm. |
| Monitors are not level. | Arms are not at the same height; VESA plate not perfectly aligned. | Adjust the height of each monitor arm independently. Re-check VESA plate attachment. |
| Difficulty rotating or swiveling monitors. | Joints are too tight. | Apply a small amount of silicone lubricant to the rotating joints if necessary. Do not force movement. |
7. Specifications
Key technical details for the MOUNT PRO Vertical Dual Monitor Stand:
| Feature | Detail |
|---|---|
| Model | B0BG59PZRW |
| Brand | MOUNT PRO |
| Material | Alloy Steel |
| Color | Black, White |
| Monitor Size Compatibility | 13 to 32 inches |
| Weight Capacity (per arm) | Up to 17.6 lbs (8 kg) |
| VESA Compatibility | 75x75mm, 100x100mm |
| Pole Height | 31.7 inches |
| Tilt Range | +30° to -30° |
| Swivel Range | ±90° |
| Rotation | 360° (Portrait/Landscape) |
| Mounting Options | C-Clamp (up to 3.15" desk thickness), Grommet (up to 1.57" desk thickness) |
| Item Weight | 7.98 pounds |
8. Warranty Information
MOUNT PRO products are designed for durability and performance. For specific warranty details, please refer to the warranty card included with your product or visit the official MOUNT PRO website. Keep your purchase receipt as proof of purchase for any warranty claims.
9. Customer Support
If you have any questions, require assistance with installation, or need to report a missing/defective part, please contact MOUNT PRO customer support. Contact information can typically be found on the product packaging, the official MOUNT PRO website, or through your retailer's support channels.


