
Gaabor GA-45M01A
Gaabor 4L 1450W Analog Air Fryer
Model: GA-45M01A
1. Introduction
Thank you for choosing the Gaabor 4L 1450W Analog Air Fryer. This appliance is designed to provide a healthier way to cook your favorite foods with little to no oil, utilizing advanced air circulation technology. Please read this manual thoroughly before using the appliance to ensure safe and efficient operation. Keep this manual for future reference.
2. Important Safety Instructions
- Always place the air fryer on a stable, heat-resistant surface, away from walls or other appliances to allow for proper air circulation.
- Do not immerse the main unit, cord, or plug in water or any other liquid.
- Ensure the voltage indicated on the appliance matches your local power supply before connecting.
- Keep children and pets away from the appliance during operation. The exterior surfaces can become hot.
- Do not block the air inlet or outlet vents.
- Unplug the air fryer from the outlet when not in use and before cleaning. Allow it to cool down completely before handling.
- Do not operate the appliance if the cord or plug is damaged, or if the appliance malfunctions or has been damaged in any way.
- Only use accessories recommended by the manufacturer.
- Exercise extreme caution when removing the basket or disposing of hot grease.
- Do not place food directly into the heating element. Always use the basket.
3. Product Overview
The Gaabor Air Fryer features a compact design with a transparent viewing window and intuitive analog controls for easy operation.
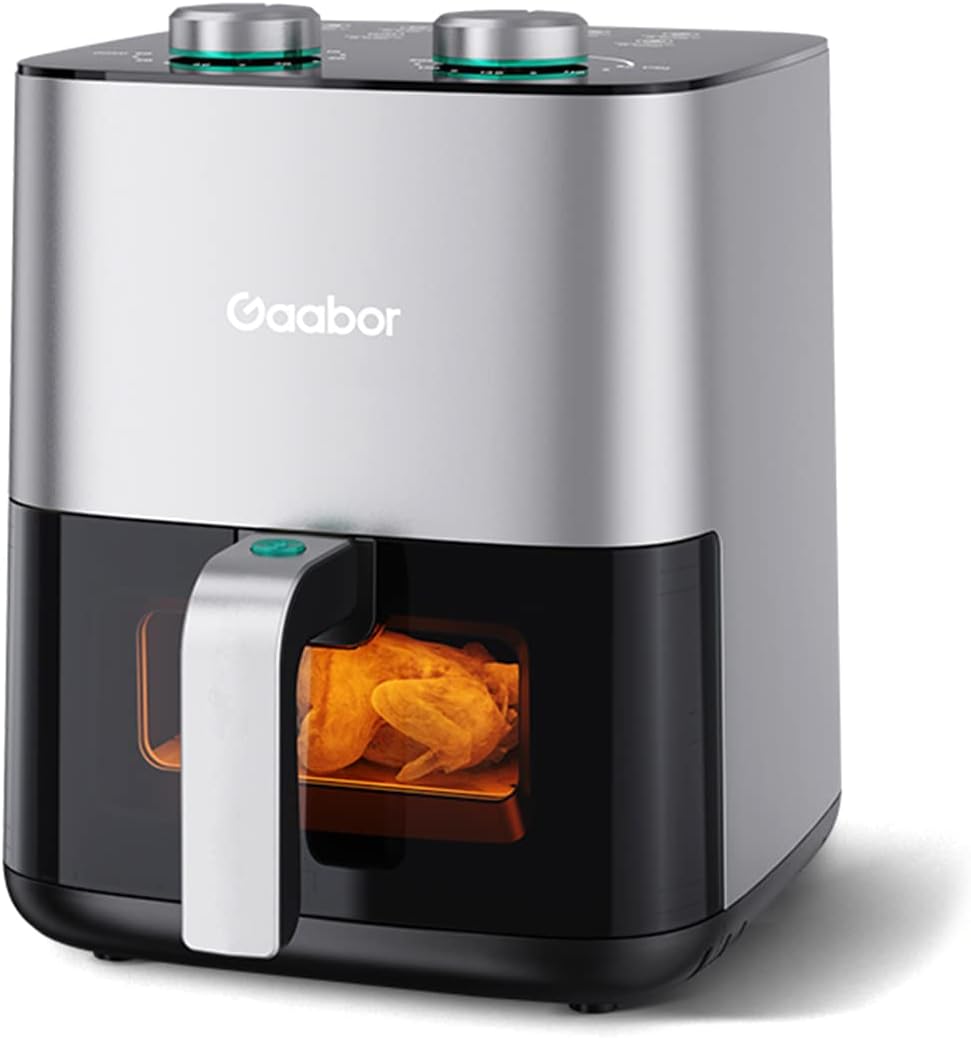
Front view of the Gaabor Air Fryer, showcasing its sleek design and transparent cooking window.

The air fryer features a transparent visor for monitoring food, advanced Cyclone Air 360 technology for even cooking, and a non-stick coating for easy cleaning.
Key Components:
- Main Unit: Houses the heating element and fan.
- Control Knobs: Analog dials for setting temperature and time.
- Transparent Visor: Allows you to monitor the cooking process without opening the basket.
- Removable Basket: For holding food during cooking. Features a non-stick coating.
- Crisper Plate: Sits inside the basket to allow air circulation around food.
4. Setup
Unpacking:
- Carefully remove all packaging materials from the air fryer.
- Check for any damage during transit. Do not use if damaged.
- Remove any stickers or labels from the appliance.
Initial Cleaning:
- Wash the removable basket and crisper plate with hot water, dish soap, and a non-abrasive sponge.
- Rinse thoroughly and dry completely.
- Wipe the inside and outside of the main unit with a damp cloth.
- Ensure all parts are completely dry before use.
Placement:
- Place the air fryer on a stable, level, and heat-resistant surface.
- Ensure there is at least 10 cm (4 inches) of clear space around the back and sides of the appliance for proper ventilation.
- Do not place the air fryer near flammable materials or heat sources.
5. Operating Instructions
The Gaabor Air Fryer uses rapid air circulation to cook food, resulting in crispy exteriors and tender interiors.

The transparent window allows for full visibility of the cooking process. Easily adjust temperature and time using the analog knobs to achieve desired results.
Basic Operation:
- Prepare Food: Prepare your ingredients as desired. For best results, lightly coat food with oil if specified in a recipe.
- Place Food in Basket: Pull out the basket from the air fryer. Place the crisper plate inside the basket, then arrange your food on the crisper plate. Do not overfill the basket to ensure even cooking.
- Insert Basket: Slide the basket back into the air fryer until it clicks into place.
- Set Temperature: Turn the temperature control knob to your desired cooking temperature (80°C to 200°C).
- Set Time: Turn the timer knob to your desired cooking time (up to 60 minutes). The air fryer will automatically start cooking.
- Monitor Cooking: Use the transparent visor to check on your food's progress without interrupting the cooking cycle.
- Shake/Turn Food (Optional): For some foods, it is recommended to shake or turn them halfway through the cooking time to ensure even browning. Carefully pull out the basket, shake or turn the food, and then reinsert the basket. The air fryer will resume cooking.
- Completion: The timer will ring when the cooking time is complete, and the air fryer will automatically shut off.
- Remove Food: Carefully pull out the basket. Use heat-resistant tongs to remove the cooked food.
Cooking Techniques:

Achieve a crispy texture and tender, juicy interior for fried foods like chicken nuggets, thanks to the fusion of steaming and grilling techniques.

Produce perfectly roasted dishes with a crispy exterior and succulent interior. The high temperatures can generate clean water vapor for enhanced cooking.
6. Maintenance and Cleaning
Regular cleaning will extend the life of your air fryer and ensure optimal performance.
- Unplug and Cool: Always unplug the air fryer and allow it to cool completely before cleaning.
- Clean Basket and Crisper Plate: Wash the basket and crisper plate with hot water, dish soap, and a non-abrasive sponge. For stubborn residue, soak them in hot water and soap for about 10 minutes. They are also dishwasher safe.
- Clean Interior: Wipe the interior of the air fryer with a damp cloth. For stubborn food particles, use a soft brush. Do not use abrasive cleaners or steel wool.
- Clean Exterior: Wipe the exterior of the air fryer with a damp cloth.
- Heating Element: If necessary, gently clean the heating element with a soft brush to remove any food residue.
- Dry Thoroughly: Ensure all parts are completely dry before storing or using again.
7. Troubleshooting
If you encounter any issues with your Gaabor Air Fryer, please refer to the following common problems and solutions:
| Problem | Possible Cause | Solution |
|---|---|---|
| Air fryer does not turn on. | Not plugged in; Power outlet malfunction; Timer not set. | Ensure the plug is securely inserted into a working outlet. Check the circuit breaker. Turn the timer knob to the desired cooking time. |
| Food is not cooked evenly. | Basket overloaded; Food not shaken/turned. | Cook food in smaller batches. Shake or turn food halfway through cooking. |
| Food is not crispy. | Too much moisture; Not enough oil (for some foods); Temperature too low. | Pat food dry before cooking. Lightly brush or spray with oil. Increase temperature slightly. |
| White smoke coming from the appliance. | Grease residue from previous use; High fat content food. | Clean the basket and crisper plate thoroughly. For high-fat foods, place a piece of aluminum foil under the crisper plate to catch excess oil. |
If the problem persists after trying these solutions, please contact customer support.
8. Specifications
Technical details for your Gaabor Air Fryer Model GA-45M01A.

Detailed dimensions of the Gaabor Air Fryer and its removable basket.
| Feature | Detail |
|---|---|
| Brand | Gaabor |
| Model | GA-45M01A |
| Capacity | 4 Liters |
| Power | 1450 Watts |
| Voltage | 127 Volts |
| Color | Gray with Transparent Visor |
| Control Type | Analog |
| Special Features | Programmable, Transparent Visor, Cyclone 360 Technology |
| Product Dimensions (D x W x H) | 10 x 32.7 x 32.3 cm (4.28 kg) |
9. Warranty and Support
Gaabor products are manufactured to high-quality standards. For information regarding warranty coverage, terms, and conditions, please refer to the warranty card included with your purchase or visit the official Gaabor website. For technical support, spare parts, or any other inquiries, please contact Gaabor customer service through the contact information provided on the official website or your purchase documentation.
Please retain your proof of purchase for warranty claims.
Ask a question about this manual
Ask about setup, troubleshooting, compatibility, parts, safety, or missing instructions. Manuals+ will review the question and use this page’s manual context to help answer it.