
Sencor SES 4040BK
SENCOR SES 4040BK Espresso Machine User Manual
Brand: Sencor | Model: SES 4040BK
1. Introduction
Thank you for choosing the SENCOR SES 4040BK Espresso Machine. This semi-automatic espresso machine is designed to deliver delicious coffee with a 20 bar pump pressure and a Thermoblock heating system for fast preheating. It features a 1.4 L water tank, milk frother, and functions for preparing single or double cups of coffee. Please read this manual carefully before first use to ensure safe and optimal operation of your appliance.

Figure 1: Front view of the Sencor SES 4040BK Espresso Machine.
2. Important Safety Instructions
Always follow basic safety precautions when using electrical appliances to reduce the risk of fire, electric shock, and/or injury to persons.
- Read all instructions before operating the appliance.
- Do not immerse the appliance, power cord, or plug in water or other liquids.
- Ensure the voltage indicated on the appliance matches your local mains voltage.
- Unplug from the outlet when not in use and before cleaning. Allow to cool before putting on or taking off parts, and before cleaning the appliance.
- Do not operate any appliance with a damaged cord or plug, or after the appliance malfunctions or has been damaged in any manner.
- The use of accessory attachments not recommended by the appliance manufacturer may result in fire, electric shock, or injury to persons.
- Do not use outdoors.
- Do not let the cord hang over the edge of a table or counter, or touch hot surfaces.
- Do not place on or near a hot gas or electric burner, or in a heated oven.
- Always attach plug to appliance first, then plug cord into the wall outlet. To disconnect, turn any control to "off", then remove plug from wall outlet.
- Do not use appliance for other than intended use.
- Extreme caution must be used when moving an appliance containing hot liquids.
- This appliance is not intended for use by persons (including children) with reduced physical, sensory or mental capabilities, or lack of experience and knowledge, unless they have been given supervision or instruction concerning use of the appliance by a person responsible for their safety.
3. Product Components
Familiarize yourself with the main parts of your SENCOR SES 4040BK Espresso Machine:
- Water Tank: Removable, 1.4 Liters capacity, located at the back.
- Control Panel: Electronic control unit with sensor buttons for various functions.
- Portafilter: Holds the ground coffee for brewing.
- Filter Baskets: Stainless steel filters for 1 or 2 cups of coffee.
- Steam Wand / Milk Frother: For frothing milk for cappuccinos and lattes.
- Transparent Milk Container: Easy to clean, attaches to the frother.
- Drip Tray: Removable for easy cleaning, collects excess liquid.
- Cup Warmer: Heated plate on top for preheating cups.

Figure 2: Side view showing the milk frother attachment.

Figure 3: Included portafilter, tamper, and filter basket.
4. Setup and First Use
4.1 Unpacking
Carefully remove all packaging materials and check that all components are present and undamaged. Keep packaging for future storage or transport.
4.2 Initial Cleaning
- Wash the water tank, portafilter, filter baskets, milk container, and drip tray with warm soapy water. Rinse thoroughly and dry.
- Wipe the exterior of the machine with a damp cloth.
4.3 Filling the Water Tank
- Remove the water tank from the back of the machine.
- Fill the tank with fresh, cold water up to the MAX level indicated.
- Place the water tank back into its position, ensuring it is securely seated.

Figure 4: Rear view showing the removable water tank.
4.4 Priming the Machine
Before first use or after a long period of inactivity, the machine needs to be primed:
- Ensure the water tank is filled.
- Place a large cup under the coffee spout.
- Press the power button to turn on the machine. It will begin heating.
- Once heated, press the button for a single espresso shot to run water through the system without coffee. Repeat this process 2-3 times to flush the internal components.
5. Operating Instructions
5.1 Control Panel Overview

Figure 5: Close-up of the electronic control panel.
The control panel features intuitive buttons for various functions:
- Power Button: Turns the machine on/off.
- Single Espresso Button: Brews a single shot of espresso.
- Double Espresso Button: Brews a double shot of espresso.
- Steam Button: Activates the steam function for milk frothing.
- Cleaning/Descaling Indicator: Illuminates when cleaning or descaling is required.
5.2 Making Espresso
- Prepare the Portafilter: Insert the desired filter basket (single or double) into the portafilter. Fill with finely ground espresso coffee. Tamp the coffee firmly and evenly.
- Attach Portafilter: Securely attach the portafilter to the brewing head by aligning it and twisting it to the right until it locks into place.
- Place Cup: Place your espresso cup(s) on the drip tray, directly under the portafilter spouts. For best results, preheat your cups on the cup warmer plate.
- Brew: Ensure the machine is powered on and preheated (indicator light stable). Press the single or double espresso button. The machine will automatically brew the coffee and stop.
- Remove Portafilter: Once brewing is complete, carefully remove the portafilter by twisting it to the left. Dispose of the used coffee grounds.

Figure 6: Espresso extraction in progress.
5.3 Using the Milk Frother
- Fill Milk Container: Fill the transparent milk container with cold milk (dairy or non-dairy) up to the desired level.
- Attach Container: Attach the milk container to the frother nozzle on the side of the machine.
- Activate Steam: Press the steam button on the control panel. Wait for the machine to heat up to steam temperature.
- Froth Milk: Position your cup under the milk frother spout. Turn the steam control knob (if present) or press the appropriate button to start frothing. Move the cup to achieve desired foam consistency.
- Stop Frothing: Turn off the steam function once done.
- Clean Frother: Immediately after use, clean the milk frother to prevent milk residue from drying. Run a small amount of steam through it and wipe the nozzle with a damp cloth.
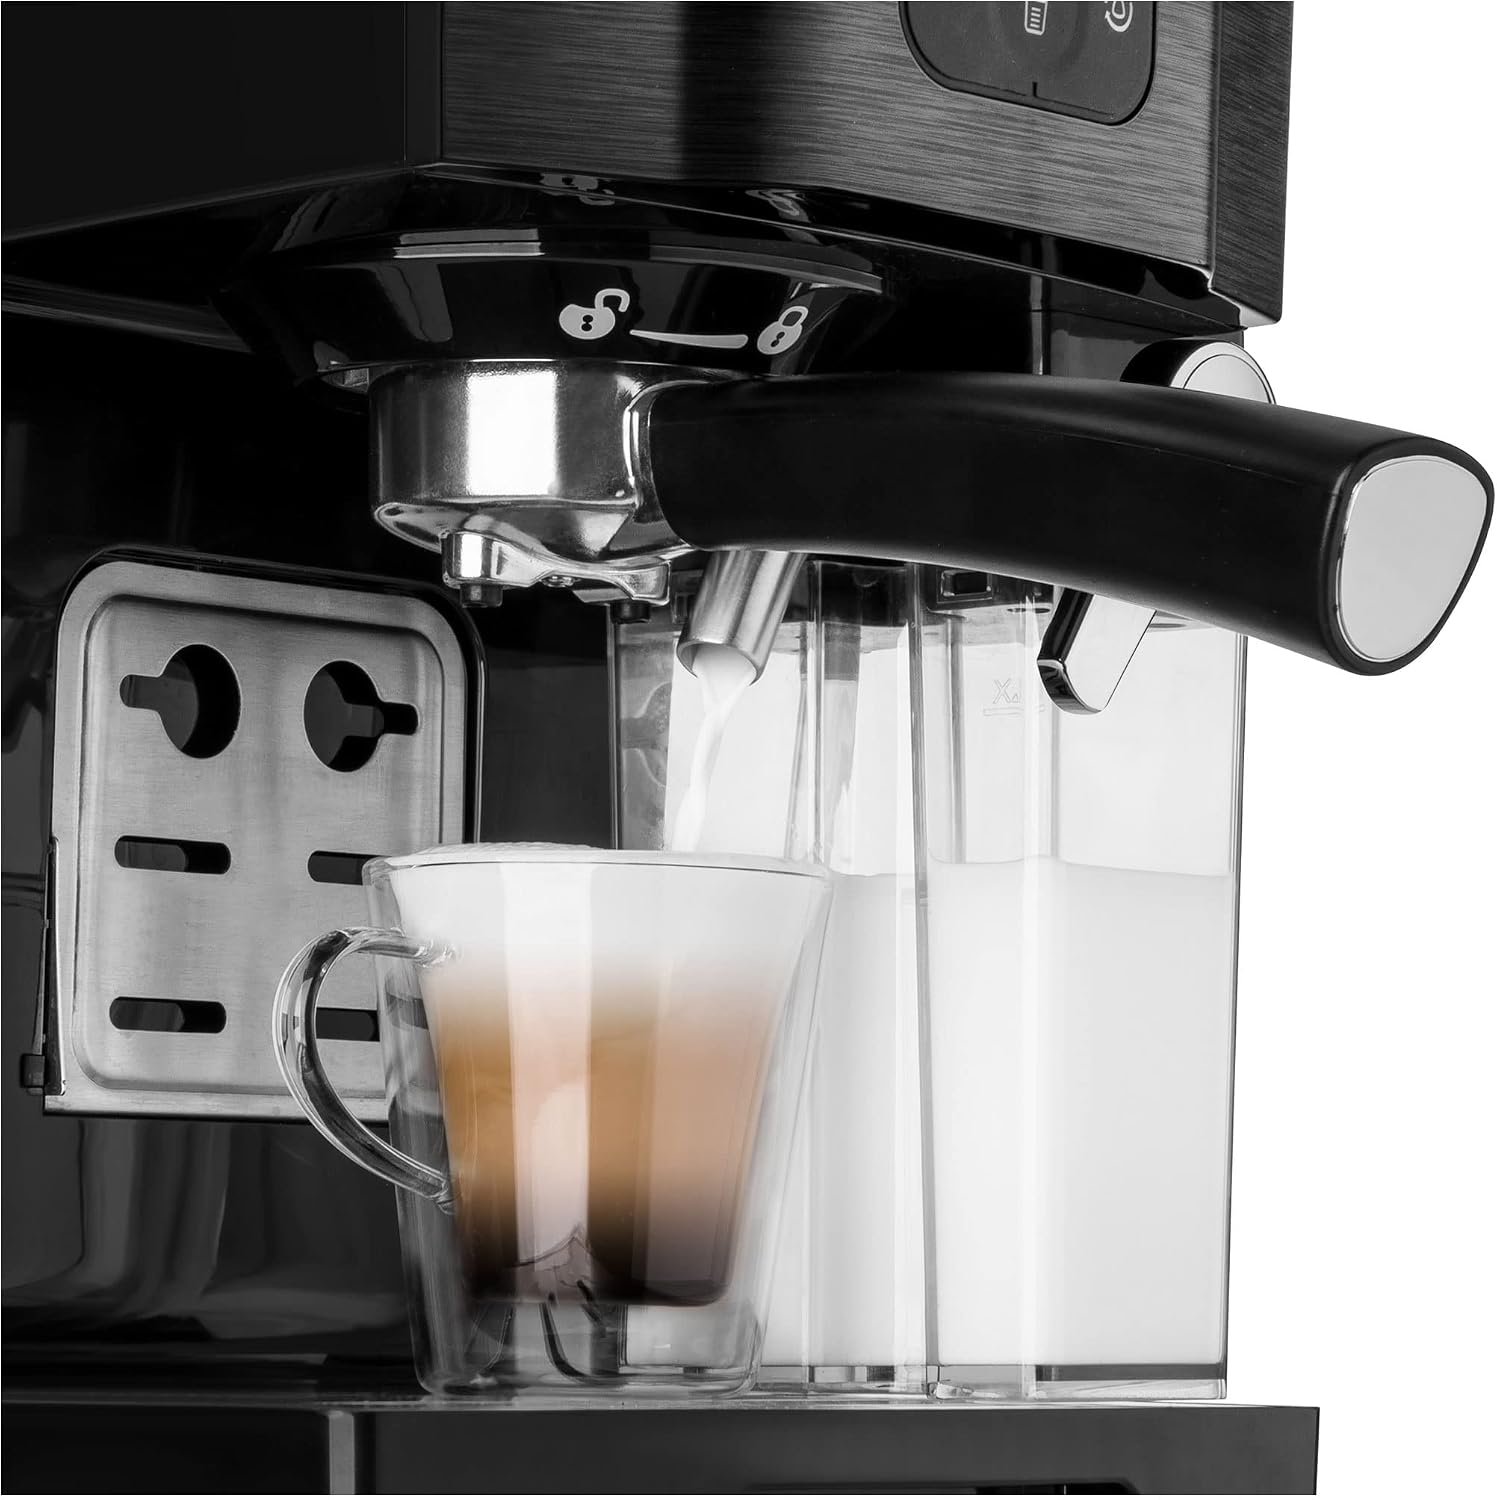
Figure 7: Milk frothing in action.
6. Maintenance and Cleaning
Regular cleaning and maintenance will prolong the life of your espresso machine and ensure consistent coffee quality.
6.1 Daily Cleaning
- Drip Tray: Empty and rinse the drip tray daily. It is removable for easy cleaning.
- Portafilter and Filter Baskets: After each use, remove the portafilter, discard grounds, and rinse the portafilter and filter basket under running water.
- Milk Frother: As mentioned, clean immediately after each use to prevent milk residue buildup. The transparent milk container is also easy to clean.
- Exterior: Wipe the exterior of the machine with a soft, damp cloth. Do not use abrasive cleaners or solvents.
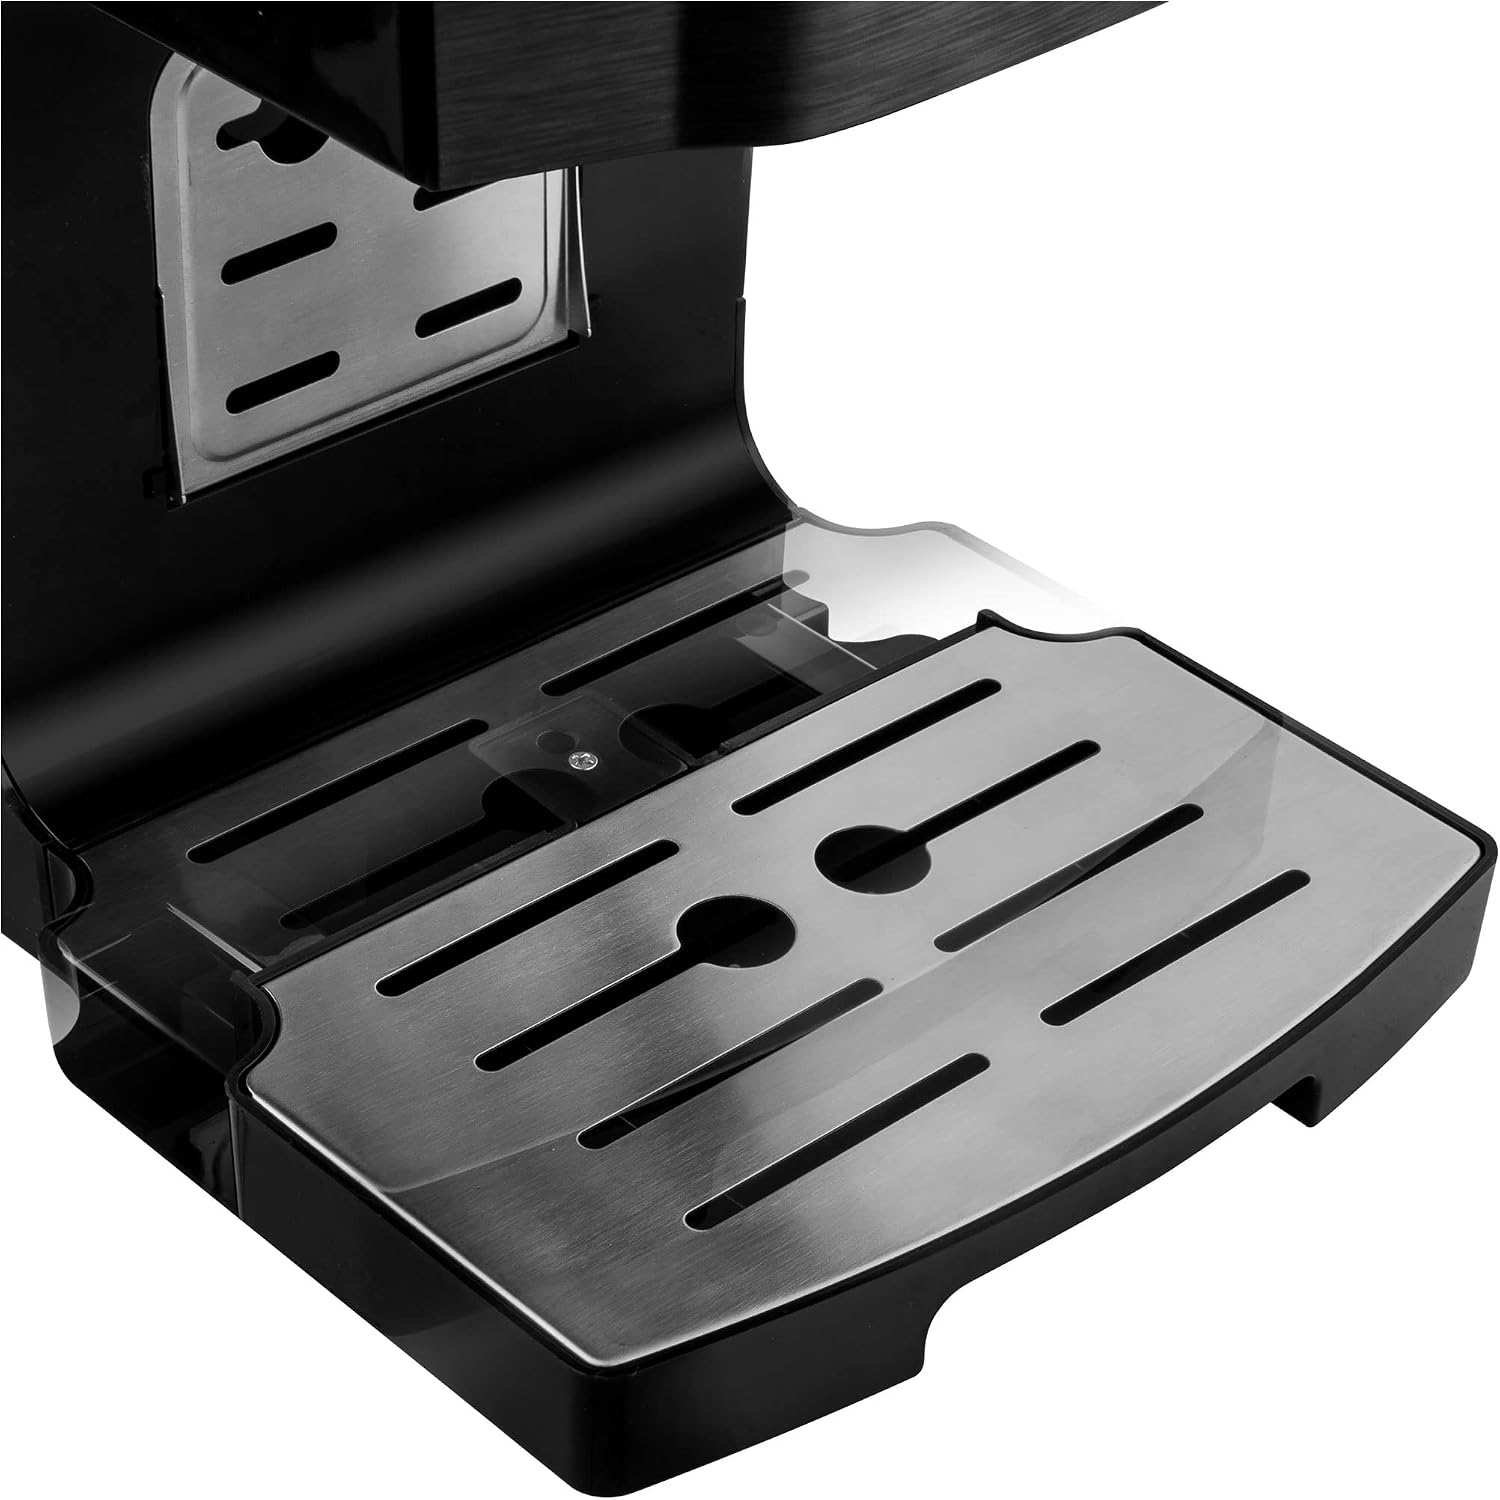
Figure 8: The removable drip tray for easy cleaning.
6.2 Descaling
Over time, mineral deposits (limescale) can build up inside the machine, affecting performance. The machine has a descaling system and an indicator. Descale your machine regularly, depending on water hardness and frequency of use.
- Use a commercially available descaling solution suitable for espresso machines. Follow the instructions on the descaling solution packaging.
- Empty the water tank and fill it with the descaling solution mixed with water as per instructions.
- Place a large container under the coffee spout and steam wand.
- Initiate the descaling cycle (refer to the machine's specific descaling program, often indicated by a flashing light or a dedicated button).
- Once the descaling cycle is complete, rinse the water tank thoroughly and fill it with fresh water. Run several cycles of fresh water through the machine to flush out any remaining descaling solution.
7. Troubleshooting
If you encounter issues with your SENCOR SES 4040BK, refer to the table below for common problems and solutions.
| Problem | Possible Cause | Solution |
|---|---|---|
| No coffee dispenses | Water tank empty; machine not primed; clogged filter/spout. | Fill water tank; prime the machine; clean portafilter/spout; descale if necessary. |
| Coffee is too weak/watery | Coffee grounds too coarse; not enough coffee; insufficient tamping. | Use finer grind; increase coffee amount; tamp more firmly. |
| No steam from frother | Steam function not activated; frother clogged. | Ensure steam button is pressed and machine is heated; clean frother nozzle. |
| Machine leaks water | Water tank not seated correctly; drip tray full; seal issues. | Re-seat water tank; empty drip tray; contact support if seals are damaged. |
| Coffee tastes burnt/plastic | Machine needs cleaning/descaling; new machine odor. | Perform thorough cleaning and descaling. Initial plastic smell should dissipate after a few uses. |
8. Technical Specifications
| Feature | Specification |
|---|---|
| Model | SES 4040BK (Model Number: SES41008783) |
| Brand | Sencor |
| Type | Semi-Automatic Espresso Machine |
| Pump Pressure | 20 Bar |
| Water Tank Capacity | 1.4 Liters |
| Power / Wattage | 1450 Watts |
| Voltage | 220 Volts |
| Material | Stainless Steel |
| Color | Black |
| Product Dimensions (D x W x H) | 22 x 35 x 30 cm |
| Item Weight | 5.26 Kilograms |
| Special Features | Removable Tank, Water Filter, Auto Shutoff, Thermoblock heating system, Pre-brewing function, Cup warmer |
9. Warranty Information
The SENCOR SES 4040BK Espresso Machine comes with a 2-year replacement warranty from the date of purchase. This warranty covers manufacturing defects and malfunctions under normal household use. Please retain your proof of purchase for warranty claims. The warranty does not cover damage caused by misuse, neglect, unauthorized repairs, or failure to follow the instructions in this manual.
10. Customer Support
For further assistance, technical support, or warranty claims, please contact Sencor customer service. Refer to the Sencor official website or your product packaging for the most up-to-date contact information in your region.
You may also find helpful resources and FAQs on the Sencor support page.
Related documentsSES 4040BK


Ask a question about this manual
Ask about setup, troubleshooting, compatibility, parts, safety, or missing instructions. Manuals+ will review the question and use this page’s manual context to help answer it.