Introduction
Thank you for choosing the LoraTap WiFi Garage Door Opener. This intelligent device allows you to control your garage door remotely using a portable RF remote control, a smartphone app (Smart Life), or voice commands via Alexa and Google Assistant. It integrates seamlessly with your existing garage door opener system, providing enhanced convenience and security. This manual provides detailed instructions for installation, operation, and maintenance to ensure optimal performance and user safety.
Safety Information
- Always ensure the garage door area is clear of people, pets, and obstructions before operating the opener.
- Do not allow children to play with the garage door opener or its controls.
- Keep the remote control out of reach of children.
- Regularly inspect the garage door and its components for signs of wear or damage. Do not operate if damaged.
- Ensure proper power supply (DC 5V 1A) to the main module.
- This device is designed to work with most common garage door operators. Verify compatibility before installation.
Package Contents
Please check the package to ensure all items are present:
- LoraTap Smart Garage Door Opener Module (GDC411WQ1)
- Wireless Door Sensor (with CR2032 battery included)
- RF Remote Control
- USB Power Adapter
- USB Cable
- Impulse Dry Contact Signal Cable
- Mounting Accessories (screws, adhesive pads)

Image: Overview of the LoraTap Smart Garage Door Opener components.
Product Overview
The LoraTap Smart Garage Door Opener system consists of three main parts:
- Smart Module: The central unit that connects to your garage door opener and Wi-Fi network.
- Wireless Door Sensor: Detects the open/closed status of your garage door. It communicates wirelessly with the smart module.
- RF Remote Control: A portable remote for convenient local control of the garage door.

Image: Dimensions and connection diagram of the LoraTap Garage Door Opener system.
Setup and Installation
1. Compatibility Check
The LoraTap Garage Door Opener is compatible with most garage door operators that have a dry contact input for a wall button. Consult your garage door opener's manual to identify the correct terminals for connection.
2. Install the Smart Module
- Mounting: Choose a location near your garage door opener and a power outlet. Ensure the location is within 10 meters of your 2.4GHz Wi-Fi router for optimal signal strength. You can use screws or adhesive pads to secure the module.
- Wiring: Connect the Impulse Dry Contact Signal Cable from the LoraTap module to the wall button terminals on your existing garage door opener. This connection simulates a button press to open/close the door.
- Power: Connect the USB cable to the LoraTap module and then to the provided USB Power Adapter. Plug the adapter into a power outlet. The module will power on.
3. Install the Wireless Door Sensor
The wireless door sensor consists of two parts: a main sensor and a magnet. They should be installed on the garage door and its frame, respectively, so that they are aligned and close to each other when the door is closed, and separate when the door is open.
- Attach the main sensor part to the garage door itself.
- Attach the smaller magnet part to the garage door frame, aligning it with the main sensor when the door is closed.
- Ensure the gap between the two parts is minimal when the door is closed. The wireless sensor offers a control distance of up to 15 meters from the smart module.

Image: Advantages of the wireless door sensor, including easier installation and extended range.
4. App Download and Pairing
- Download App: Search for "Smart Life" or "Tuya Smart" in your smartphone's app store (App Store for iOS, Google Play Store for Android) and download the app.
- Register/Login: Open the app and register a new account or log in if you already have one.
- Add Device:
- Ensure your phone is connected to a 2.4GHz Wi-Fi network. 5GHz networks are not supported.
- In the Smart Life app, tap the "+" icon in the top right corner to add a device.
- Select "Garage Door Opener" from the device list (usually under "Security & Sensor" or "Electrician").
- Follow the on-screen instructions to put the LoraTap module into pairing mode (usually by pressing and holding the pairing button until the indicator light blinks rapidly).
- Enter your 2.4GHz Wi-Fi network password when prompted.
- The app will search for and connect to the device. Once connected, you can rename the device.

Image: Step-by-step guide for easy pairing with the Smart Life app.

Image: Wi-Fi signal strength guidance for device placement.
Operating Instructions
1. Using the Smart Life App
Once paired, you can control and monitor your garage door from anywhere using the Smart Life app:
- Open/Close: Tap the garage door icon on the app's main screen to open or close the door.
- Real-time Status: The app displays the current status of your garage door (open or closed) based on the wireless sensor.
- Notifications: Receive instant notifications on your smartphone when the garage door opens or closes.
- Alarm Prompt: Set reminders to notify you if the garage door remains open for a specified period (e.g., 15 minutes).
- History: View a log of all garage door operations.
- Schedules: Set up schedules for automatic opening or closing at specific times.
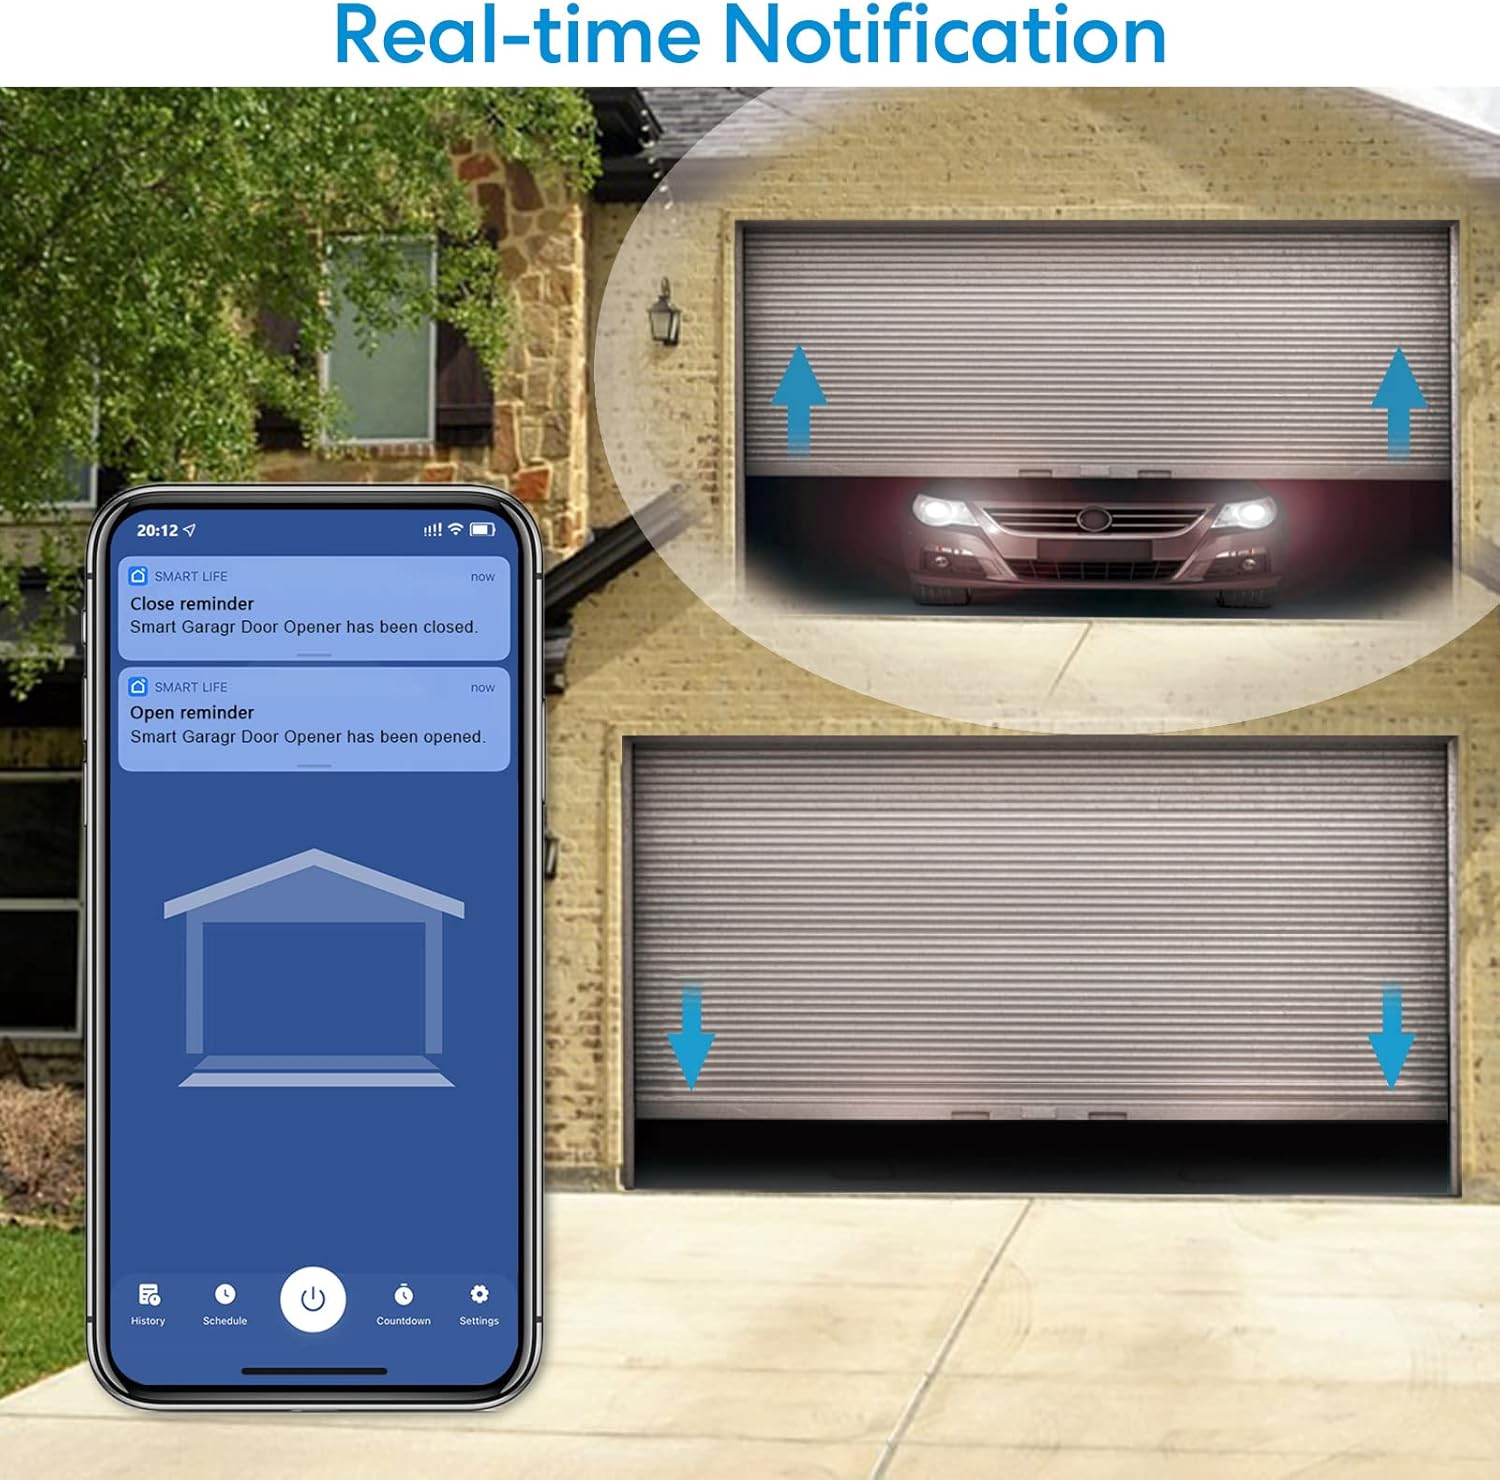
Image: Real-time notifications and status display in the Smart Life app.
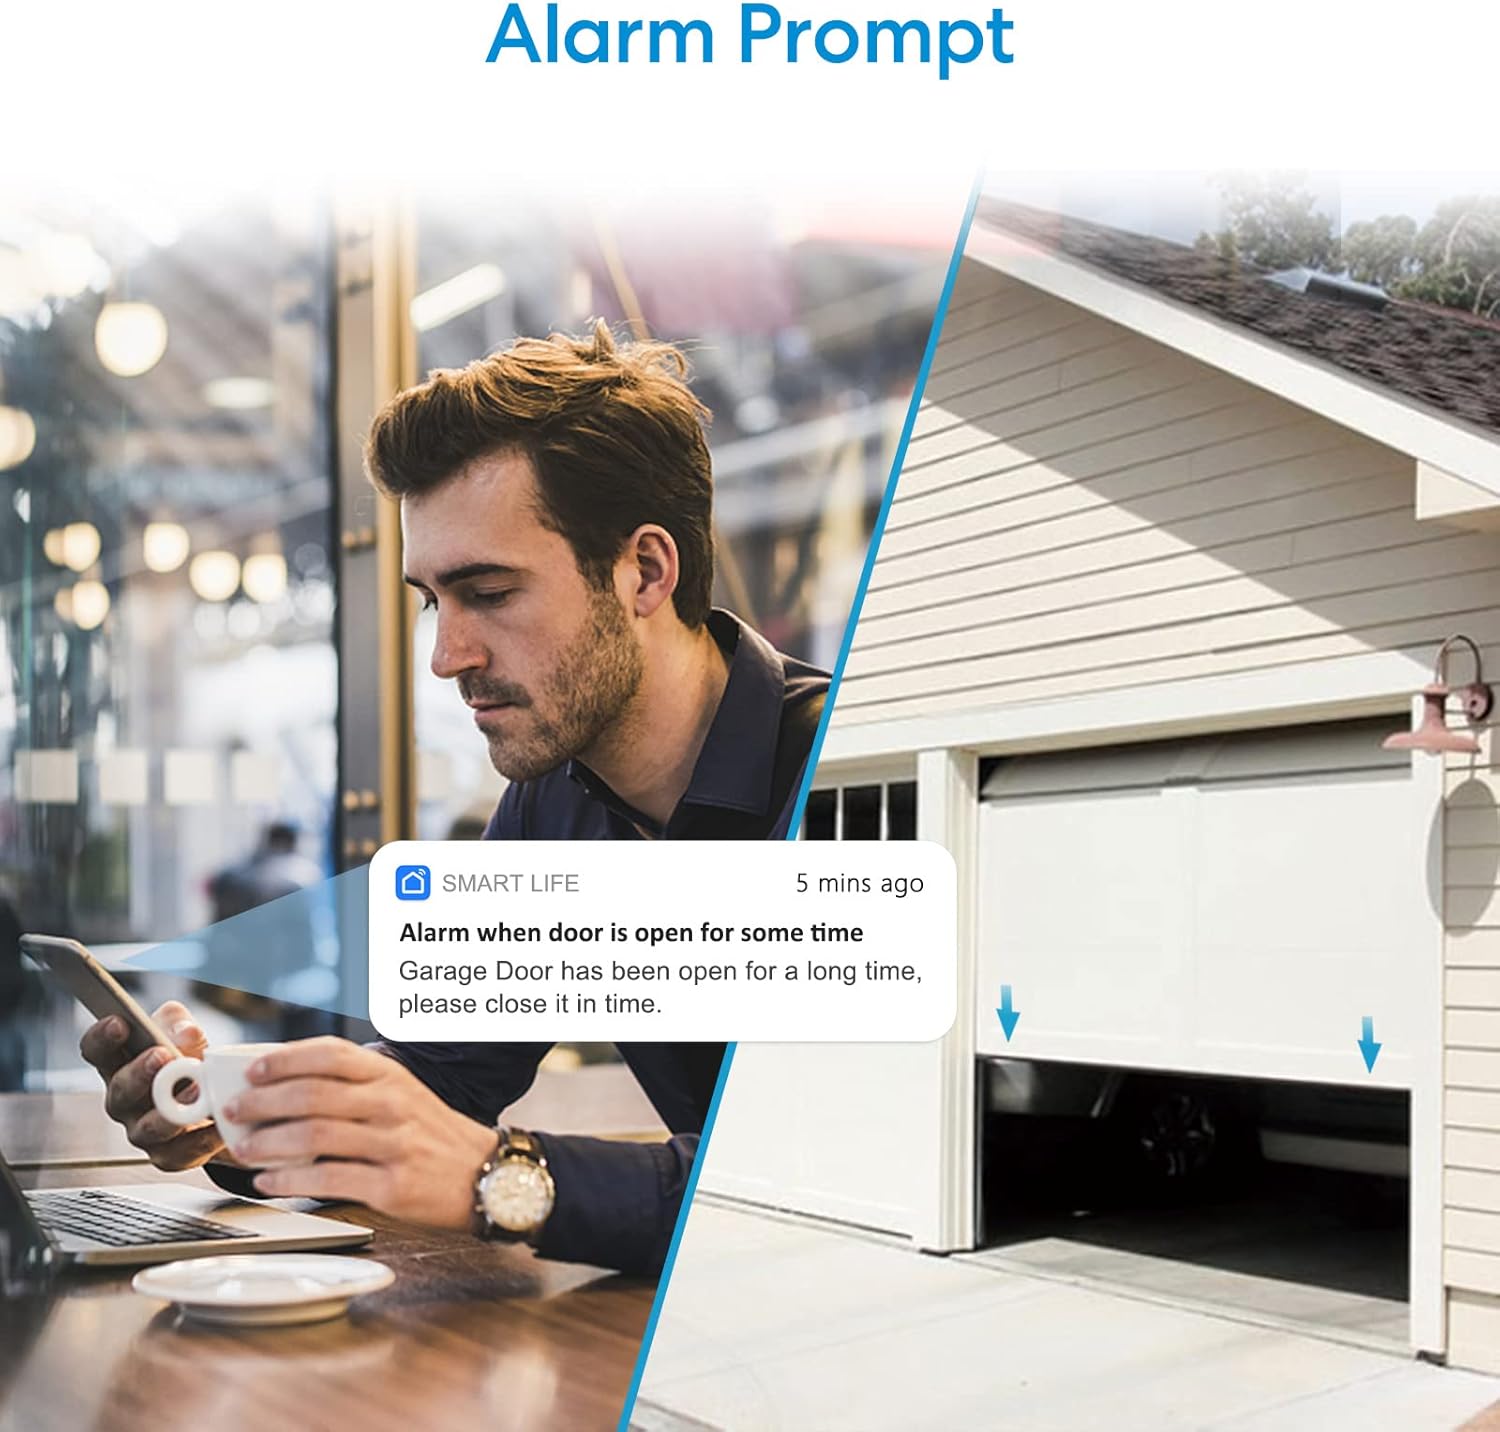
Image: Alarm prompt feature notifying the user if the garage door is left open.
2. Using the RF Remote Control
The included RF remote control provides a convenient way to open and close your garage door when you are within approximately 30 meters of the smart module, even if your Wi-Fi is offline.
- Press the button on the RF remote control to toggle the garage door's state (open if closed, close if open).
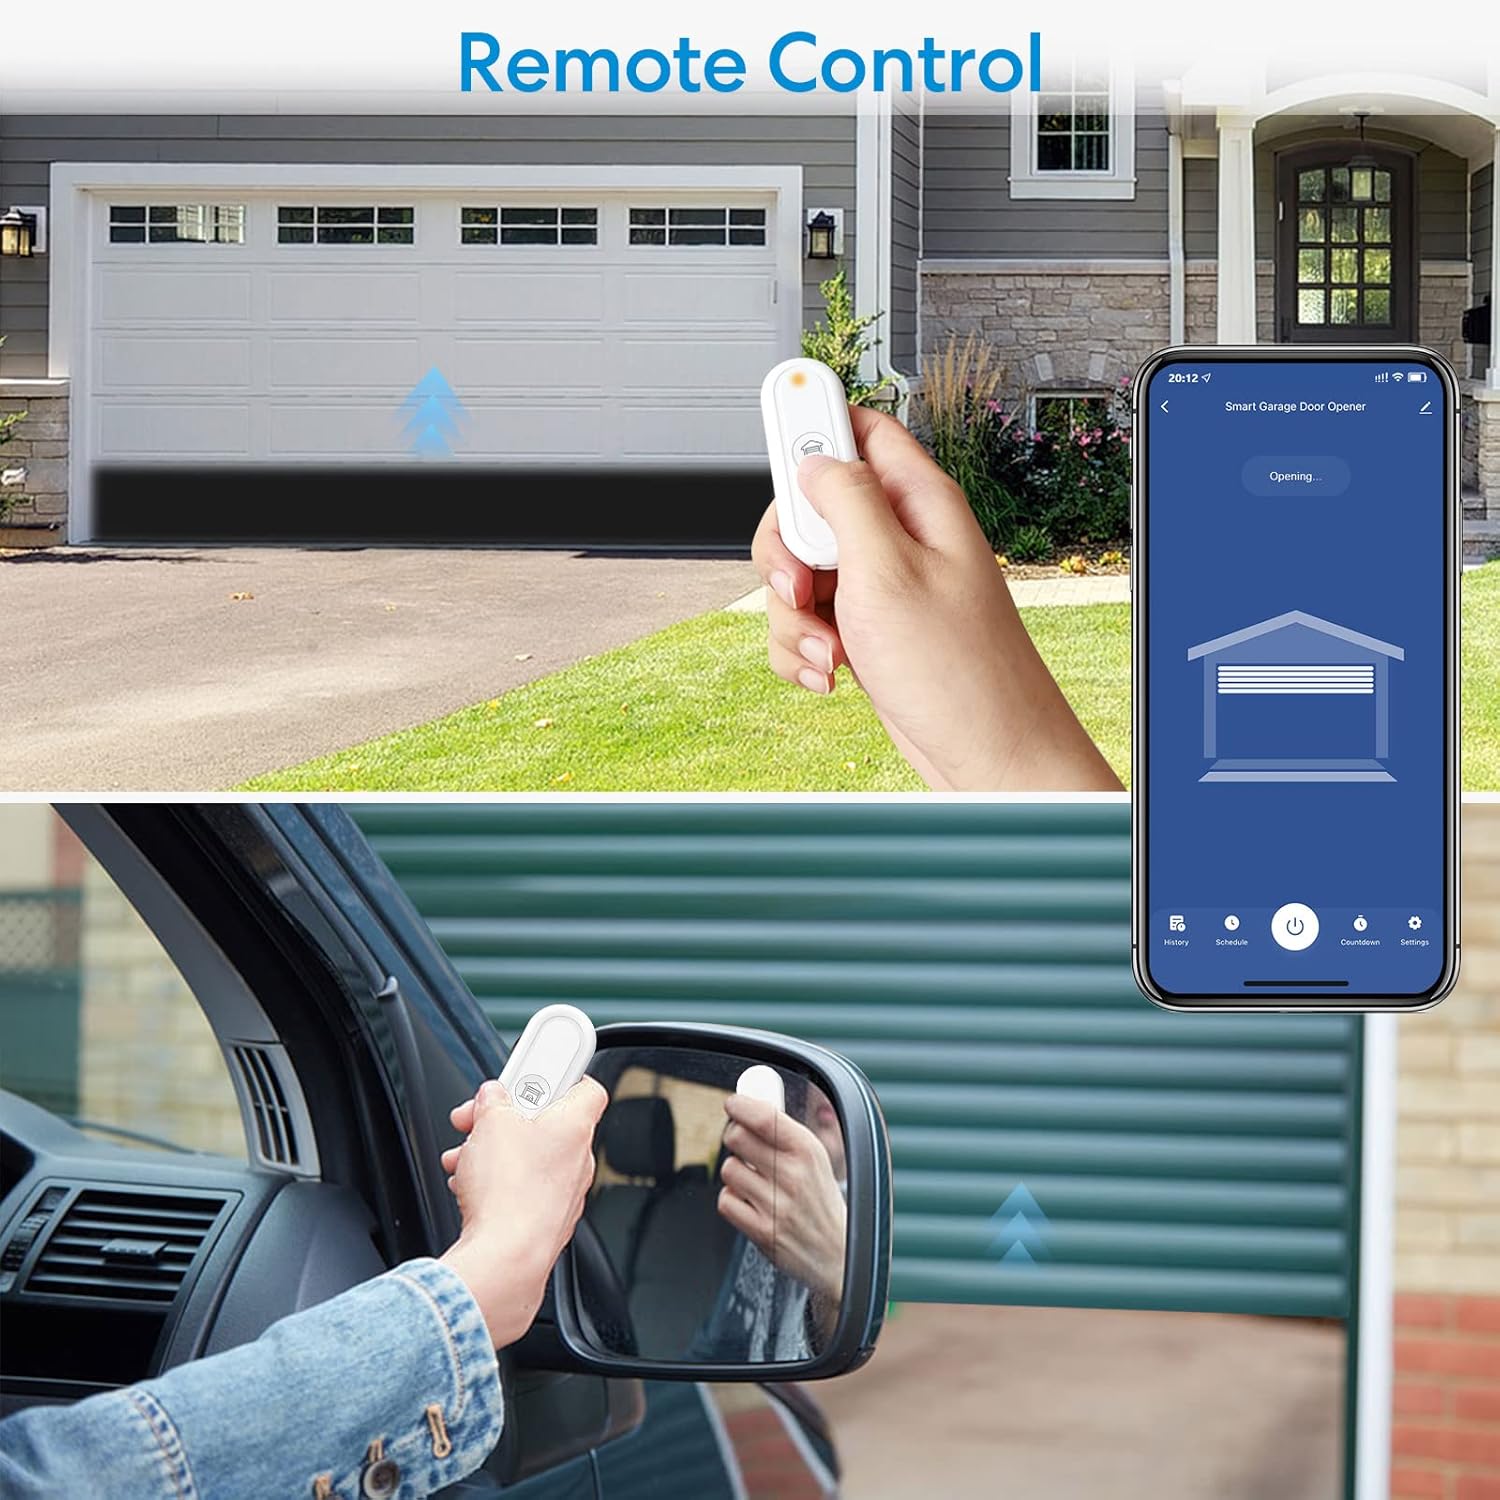
Image: Operating the garage door with the RF remote control.

Image: The compact RF remote control.
3. Voice Control (Alexa & Google Assistant)
Integrate your LoraTap Garage Door Opener with Amazon Alexa or Google Assistant for hands-free control:
- Link Account: In the Alexa or Google Home app, enable the "Smart Life" skill/service and link your Smart Life account.
- Discover Devices: Ask Alexa or Google Assistant to "Discover devices" or manually add the device in their respective apps.
- Voice Commands: Use commands like:
- "Alexa, open the Garage Door."
- "Hey Google, close the Garage Door."

Image: Voice control functionality with smart assistants.
Maintenance
- Wireless Sensor Battery: The wireless door sensor is powered by a CR2032 button cell battery. If the sensor stops reporting status or its indicator light is dim, replace the battery.
- Cleaning: Wipe the devices with a soft, dry cloth. Do not use abrasive cleaners or solvents.
- Firmware Updates: Periodically check the Smart Life app for available firmware updates for the smart module to ensure optimal performance and security.
Troubleshooting
| Problem | Possible Cause | Solution |
|---|---|---|
| Device offline in app. | No Wi-Fi connection, weak Wi-Fi signal, power disconnected. | Check Wi-Fi router, ensure device is within 10m of router, check power connection. Re-pair if necessary. |
| Garage door not responding to app/remote. | Incorrect wiring, module not powered, garage door opener issue, RF remote battery low. | Verify wiring to garage door opener, check module power, test garage door opener with its original wall button, replace RF remote battery. |
| Incorrect door status in app. | Wireless sensor misaligned or battery low. | Ensure sensor and magnet are properly aligned when door is closed. Replace CR2032 battery in the sensor. |
| Cannot connect to Wi-Fi. | Incorrect Wi-Fi band (5GHz), wrong password, weak signal. | Ensure you are connecting to a 2.4GHz Wi-Fi network. Double-check password. Move device closer to router. |
Specifications
| Feature | Detail |
|---|---|
| Model | GDC411WQ1 |
| Brand | LoraTap |
| Input Voltage | DC 5V 1A |
| Connectivity | Wi-Fi (2.4GHz only) |
| Wireless Sensor Battery | CR2032 (included) |
| Max. Wireless Sensor Range | 15 meters |
| Max. RF Remote Range | 30 meters |
| Compatible Devices | Garage Door Openers with dry contact input |
| Product Dimensions | 10.16 x 5 x 0.03 cm (main module) |
| Weight | 180 g |
Warranty and Support
LoraTap products are designed for reliability and performance. For warranty information and technical support, please refer to the contact details provided with your purchase or visit the official LoraTap website. Please retain your proof of purchase for warranty claims.


