1. Introduction and Overview
This manual provides essential information for the safe and effective operation, assembly, and maintenance of your SKIL DP9505-00 6.2 Amp 10-Inch 5-Speed Benchtop Drill Press. The SKIL DP9505-00 is designed for precise drilling in various materials, featuring a powerful induction motor, a laser alignment system, and adjustable controls for depth and table height.

Figure 1: SKIL DP9505-00 Benchtop Drill Press. This image shows the complete drill press unit, highlighting its compact benchtop design and key components.
2. Safety Information
WARNING: Read and understand all safety warnings and instructions before operating this power tool. Failure to follow the warnings and instructions may result in electric shock, fire, and/or serious injury.
General Power Tool Safety Warnings
- Work Area Safety: Keep the work area clean and well-lit. Cluttered or dark areas invite accidents. Do not operate power tools in explosive atmospheres, such as in the presence of flammable liquids, gases, or dust.
- Electrical Safety: Power tool plugs must match the outlet. Never modify the plug in any way. Do not abuse the cord. Never use the cord for carrying, pulling, or unplugging the power tool.
- Personal Safety: Always wear eye protection. Use safety glasses, goggles, or a face shield. Wear hearing protection when operating noisy tools. Dress properly. Do not wear loose clothing or jewelry. Keep hair, clothing, and gloves away from moving parts.
- Tool Use and Care: Do not force the power tool. Use the correct power tool for your application. Disconnect the plug from the power source before making any adjustments, changing accessories, or storing power tools.
- Laser Safety: This product uses a Class II laser. Do not stare directly into the laser beam. Avoid direct eye exposure. Maximum Average Radiant Power: 0.83mW.
3. Product Features
The SKIL DP9505-00 Benchtop Drill Press incorporates several features designed for enhanced performance and user convenience:
- Powerful 6.2 Amp Induction Motor: Provides consistent power for drilling through various materials including wood and metal.
- 5-Speed System: Offers speed settings from 610 to 2800 RPM, allowing selection of the optimal speed for different material types and bit sizes.
- Laser Alignment System: Projects a crosshair onto the workpiece for precise drilling maneuvers.
- Adjustable Depth Stop: Ensures accurate and consistent drilling depth, preventing over-drilling.
- Adjustable Table Height: Allows easy positioning of the workpiece for optimal drilling.
- LED Worklight: Illuminates the workspace for improved visibility and accuracy.
- Bump-Off Switch: Provides an added layer of safety by allowing quick power cutoff.
- Tilting Work Surface: The table can tilt from 0 to 45 degrees left and right for angled drilling.
4. Assembly
Before beginning assembly, ensure all components are present and undamaged. Refer to the included parts list for verification.
Included Components:
- 10 in Drill Press Unit
- Hex Wrench
- Chuck Key
Assembly Steps:
- Base and Column Assembly: Securely attach the column to the base using the provided hardware. Ensure all fasteners are tightened to the manufacturer's specifications.
- Table Assembly: Slide the work table onto the column. Position it at a comfortable working height and secure it using the table lock handle.
- Head Assembly: Carefully place the drill press head onto the top of the column. Align the head and secure it with the appropriate bolts and nuts.
- Chuck Installation: Insert the chuck onto the spindle. Use a rubber mallet to gently tap the chuck into place, ensuring a firm fit.
- Handle Installation: Attach the feed handles to the drill press head.
- Power Connection: Connect the power cord to a grounded electrical outlet.
5. Operation
5.1 Powering On/Off and Safety Switch
The drill press is equipped with a safety bump-off switch. To operate, lift the safety pin and press the ON button. To turn off, press the large red OFF button or push the safety pin down.

Figure 2: Bump-Off Switch. This image shows the safety switch with a yellow key, designed for quick and secure power control.
5.2 Adjusting Spindle Speed (5-Speed System)
The drill press features a 5-speed pulley system to optimize drilling for different materials. To change speeds:
- Disconnect Power: Always unplug the drill press before opening the pulley cover.
- Open Pulley Cover: Lift the top cover of the drill press head.
- Adjust Belt Position: Loosen the motor tension and move the drive belt to the desired pulley combination for the required RPM. Refer to the speed chart inside the cover for guidance.
- Re-tension Belt: Adjust the motor to re-tension the belt.
- Close Cover: Securely close the pulley cover.

Figure 3: 5-Speed System. This image illustrates the belt and pulley system used to adjust the spindle speed for various drilling applications.
5.3 Using the Laser Alignment System
The integrated laser alignment system provides a visual guide for precise hole placement.
- Activate Laser: Press the laser ON button located on the control panel.
- Position Workpiece: Place your workpiece on the table. The laser crosshairs will indicate the exact point where the drill bit will enter the material.
- Adjust if Necessary: If the laser is not perfectly aligned with the drill bit, refer to the calibration section in the full manual (not provided here) for adjustment instructions.
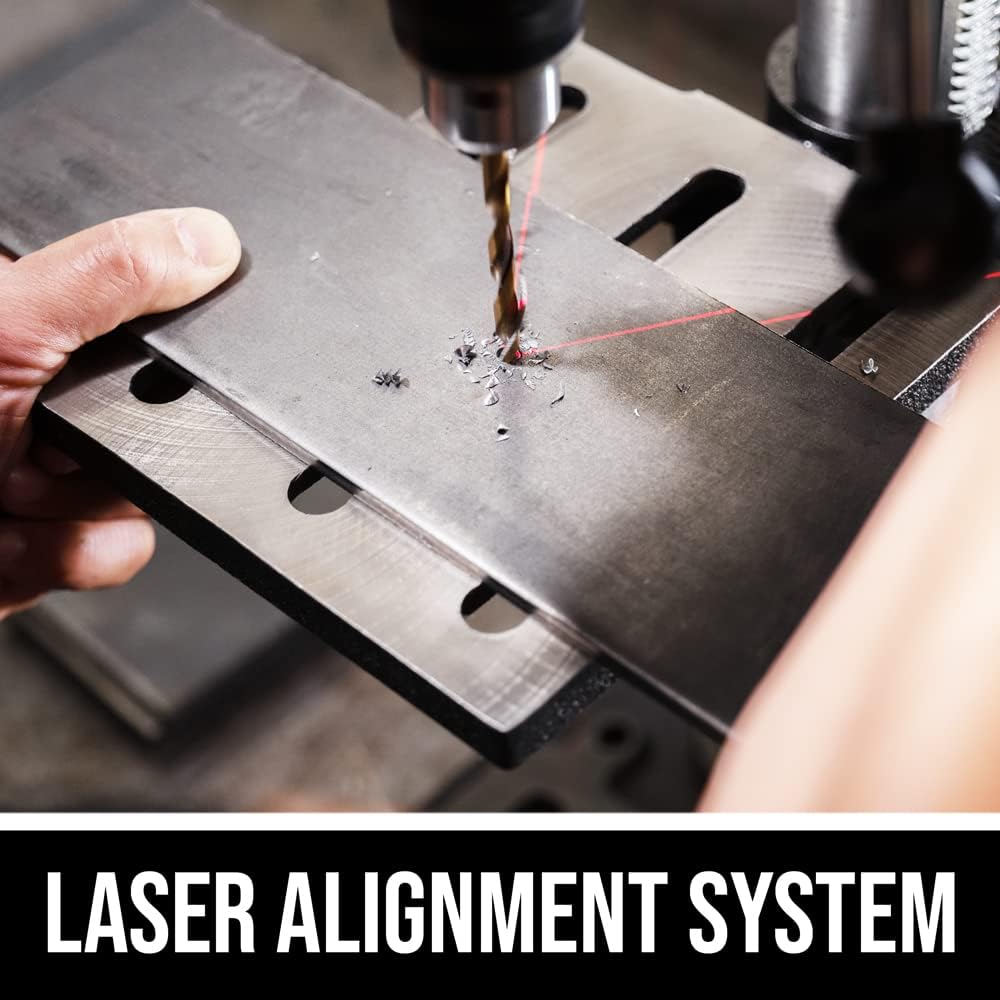
Figure 4: Laser Alignment System. This image demonstrates the laser crosshairs projected onto a metal workpiece, aiding in precise drilling.
5.4 Adjusting Drilling Depth
The adjustable depth stop allows for consistent and repeatable drilling depths.
- Lower Spindle: Bring the drill bit down to the desired depth on your workpiece.
- Set Depth Stop: Adjust the depth stop mechanism (a threaded rod with a nut) until it contacts the stop collar. Tighten the locking nut to secure the setting.
- Verify: Raise the spindle and then lower it again to confirm the depth stop engages at the correct point.
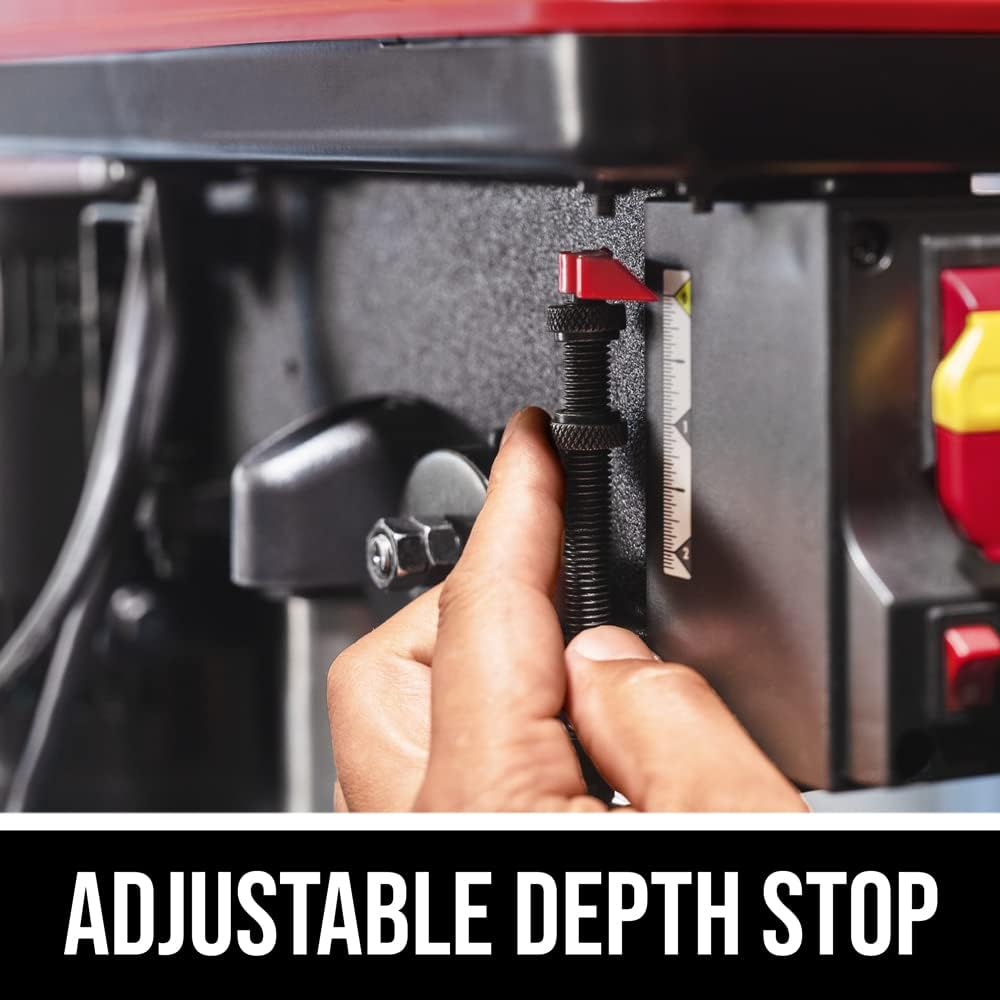
Figure 5: Adjustable Depth Stop. This image shows a hand adjusting the threaded depth stop, which ensures consistent drilling depth.
5.5 Adjusting Work Table Height and Angle
The work table can be adjusted vertically and tilted for angled drilling.
- Height Adjustment: Loosen the table lock handle. Use the crank to raise or lower the table to the desired height. Tighten the table lock handle to secure.
- Angle Adjustment: Loosen the table tilt bolts. Tilt the table to the desired angle (0-45 degrees left or right). Use a protractor or angle finder for accuracy. Tighten the tilt bolts to secure the angle.
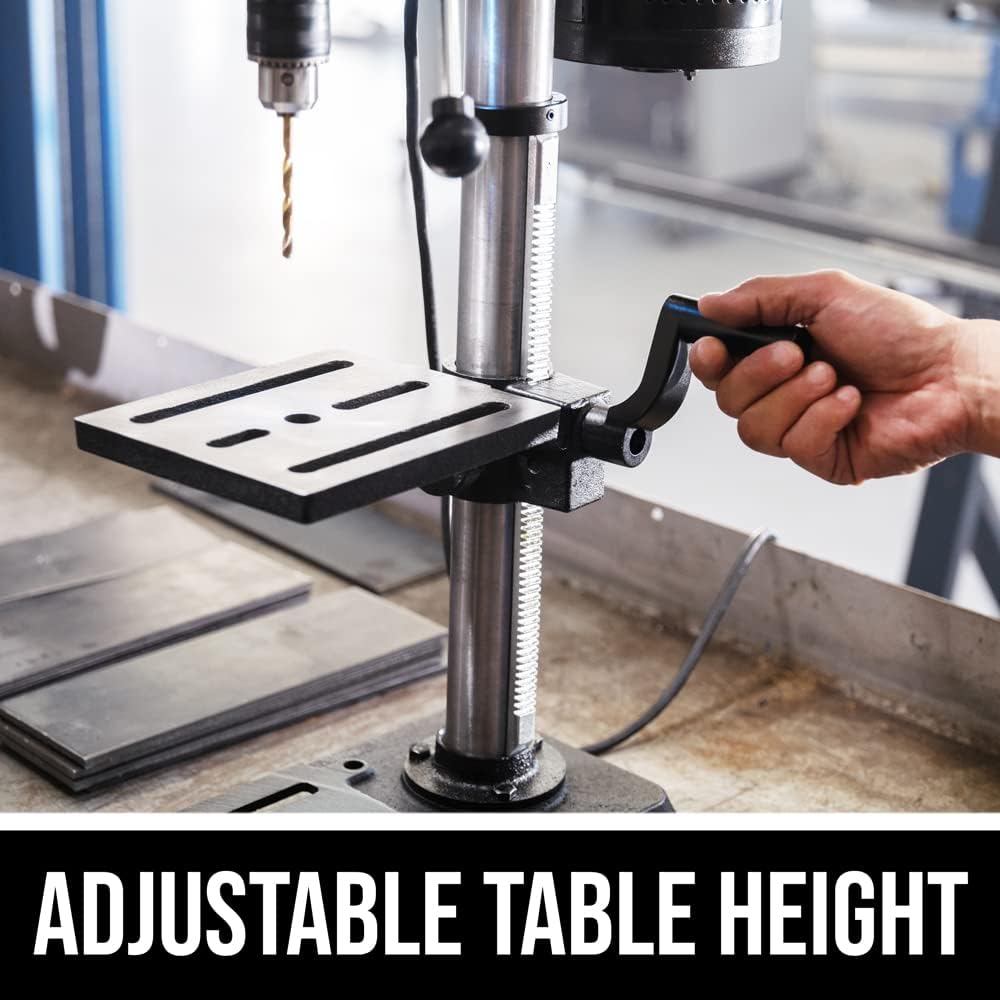
Figure 6: Adjustable Table Height. This image shows a hand using the crank to adjust the vertical position of the work table.
6. Maintenance
Regular maintenance ensures the longevity and optimal performance of your drill press.
- Cleaning: Keep the machine clean and free of dust and debris. Use a vacuum cleaner for sawdust.
- Lubrication: Periodically lubricate moving parts such as the column and quill.
- Belt Inspection: Check the drive belt for wear, cracks, or slippage. Replace if necessary.
- Chuck Maintenance: Keep the chuck jaws clean and free of debris to ensure proper bit gripping.
- Laser Calibration: Periodically check and recalibrate the laser alignment system for accuracy.
7. Troubleshooting
This section addresses common issues you might encounter with your drill press.
| Problem | Possible Cause | Solution |
|---|---|---|
| Drill not starting | No power, safety switch not engaged, faulty switch. | Check power connection, ensure safety switch is fully engaged, inspect switch for damage. |
| Excessive vibration | Loose components, unbalanced bit, worn belt. | Tighten all fasteners, ensure bit is properly seated, check and replace belt if worn. |
| Inaccurate drilling | Loose table, misaligned laser, dull drill bit. | Secure table, recalibrate laser, replace or sharpen drill bit. |
| Motor overheating | Overloading, insufficient ventilation. | Reduce feed pressure, ensure proper ventilation around the motor. |
8. Specifications
| Specification | Value |
|---|---|
| Brand | Skil |
| Model Number | DP9505-00 |
| Power Source | Corded Electric |
| Amperage | 6.2 Amps |
| Voltage | 120 Volts |
| Maximum Rotational Speed | 2800 RPM |
| Number of Speeds | 5 |
| Maximum Chuck Size | 0.5 Inches |
| Drilling Capacity (Wood) | 0.5 Inches |
| Drilling Capacity (Metal) | 0.5 Inches |
| Product Dimensions | 24.02"L x 15.16"W x 12.4"H |
| Item Weight | 46.65 Pounds |
| Laser Class | II |
| Maximum Average Radiant Power (Laser) | 0.83mW |
| Included Components | 10 in Drill Press; Hex Wrench; Chuck Key |
| Material | Blend |
9. Warranty and Support
The SKIL DP9505-00 Benchtop Drill Press comes with a 3-Year Limited Warranty. For warranty claims, technical support, or to purchase replacement parts, please contact SKIL customer service or visit the official SKIL website.
You can also visit the Skil Store on Amazon for more product information and accessories.


