1. Introduction
Thank you for choosing the Kismile KM-WD5820Y 3-in-1 Water Dispenser with Ice Maker. This appliance provides convenient access to hot, cold, and ice water. Please read this manual thoroughly before operation to ensure proper use, maintenance, and safety. Keep this manual for future reference.
2. Safety Instructions
- Electrical Safety: Ensure the power outlet matches the appliance's voltage. Do not use extension cords. Always unplug the dispenser before cleaning or maintenance.
- Hot Water Safety: The hot water function dispenses water at temperatures up to 194°F (90°C). Exercise extreme caution to prevent burns. Keep children away from the hot water dispenser.
- Placement: Place the dispenser on a flat, stable, and level surface. Ensure adequate ventilation around the unit (at least 4 inches from walls). Do not place in direct sunlight or near heat sources.
- Water Supply: Use only potable water. Do not operate the dispenser without water in the reservoir to prevent dry burning.
- Cleaning: Regularly clean the appliance as instructed in the maintenance section to ensure hygienic operation and prevent odors.
- Damage: Do not operate if the power cord or plug is damaged. Contact customer support for repairs.
3. Product Overview
The Kismile KM-WD5820Y is a versatile countertop water dispenser designed to provide hot, cold, and ice water. It features a top-loading design for 3-5 gallon water bottles or direct water addition.

Figure 3.1: Kismile 3-in-1 Water Dispenser with Ice Maker, showing a 5-gallon water bottle installed on top and a glass of iced water next to it.
Components and Controls

Figure 3.2: Diagram illustrating the main components of the water dispenser, including the water bottle, control panel, and drip tray, with approximate dimensions.
- Water Bottle Holder: Located on top, compatible with 3-5 gallon bottles.
- Control Panel: Features buttons and indicator lights for various functions.
- Hot Water Spout: Dispenses hot water.
- Cold Water Spout: Dispenses cold water.
- Ice Dispenser: Area where ice cubes are produced and collected.
- Removable Drip Tray: Collects spills and is easy to clean.
- Ventilation Grille: Located on the sides for heat dissipation.

Figure 3.3: Close-up views of the stainless steel control panel, removable drip tray, and side fan for heat dissipation.
Control Panel Indicators:
- Power Light: Indicates the unit is powered on.
- Add Water Light: Flashes red when water level is low, indicating a need to refill.
- Unlock Light: Indicates the hot water safety lock is disengaged.
- Hot Water Light: Illuminates when hot water heating is active.
- Ice Block Light: Illuminates when ice making is active.
- Cold Water Light: Illuminates when cold water cooling is active.
4. Setup
4.1 Unpacking
- Carefully remove the dispenser from its packaging.
- Inspect the unit for any shipping damage. If damaged, do not operate and contact the seller.
- Remove all packaging materials, including any protective films or tapes.
4.2 Placement
- Place the dispenser on a sturdy, level countertop or table capable of supporting its weight when full.
- Ensure there is at least 4 inches (10 cm) of clearance from walls and other objects on all sides to allow for proper ventilation.
- Avoid placing the unit in direct sunlight or near heat-generating appliances.
4.3 Initial Cleaning
Before first use, it is recommended to clean the internal water paths.
- Prepare a mixture of water and a small amount of food-grade vinegar or a mild cleaning solution.
- Pour the cleaning solution into the water reservoir (if using direct fill) or through a clean water bottle.
- Dispense a few cups of water from both hot and cold spouts until the solution is flushed out.
- Rinse thoroughly by repeating the process with clean, fresh water until no cleaning solution residue or odor remains.
4.4 Water Supply Connection
The dispenser supports two methods for adding water:
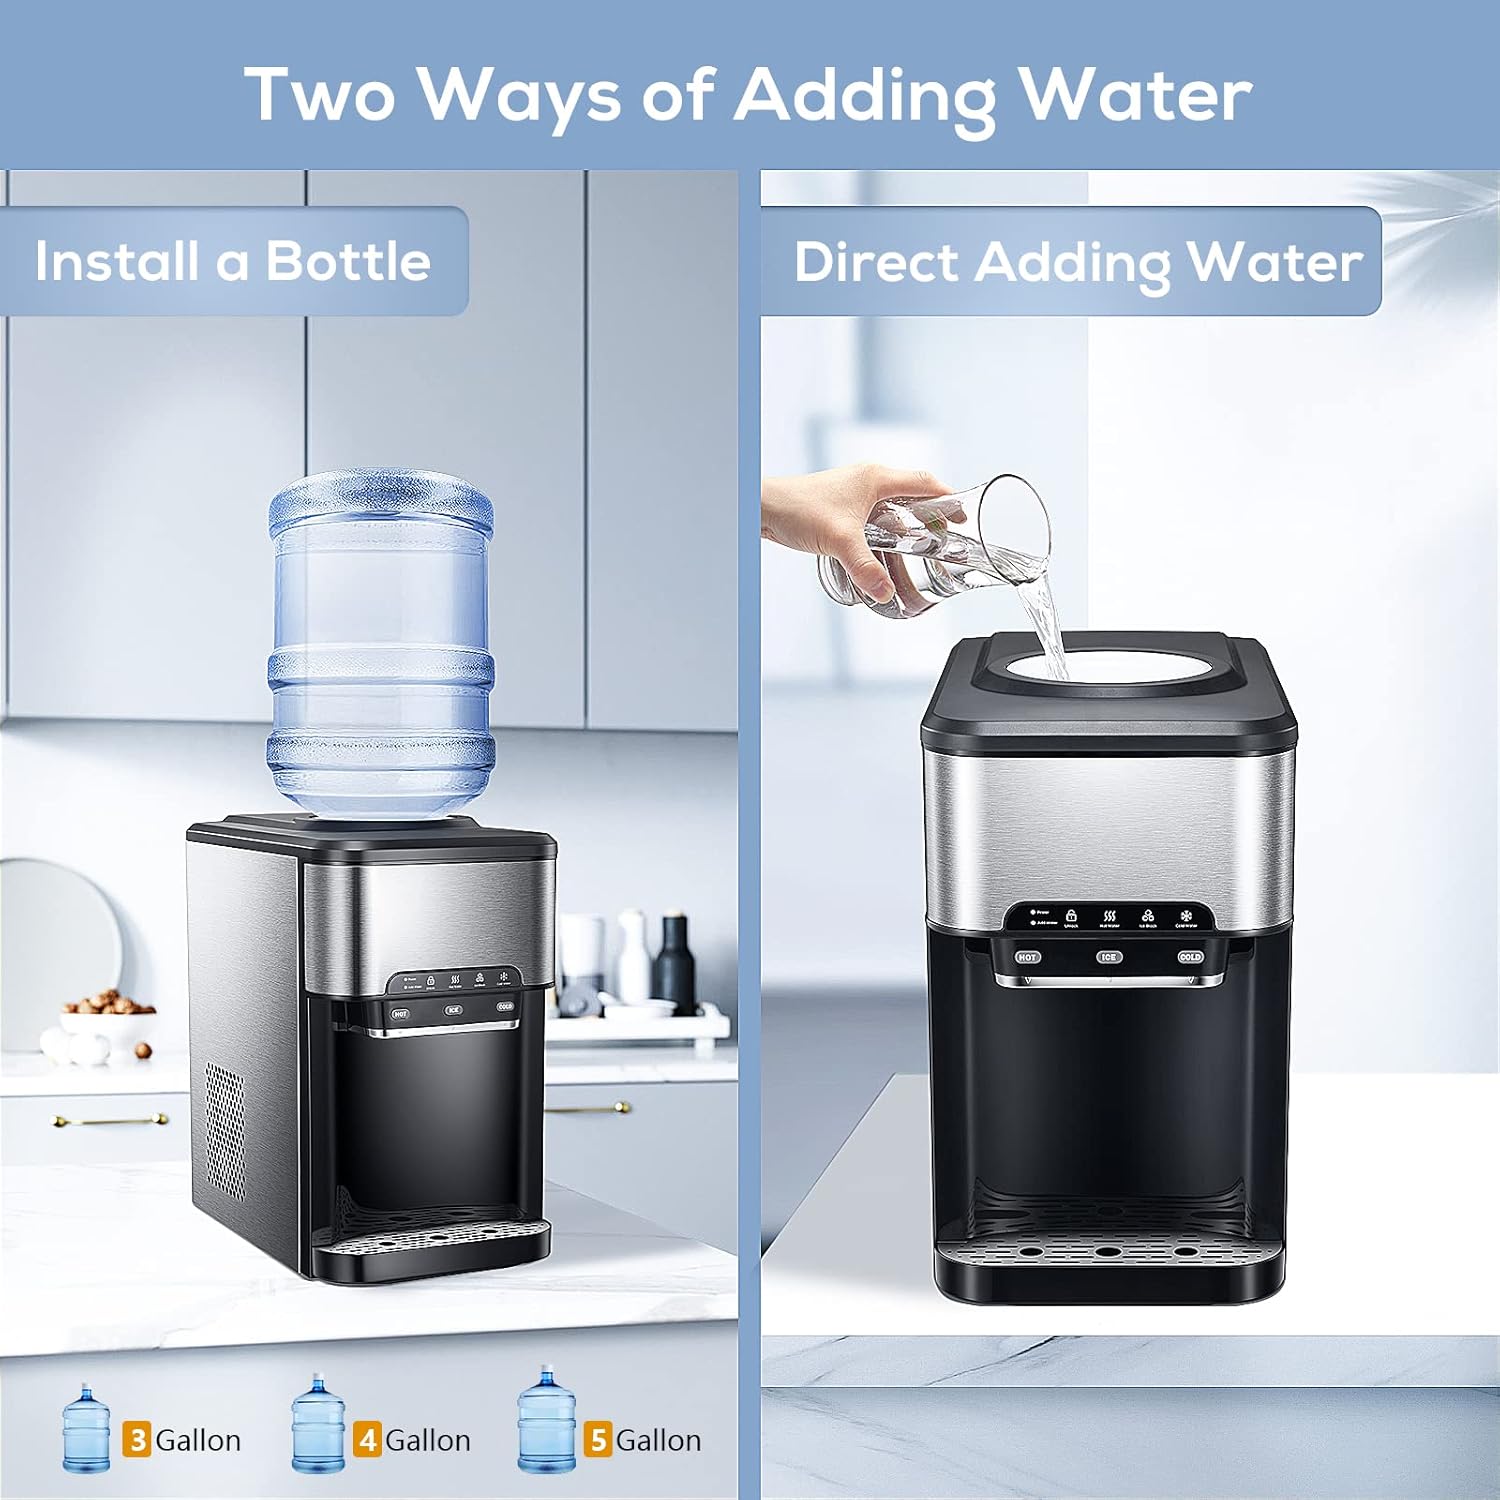
Figure 4.1: Illustration showing the two methods for adding water: installing a 3-5 gallon water bottle or directly pouring water into the top reservoir.
- Option 1: Install a Water Bottle
Place a 3-5 gallon water bottle onto the top loading port. Ensure it is seated firmly to prevent leaks. - Option 2: Direct Adding Water
Open the top cover and pour potable water directly into the internal reservoir.
4.5 Power Connection
- Once water is loaded, plug the power cord into a grounded electrical outlet.
- The Power indicator light on the control panel will illuminate.
5. Operating Instructions
After setup, allow the unit approximately 15-30 minutes for the water to reach optimal hot and cold temperatures, and for the first batch of ice to be produced.
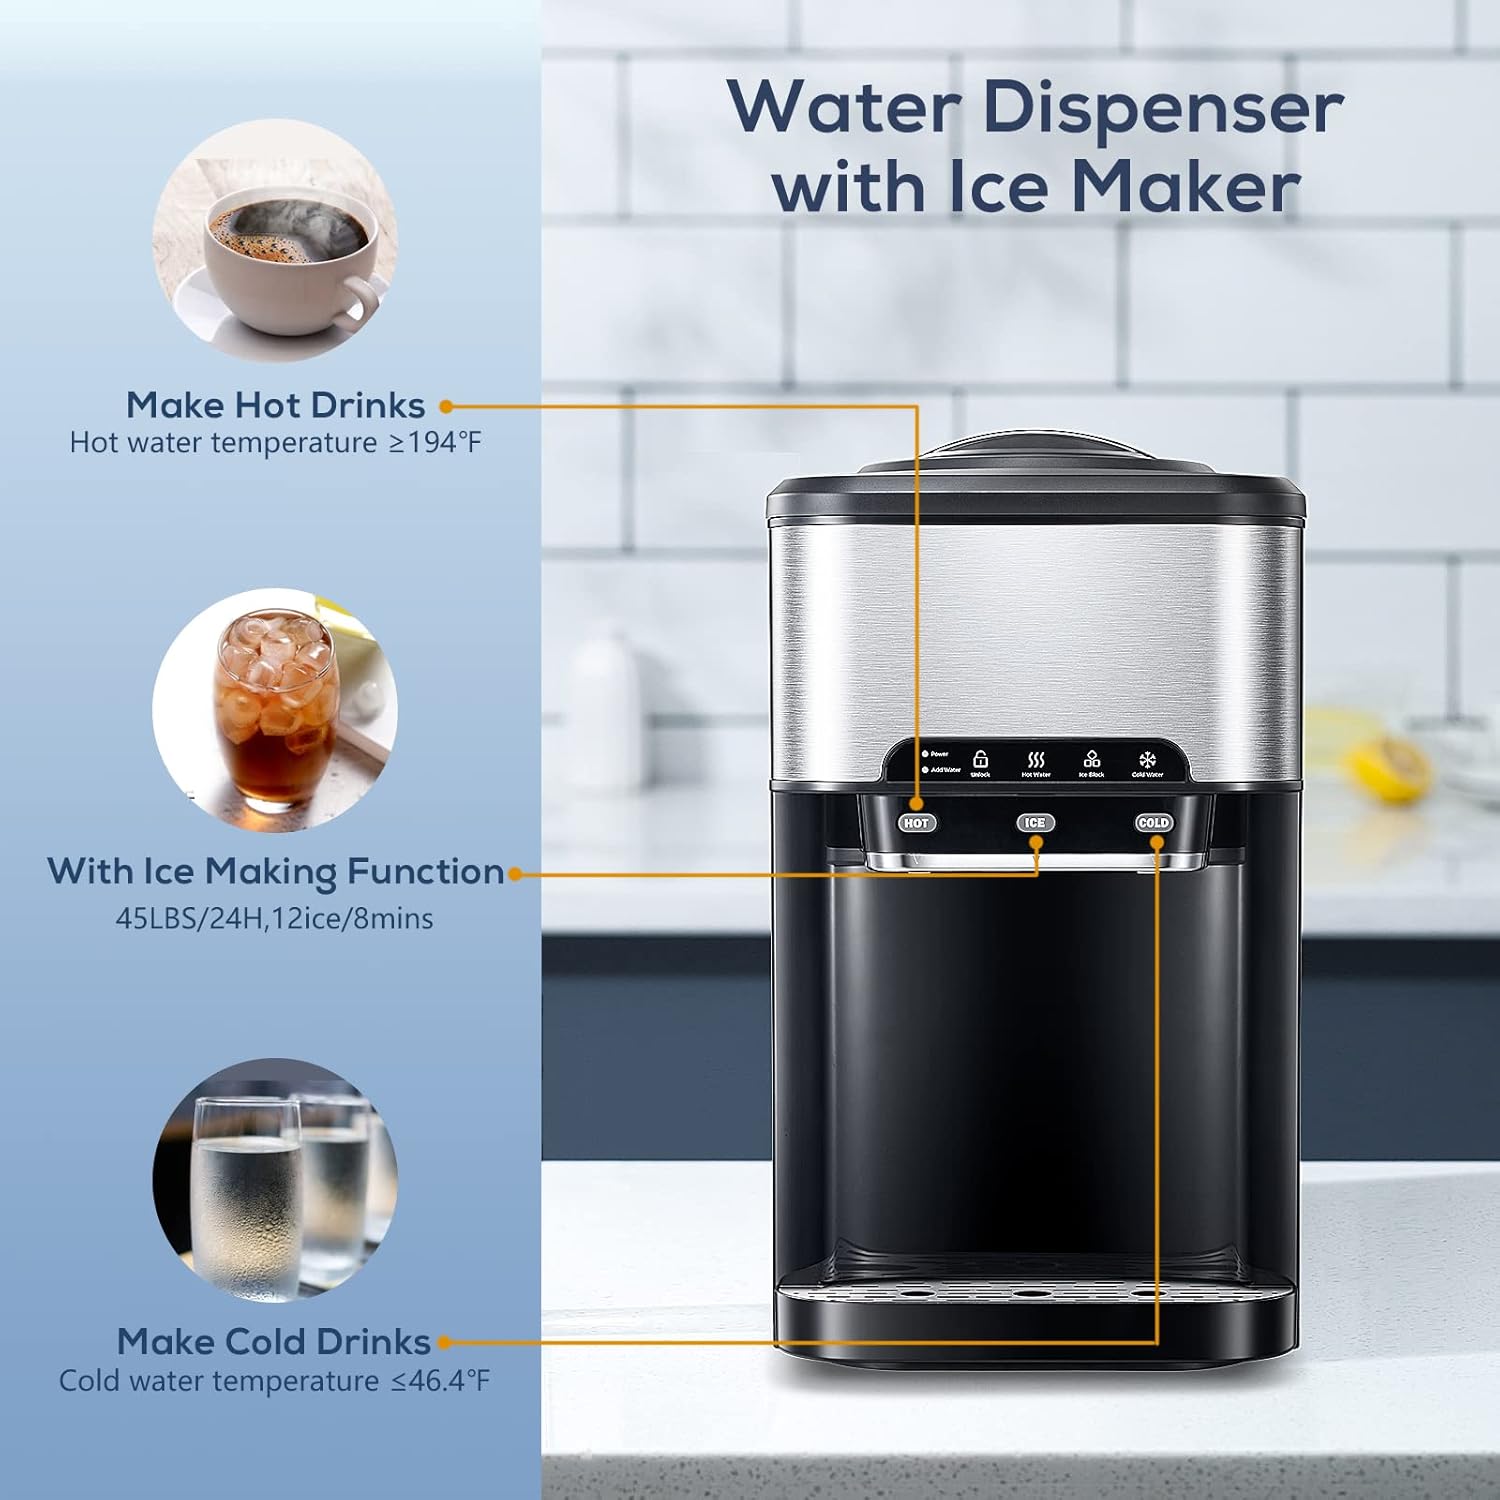
Figure 5.1: Diagram highlighting the hot water, ice making, and cold water functions of the dispenser.
5.1 Dispensing Hot Water
- Place a cup under the hot water spout.
- Press and hold the safety lock button (if applicable, indicated by 'Unlock' light) and then press the 'HOT' button to dispense hot water.
- Release the button to stop dispensing.
- The hot water temperature reaches approximately ≥194°F (90°C).
5.2 Dispensing Cold Water
- Place a cup under the cold water spout.
- Press the 'COLD' button to dispense cold water.
- Release the button to stop dispensing.
- The cold water temperature reaches approximately ≤46.4°F (8°C).
5.3 Ice Making Function
- Ensure the water reservoir is adequately filled. The 'Add Water' light will flash if water is low.
- Press the 'ICE' button on the control panel to activate the ice making function. The 'Ice Block' light will illuminate.
- The dispenser can produce 9 bullet-shaped ice cubes in approximately 6-13 minutes.
- Ice production capacity is approximately 45 lbs per 24 hours.
- The ice will be dispensed into the internal ice storage bin.
5.4 Water Shortage Indicator
If the water level in the reservoir is low, the 'Add Water' indicator light will flash red. Refill the water bottle or add water directly to the reservoir. The light will stop flashing once the water level is sufficient.
6. Maintenance and Cleaning
Regular cleaning is essential for maintaining hygiene and optimal performance of your water dispenser.
6.1 External Cleaning
- Unplug the dispenser from the power outlet.
- Wipe the exterior surfaces with a soft, damp cloth. Do not use abrasive cleaners or solvents.
- Dry thoroughly with a clean cloth.
6.2 Drip Tray Cleaning
- The drip tray is removable for easy cleaning.
- Slide out the drip tray, empty any collected water, and wash it with mild soap and water.
- Rinse thoroughly and dry before reinserting.
6.3 Internal Cleaning (Recommended Monthly)
To prevent mineral buildup and ensure fresh-tasting water, perform internal cleaning regularly.
- Unplug the dispenser and remove the water bottle.
- Drain all remaining water from the hot and cold tanks by dispensing from the spouts until no more water comes out.
- Prepare a cleaning solution: Mix 1 gallon of clean water with 1 cup of food-grade white vinegar, or use a commercially available water dispenser cleaning solution.
- Pour the cleaning solution into the water reservoir.
- Allow the solution to sit for 15-30 minutes.
- Dispense the entire cleaning solution through both hot and cold spouts into a bucket.
- Rinse the internal system thoroughly by pouring several gallons of fresh, clean water through the reservoir and dispensing it from both spouts until no vinegar smell or taste remains.
- Wipe down the inside of the reservoir with a clean cloth.
7. Troubleshooting
Refer to the following table for common issues and their solutions.
| Problem | Possible Cause | Solution |
|---|---|---|
| No hot water | Hot water switch off; heating element malfunction. | Ensure hot water switch is on. If problem persists, contact support. |
| No cold water | Cold water switch off; cooling element malfunction. | Ensure cold water switch is on. If problem persists, contact support. |
| No ice production | Water shortage; ice making function off; ambient temperature too high. | Check water level and refill if necessary. Ensure 'ICE' button is pressed. Place unit in a cooler environment. |
| Water tastes bad/odor | Unit needs cleaning; old water. | Perform thorough internal cleaning as per Section 6.3. Replace water bottle with fresh water. |
| Water leaking | Water bottle not seated correctly; damaged bottle; loose drain plug. | Re-seat water bottle. Check bottle for cracks. Ensure drain plug is secure. If leak persists, contact support. |
| Unit is noisy | Normal compressor/fan operation; unit not level; insufficient ventilation. | Ensure unit is on a level surface. Check for adequate ventilation. Some noise during cooling/ice making is normal. |
| Add Water light flashing | Water reservoir is low. | Refill the water bottle or add water directly to the reservoir. |
8. Specifications
| Feature | Specification |
|---|---|
| Model Number | KM-WD5820Y |
| Brand | Kismile |
| Type | 3-in-1 Water Dispenser with Ice Maker |
| Installation Type | Countertop |
| Water Access Location | Top Loading (for 3-5 Gallon bottles or direct fill) |
| Hot Water Temperature | ≥194°F (90°C) |
| Cold Water Temperature | ≤46.4°F (8°C) |
| Ice Production Rate | 9 cubes / 6-13 minutes |
| Daily Ice Capacity | Approx. 45 lbs / 24 hours |
| Material | Edible grade material |
| Color | Black and Silver |
| Product Dimensions (L x W x H) | 41.4 x 27.71 x 47.4 cm (16.3 x 10.9 x 18.7 inches) |
| Item Weight | 16.65 kg (36.7 lbs) |
| Power Source | Corded Electric |
9. Warranty and Support
For warranty information, please refer to the documentation provided with your purchase or contact the retailer where the product was acquired. For technical support, troubleshooting assistance beyond this manual, or to inquire about replacement parts, please contact Kismile customer service or the seller directly.
Please have your model number (KM-WD5820Y) and purchase date available when contacting support.


