1. Introduction
This manual provides essential instructions for the safe and efficient operation, maintenance, and troubleshooting of the ZGOOD YX-18LM 18L Stainless Steel Pressure Steam Sterilizer Autoclave. Please read this manual thoroughly before operating the device to ensure proper usage and to prevent injury or damage.
2. Safety Information
Operating a pressure steam sterilizer involves high temperatures and pressures. Adherence to safety guidelines is critical.
- Always ensure the unit is placed on a stable, level, heat-resistant surface.
- Do not operate the sterilizer near flammable materials.
- Verify that the power supply matches the unit's requirements (AC220V/50Hz or 110V/60Hz).
- Never open the lid while the sterilizer is under pressure. Always wait for the pressure gauge to read zero and for the unit to cool down.
- Regularly inspect the pressure gauge, safety valve, and sealing gasket for any signs of wear or damage.
- Use only distilled or demineralized water to prevent scale buildup and ensure proper operation.
- Wear appropriate personal protective equipment, such as heat-resistant gloves, when handling hot components or sterilized items.
3. Product Overview
The ZGOOD YX-18LM is an 18-liter stainless steel pressure steam sterilizer designed for effective sterilization of various materials. It features a robust construction and a double-scale indication pressure gauge for precise monitoring.
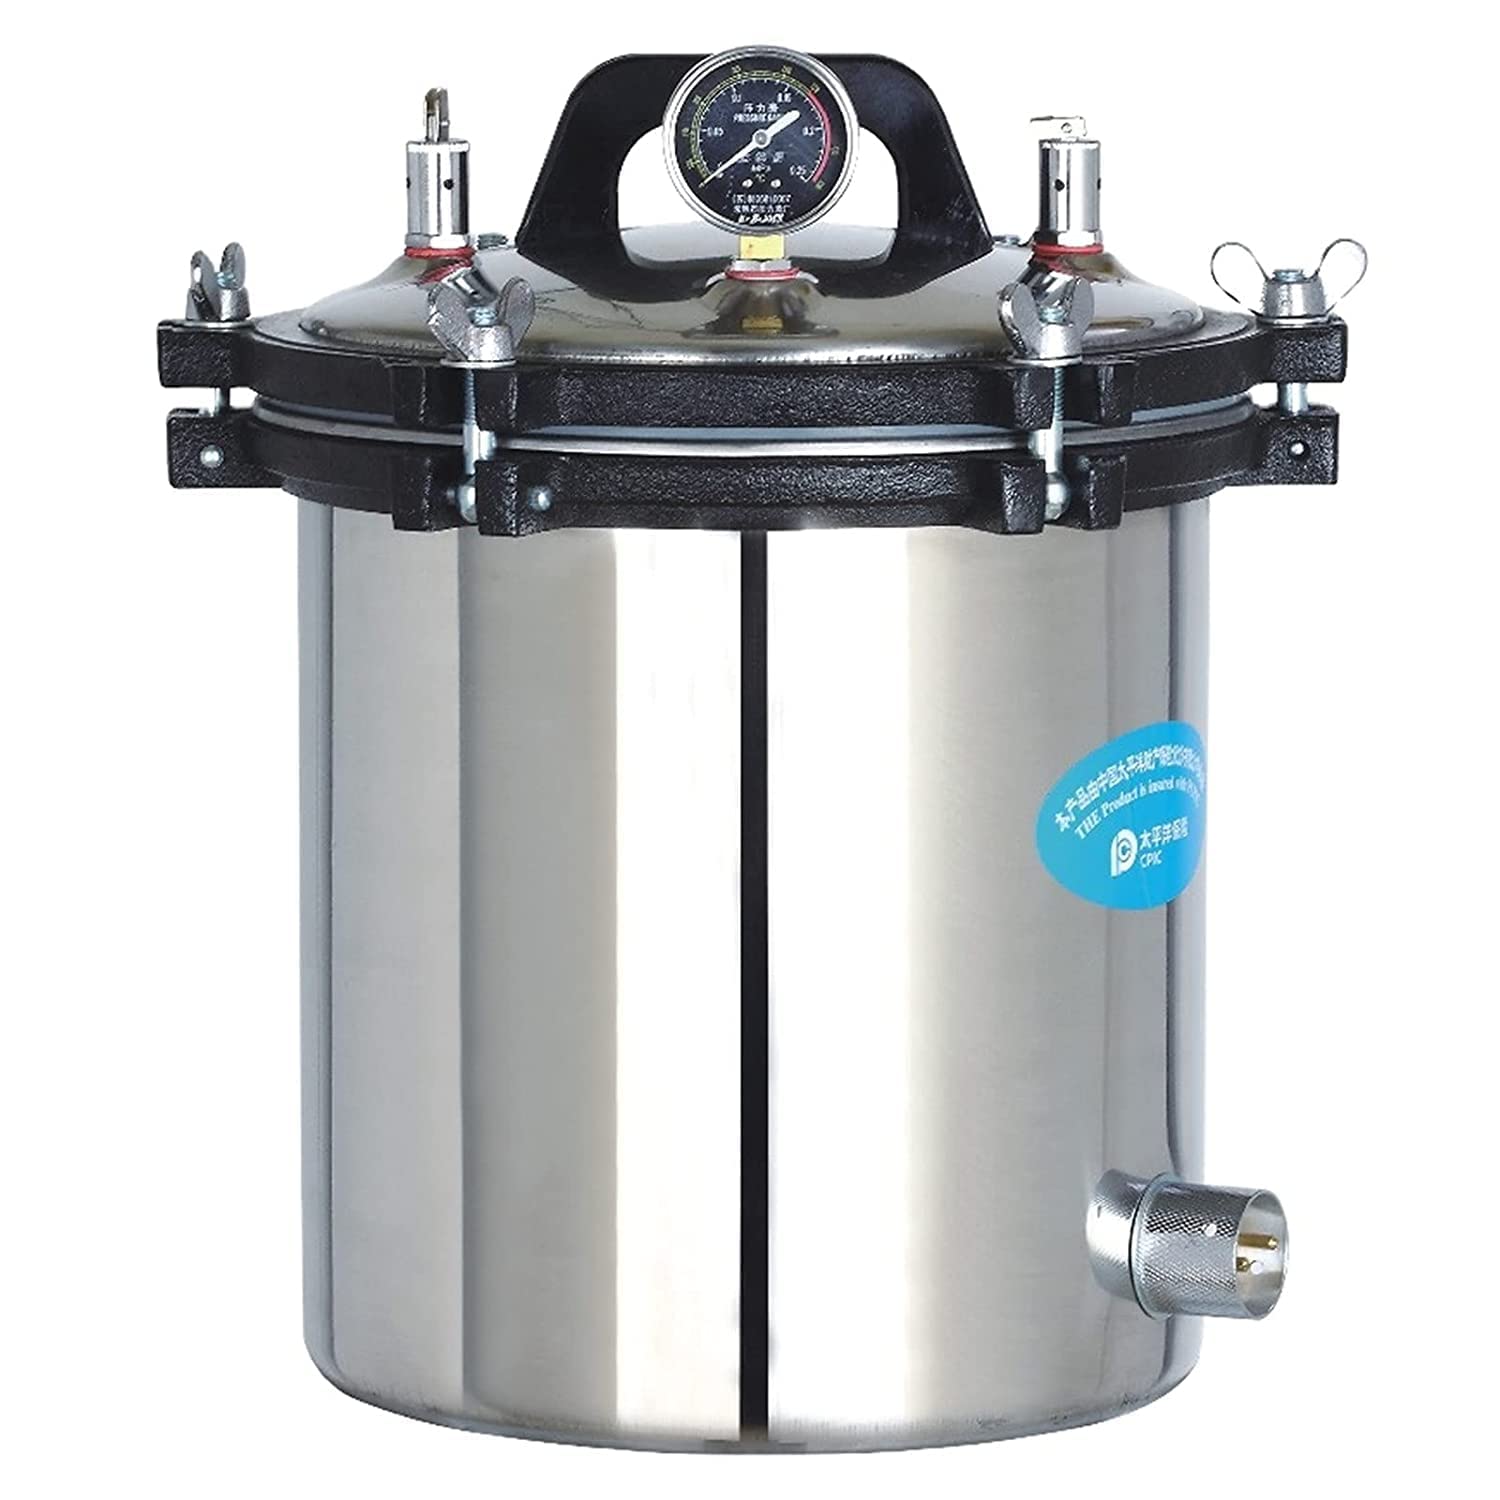
Figure 3.1: Front view of the ZGOOD YX-18LM 18L Stainless Steel Pressure Steam Sterilizer Autoclave. This image displays the complete unit, highlighting its stainless steel construction, the lid with its pressure gauge, and the secure clamping mechanism.

Figure 3.2: Diagram illustrating key components of the ZGOOD YX-18LM Autoclave. This view points out the pressure gauge, safety valve, lid handle, and the electrical power connector, providing a clear understanding of the device's main parts.

Figure 3.3: Detailed view of the autoclave lid, focusing on the pressure gauge and safety valves. The double-scale indication pressure gauge is clearly visible, along with the safety valve and air escape valve, which are crucial for safe operation.

Figure 3.4: View of the autoclave's interior, showing the included accessories. This image displays the power cord, instruction manual, and the handle for the sterilization basket, all neatly placed inside the lid for transport.
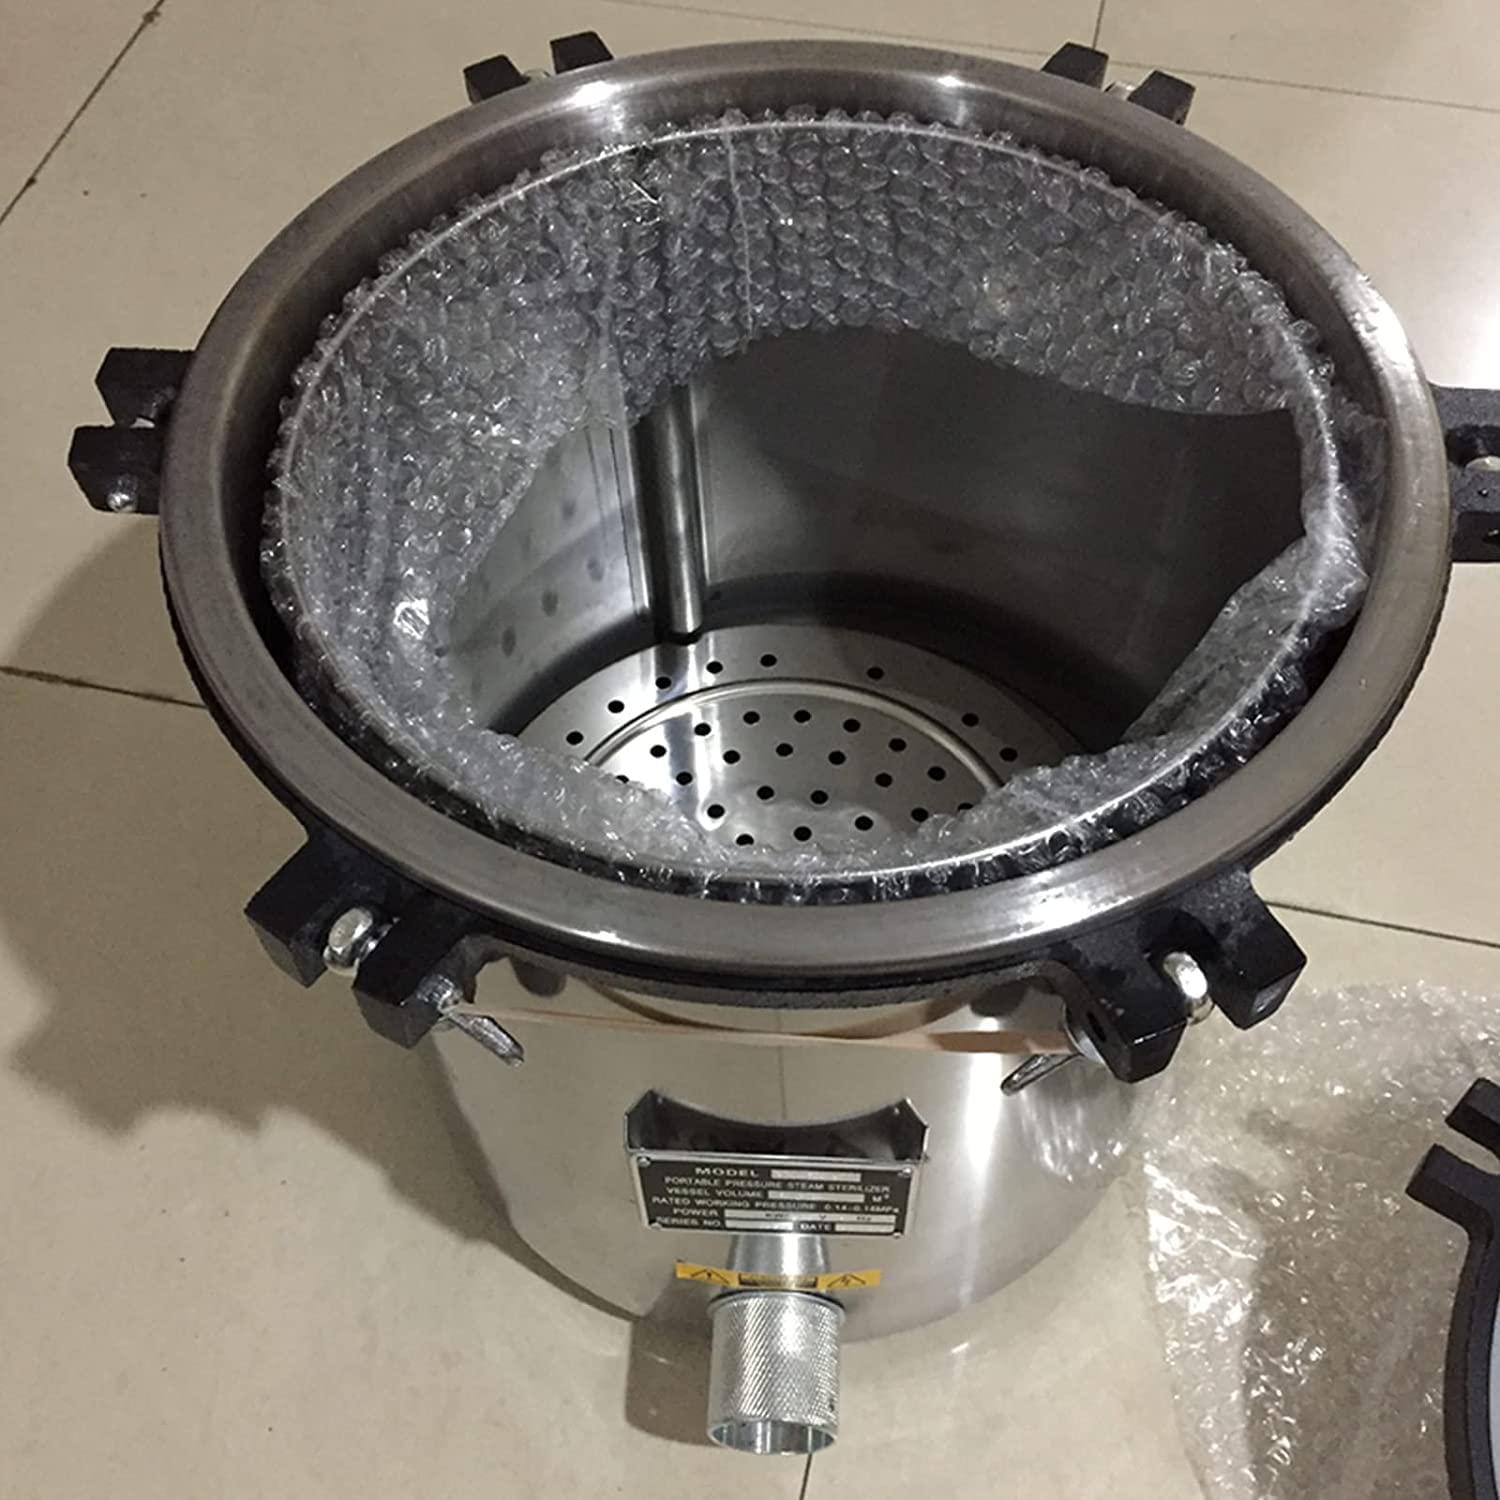
Figure 3.5: Internal view of the autoclave chamber with the perforated sterilization basket in place. This shows the area where items to be sterilized are placed, ensuring proper steam circulation.
4. Setup
- Unpacking: Carefully remove the sterilizer from its packaging. Inspect for any visible damage incurred during transit. Retain packaging for future transport or storage.
- Placement: Position the autoclave on a sturdy, level, and heat-resistant surface in a well-ventilated area. Ensure adequate clearance around the unit for heat dissipation and safe operation.
- Power Connection: Connect the power cord to the designated port on the sterilizer and then to a grounded electrical outlet that matches the specified voltage (AC220V/50Hz or 110V/60Hz).
- Initial Cleaning: Before first use, wipe the interior of the chamber and the sterilization basket with a damp cloth.
5. Operating Instructions
Follow these steps for safe and effective sterilization:
- Add Water: Pour distilled or demineralized water into the sterilization chamber. Ensure the water level is above the heating element but below the sterilization basket. Refer to the internal markings for appropriate water levels.
- Load Items: Place items to be sterilized into the sterilization basket. Ensure items are arranged to allow for proper steam penetration and circulation. Do not overfill the chamber.
- Seal the Lid: Carefully place the lid onto the chamber, aligning it correctly. Secure the lid by tightening the clamping bolts evenly and firmly. Ensure the sealing gasket is properly seated.
- Power On: Connect the unit to the power supply. The heating element will begin to heat the water, generating steam.
- Air Purge: As steam is generated, it will displace air from the chamber. Allow steam to escape through the air escape valve for several minutes until a steady stream of steam is observed, indicating that most air has been purged. Then, close the air escape valve.
- Sterilization Cycle: The pressure inside the chamber will begin to rise. Monitor the pressure gauge. Once the working pressure of 0.14–0.16 Mpa (corresponding to approximately 126℃) is reached, begin timing the sterilization cycle according to the requirements of the items being sterilized.
- Cool Down and Venting: After the sterilization cycle is complete, turn off the power. Allow the sterilizer to cool down naturally until the pressure gauge reads zero. Do not force cool the unit or open the lid while under pressure. Once pressure is at zero, slowly open the air escape valve to ensure all residual pressure is released.
- Unload Items: Carefully open the clamping bolts and remove the lid. Using heat-resistant gloves, remove the sterilized items. Be aware that items and the interior of the sterilizer will still be hot.
6. Maintenance
Regular maintenance ensures the longevity and safe operation of your sterilizer.
- Cleaning: After each use, clean the interior of the chamber and the sterilization basket. Remove any residue or scale buildup. Use a non-abrasive cleaner if necessary.
- Gasket Inspection: Periodically inspect the rubber sealing gasket on the lid for cracks, hardening, or deformation. Replace the gasket if any damage is observed to ensure a proper seal.
- Safety Valve Check: Annually, or as recommended by local regulations, have the safety valve inspected by a qualified technician to ensure it functions correctly and releases pressure at the specified maximum safety pressure (0.165 Mpa).
- Water Quality: Always use distilled or demineralized water to prevent mineral deposits that can affect heating efficiency and damage components.
7. Troubleshooting
Refer to the following table for common issues and their solutions:
| Problem | Possible Cause | Solution |
|---|---|---|
| Sterilizer not reaching pressure | Lid not sealed properly; insufficient water; faulty heating element; air escape valve open. | Ensure lid is securely clamped; add more water; check power connection; close air escape valve after purging. |
| Steam leaking from lid | Damaged or improperly seated gasket; lid not tightened evenly. | Inspect and reseat/replace gasket; tighten lid clamps evenly and firmly. |
| No power indication | Power cord disconnected; circuit breaker tripped; faulty power switch. | Check power cord connection; reset circuit breaker; contact qualified service personnel. |
If the problem persists after attempting these solutions, contact customer support.
8. Specifications
| Feature | Specification |
|---|---|
| Model | YX-18LM |
| Sterilizing Volume | 18 Liters (280mm diameter * 260mm height) |
| Working Pressure | 0.14 – 0.16 Mpa |
| Working Temperature | 126℃ |
| Max. Safety Pressure | 0.165 Mpa |
| Power/Consumption | AC220V/50Hz/2KW or 110V/60Hz |
| Dimensions (L×W×H) | 410 × 410 × 430 mm |
| Gross Weight / Net Weight | 16 KG |
| Material | Fully Stainless Steel Structure |
| UPC | 737417205420 |
9. Warranty and Support
For warranty information, technical support, or service inquiries, please contact the seller or manufacturer directly. Retain your proof of purchase for warranty claims. Specific warranty terms and conditions may vary.


