1. Introduction
The East Tester ET4401 is a high-precision LCR meter designed for accurate measurement of inductance (L), capacitance (C), and resistance (R), as well as impedance (Z) and various secondary parameters. This instrument features a 3.5-inch TFT LCD screen, offering clear display of measurement results and settings. It supports multiple testing frequencies and levels, internal bias, and various interfaces for connectivity. This manual provides essential information for the safe and effective use of your ET4401 LCR Meter.

Figure 1: Front view of the East Tester ET4401 LCR Meter.
2. Setup
2.1 Unboxing and Inspection
Carefully remove the ET4401 LCR Meter and its accessories from the packaging. Verify that all components are present and undamaged. The standard package typically includes the LCR meter unit, a power cable, and 4-terminal test leads.
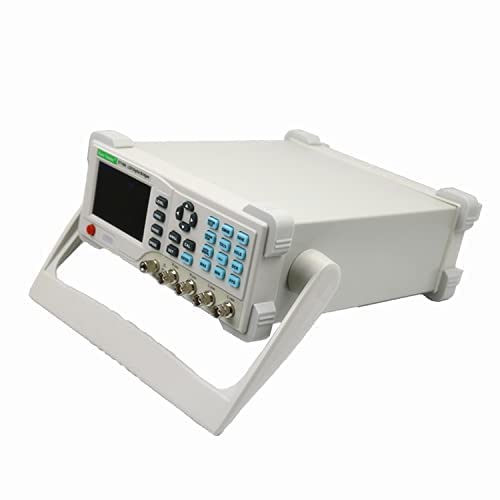
Figure 2: ET4401 LCR Meter with power cable and test leads.
2.2 Power Connection
- Ensure the power switch on the rear panel is in the OFF position.
- Connect the provided power cable to the AC inlet on the rear panel of the meter.
- Connect the other end of the power cable to a suitable AC power outlet.
- Voltage Selection: On the rear panel, verify the input voltage selection switch is set correctly for your region (110V or 220V). Adjust if necessary.
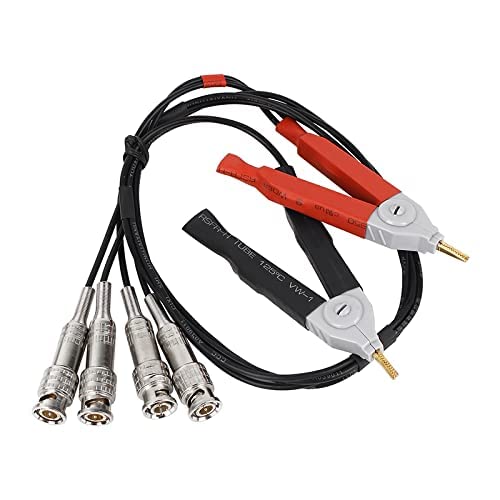
Figure 3: Rear panel with power connection and voltage selector.
2.3 Test Lead Connection
The ET4401 uses 4-terminal (Kelvin) test leads for accurate measurements, minimizing the effects of lead resistance and inductance. Connect the test leads to the corresponding BNC connectors on the front panel. Ensure a secure connection for each lead.
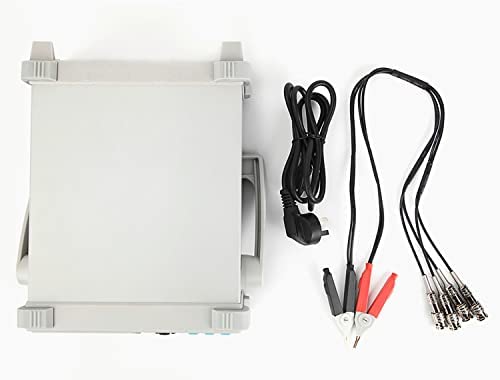
Figure 4: Included 4-terminal test leads.
2.4 Initial Power On
After connecting the power and test leads, switch the power button on the rear panel to the ON position. The meter will perform a self-test and display the main measurement interface.
3. Operating Instructions
The ET4401 features a user-friendly interface with a 3.5-inch TFT LCD and a combination of function buttons and a navigation keypad.
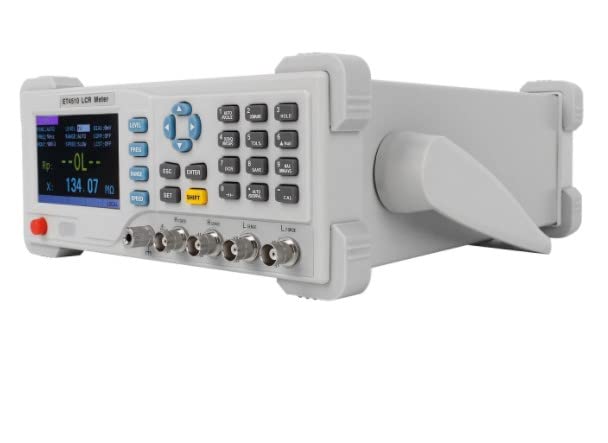
Figure 5: Control panel and display.
3.1 Basic Measurements (L/C/R/Z)
- Press the FUNC button to cycle through the primary measurement parameters: L (Inductance), C (Capacitance), R (Resistance), and Z (Impedance).
- Connect the component to be measured to the test leads. The display will show the primary and secondary parameters.
3.2 Test Frequency Selection
The ET4401 supports 10 fixed test frequencies: 100Hz, 120Hz, 200Hz, 400Hz, 800Hz, 1kHz, 2kHz, 4kHz, 8kHz, and 10kHz.
- Press the FREQ button to enter the frequency selection menu.
- Use the arrow keys (Up/Down) to navigate through the available frequencies.
- Press ENTER to confirm your selection.
3.3 Test Level Adjustment
The meter offers six fixed test voltage levels: 0.1V, 0.3V, 0.6V, 1V, 1.5V, and 2V.
- Press the LEVEL button to enter the test level selection menu.
- Use the arrow keys (Up/Down) to select the desired test level.
- Press ENTER to confirm.
3.4 Internal Bias Voltage
The internal bias voltage can be adjusted from 0V to 1500mV in 1mV steps.
- Access the bias setting through the menu (refer to the on-screen prompts or full manual for exact navigation).
- Use the arrow keys to adjust the bias voltage.
- Press ENTER to save the setting.
3.5 DCR (DC Resistance) Measurement
The ET4401 supports direct current resistance measurement.
- Press the DCR button to switch to DCR measurement mode.
- Connect the component to the test leads. The DCR value will be displayed.
3.6 Electrolytic Capacitor Measurement Mode
This mode is specifically designed for measuring electrolytic capacitors.
- Select the electrolytic capacitor measurement mode from the function menu (refer to the full manual for specific button sequence).
- Connect the electrolytic capacitor to the test leads, observing polarity if applicable.
3.7 Calibration Function
The meter includes Open Circuit and Short Circuit calibration functions to ensure measurement accuracy.
- Press the CAL button to access calibration options.
- Follow the on-screen instructions for Open Circuit calibration (no component connected) and Short Circuit calibration (test leads shorted).
3.8 Language and Backlight Settings
The meter supports both Chinese and English languages, and the backlight brightness is adjustable.
- Navigate to the System Settings menu (often accessible via a SET or similar button).
- Select 'Language' to switch between Chinese and English.
- Select 'Brightness' to adjust the display backlight intensity.
3.9 Operational Demonstration Video
Video 1: A demonstration of the East Tester ET4401 LCR Meter's various measurement functions and settings, including language selection and component testing.
4. Maintenance
4.1 Cleaning
To clean the instrument, use a soft, dry cloth. Do not use abrasive cleaners, solvents, or harsh chemicals, as these may damage the casing or display. Ensure the device is powered off and unplugged before cleaning.
4.2 Storage
When not in use, store the ET4401 LCR Meter in a dry, dust-free environment, away from direct sunlight and extreme temperatures. Keep it in its original packaging or a protective case to prevent damage.
4.3 Calibration
For optimal accuracy, periodic professional calibration of the ET4401 LCR Meter is recommended. Refer to a qualified service center for calibration services.
5. Troubleshooting
5.1 "OL" or "Over Limit" Display
If the display shows "OL" (Over Limit) or similar, it indicates that the measured value is outside the meter's range or there is an open circuit. Check the following:
- Ensure the component is properly connected to the test leads.
- Verify the component is not damaged or open.
- Select an appropriate measurement range if available, or a different test frequency.
5.2 Inaccurate Readings
If measurements appear inaccurate:
- Perform an Open Circuit and Short Circuit calibration as described in Section 3.7.
- Ensure the test leads are clean and securely connected.
- Check for external interference or electromagnetic fields.
- Verify the selected test frequency and level are appropriate for the component being measured.
5.3 Display Flickering
Some users have reported display flickering, particularly at maximum brightness settings. If this occurs, try reducing the backlight brightness in the System Settings menu (Section 3.8).
5.4 No Power
If the unit does not power on:
- Check that the power cable is securely connected to both the meter and the power outlet.
- Verify the power outlet is functional.
- Ensure the voltage selection switch on the rear panel is set correctly (110V/220V).
- Check the fuse located near the AC inlet on the rear panel. Replace if blown (use only specified fuse type).
6. Specifications
The following table outlines the key technical specifications for the East Tester ET4401 LCR Meter:
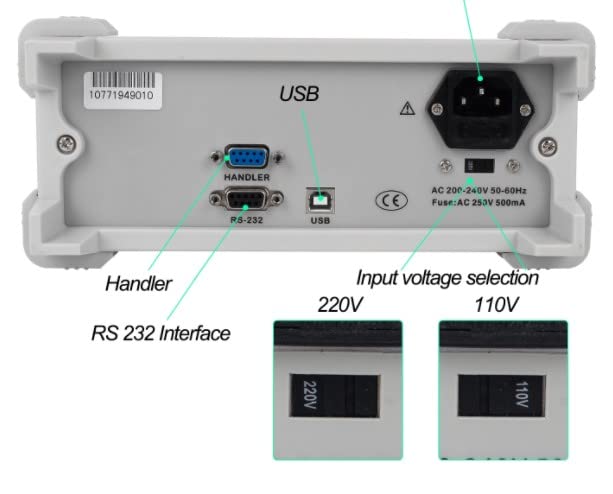
Figure 6: Main Technical Indications (refer to ET4401 column).
| Feature | Specification (ET4401) |
|---|---|
| Testing Frequency | 10 Points (100, 120, 200, 400, 800, 1K, 2K, 4K, 8K, 10K Hz) |
| Display Screen | 3.5” TFT LCD |
| Number of Display Digits | Principal parameter: 5 digits; Secondary parameter: 5 digits |
| Measured Parameters | Principal: L/C/R/Z; Secondary: X/D/Q/θ/ESR |
| Measurement Range (L) | 0.001µH~9999H |
| Measurement Range (C) | 0.001pF~99.999mF |
| Measurement Range (R) | 0.0001Ω~99.99MΩ |
| Basic Accuracy | 0.2% |
| Measuring Display Speed | 2 times/s (slow), 4 times/s (medium), 8 times/s (fast) |
| Internal Bias | 0-1500mV adjustable, 1mV step |
| Testing Level | Six fixed levels (0.1V, 0.3V, 0.6V, 1V, 1.5V, 2V) |
| Signal Source Output Impedance | 30Ω, 100Ω |
| Calibration Function | Open circuit calibration, short circuit calibration |
| Screening Function | Limit range -50% to +50%, fixed points 1%, 5%, 10%, 20% |
| Comparator | 5 groups sorting (3 qualified, 1 unqualified, 1 auxiliary) |
| Interfaces | Standard: RS232 (or 485), USB Device, Handler; Optional: GPIB, USB Host |
| Other Features | DCR support, electrolytic capacitor measurement mode, adjustable backlight brightness, Chinese/English language options |
| Dimensions (Approx.) | 270mm (10.6 in) W x 105mm (4.1 in) H x 300mm (11.8 in) D |
| Item Weight | 6.49 pounds |

Figure 7: Approximate dimensions of the ET4401 LCR Meter.
7. Warranty and Support
For warranty information, technical support, or service inquiries, please refer to the documentation provided with your purchase or contact the East Tester customer service directly. Keep your purchase receipt as proof of purchase for warranty claims.