1. Introduction
This user manual provides comprehensive instructions for the setup, operation, and maintenance of your Karlsson Silver Mirror LED Alarm Clock. Please read this manual thoroughly before using the product to ensure proper function and longevity.
2. Product Overview
The Karlsson Silver Mirror LED Alarm Clock is a modern and functional timepiece designed for various room types including bedrooms, living rooms, and home offices. It features a digital display with a mirror finish and an alarm function.
2.1 Components
- Karlsson Silver Mirror LED Alarm Clock unit
- USB power cable
- (Batteries not included: Requires 3 x AAA LR03 batteries)

Image: Front view of the Karlsson Silver Mirror LED Alarm Clock, showing the digital LED display and the mirror finish. The time displayed is 20:00.
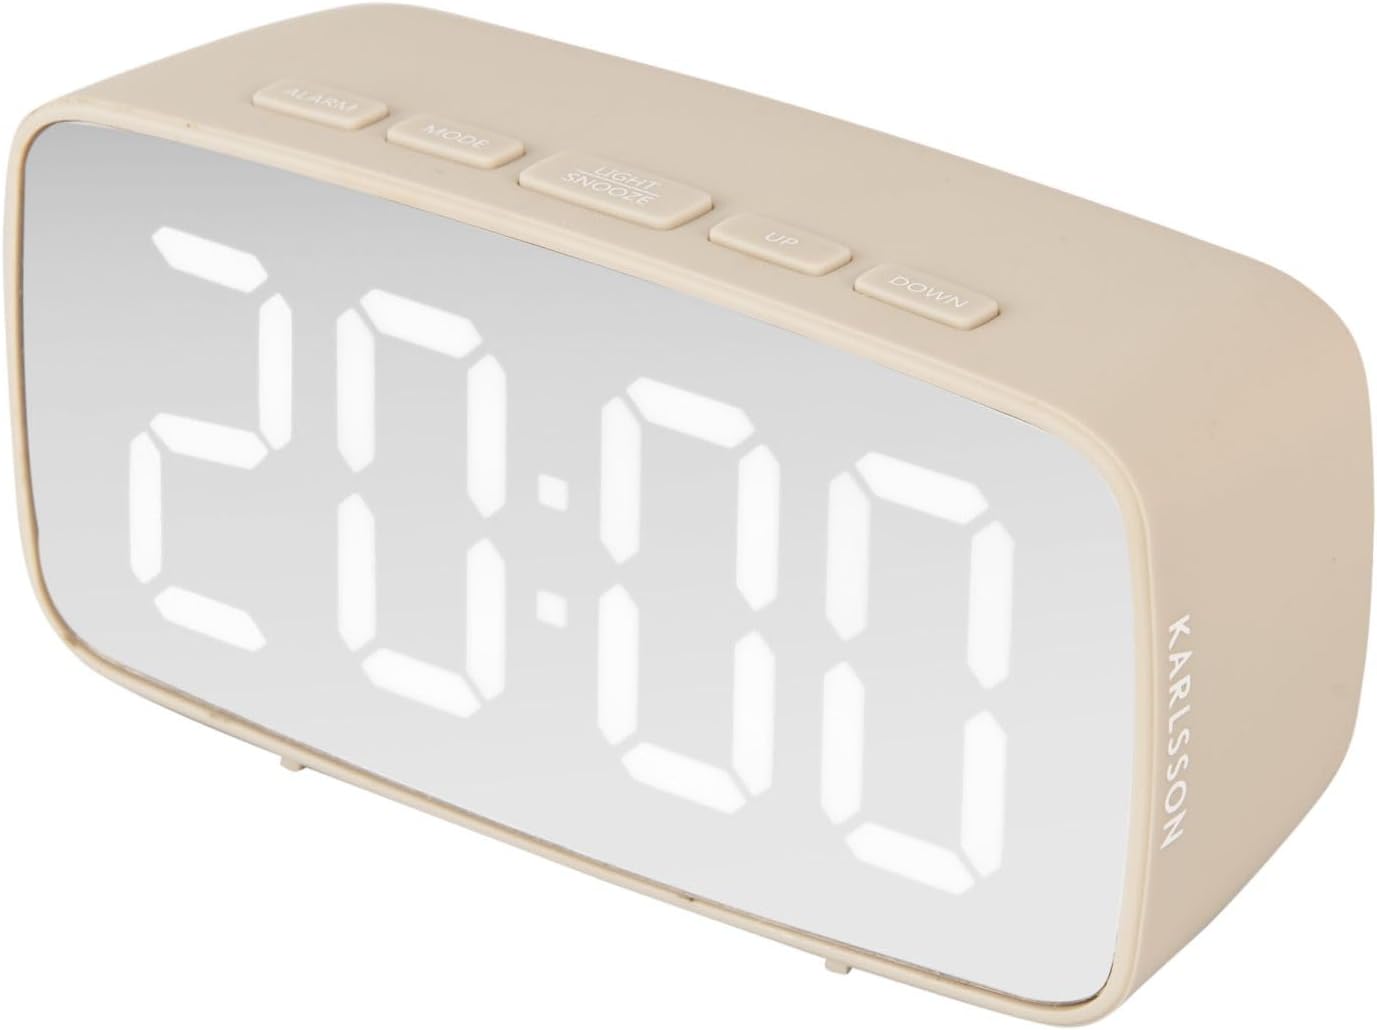
Image: Side view of the Karlsson Silver Mirror LED Alarm Clock, highlighting the Karlsson branding on the side of the unit.

Image: Rear view of the Karlsson Silver Mirror LED Alarm Clock, showing the battery compartment cover, speaker grilles, and the DC 5V USB power input port.

Image: The included USB power cable, used to power the Karlsson Silver Mirror LED Alarm Clock.
3. Setup
3.1 Powering the Clock
- Open the battery compartment cover located on the back of the clock.
- Insert 3 x AAA LR03 batteries, ensuring correct polarity (+/-).
- Alternatively, connect the provided USB cable to the DC 5V port on the back of the clock and plug the other end into a compatible USB power adapter (not included) or a USB port.
- The clock can be powered by batteries for portability or by USB for continuous operation.
3.2 Initial Time Setting
Upon first power-up, the display will illuminate. Follow the operating instructions to set the current time.
4. Operating Instructions
The clock features several buttons on the top for easy operation:
- ALARM: Used to set and activate/deactivate the alarm.
- MODE: Used to switch between time display, alarm setting, and other modes.
- LIGHT/SNOOZE: Used to adjust display brightness or activate snooze when the alarm sounds.
- UP: Used to increase values during setting or navigate menus.
- DOWN: Used to decrease values during setting or navigate menus.
4.1 Setting the Time
- Press the MODE button once to enter time setting mode. The hour digits will flash.
- Use the UP or DOWN buttons to adjust the hour.
- Press MODE again to move to minute setting. The minute digits will flash.
- Use the UP or DOWN buttons to adjust the minute.
- Press MODE a third time to confirm and exit time setting mode.
4.2 Setting the Alarm
- Press the ALARM button once to enter alarm setting mode. The alarm hour digits will flash.
- Use the UP or DOWN buttons to adjust the alarm hour.
- Press ALARM again to move to alarm minute setting. The alarm minute digits will flash.
- Use the UP or DOWN buttons to adjust the alarm minute.
- Press ALARM a third time to confirm and exit alarm setting mode.
4.3 Activating/Deactivating the Alarm
- To activate the alarm, press the ALARM button repeatedly until the alarm icon (usually a bell symbol) appears on the display.
- To deactivate the alarm, press the ALARM button repeatedly until the alarm icon disappears from the display.
4.4 Snooze Function
When the alarm sounds, press the LIGHT/SNOOZE button to activate the snooze function. The alarm will temporarily stop and sound again after a few minutes (default snooze time may vary, typically 5-9 minutes).
4.5 Display Brightness Adjustment
Press the LIGHT/SNOOZE button (when the alarm is not sounding) to cycle through different brightness levels for the LED display.
5. Maintenance
- Clean the clock surface with a soft, dry cloth. Do not use abrasive cleaners or solvents.
- Avoid exposing the clock to extreme temperatures, direct sunlight, or high humidity.
- If using batteries, replace them when the display dims or the clock functions become erratic. Remove batteries if the clock will not be used for an extended period.
6. Troubleshooting
| Problem | Possible Cause | Solution |
|---|---|---|
| Display is dim or off. | Low batteries or power disconnected. | Replace batteries or ensure USB cable is securely connected to a power source. |
| Alarm does not sound. | Alarm not activated or set incorrectly. | Ensure alarm is activated (alarm icon visible) and the alarm time is correctly set. |
| Buttons are unresponsive. | Temporary software glitch or low power. | Remove and reinsert batteries, or disconnect and reconnect USB power to reset the device. |
7. Specifications
| Feature | Detail |
|---|---|
| Model Number | PTG-KA5876WG |
| Dimensions (L x W x H) | 12.2 cm x 4 cm x 6 cm |
| Weight | 200 Grams |
| Main Material | Acrylonitrile Butadiene Styrene (ABS) |
| Power Source | 3 x AAA LR03 batteries (not included) or USB DC 5V |
| Display Type | Digital LED |
| Special Features | Alarm, Snooze, Brightness Adjustment, Mirror Display |
8. Warranty and Support
For warranty information and customer support, please refer to the official Karlsson website or contact your retailer. Keep your purchase receipt as proof of purchase for any warranty claims.
Official Karlsson Website: www.karlssonclocks.com


