1. Introduction
This manual provides essential information for the safe and effective operation of your DuroMax XP15000HX 15,000-Watt Dual Fuel Portable Generator. Please read all instructions carefully before setup, operation, or maintenance. Keep this manual for future reference.
Video: DuroMax Home Power Backup. This video provides an overview of the generator's capabilities for home power backup.
2. Safety Information
Always operate the generator outdoors in a well-ventilated area, at least 5 feet away from open doors, windows, and vents to prevent carbon monoxide poisoning. The generator is equipped with a CO Alert system that automatically shuts down the unit if harmful carbon monoxide levels are detected.
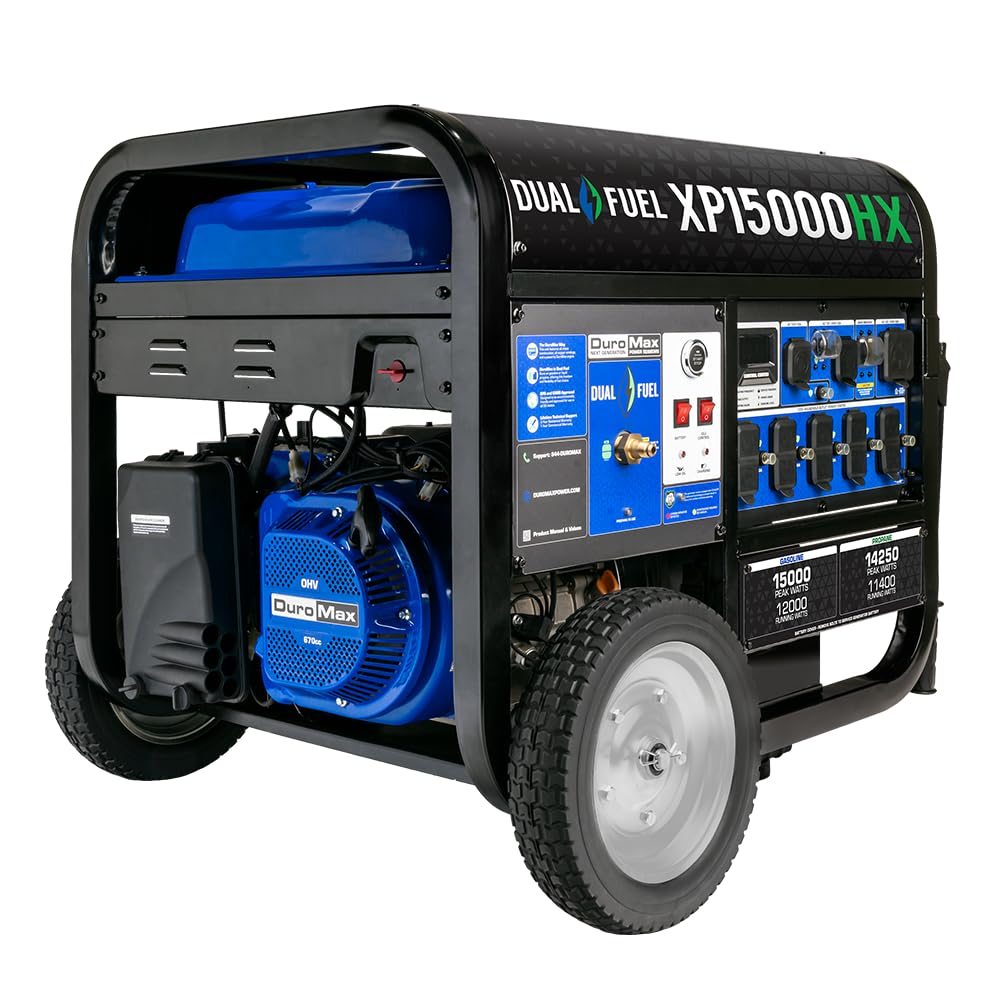
Image: The DuroMax XP15000HX Dual Fuel Portable Generator shown outdoors, highlighting its robust design and dual fuel capability (Gasoline and Propane).
3. Package Contents
Upon receiving your generator, carefully inspect the packaging for any damage. Unpack all components and verify that the following items are included:
- XP15000HX Generator
- Oil Funnel
- Spark Plug Wrench
- Tool Set
- Wheel & Handle Kit
- Propane Regulator
- Remote Control
- Owner's Manual
Video: DuroMax Generator Unboxing. This video demonstrates the unboxing process and shows the included components.
4. Assembly
Follow these steps to assemble your generator before initial use:
- Attach the Wheels and Handles: Securely attach the wheels and handles using the provided hardware from the Wheel & Handle Kit.
- Remove Shipping Brace: Locate and remove any shipping braces or protective materials from the generator frame.

Image: Two individuals are shown attaching the wheels to the generator frame, illustrating the assembly process.
5. Initial Setup
Before starting the generator, ensure proper fluid levels and connections.
5.1. Add Engine Oil
The engine is shipped without oil. Fill with 10W-30 oil before starting. Do not overfill. Use the provided oil funnel for easy pouring.
5.2. Connect Battery
The battery is shipped disconnected. Connect the battery terminals as per the instructions in the owner's manual.
5.3. Generator Placement
Place the generator on a level surface outdoors, away from any enclosed areas, windows, or doors to ensure adequate ventilation and prevent carbon monoxide buildup.
Video: DuroMax FAQ and Setup. This video covers frequently asked questions and setup procedures, including adding oil and connecting the battery.
6. Fueling Options
The DuroMax XP15000HX is a dual fuel generator, capable of running on either gasoline or propane.
6.1. Gasoline Operation
Fill the fuel tank with unleaded gasoline. The tank has a capacity of 13.2 gallons. Ensure the fuel cap is securely tightened.
6.2. Propane Operation
Connect a propane tank to the generator's propane inlet using the provided propane regulator and hose. Propane offers a cleaner burn and longer shelf life compared to gasoline.

Image: The DuroMax XP15000HX generator is shown with indicators for gasoline (15000 peak watts, 12000 running watts) and propane (14250 peak watts, 11400 running watts) power outputs.

Image: A detailed view of the generator's front-facing fuel interface, which allows for automatic propane or gasoline fuel selection and includes a push-button start and CO Alert sensor.
7. Operating Instructions
Familiarize yourself with the control panel and starting procedures.
7.1. Control Panel Overview
The fully loaded power panel includes:
- Digital Multimeter: Displays voltage, frequency, total hours run, and hours until recommended maintenance.
- Push-Button Start: For easy ignition.
- CO Alert Sensor: Automatically shuts down the generator if harmful carbon monoxide fumes are detected.
- Five 120V GFCI household outlets.
- One 120V 30AMP outlet.
- One 120/240V 30AMP twist-lock outlet.
- Heavy-duty 120/240V 50AMP outlet (transfer switch ready).

Image: A close-up of the generator's control panel, showing the digital multimeter, various AC outlets (120V, 120/240V 30A, 120/240V 50A), and main breaker.
7.2. Starting the Generator
- Ensure the generator is placed outdoors and on a level surface.
- Verify engine oil level.
- Select your desired fuel type (gasoline or propane) using the fuel selector switch.
- Press the 'Engine Start/Stop' button to start the generator.
- Alternatively, use the provided remote control for convenient starting.

Image: A remote start key fob with 'Start' and 'Stop' buttons, designed for convenient operation of the generator.
8. Electrical Connections
Connect your appliances or home transfer switch to the appropriate outlets on the generator.
8.1. Connecting Appliances
Plug your 120V appliances into the GFCI household outlets. For higher power demands, use the 30AMP or 50AMP outlets with compatible cords.
8.2. Transfer Switch Ready
The 120/240V 50AMP outlet is designed to be transfer switch ready, allowing for seamless integration with your home's electrical system for whole-home power backup (transfer switch and cord sold separately).

Image: A person is shown plugging an electrical cord into one of the generator's outlets on the control panel, demonstrating a typical electrical hookup.

Image: A detailed view of the heavy-duty 120/240V 50AMP twist-lock outlet, labeled as 'Home Power Backup-Ready', indicating its suitability for connecting to a transfer switch.
9. Maintenance
Regular maintenance ensures the longevity and optimal performance of your generator. Refer to the owner's manual for a detailed maintenance schedule.
- Oil Changes: Change the engine oil after the initial break-in period and then according to the recommended intervals.
- Air Filter: Inspect and clean or replace the air filter regularly.
- Spark Plug: Check and replace the spark plug as needed.
- Fuel System: If storing for extended periods, drain the gasoline or use a fuel stabilizer. Propane has a longer shelf life.
- Battery: Keep the battery charged, especially during periods of inactivity. A battery maintainer is recommended.
10. Troubleshooting
If your generator experiences issues, consult the troubleshooting section in your owner's manual. Common issues and their solutions include:
- Generator will not start: Check fuel levels, oil levels, battery connection, and spark plug. Ensure the fuel selector is in the correct position.
- No power output: Check circuit breakers on the control panel and ensure they are in the 'ON' position. Verify all electrical connections.
- Engine runs rough: Inspect the air filter, spark plug, and fuel quality.
For persistent issues, contact DuroMax customer support.
11. Specifications
| Feature | Specification |
|---|---|
| Brand | DuroMax |
| Model Name | XP15000HX |
| Wattage (Gasoline) | 15000 Peak Watts / 12000 Running Watts |
| Wattage (Propane) | 14250 Peak Watts / 11400 Running Watts |
| Fuel Type | Gasoline, Liquefied Petroleum Gas |
| Engine Type | 670cc OHV 4-Stroke Engine |
| Tank Volume | 13.2 Gallons |
| Voltage | 120V / 240V |
| Total Power Outlets | 10 (including 120V GFCI, 120V 30A, 120/240V 30A, 120/240V 50A) |
| Special Features | CO Sensor, Digital Display, Dual Fuel, Portable, Remote Start |
| Item Weight | 345 Pounds |
| Product Dimensions | 38"L x 28"W x 33"H |
| Construction | All Metal Construction, 100% Copper Windings |

Image: A diagram illustrating the dimensions of the DuroMax XP15000HX generator: 38 inches long, 28 inches wide, and 33 inches high.

Image: A graphic emphasizing the use of 100% copper windings in DuroMax generators, noting their superior conductivity and longer lifespan compared to aluminum.
12. Warranty and Support
Your DuroMax XP15000HX generator comes with a 5-Year Warranty. For technical support, parts, or warranty claims, please contact DuroMax customer support.
- Customer Support: Refer to the contact information provided in your owner's manual or visit the official DuroMax website.


