
Introduction
Thank you for choosing the Minolta MNCD450 Dash Cam. This device is designed to record your driving journey in high definition, providing security and evidence in case of incidents. This manual provides detailed instructions for the proper installation, operation, and maintenance of your dash cam. Please read it thoroughly before use.
Package Contents
Ensure all items are present in the package:
- Minolta MNCD450 Dash Cam
- Windshield Mount
- USB Cable
- DC Car Adaptor
- 16GB Memory Card
Product Overview
The Minolta MNCD450 Dash Cam features a compact design with a 4.0-inch LCD screen and a 120-degree wide-angle lens. Familiarize yourself with the device's components and controls.
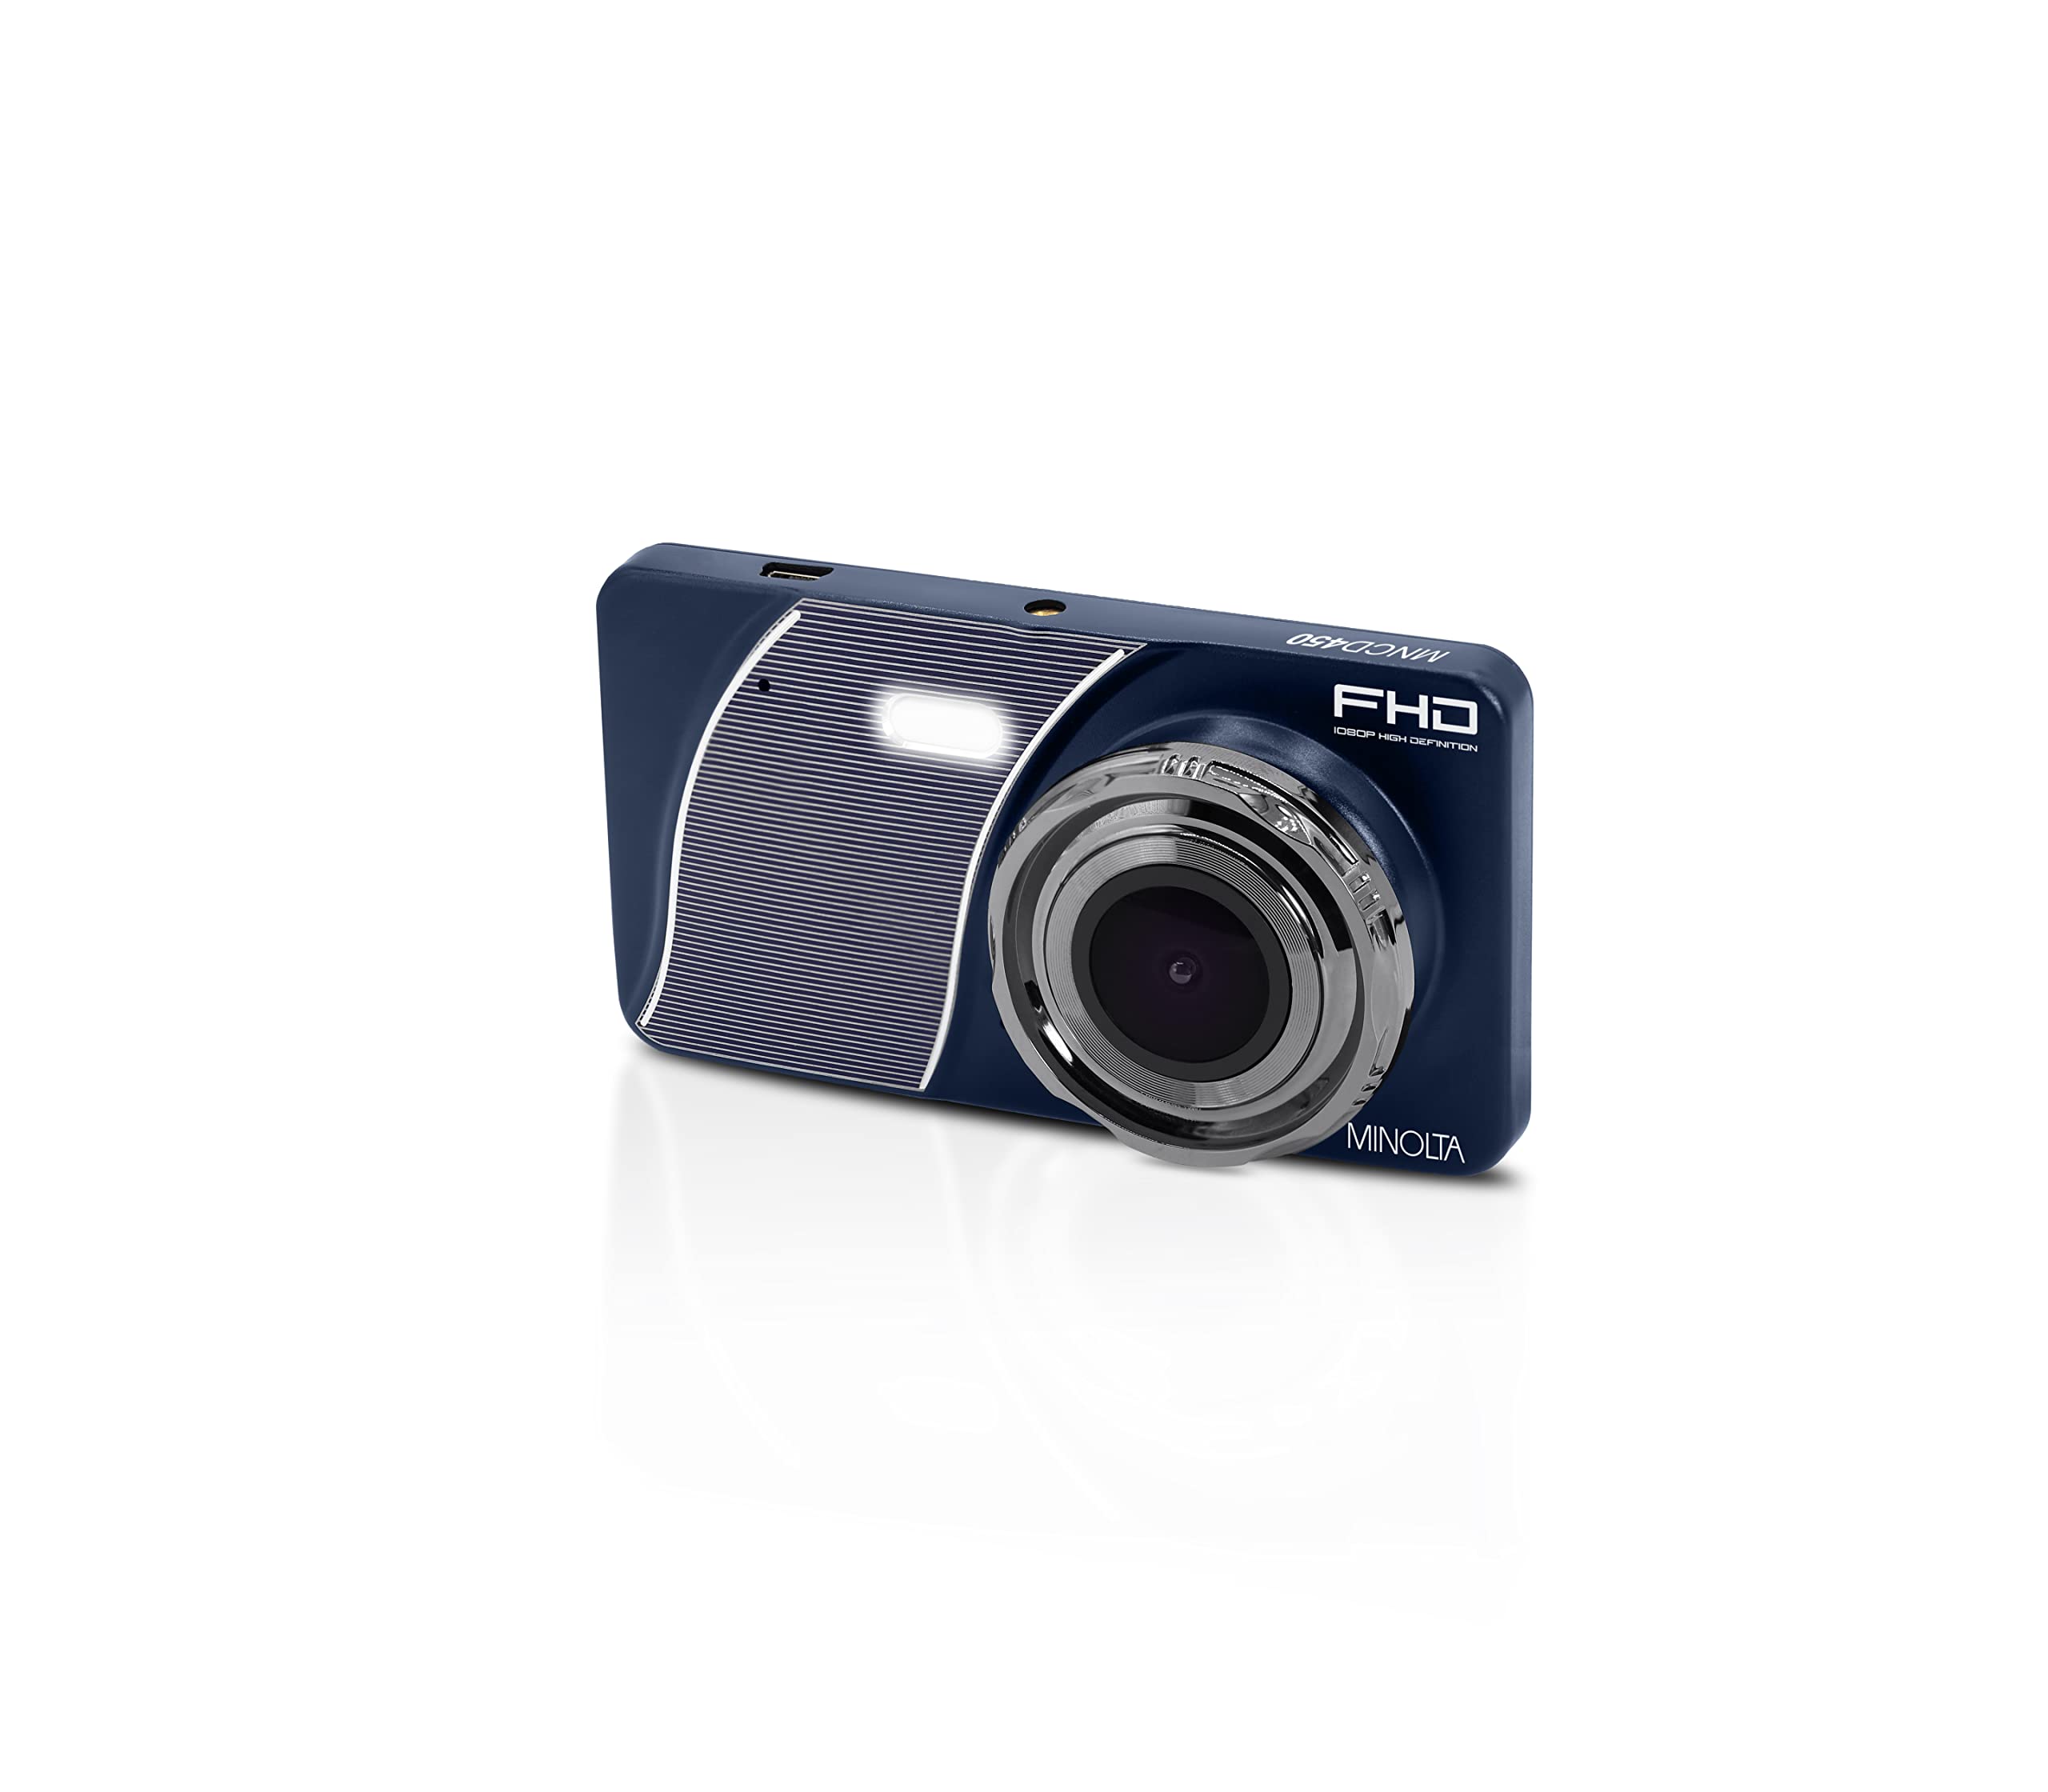
Figure 1: Front view of the Minolta MNCD450 Dash Cam, showcasing the lens and overall blue design.
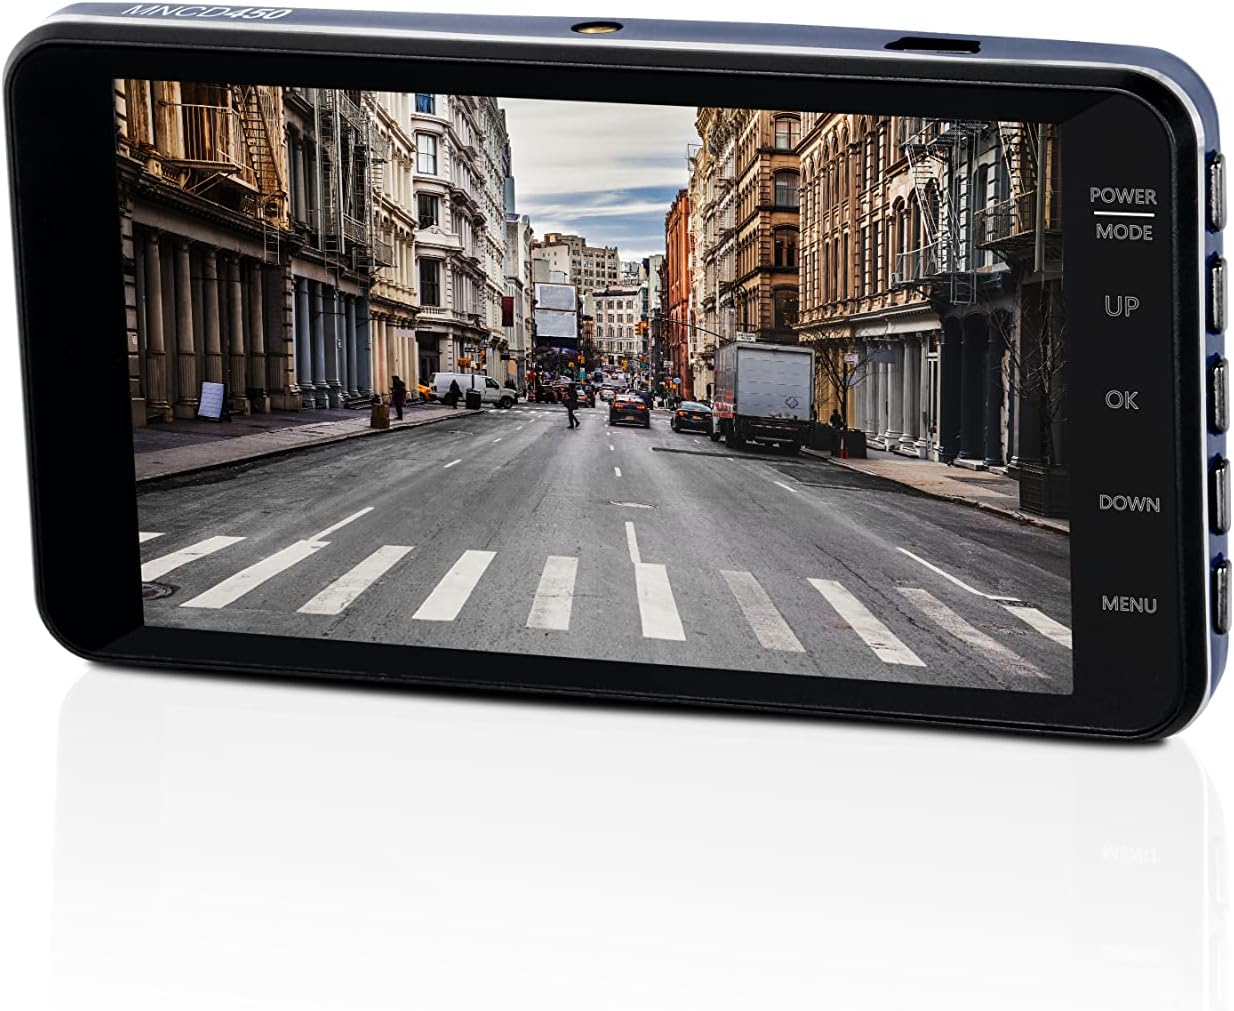
Figure 2: Rear view of the Minolta MNCD450 Dash Cam, displaying the 4.0-inch LCD screen and control buttons on the right side.
Control Buttons:
- Power Button: Turns the device on/off.
- Mode Button: Switches between video recording, photo, and playback modes.
- Up/Down Buttons: Navigates through menu options or adjusts settings.
- OK Button: Confirms selections or starts/stops recording.
- Menu Button: Accesses the system settings menu.
Setup
1. Insert Memory Card
Before first use, insert the provided 16GB memory card into the dash cam's memory card slot. Ensure the card is inserted correctly until it clicks into place. For optimal performance, use a high-endurance microSD card (Class 10 or higher).
2. Mount the Dash Cam
Attach the windshield mount to the dash cam. Clean a suitable area on your windshield, ensuring it does not obstruct your view. Press the suction cup firmly against the glass and engage the lever to secure it. Adjust the camera angle to capture the desired view of the road.

Figure 3: Dash cam securely mounted on a car windshield, positioned to record the road ahead.
3. Connect Power
Connect the DC car adaptor to your vehicle's 12V power outlet (cigarette lighter socket) and the other end to the dash cam's USB power input. Route the cable safely to avoid interference with driving controls.

Figure 4: Minolta DC car adapter with attached USB cable, used to power the dash cam.
Operating Instructions
Power On/Off
- Automatic: The dash cam will automatically power on and begin recording when your vehicle's ignition is turned on (and power is supplied to the 12V outlet).
- Manual: Press and hold the Power button to manually turn the device on or off.
Recording Modes
The MNCD450 offers several recording functionalities:
- Loop Recording: The camera continuously records video in segments (1, 3, or 5 minutes). When the memory card is full, the oldest unlocked files are overwritten by new recordings. This ensures continuous recording without manual intervention.

Figure 5: Illustration of the Loop Recording feature, showing continuous video capture.
- Emergency Recording (G-Sensor): The built-in G-sensor detects sudden impacts or rapid deceleration. When triggered, it automatically locks the current video segment, preventing it from being overwritten by loop recording. These files are stored in a separate folder.

Figure 6: Example of an incident that would trigger the G-Sensor for emergency recording.
- Parking Monitor: When enabled, the dash cam will automatically start recording if it detects motion or impact while your vehicle is parked and the engine is off. This feature provides surveillance when you are away from your vehicle.

Figure 7: A parked car, demonstrating the utility of the parking monitor feature.
Menu Navigation and Settings
Press the Menu button to access the settings. Use the Up and Down buttons to navigate through options and the OK button to select. Settings include video resolution, loop recording duration, G-sensor sensitivity, date/time, and more.
Playback Mode
Press the Mode button to switch to playback mode. Use the Up and Down buttons to browse recorded videos or photos. Press OK to play a selected file.

Figure 8: The 4.0-inch LCD screen displaying recorded footage of a road.
Photo Mode
Press the Mode button to switch to photo mode. Press the OK button to capture a 12MP still image.
Maintenance
Cleaning
Regularly clean the dash cam's lens and screen with a soft, dry cloth to ensure clear recordings and optimal display visibility. Avoid using abrasive cleaners.
Memory Card Management
It is recommended to format the memory card periodically (e.g., once a month) to maintain optimal performance and prevent data corruption. This can usually be done through the dash cam's menu settings. Always use a high-endurance microSD card designed for continuous recording.
Troubleshooting
- Dash Cam not powering on: Ensure the DC car adaptor is securely connected to both the dash cam and the vehicle's 12V power outlet. Check if the vehicle's power outlet is functioning.
- Recording issues (e.g., freezing, skipped frames): Format the memory card. Ensure you are using a high-speed, high-endurance microSD card (Class 10 or higher).
- Mounting issues (suction cup not holding): Clean both the windshield and the suction cup thoroughly. Apply slight moisture to the suction cup before pressing it firmly against the glass and engaging the lever. Ensure the surface is smooth and free of debris.
- Overheating concerns: While dash cams are designed for in-car use, extreme temperatures can affect performance. If the device feels excessively hot, ensure it is not exposed to direct sunlight for prolonged periods when parked. Consider removing it from the windshield when the vehicle is stationary in high heat.
- Poor video quality: Clean the camera lens. Check the video resolution settings in the menu to ensure it is set to 1080p Full HD.
Specifications
| Feature | Specification |
|---|---|
| Model Name | MNCD450 |
| Video Capture Resolution | 1080p Full HD |
| Field Of View | 120 Degrees |
| Display | 4.0-inch IPS LCD |
| Special Features | G-Sensor, Loop Recording, Parking Monitor |
| Connectivity Technology | USB |
| Product Dimensions | 1.1 x 3.9 x 2.2 inches |
| Item Weight | 1.31 pounds |
| Batteries | 1 Lithium Ion battery required |
Warranty and Support
For technical assistance or warranty inquiries, please contact Minolta customer support. Refer to the product packaging or the official Minolta website for the most current contact information.


