Introduction
This manual provides detailed instructions for the setup, operation, and maintenance of your Behringer C-2 Matched Studio Condenser Microphones and Pyle Foldable Tripod Microphone Stand. This bundle is designed for high-quality audio capture in studio and live environments, offering versatility and robust performance.
What's Included
Your package should contain the following items:
- 2 x Behringer C-2 Matched Studio Condenser Microphones
- 1 x Pyle Foldable Tripod Microphone Stand (Model PMKS3)
- Custom Stand Adapters for C-2 Microphones
- Windscreens for C-2 Microphones
- Stereo Bar for C-2 Microphones
- Transport Case for C-2 Microphones and accessories
- Universal Mic Holder/Clip Attachment for Pyle Stand
Behringer C-2 Studio Condenser Microphones
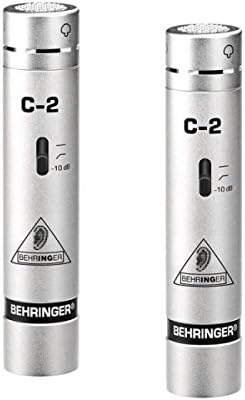
Image: Two Behringer C-2 condenser microphones, showing their sleek silver design and C-2 model designation.

Image: A closer view of a single Behringer C-2 microphone, highlighting its compact form factor.
Features
- Matched pair for stereo studio recording and live applications.
- Cardioid pickup pattern for effective feedback elimination and focused sound capture.
- Low-mass diaphragm for ultra-wide frequency response and accurate sound reproduction.
- Switchable low-frequency roll-off to reduce unwanted rumble and handling noise.
- Switchable -10 dB input attenuation pad for handling high sound pressure levels (SPL).
- Ultra low-noise transformerless FET input circuitry to eliminate low-frequency distortion.
- Rugged metal die-cast body for durability.
- Gold-plated 3-pin XLR connector for high signal integrity.
Understanding Condenser Microphones
The C-2 microphones are condenser type, ideal for capturing vocals and acoustic instruments due to their high sensitivity. They require +48V DC phantom power for operation, typically supplied by a mixer or audio interface. Their cardioid pattern ensures they pick up sound primarily from the front, rejecting off-axis noise.

Image: A person wearing headphones, smiling and holding drumsticks, illustrating the enjoyment of high-quality audio.

Image: A graph illustrating the frequency response of a condenser microphone compared to a dynamic microphone, showing the condenser's wider and brighter response.
The C-2 microphones offer a slight boost in the 1 kHz - 8 kHz range, contributing to a brighter sound profile. This characteristic is particularly beneficial for capturing cymbals, overhead miking, acoustic pianos, and choirs, providing clarity and presence.
Source Isolation and Durability
The cardioid pickup pattern of the C-2 microphones provides excellent sound source separation and feedback rejection. With a maximum sound pressure level (SPL) of 136 dB, these microphones can handle extreme dynamics without distortion. The low-frequency roll-off switch helps eliminate infrasonics like handling noise or stage rumble, while the -10 dB input pad accommodates very loud sound sources.

Image: The Behringer C-2 microphones and their included accessories neatly organized within their protective transport case.

Image: The transport case for the Behringer C-2 microphones shown open, revealing the custom-fit foam interior designed to protect the microphones and accessories.
Pyle Foldable Tripod Microphone Stand (Model PMKS3)

Image: The Pyle foldable tripod microphone stand, featuring its boom arm and the universal microphone clip attachment.

Image: The complete bundle, showing the two Behringer C-2 microphones alongside the Pyle tripod microphone stand.
Features
- Durable and lightweight metal construction.
- Conveniently folds for easy storage and transport.
- Quick and easy telescoping height adjustment.
- Adjustable height range: 37.5 inches (minimum) to 65.0 inches (maximum).
- Knob-style tension locking mechanism for secure height adjustments.
- Foldable tripod leg base for stability.
- Extending telescoping boom arm up to 28.0 inches.
- Includes universal mic holder/clip attachment.
- USA Standard 5/8'' threading for broad compatibility.
- Glossy black finish.

Image: The Pyle microphone stand illustrating its adjustable height range from 37.5 to 65.0 inches.

Image: A close-up view of the anti-slip tripod legs of the Pyle microphone stand, designed for stability.
Setup
1. Microphone Stand Assembly
- Unfold the tripod legs of the Pyle PMKS3 stand until they are fully extended and stable.
- Loosen the knob-style tension lock on the main vertical pole and extend it to your desired height. Securely tighten the knob.
- Insert the boom arm into the designated slot on the top of the vertical pole. Adjust its angle and extension as needed, then tighten its locking mechanism.
- Screw the universal mic holder/clip attachment onto the 5/8'' threaded end of the boom arm.
2. Microphone Setup
- Carefully remove the Behringer C-2 microphones from their transport case.
- Attach the custom stand adapters to the base of each C-2 microphone.
- For stereo miking, attach both C-2 microphones to the included stereo bar, then mount the stereo bar onto the universal mic holder/clip on the stand. Alternatively, mount individual microphones directly to separate mic clips if using multiple stands.
- Place the windscreens over the microphone capsules to reduce plosives and wind noise.
- Connect a 3-pin XLR cable (not included) to the gold-plated XLR connector at the base of each C-2 microphone.
- Connect the other end of the XLR cables to your mixer or audio interface, ensuring that phantom power (+48V DC) is enabled for the connected inputs.
Operating Instructions
Using the C-2 Microphones
- Phantom Power: Ensure your mixer or audio interface provides +48V phantom power to the XLR inputs connected to the C-2 microphones. The microphones will not operate without it.
- Low-Frequency Roll-off Switch: Located on the microphone body, this switch reduces low-frequency rumble (e.g., stage vibrations, handling noise). Engage it when recording in environments prone to such noise.
- Input Attenuation Pad (-10 dB): Also on the microphone body, this switch reduces the microphone's output level by 10 dB. Use this when recording very loud sound sources (e.g., close-miked drums, loud vocals) to prevent input clipping at your mixer/interface.
- Placement: Experiment with microphone placement relative to the sound source. For stereo recording, the included stereo bar allows for various configurations (e.g., X/Y, ORTF) to capture a wide and accurate stereo image.
Adjusting the Microphone Stand
- Height Adjustment: Loosen the tension knob on the main pole, adjust to the desired height (between 37.5'' and 65''), and firmly tighten the knob to secure.
- Boom Arm Adjustment: Loosen the boom arm's locking mechanism to adjust its angle and extension (up to 28''). Tighten securely once positioned.
- Stability: Always ensure the tripod legs are fully extended and the stand is balanced before mounting microphones.
Maintenance and Care
- Cleaning: Wipe microphones and stand with a soft, dry cloth. Avoid using liquid cleaners or solvents, which can damage components.
- Storage: When not in use, store the C-2 microphones in their protective transport case to prevent dust accumulation and physical damage. Fold the Pyle stand for compact storage.
- Handling: Handle microphones with care. Avoid dropping them or exposing them to extreme temperatures or humidity.
- Cable Management: Route XLR cables neatly to prevent tripping hazards and reduce strain on connectors.
Troubleshooting
No Sound from Microphones
- Ensure +48V phantom power is enabled on your mixer/interface for the connected inputs.
- Check all XLR cable connections for proper seating.
- Verify that input gain levels on your mixer/interface are appropriately set.
- Test with different XLR cables to rule out cable failure.
Distorted Sound
- Engage the -10 dB input attenuation pad on the C-2 microphone if the sound source is very loud.
- Reduce the input gain on your mixer/interface.
- Increase the distance between the microphone and the sound source.
Excessive Low-Frequency Noise/Rumble
- Engage the low-frequency roll-off switch on the C-2 microphone.
- Ensure the microphone stand is on a stable surface and not transmitting vibrations.
Technical Specifications
| Feature | Behringer C-2 Microphones | Pyle PMKS3 Mic Stand |
|---|---|---|
| Model | C-2 | PMKS3 |
| Type | Condenser | Tripod Microphone Stand |
| Polar Pattern | Cardioid | N/A |
| Max SPL | 136 dB | N/A |
| Power Requirement | +48V Phantom Power | N/A |
| Connector | Gold-plated 3-pin XLR | 5/8'' Threading |
| Material | Metal Die-Cast Body | Metal |
| Color | Silver | Black |
| Height Adjustment | N/A | 37.5'' - 65.0'' |
| Boom Arm Length | N/A | Up to 28.0'' |
Warranty and Support
For detailed warranty information and customer support, please refer to the official Behringer and Pyle websites or contact their respective customer service departments. A comprehensive user manual in PDF format is also available for download:


