
1. Introduction
Thank you for choosing the BidetMate 3000 Series Electric Bidet Toilet Seat. This manual provides essential information for the safe and efficient operation of your new bidet seat. Please read this manual thoroughly before installation and use, and retain it for future reference.
The BidetMate 3000 Series offers advanced hygiene features including customizable wash functions, heated water, a warm air dryer, and a heated seat, designed for elongated toilets.
2. Safety Information
- Electrical Safety: Ensure the bidet seat is connected to a grounded 110V GFCI (Ground Fault Circuit Interrupter) outlet. Do not use extension cords.
- Water Connection: Turn off the main water supply before installation. Ensure all connections are secure to prevent leaks.
- Children and Supervision: This appliance is not intended for use by persons with reduced physical, sensory, or mental capabilities unless supervised or instructed concerning its use by a person responsible for their safety. Children should be supervised to ensure they do not play with the appliance.
- Cleaning: Disconnect power before cleaning. Do not immerse the unit in water. Use mild, non-abrasive cleaners.
- Temperature: Avoid setting water or seat temperatures excessively high to prevent burns.
3. Product Overview
Key Features:
- Customizable Wash Functions: Aerated, pulse, feminine, power wash, massage, and child wash.
- Adjustable Settings: Heated seat, water temperature, and warm air dryer.
- Self-Cleaning Nozzle: Stainless steel nozzle with UV sterilization.
- Soft-Closing Seat: Prevents slamming.
- Night Light: Illuminates the bowl for nighttime use.
- Pressure Sensor: Activates functions only when seated.
- Remote Control: Intuitive control of all functions.
Components:
The BidetMate 3000 Series includes the bidet seat, a wireless remote control, mounting hardware, a T-valve for water connection, and a water supply hose.

Figure 3.1: BidetMate 3000 Series Electric Bidet Toilet Seat and Remote Control.
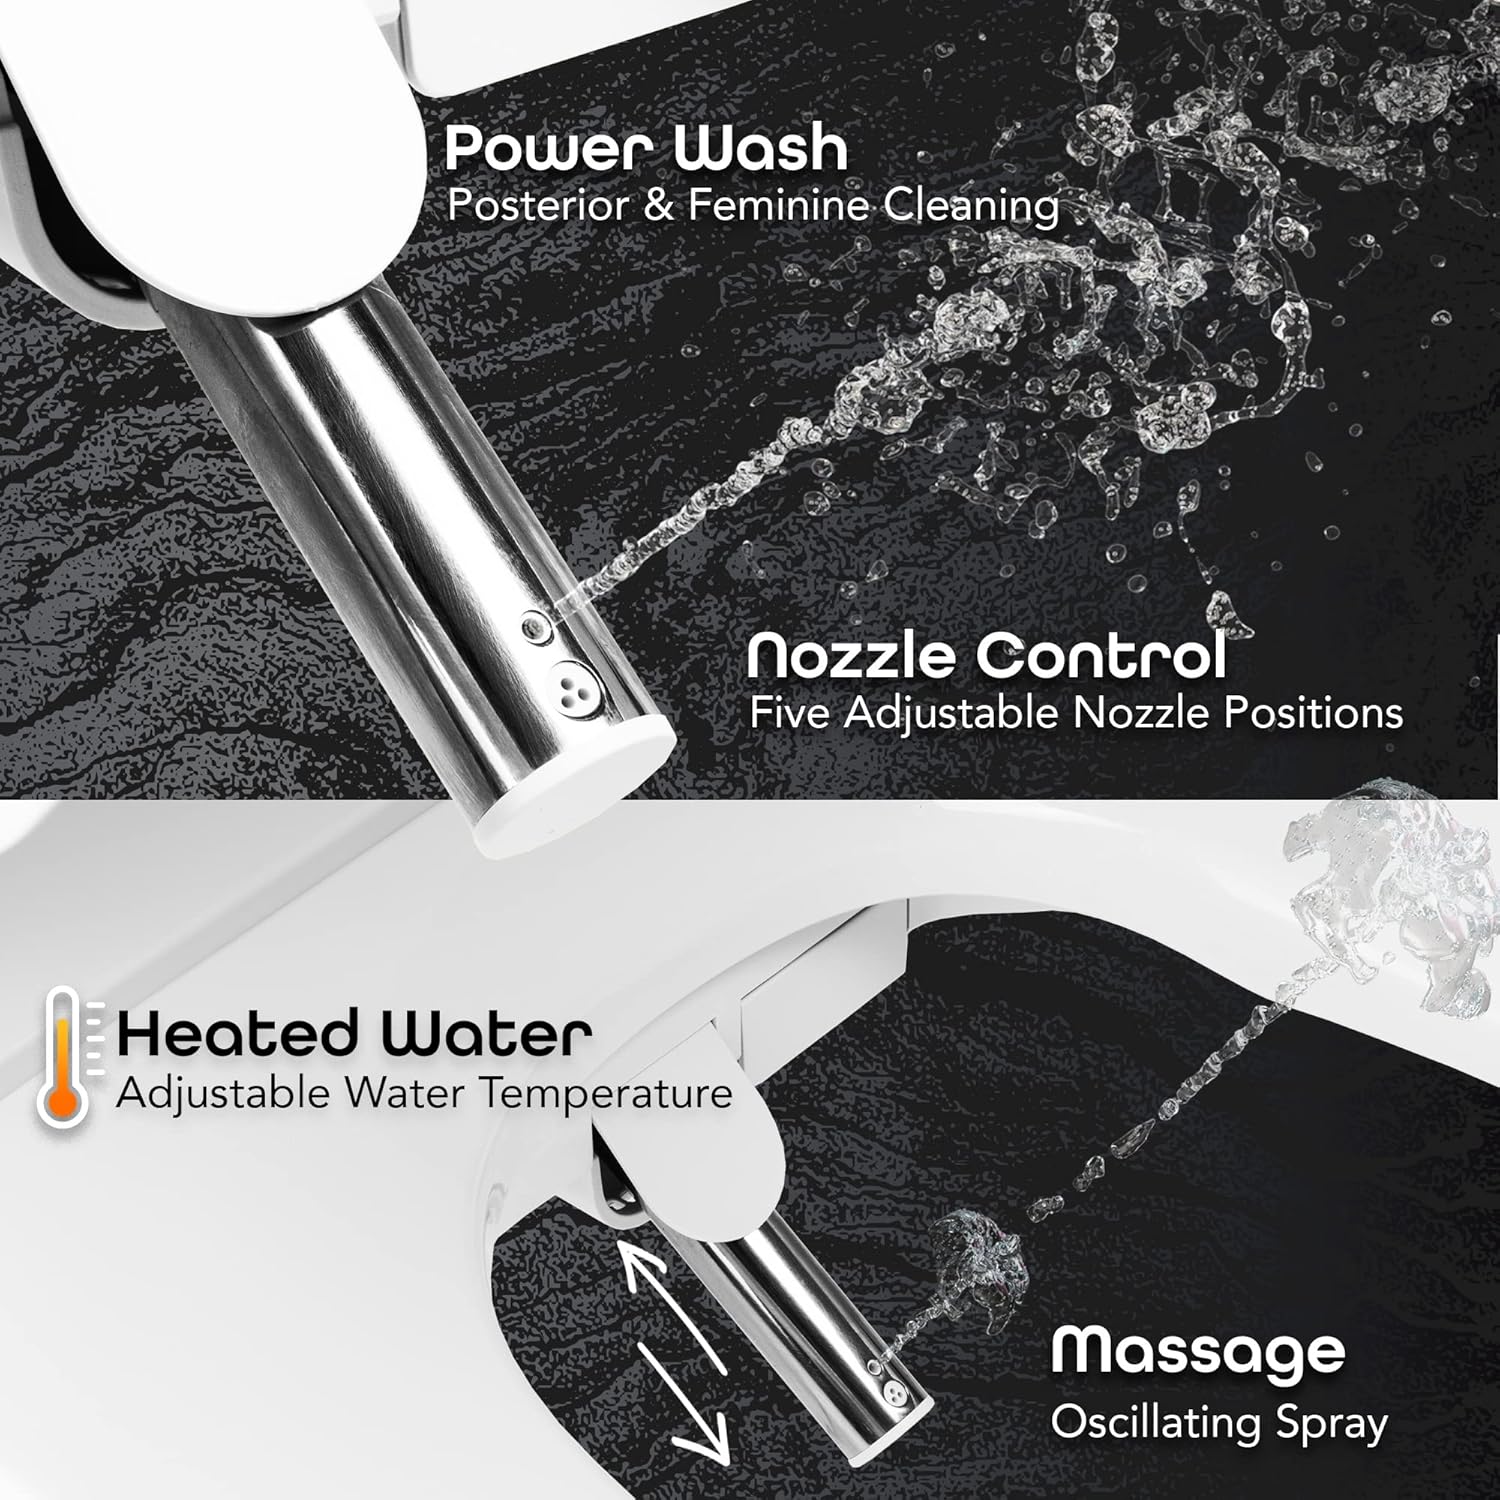
Figure 3.2: Detailed view of the bidet nozzle demonstrating power wash, heated water, and oscillating massage functions.

Figure 3.3: Visual representation of the Cyclone-DRI warm air dryer, UV sterilization light, and the self-cleaning stainless steel nozzle.

Figure 3.4: Key comfort and safety features: soft-closing lid, adjustable heated seat, integrated night light, and pressure sensor.
4. Installation
The BidetMate 3000 Series is designed for easy installation on most elongated toilets. A minimum clearance of 40-50mm from the toilet tank to the mounting bolts is recommended for flat-back toilet bowls. The integrated power cord is 47 inches long.
Installation Steps:
- Prepare the Toilet: Turn off the water supply to the toilet and flush to empty the tank. Remove your existing toilet seat.
- Install Mounting Plate: Secure the mounting plate to the toilet bowl using the provided bolts and rubber bushings. Ensure the plate is aligned correctly.
- Attach Bidet Seat: Slide the bidet seat onto the mounting plate until it clicks into place.
- Connect Water Supply: Install the T-valve between the toilet's fill valve and the water supply line. Connect the bidet's water supply hose to the T-valve.
- Connect Power: Plug the bidet seat into a grounded 110V GFCI outlet.
- Test: Slowly turn on the water supply. Check for leaks. Plug in the unit and test all functions.

Figure 4.1: Detailed installation diagram for the BidetMate 3000 Series, highlighting key components and connection points for elongated toilets.

Figure 4.2: Step 1 of installation: Removing the existing toilet seat from the bowl.

Figure 4.3: Step 2 of installation: Attaching the mounting plate to the toilet bowl.

Figure 4.4: Step 3 of installation: Sliding the bidet seat securely onto the installed mounting plate.

Figure 4.5: Step 4 of installation: Connecting the bidet's water supply hose to the T-valve and toilet.
5. Operating Instructions
All functions of the BidetMate 3000 Series are controlled via the wireless remote control.

Figure 5.1: The BidetMate 3000 Series remote control, featuring the 'Auto Wash' button for combined cleaning and drying.

Figure 5.2: Detailed view of the remote control buttons for various bidet functions.
Basic Operation:
- Power On/Off: Press the 'Power' button on the remote.
- Wash Functions: Select 'Bidet' for posterior wash or 'Feminine' for front wash. Adjust water pressure and nozzle position using the respective buttons.
- Heated Water: Use the 'Water Temp' buttons to adjust the water temperature.
- Warm Air Dryer: After washing, press 'Dry' and adjust the air temperature and fan speed.
- Heated Seat: Adjust the seat temperature using the 'Seat Temp' buttons.
- Night Light: Activate or deactivate the night light feature.
- Auto Wash: Press the 'Auto' button for a pre-programmed wash and dry cycle.
- Stop: Press 'Stop' to cease any active function.
6. Maintenance
Cleaning the Bidet Seat:
- Disconnect the power cord before cleaning.
- Wipe the exterior surfaces with a soft, damp cloth and a mild, non-abrasive cleaner.
- Do not use harsh chemicals, abrasive pads, or spray water directly onto the unit.
Nozzle Cleaning:
- The stainless steel nozzle features an automatic self-cleaning function before and after each use.
- For manual cleaning, extend the nozzle (refer to remote instructions) and gently wipe with a soft brush or cloth.
- The UV sterilization light automatically sanitizes the nozzle.
7. Troubleshooting
| Problem | Possible Cause | Solution |
|---|---|---|
| No power | Power cord unplugged, GFCI tripped, no electricity | Ensure cord is plugged in, reset GFCI, check power supply |
| No water spray | Water supply off, nozzle blocked, pressure sensor not activated | Turn on water supply, clean nozzle, ensure proper seating on bidet |
| Water temperature not adjusting | Heater malfunction, incorrect setting | Check settings on remote, contact customer support if issue persists |
| Leaks from connections | Loose connections, damaged seals | Tighten connections, replace seals if damaged |
If troubleshooting steps do not resolve the issue, please contact BidetMate Customer Support.
8. Specifications
| Feature | Detail |
|---|---|
| Model Number | BM-3000R-E |
| Dimensions (L x W x H) | 20.43 x 15.16 x 3.9 inches |
| Item Weight | 11.88 pounds |
| Color | White |
| Toilet Type Compatibility | Elongated |
| Power Supply | 110V AC (GFCI outlet required) |
| Power Cord Length | 47 inches |
| UPC | 810004872707 |

Figure 8.1: Side profile and dimensions of the BidetMate 3000 Series bidet seat.
9. Warranty and Support
The BidetMate 3000 Series Electric Bidet Toilet Seat is covered by a 3-year warranty from the date of purchase. This warranty covers manufacturing defects and malfunctions under normal use.
For warranty claims, technical assistance, or any questions regarding your product, please contact BidetMate's US-based Customer Support. Contact information can be found on the official BidetMate website or your purchase documentation.


