
meross MSS550
Meross 3 Way Smart Switch Instruction Manual
Model: MSS550 | Brand: meross
1. Product Overview
The Meross 3 Way Smart Switch allows you to control your lights from two different locations, offering convenience and smart home integration. This switch is compatible with Apple HomeKit, Siri, Amazon Alexa, and SmartThings, enabling voice control and remote access. It requires a neutral wire for installation and operates on 2.4GHz Wi-Fi without the need for an additional hub.

Image: Meross 3 Way Smart Switch (MSS550) product packaging and two individual switches.
2. Safety Information
- Neutral Wire Requirement: A neutral wire (typically white) is required for the installation of this smart switch. Ensure your electrical box has a neutral wire before purchasing or attempting installation. If unsure, consult a qualified electrician.
- Power Off Before Installation: Always turn off the power at the circuit breaker before installing, removing, or servicing the switch. Failure to do so can result in serious injury or death.
- Not a Dimmer Switch: This is a standard 3-way smart switch and is NOT a dimmer switch. Do not attempt to use it for dimming functions.
- Indoor Use Only: This device is designed for indoor use in dry locations only.
- Electrical Standards: Ensure all wiring and installation comply with local and national electrical codes.
- Fire-Retardant Material: The switch housing is made of PC+ABS fire-retardant material for safety.
3. What's in the Box
Upon opening the product packaging, you will find the following items:
- Meross 3 Way Smart Switch (2 Pack)
- Quick Installation Guide
4. Installation Guide
Installation typically takes about 15 minutes. Please follow these steps carefully. If you are not comfortable with electrical wiring, please consult a qualified electrician.
- Verify Neutral Wire: Before starting, confirm that your electrical box has a neutral wire. This is essential for the smart switch to function.
- Turn Off Power: Locate the circuit breaker that controls the light switch you intend to replace and turn off the power. Verify the power is off using a voltage tester.
- Remove Old Switch: Carefully remove the existing 3-way switch from the wall box. Take note of the wiring connections.
- Wire the Meross Smart Switch: Connect the Meross smart switch according to the wiring diagram. For a 3-way setup, you will typically connect five wires: Ground, Neutral, Live, and two Traveler wires (T1 and T2). For a single pole setup, you only need to connect four wires: Ground, Neutral, Live, and one Traveler wire (T1 or T2).

Image: Detailed wiring diagram illustrating the connection of the Meross 3 Way Smart Switch, highlighting the neutral wire (white).

Image: Comparison of wiring for 3-way switch (five wires) and single pole switch (four wires) configurations.
- Secure the Switch: Gently push the wired switch into the wall box and secure it with screws. Attach the faceplate.
- Restore Power: Turn the power back on at the circuit breaker. The smart switch should now be powered on.
5. Setup and Configuration
After physical installation, configure your Meross Smart Switch using the Meross app.
- Download Meross App: Download the Meross app from the Apple App Store or Google Play Store.
- Create Account: Open the app and create a Meross account or log in if you already have one.
- Add Device: Follow the in-app instructions to add your new smart switch. Ensure your phone is connected to a 2.4GHz Wi-Fi network during this process. The switch does not support 5GHz Wi-Fi.
- Integrate with Smart Home Platforms:
- Apple HomeKit: For HomeKit integration, set up a HomePod, Apple TV, or iPad as a home hub. This allows remote control of your HomeKit accessories. The home hub must remain in your home, connected to your Wi-Fi network, and powered on.
- Amazon Alexa / Google Assistant / SmartThings: Link your Meross account within the respective smart home app (Alexa, Google Home, SmartThings) to enable voice control and advanced automation.

Image: Illustration of setting up a HomePod, Apple TV, or iPad as a home hub for Apple HomeKit integration.
6. Operating Instructions
The Meross Smart Switch offers multiple ways to control your lights:
- Manual Control: Press the physical button on the switch to turn lights on or off.
- Remote Control: Use the Meross app on your smartphone to control the lights from anywhere with an internet connection.

Image: A user controlling the smart switch remotely using the Meross app on a smartphone.
- Voice Control: Use voice commands with compatible smart assistants:
- Siri: Say "Hey Siri, turn on the light."
- Alexa: Say "Alexa, turn on the [light name]."
- Google Assistant: Say "Hey Google, turn on the [light name]."

Image: A kitchen scene demonstrating voice control with Siri to turn on the lights.
- Scheduling and Timers: Set schedules and timers through the Meross app to automatically turn lights on or off. This can help save energy and automate your home lighting.

Image: Examples of timer settings, such as automatic turn-on at 7:00 AM and countdown auto-off for 20 minutes.
- 3-Way Application: Control the same light fixture from two different locations, ideal for staircases or large rooms with multiple entrances.
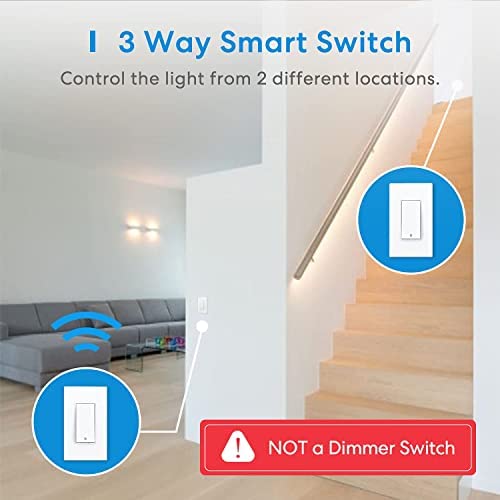
Image: A diagram illustrating how the 3-way smart switch allows control of a single light from two separate wall locations.
Official Product Video: Voice Control Demonstration
Video: This official Meross video demonstrates the voice control capabilities of the 3 Way Smart Switch, showing how users can turn lights on and off using voice commands.
7. Maintenance
- Cleaning: To clean the switch, gently wipe it with a dry, soft cloth. Do not use harsh chemicals or abrasive cleaners.
- Firmware Updates: Meross may release firmware updates to improve performance or add new features. Check the Meross app regularly for available updates and follow the instructions to install them.
- Power Cycle: If the switch becomes unresponsive, try turning off the power at the circuit breaker for a few seconds, then turning it back on.
8. Troubleshooting
- Switch Not Responding:
- Ensure the power is on at the circuit breaker.
- Check if the neutral wire is correctly connected.
- Verify the switch is within range of your 2.4GHz Wi-Fi network.
- Perform a power cycle by turning off and on the circuit breaker.
- Cannot Connect to Wi-Fi:
- Confirm your Wi-Fi network is 2.4GHz. The switch does not support 5GHz.
- Ensure your Wi-Fi password is correct.
- Move the switch closer to your Wi-Fi router or consider a Wi-Fi extender.
- If using a mesh Wi-Fi system, ensure it's configured to allow 2.4GHz device connections or try setting a static IP for the switch.
- Voice Control Not Working:
- Ensure the Meross app is linked to your smart assistant (Alexa, Google Home, HomeKit).
- Check your internet connection.
- Verify the device name used in your voice command matches the name in the smart assistant app.
9. Specifications
| Attribute | Value |
|---|---|
| Model Number | MSS550 |
| Product Dimensions | 4.7 x 2.8 x 1.5 inches |
| Item Weight | 10.93 ounces |
| Operating Voltage | 120 Volts |
| Current Rating | 2 Amps |
| Circuit Type | 3-way |
| Operation Mode | ON-OFF |
| Wireless Connectivity | 2.4GHz Wi-Fi Only |
| Hub Required | No |
| Compatibility | Apple HomeKit, Siri, Alexa, SmartThings |

Image: Front and side view of the Meross Smart Switch with key dimensions and component labels (Power Button, Status LED, Reboot Button).
10. Warranty and Support
Meross products come with a standard warranty. For specific warranty terms and conditions, please refer to the documentation included with your product or visit the official Meross website. If you encounter any issues with your switch types, installation, or Wi-Fi connections, please contact Meross technical support for assistance. They are committed to providing satisfactory solutions.
You can often find support resources, FAQs, and contact information on the Meross official website or within the Meross app.
Related documentsMSS550


Ask a question about this manual
Ask about setup, troubleshooting, compatibility, parts, safety, or missing instructions. Manuals+ will review the question and use this page’s manual context to help answer it.