1. Product Overview
The KUMIO ICM-1216 is a stainless steel countertop ice maker designed for convenient ice production. It features an LCD digital control panel for easy operation, producing bullet-shaped ice in two sizes (S/L) within minutes. With a 2.1L water tank and a self-cleaning function, it is suitable for various settings including home, parties, and outdoor activities.
Key Features:
- Fast Ice Making: Produces 9 bullet-shaped ice cubes in 6-8 minutes, up to 26.5 lbs per day.
- Easy Operation: LCD smart control panel with advanced infrared sensor technology.
- Automatic Functions: Stops ice production when basket is full, alerts for low water level.
- Self-Cleaning: Integrated self-cleaning function for easy maintenance.
- Water Filtration: Equipped with a water filtration system for clean ice.
- Two Ice Sizes: Selectable small (S) or large (L) bullet ice.
- Compact & Portable: Designed for easy movement and fits most countertops.

2. Safety Instructions
Please read all instructions carefully before using the appliance to ensure safe operation and prevent damage.
- Ensure the appliance is connected to a grounded power outlet with the correct voltage (110-120V).
- Do not immerse the appliance, power cord, or plug in water or other liquids.
- Keep the appliance away from heat sources, direct sunlight, and corrosive gases.
- Do not operate the appliance with a damaged cord or plug. Contact qualified service personnel for repairs.
- Supervise children when the appliance is in use.
- Use only potable water in the water tank.
- Unplug the appliance before cleaning or when not in use for extended periods.
- Do not block ventilation openings. Ensure adequate air circulation around the unit.
- Do not store explosive substances such as aerosol cans with a flammable propellant in this appliance.
3. Package Contents
Verify that all items are present in the package:
- KUMIO ICM-1216 Ice Maker Unit
- Ice Basket
- Ice Scoop
- User Manual (this document)
4. Setup
4.1 Unpacking
- Carefully remove the ice maker from its packaging.
- Remove all packaging materials, tapes, and protective films.
- Inspect the appliance for any damage during transit. If damaged, do not operate and contact customer support.
4.2 Placement
- Place the ice maker on a flat, stable, and level surface.
- Ensure there is at least 15 cm (6 inches) of space around the unit for proper ventilation.
- Avoid placing the unit near heat sources (e.g., ovens, radiators) or in direct sunlight.
- Do not place the unit in an enclosed cabinet, as this can hinder ventilation and affect performance.
4.3 Initial Cleaning
Before first use, it is recommended to clean the ice maker.
- Open the lid and remove the ice basket.
- Clean the interior of the water tank and the ice basket with a soft cloth and warm, soapy water. Rinse thoroughly.
- Wipe the exterior with a damp cloth.
- Ensure all parts are dry before reassembling.
5. Operating Instructions
5.1 Adding Water
- Ensure the drain plug at the bottom is securely closed.
- Open the top lid of the ice maker.
- Pour potable water into the water tank. Do not exceed the maximum water level mark.
- Close the lid.
5.2 Selecting Ice Size
- Plug the ice maker into a power outlet. The LCD display will illuminate.
- Press the "S/L" button on the control panel to select your desired ice cube size: 'S' for small or 'L' for large. The selected size indicator will light up on the LCD.

5.3 Starting Ice Production
- After adding water and selecting the ice size, press the "Start/Stop" button to begin the ice-making cycle.
- The "Ice Making" indicator on the LCD will light up.
- The first batch of ice will be ready in approximately 6-8 minutes.
- The ice maker will continue to produce ice until the ice basket is full or the water level is low.


5.4 Monitoring and Indicators
- Water Shortage Indicator: If the water level is too low, this indicator will flash, and the ice maker will pause operation. Refill the water tank to resume.
- Ice Full Indicator: When the ice basket is full, this indicator will light up, and the ice maker will stop producing ice. Remove ice from the basket to resume.
- Cleaning Indicator: Lights up during the self-cleaning cycle.
6. Maintenance
Regular cleaning and maintenance will ensure the longevity and optimal performance of your ice maker.
6.1 Regular Cleaning
- Unplug the ice maker from the power outlet.
- Remove the ice basket.
- Clean the interior with a soft cloth dampened with a mild detergent solution. Rinse with clean water.
- Wipe the exterior with a damp cloth. Do not use abrasive cleaners or solvents.
- Ensure all parts are completely dry before reassembling and storing.
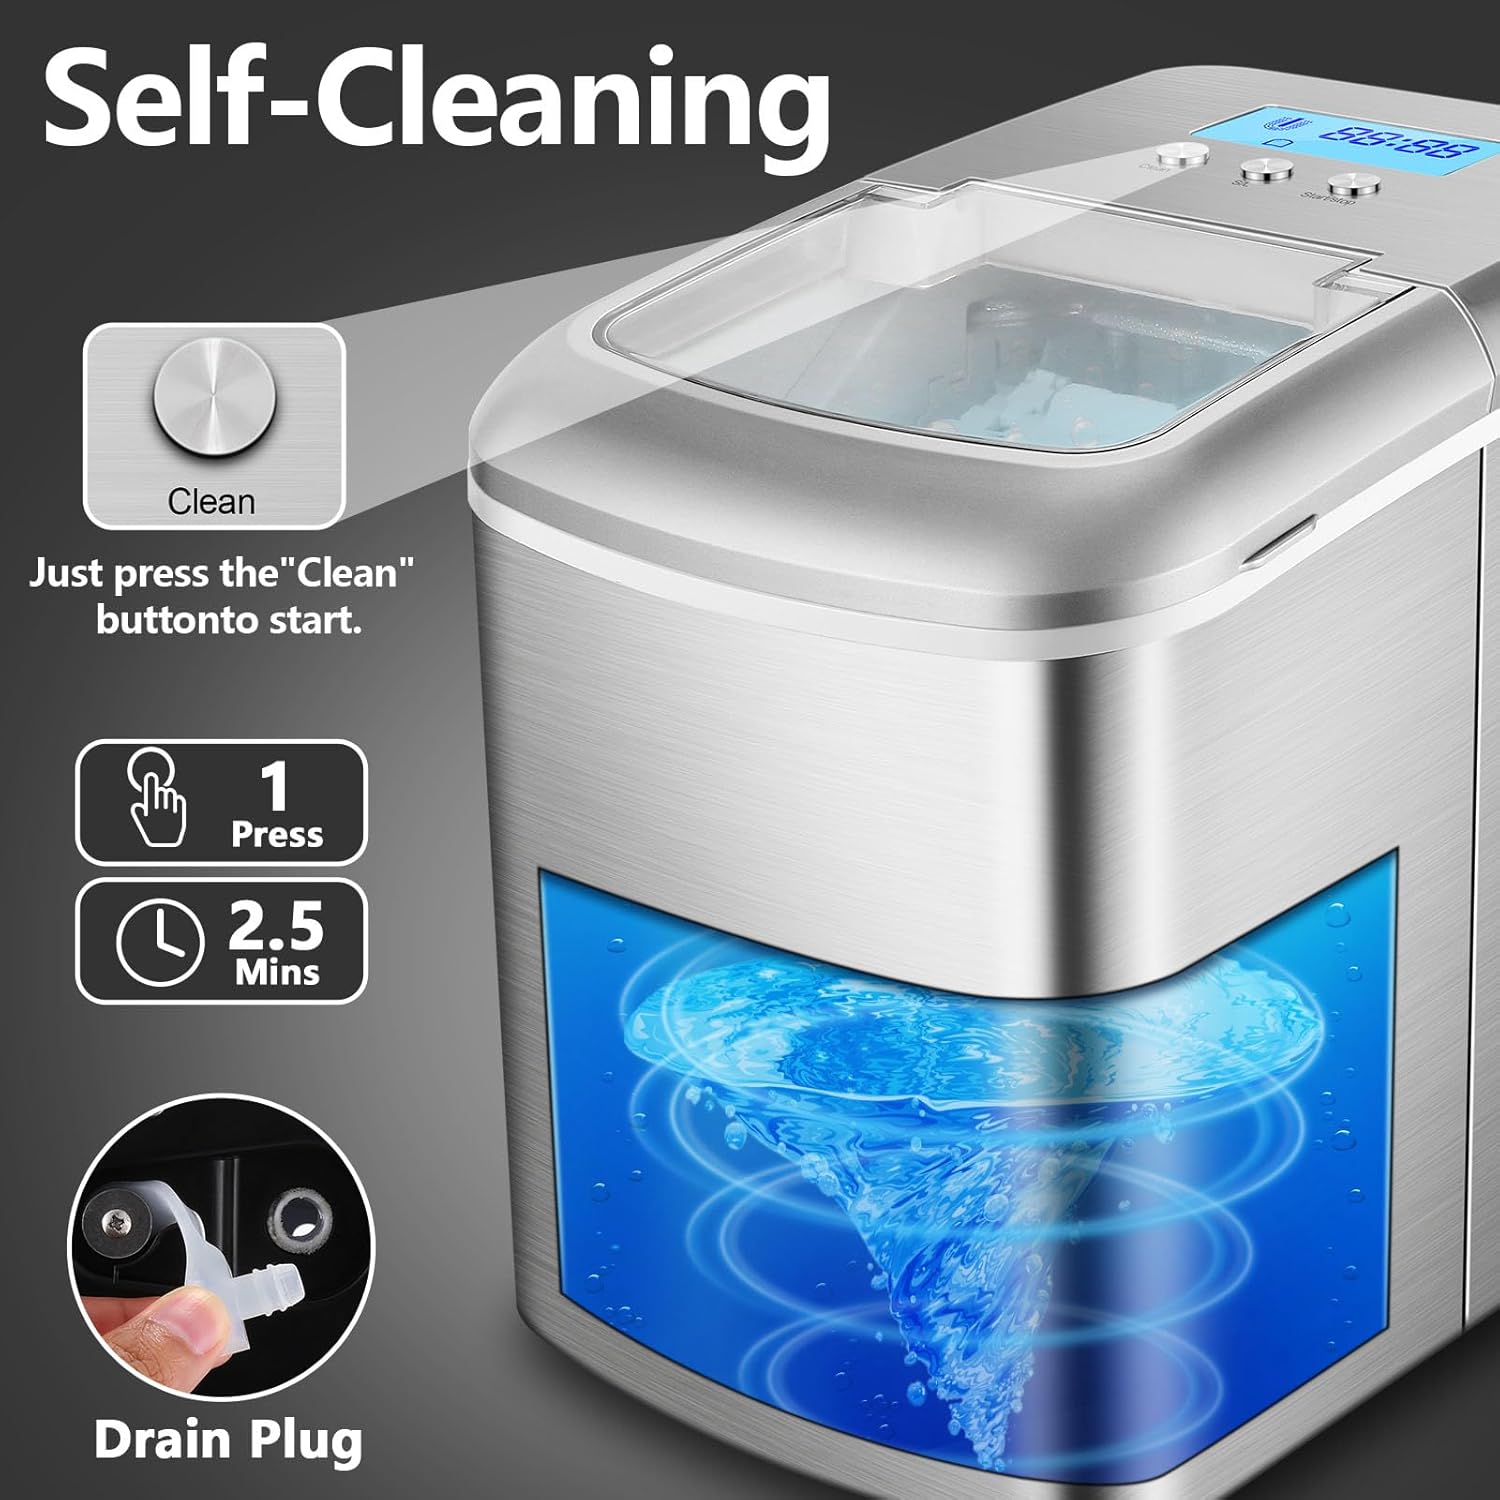
6.2 Self-Cleaning Function
The ice maker features an automatic self-cleaning cycle:
- Ensure the water tank is filled with clean water.
- Press and hold the "Clean" button for a few seconds to activate the self-cleaning cycle. The "Cleaning" indicator will light up.
- The cycle typically lasts about 2.5 minutes, circulating water through the system.
- Once the cycle is complete, drain the water as described in section 6.3.
6.3 Draining Water
To drain water from the tank:
- Place a container under the drain plug located at the bottom of the unit.
- Carefully remove the rubber drain plug.
- Allow all water to drain completely.
- Replace the drain plug securely.
7. Troubleshooting
If you encounter issues with your ice maker, refer to the following table for common problems and solutions.
| Problem | Possible Cause | Solution |
|---|---|---|
| Ice maker not working | No power; Water shortage; Ice basket full | Check power connection; Add water; Remove ice from basket |
| Ice cubes are too small or melt quickly | Ambient temperature too high; Water temperature too high; Insufficient ventilation | Place in a cooler environment; Use colder water; Ensure proper ventilation around the unit |
| Water leakage | Drain plug not secured; Unit not level | Ensure drain plug is tightly closed; Place unit on a level surface |
| "Water Shortage" indicator on, but water is present | Water level sensor malfunction; Water below minimum level | Ensure water is above the minimum fill line; Contact customer support if issue persists |
| Unusual noise during operation | Unit not level; Internal component issue | Ensure unit is on a level surface; Contact customer support if noise is excessive or unusual |
If the problem persists after attempting these solutions, please contact KUMIO customer support for assistance.
8. Specifications
Technical details for the KUMIO ICM-1216 Ice Maker:
| Feature | Specification |
|---|---|
| Model Number | ICM-1216 |
| Product Dimensions | 37.2D x 24.8W x 31.5H centimeters (9.76 x 14.65 x 12.4 inches) |
| Weight | 9 kg (19.84 pounds) |
| Capacity (Water Tank) | 2.1 Liters |
| Daily Ice Production | Approximately 26.5 lbs (12 kg) |
| Ice Making Cycle | 6-8 minutes per batch (9 cubes) |
| Voltage | 110-120 Volts |
| Wattage | 120 watts |
| Refrigerant | R600a |
| Material | Stainless Steel |

9. Warranty and Support
KUMIO products are manufactured to high-quality standards. For warranty information, technical support, or service inquiries, please refer to the warranty card included with your purchase or contact KUMIO customer service directly. Please have your model number (ICM-1216) and purchase date available when contacting support.


