1. Introduction and Overview
The Parweld XTS 204 is a compact yet powerful MMA (Manual Metal Arc) inverter welding machine designed for maximum portability and performance. It is capable of welding with electrodes up to 4mm in diameter. This machine also supports TIG welding when an optional TIG torch and appropriate gas supply are connected, making it suitable for welding steel and stainless steel. Its lift arc mode helps prevent electrode damage by limiting arc current when the tungsten touches the workpiece. The XTS 204 is generator compatible, handling input fluctuations of +/-15%, and is housed in a robust steel casing.
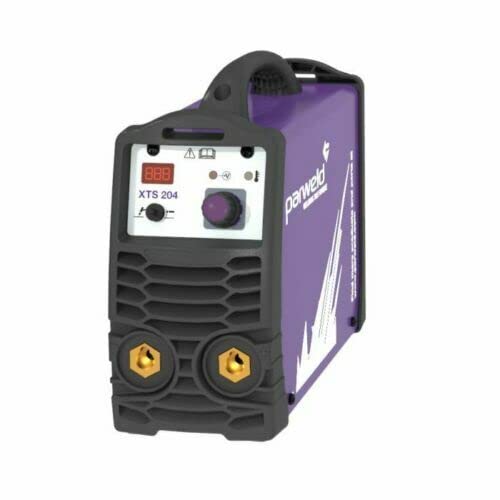
Figure 1: Front view of the Parweld XTS 204 MMA Electrode Welding Machine. The image shows a purple and black welding inverter with a digital display showing "XTS 204", a control knob, and two brass electrode terminals at the bottom.
2. Safety Information
Always prioritize safety when operating welding equipment. Read and understand all safety warnings and instructions before use. Failure to do so may result in serious injury or death.
- Wear appropriate personal protective equipment (PPE), including welding helmet, gloves, and protective clothing.
- Ensure adequate ventilation in the work area to avoid inhaling welding fumes.
- Do not operate the machine in wet conditions or near flammable materials.
- Ensure proper grounding of the welding machine and workpiece.
- Disconnect power before performing any maintenance or adjustments.
3. Product Features
- Maximum Electrode Size: Supports electrodes up to 4.0 mm.
- Recommended Generator Size: 10 KVA for optimal performance.
- Welding Type: Primarily MMA (Manual Metal Arc), with TIG capability (requires optional torch).
- Portability: Compact design for easy transport.
- Generator Compatibility: Tolerates input voltage fluctuations of +/-15%.
- Robust Construction: Housed in a durable steel casing.
4. Components and Controls
Familiarize yourself with the main components and controls of your Parweld XTS 204 welding machine.
- Digital Display: Shows current settings and error codes (e.g., "XTS 204").
- Current Adjustment Knob: Used to set the welding current (amperage).
- Mode Selector Switch: For switching between MMA and TIG welding modes.
- Electrode Terminals: Positive and negative terminals for connecting welding cables.
- Power Switch: Typically located at the rear or side of the unit.
- Carry Handle: Integrated handle for easy transportation.
Figure 2: Detailed view of the front panel, highlighting the digital display, control knob, and electrode terminals.
5. Setup
5.1 Power Connection
- Ensure the power source matches the machine's requirements (voltage and frequency).
- If using a generator, ensure it meets the recommended 10 KVA output.
- Connect the power cable securely to a grounded outlet.
5.2 Welding Cable Connection (MMA)
- Connect the electrode holder cable to the positive (+) terminal.
- Connect the earth clamp cable to the negative (-) terminal.
- Ensure all connections are tight and secure.
5.3 TIG Setup (Optional)
- Connect the optional TIG torch to the appropriate terminal (usually negative for DC TIG).
- Connect the gas hose from the TIG torch to a suitable gas supply (e.g., Argon).
- Ensure gas flow is properly regulated.
6. Operating Instructions
6.1 MMA Welding
- Turn on the welding machine using the power switch.
- Select the MMA welding mode.
- Adjust the welding current using the control knob according to the electrode type and material thickness.
- Securely insert the electrode into the electrode holder.
- Attach the earth clamp firmly to the workpiece.
- Initiate the arc by striking the electrode against the workpiece.
- Maintain a consistent arc length and travel speed for a quality weld.
6.2 TIG Welding (Optional)
- Turn on the welding machine and select TIG mode.
- Ensure the gas supply is open and flowing.
- Adjust the welding current.
- Use the lift arc feature by gently touching the tungsten to the workpiece and lifting slightly to initiate the arc.
- Feed filler rod as needed and maintain proper torch angle and travel speed.
7. Maintenance
Regular maintenance ensures the longevity and optimal performance of your welding machine.
- Cleaning: Periodically clean the machine's exterior with a dry cloth. Use compressed air to clear dust from internal components, ensuring the machine is unplugged.
- Cable Inspection: Regularly inspect welding cables, electrode holder, and earth clamp for damage, fraying, or loose connections. Replace damaged parts immediately.
- Ventilation: Ensure ventilation openings are clear and unobstructed to prevent overheating.
- Storage: Store the machine in a dry, clean environment away from excessive dust and moisture.
8. Troubleshooting
This section provides solutions to common issues you might encounter.
| Problem | Possible Cause | Solution |
|---|---|---|
| Machine does not power on. | No power supply; faulty power cable; internal fuse. | Check power outlet and cable. Consult a qualified technician if fuse is suspected. |
| No arc or weak arc. | Poor earth connection; incorrect current setting; damp electrode. | Ensure earth clamp is clean and secure. Adjust current. Use dry electrodes. |
| Overheating indicator on. | Exceeded duty cycle; blocked ventilation. | Allow machine to cool down. Clear any obstructions from vents. |
For issues not listed here, please contact customer support.
9. Technical Specifications
| Specification | Value |
|---|---|
| Manufacturer | Parweld |
| Model Number | XTS204 |
| ASIN | B0BD55KFVC |
| Maximum Electrode Size | 4.0 mm |
| Recommended Generator Size | 10 KVA |
| Welding Type | MMA (TIG optional) |
| First Available Date | September 5, 2022 |
10. Warranty and Support
For warranty information, technical support, or service inquiries, please refer to the official Parweld website or contact your authorized dealer. Keep your purchase receipt as proof of purchase for warranty claims.
Contact Information:
- Manufacturer: Parweld
- Visit Parweld Official Website (Placeholder link)
- Consult your local dealer for specific support in your region.