This manual provides comprehensive instructions for the safe and efficient operation, maintenance, and troubleshooting of your Koblenz Contractor Wet Dry Vacuum Cleaner, Model WD-6 C212. This versatile 6-gallon, 5.0 Peak HP vacuum is designed for both wet and dry messes, and also functions as a powerful blower, making it suitable for various cleaning tasks.
Image: The Koblenz Contractor Wet Dry Vacuum Cleaner with callouts for lightweight design, swivel casters, cartridge filter, corded electric power, various accessories, and suitability for multiple surfaces.
Important Safety Information
Read all instructions carefully before using the appliance. Failure to follow these instructions may result in electric shock, fire, and/or serious injury.
Always disconnect from power supply before servicing.
Do not leave appliance unattended when plugged in.
Do not pick up flammable or combustible liquids, such as gasoline, or use in areas where they may be present.
Do not pick up anything that is burning or smoking, such as cigarettes, matches, or hot ashes.
Use only as described in this manual. Use only manufacturer's recommended attachments.
Keep hair, loose clothing, fingers, and all parts of body away from openings and moving parts.
Do not use with damaged cord or plug. If appliance is not working as it should, has been dropped, damaged, left outdoors, or dropped into water, return it to a service center.
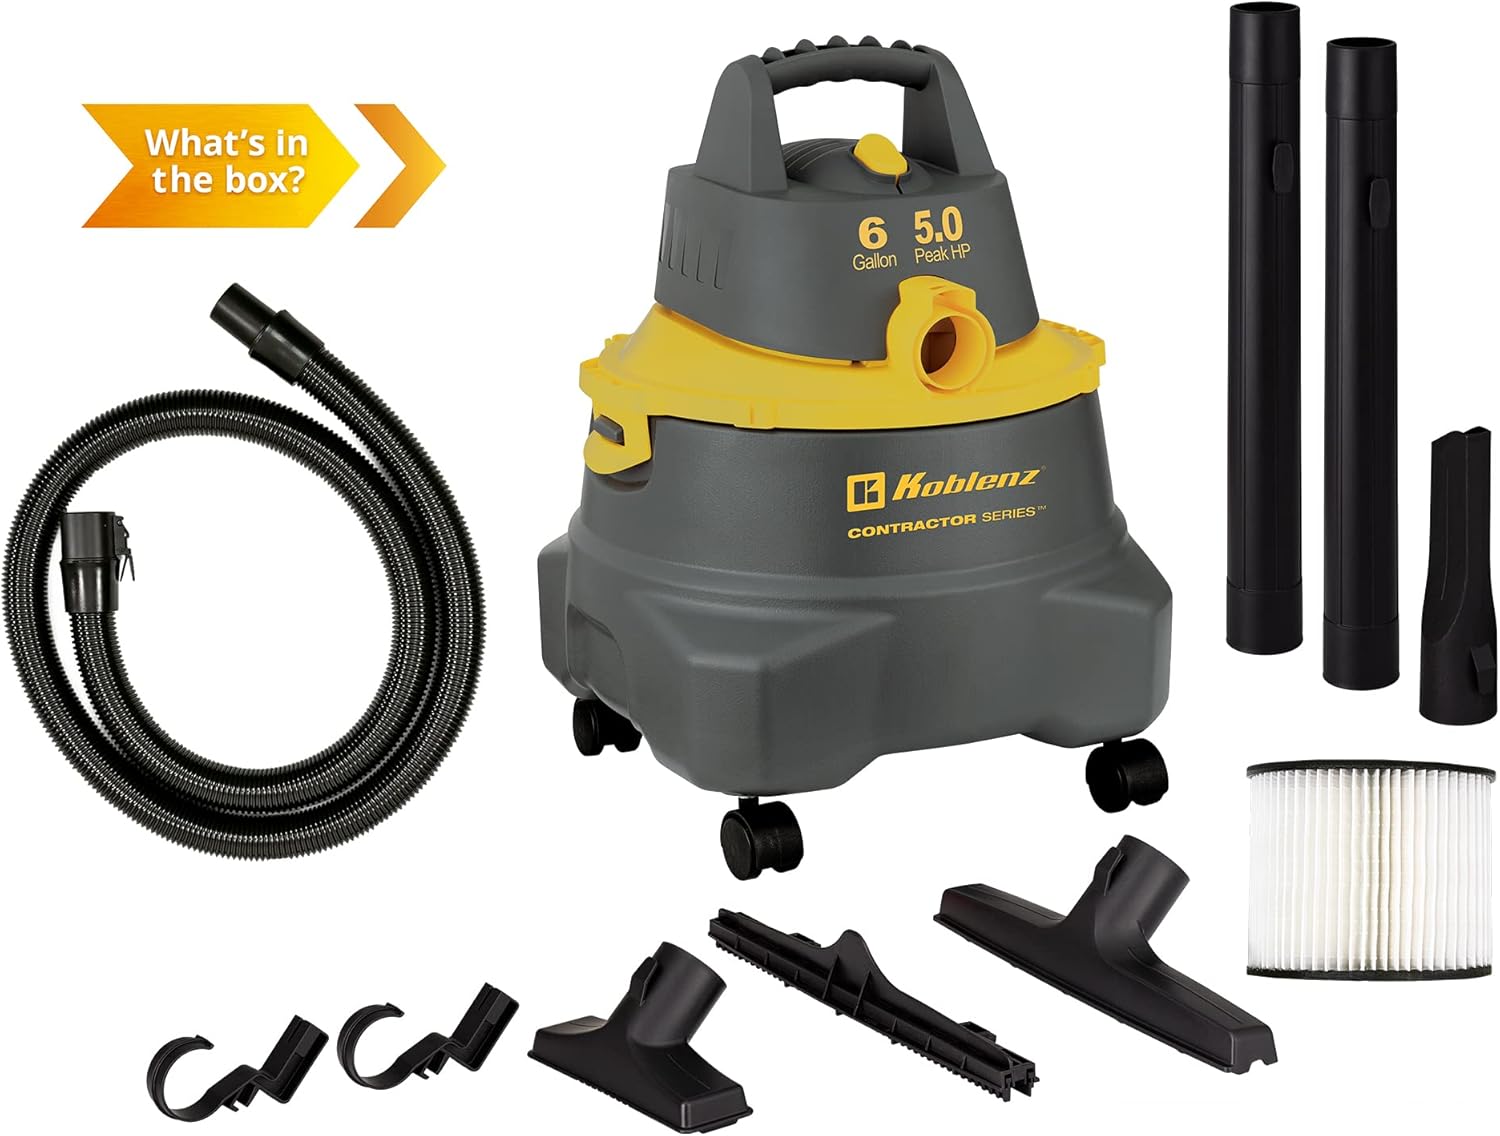
Package Contents
Verify that all components listed below are included in your package:
Koblenz Wet/Dry Vacuum Unit
1-7/8 Inch x 7 Feet CLICK-N-LOCK EVA Hose
2 Extension Wands
Pick Up Tool
Crevice Tool
Floor-Squeegee Tool (with removable squeegee)
Cartridge Filter
Owner's Manual
Image: A visual representation of the Koblenz Wet Dry Vacuum and all its included accessories, such as the hose, extension wands, various nozzles, and filter.
Setup
1. Attaching Casters
Insert the four swivel casters into the designated holes on the bottom of the vacuum tank. Push firmly until they click into place, ensuring secure attachment for mobility.
2. Attaching the Hose
Connect the 1-7/8 inch x 7 feet CLICK-N-LOCK EVA Hose to the intake port on the front of the vacuum for suction mode. For blower functionality, attach the hose to the exhaust port located on the motor head.
3. Filter Installation (Dry vs. Wet)
For dry vacuuming, ensure the cartridge filter is securely installed over the motor housing inside the tank. For wet vacuuming, the cartridge filter must be removed. A foam filter (not included, but typically used for wet applications) can be installed if desired, but the unit can operate for wet pickup without it.
Image: An exploded diagram illustrating the main components of the vacuum: powerful motor, intake port, reliable safety protection, cartridge filter, and tip-over resistant base design.
4. Cord Management
Utilize the built-in cord management system on the vacuum's motor head to neatly store the power cord when not in use, preventing tangles and ensuring easy access.
Operating Instructions
1. Power On/Off
Plug the power cord into a grounded electrical outlet. Press the yellow power switch located on the top of the motor head to turn the vacuum on or off.
Image: A top-down view of the Koblenz Wet Dry Vacuum, clearly showing the yellow power switch on the motor head.
2. Dry Vacuuming
Ensure the cartridge filter is installed. Attach the hose to the intake port. Select the appropriate accessory (e.g., Pick Up Tool, Crevice Tool) for the surface you are cleaning. Move the nozzle over the dry debris to collect it.
3. Wet Vacuuming
Remove the cartridge filter before wet vacuuming. Attach the hose to the intake port. Use the Floor-Squeegee Tool for efficient liquid pickup. Move the squeegee over the liquid spills to collect them into the tank.
4. Blower Function
To use the blower function, detach the hose from the intake port and securely attach it to the exhaust port on the motor head. The vacuum will now expel air, allowing you to clear debris from surfaces or inflate items.
Image: A close-up side view of the Koblenz Wet Dry Vacuum, highlighting the exhaust port on the motor head used for the blower function.
5. Using Accessories
The vacuum comes with various HOOK-N-STORE accessories. Attach extension wands for extended reach. Use the Pick Up Tool for general debris, the Crevice Tool for tight spaces, and the Floor-Squeegee Tool for liquids or by removing the squeegee insert, for dry floor cleaning.
Image: A display of the various accessories included with the vacuum, such as the cartridge filter, extension wands, pick-up tool, crevice tool, and floor-squeegee tool.
Maintenance
1. Emptying the Tank
Regularly empty the 6-gallon tank to maintain optimal suction performance. For dry debris, unlatch the motor head and carefully lift it off. Dispose of collected debris. For liquids, unlatch the motor head and pour out the liquid from the tank.
2. Cleaning/Changing Filters
For dry use, periodically blow dust off the cartridge filter to maintain suction. Replace the cartridge filter (Koblenz part numbers: 45-1168-00-9 Standard, 45-1170-00-5 Fine dust, 45-1169-00-7 Washable) after multiple cleanings or when performance decreases. For wet use, ensure the foam filter (if used) is clean and free of debris.
3. Hose and Accessory Care
Inspect the 1-7/8 inch x 7 feet EVA hose and all accessories for blockages or damage before and after each use. Clear any obstructions to ensure proper airflow. Store accessories using the HOOK-N-STORE system around the tank's perimeter.
Troubleshooting
Problem
Possible Cause
Solution
No power
Not plugged in; tripped circuit breaker
Ensure cord is securely plugged into a working outlet; check and reset circuit breaker.
Low suction
Clogged hose/filter; full tank; incorrect filter for application
Check hose and accessories for blockages; clean or replace filter; empty tank; ensure correct filter is used (remove cartridge for wet).
Motor runs, but no suction
Hose not properly attached; blockage in hose/nozzle
Ensure hose is securely connected to the intake port; clear any blockages in the hose or nozzle.
Specifications
Brand: Koblenz
Model Name: WD-6 C212
Capacity: 6 Gallons
Motor Horsepower: 5.0 Peak HP
Wattage: 960 watts
Amperage: 8 Amps
Maximum Suction: 77 Inches (water lift)
Hose Length: 7 Feet (1-7/8 Inch diameter)
Power Source: Corded Electric
Cord Length: 20 Feet
Item Weight: 14 pounds
Product Dimensions: 13.97"L x 13.97"W x 19.75"H
Filter Type: Cartridge (Standard, Fine dust, Washable options available)
Special Features: Tip-Over resistant tank, Rain protected motor head, CLICK-N-LOCK hose, HOOK-N-STORE accessory system
Image: The Koblenz Contractor Wet Dry Vacuum Cleaner with its dimensions (length, width, height) clearly indicated.
Warranty and Support
The Koblenz Contractor Wet Dry Vacuum Cleaner Model WD-6 C212 is backed by a Lifetime Limited Warranty. This warranty covers defects in materials and workmanship under normal use. Please refer to the full warranty statement included in your product packaging for complete details, terms, and conditions.
For technical support, warranty claims, or to order replacement parts, please contact Koblenz Customer Service:
Koblenz Coffee Maker User Manual - CKM Series Comprehensive user manual for Koblenz coffee makers, including models CKM-215 IN, CKM-212 IN, CKM-212 R, CKM-212 PIN, CKM-204 N, and CKM-204 B. Features setup, operation, maintenance, troubleshooting, and warranty information.
Koblenz Mix&Go BKM-1000/BKM-800 User Manual User manual for the Koblenz Mix&Go blender, including safety instructions, operation, maintenance, troubleshooting, and warranty information for models BKM-1000 and BKM-800.
Koblenz Product Warranty Information Details the warranty terms for Koblenz products, covering defects in materials and workmanship for one year, and exclusions for misuse or unauthorized repairs. Includes contact information for service centers.
Koblenz B-1500 P/DC Burnisher Service Manual and Parts List Comprehensive service manual and parts list for the Koblenz B-1500 P and B-1500 DC burnisher models, including safety tests, replacement procedures, troubleshooting, electrical information, wiring diagrams, and a detailed parts list with assembly diagrams.