1. Introduction
This manual provides detailed instructions for the setup, operation, maintenance, and troubleshooting of your TRIGKEY S5 5500U Mini PC. Please read this manual thoroughly before using the device to ensure proper functionality and to prevent damage.

Image 1.1: The TRIGKEY S5 5500U Mini PC, a compact desktop computer.
2. What's in the Box
Verify that all items are present in the package:
- 1 x TRIGKEY Mini PC 5500U 16GB+500GB
- 1 x Power Adapter
- 1 x HDMI Cable (100cm)
- 1 x User Manual (this document)
- 1 x Wall-Mounted bracket
3. Product Overview
3.1. Dimensions and Physical Layout
The TRIGKEY S5 5500U Mini PC features a compact design, measuring approximately 126mm (width) x 113mm (depth) x 42mm (height).

Image 3.1: Top, front, side, and rear views of the Mini PC with dimensions indicated.
3.2. Front Panel Ports

Image 3.2: Front panel of the Mini PC showing the power button, USB ports, and Type-C port.
- Power Button: To turn the device on or off.
- USB 3.2 Gen 2 (x3): High-speed data transfer ports.
- Type-C (Data & Video): Supports data transfer and video output.
- 3.5mm Audio Jack (HP&MIC): For headphones and microphone.
- CLR CMOS: Button to clear CMOS settings.
3.3. Rear Panel Ports

Image 3.3: Rear panel of the Mini PC showing the LAN, USB, DisplayPort, HDMI, and power input.
- LAN (2.5Gbps): Ethernet port for wired network connection.
- USB 2.0 (x1): Standard USB port.
- DP 1.4 (x1): DisplayPort for video output.
- HDMI 2.0 (x1): HDMI port for video and audio output.
- DC Input: Power adapter connection.
4. Setup Instructions
4.1. Connecting Peripherals
- Connect your monitor(s) to the HDMI, DisplayPort, or Type-C video output ports. The device supports up to three displays simultaneously.
- Connect your keyboard and mouse to the available USB ports.
- For a wired network connection, connect an Ethernet cable to the LAN port.
- Connect the power adapter to the DC input port on the Mini PC, then plug the adapter into a power outlet.
4.2. Initial Power On
Press the power button located on the front panel. The device will boot up, and the pre-installed OS 11 Pro system will load.
5. Operating Instructions
5.1. Operating System
The TRIGKEY S5 5500U Mini PC comes with OS 11 Pro pre-installed. Follow the on-screen instructions for initial setup, including language, region, and user account creation.

Image 5.1: The Mini PC supports various operating systems and applications, including Windows and Linux.
5.2. Display Configuration
The Mini PC supports triple-screen display output at 4K@60Hz via HDMI 2.0, DisplayPort 1.4, and Type-C. To configure multiple displays:
- Connect your monitors to the available video output ports.
- In OS 11 Pro, navigate to Settings > System > Display to arrange and extend your displays as needed.

Image 5.2: Example of a triple-screen display setup with the Mini PC.
5.3. Wireless Connectivity (Wi-Fi and Bluetooth)
The device is equipped with Wi-Fi 6 and Bluetooth 5.2 for wireless connections.
- Wi-Fi: To connect to a wireless network, go to Settings > Network & internet > Wi-Fi, select your network, and enter the password.
- Bluetooth: To pair Bluetooth devices, go to Settings > Bluetooth & devices, turn on Bluetooth, and select your device from the list.

Image 5.3: The Mini PC supports Wi-Fi 6 and Bluetooth 5.2 for enhanced wireless connectivity.
6. Storage and Memory Expansion
The Mini PC offers options for storage and memory upgrades.
6.1. RAM Upgrade
The device is equipped with dual-channel 16GB (8GBx2) DDR4 RAM. It supports up to 64GB (32GBx2) DDR4 RAM. To upgrade:
- Power off the Mini PC and disconnect all cables.
- Carefully open the chassis (refer to the detailed instructions in the full user manual for specific steps).
- Locate the SO-DIMM DDR4 slots.
- Install the new RAM modules, ensuring they are seated correctly.
- Close the chassis and reconnect cables.

Image 6.1: Illustration of RAM and M.2 NVMe SSD slots for expansion.
6.2. Storage Upgrade
The Mini PC includes a 500GB M.2 2280 NVMe SSD and supports expansion up to 2TB. It also has one SATA HDD (2.5-inch 7mm) slot for additional storage.
- Power off the Mini PC and disconnect all cables.
- Open the chassis.
- To install an M.2 NVMe SSD, locate the M.2 2280 slot and secure the new SSD.
- To install a 2.5-inch SATA HDD, connect it to the SATA slot and secure it within the chassis.
- Close the chassis and reconnect cables.

Image 6.2: A close-up view of an M.2 NVMe SSD, indicating its form factor and interface.
7. Maintenance
7.1. General Care
- Keep the Mini PC in a clean, dry environment, away from direct sunlight and heat sources.
- Avoid placing heavy objects on top of the device.
- Ensure proper ventilation by not blocking the air vents.
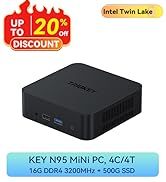
Image 7.1: Internal view highlighting the cooling fan and heat sink for efficient heat dissipation.
7.2. Cleaning
- Use a soft, dry cloth to clean the exterior of the Mini PC.
- For dust accumulation in vents, use compressed air. Ensure the device is powered off before cleaning.
- Do not use liquid cleaners or solvents directly on the device.
8. Troubleshooting
| Problem | Possible Cause | Solution |
|---|---|---|
| No power | Power adapter not connected or faulty. | Ensure the power adapter is securely connected to the Mini PC and a working power outlet. Test with another outlet if possible. |
| No display output | Monitor not connected, incorrect input selected, or faulty cable. | Verify monitor connections (HDMI, DP, Type-C). Ensure the monitor is set to the correct input source. Try a different cable. |
| Wi-Fi/Bluetooth issues | Drivers not installed, disabled in OS, or interference. | Check Wi-Fi/Bluetooth settings in OS 11 Pro. Ensure drivers are up to date. Move away from potential interference sources. |
| System crashes/freezes | Overheating, software conflict, or hardware issue. | Ensure proper ventilation. Update drivers and OS. Run system diagnostics. If issues persist, contact support. |
For more complex issues, refer to the TRIGKEY support website or contact customer service.
9. Specifications
| Feature | Detail |
|---|---|
| Processor | AMD Ryzen 5 5500U (6 Cores, 12 Threads, up to 4.0GHz) |
| Graphics | AMD Radeon Graphics 7Cores 1800MHz (Integrated) |
| RAM | 16GB DDR4 (Dual Channel, expandable up to 64GB) |
| Storage | 500GB M.2 2280 NVMe SSD (expandable up to 2TB), 1x 2.5-inch SATA HDD slot |
| Operating System | OS 11 Pro (Pre-installed) |
| Wireless Connectivity | Wi-Fi 6 (802.11ax), Bluetooth 5.2 |
| Wired Connectivity | 1x LAN 2.5Gbps Ethernet Port |
| Video Output | 1x HDMI 2.0 (4K@60Hz), 1x DP 1.4 (4K@60Hz), 1x Type-C (Data & Video, 4K@60Hz) - Triple Display Support |
| USB Ports | 3x USB 3.2 Gen 2 (10Gbps), 1x USB 2.0 (480Mbps) |
| Audio | 1x 3.5mm Audio Jack (HP&MIC) |
| Dimensions | Approx. 126mm x 113mm x 42mm (4.96 x 4.45 x 1.65 inches) |
| Weight | Approx. 0.96 kg (2.12 pounds) |
10. Warranty and Support
TRIGKEY provides the following support and warranty services:
- One-Year Return/Exchange: Under reasonable circumstances.
- 12-Month Replacement: Available within 12 months of purchase.
- Lifetime After-Sales Service and Technical Support: For any questions or issues with the machine.
- 24-Hour Quick Reply: Customer service aims to respond within 24 hours.
For technical assistance or warranty claims, please contact TRIGKEY customer support through their official channels. Refer to the product packaging or TRIGKEY's official website for contact information.

Image 10.1: TRIGKEY brand logo.


