1. Introduction
Thank you for choosing the MOES Smart Light Switch. This device allows you to control your lighting remotely via the Tuya Smart Life App, voice commands with Alexa or Google Home, and traditional manual operation. Designed for convenience, it requires no neutral wire or capacitor for installation, making it suitable for a wide range of existing electrical setups. Please read this manual carefully before installation and use to ensure proper function and safety.
2. Product Features
- No Neutral Wire Required: Simplifies installation in homes without neutral wiring at the switch box.
- No Capacitor Required: Eliminates the need for an external capacitor, reducing installation complexity and potential noise.
- No Hub Required: Connects directly to your 2.4GHz Wi-Fi network.
- App Control: Remote control via Tuya Smart Life App from anywhere.
- Voice Control: Compatible with Amazon Alexa and Google Home for hands-free operation.
- Scheduling & Timers: Set schedules and timers for automated lighting control.
- Wide Compatibility: Supports incandescent/halogen bulbs up to 1000W and LED bulbs up to 350W. Minimum wattage of 7W required.
- Multi-Control Association: Allows control from multiple smart switches within the Smart Life App.
3. Safety Information
WARNING: RISK OF ELECTRIC SHOCK. Improper installation can be dangerous or illegal. Consult a qualified electrician if you are unfamiliar or uncomfortable with electrical work. Always turn off power at the circuit breaker before installation or maintenance.
- Ensure the power is OFF at the circuit breaker before wiring.
- This device is for indoor use only.
- Do not exceed the maximum load ratings specified in the specifications section.
- Only supports 2.4GHz Wi-Fi networks. 5GHz networks are not supported.
- Minimum load of 7W is required for proper operation.
4. Package Contents
- MOES Smart Light Switch (2 Pack)
- Mounting Screws
- User Manual
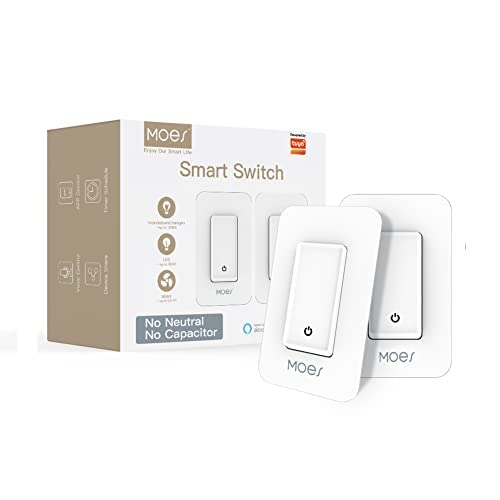
Image: MOES Smart Light Switch packaging and included switches.
5. Product Overview
The MOES Smart Light Switch features a simple push-button design for manual control and integrates seamlessly with smart home ecosystems. Its compact design allows for easy installation in standard wall boxes.

Image: MOES Smart Light Switch in a bedroom setting, highlighting its smart features.

Image: Working Loads diagram, showing compatibility with incandescent/halogen (up to 1000W) and LED (up to 350W) bulbs, with a minimum control of 7W.
6. Installation
Follow these steps carefully to install your MOES Smart Light Switch. Ensure power is OFF at the circuit breaker before proceeding.
- Turn Off Power: Locate your circuit breaker and turn off the power to the switch you are replacing. Verify the power is off using a voltage tester.
- Remove Old Switch: Unscrew and carefully pull the old switch out of the wall box. Disconnect the wires.
- Identify Wires: Identify the Line/Hot wire (usually black), Load wire (usually red or black), and Ground wire (usually green or bare copper). This switch does NOT require a neutral wire.
- Wire the Smart Switch: Connect the wires from your wall box to the corresponding wires on the MOES Smart Light Switch using wire nuts:
- Connect the Line/Hot wire to the switch's L terminal.
- Connect the Load wire to the switch's L1 terminal.
- Connect the Ground wire to the switch's GND terminal.

Image: Single Pole Connection Diagram for the Smart Switch.
- Mount the Switch: Gently push the wired switch back into the wall box. Secure it with the provided screws.
- Install Wall Plate: Attach the wall plate.
- Restore Power: Turn the power back on at the circuit breaker.
- Initial Power-On: Allow the switch to power on for 5-7 minutes before attempting to use it for the first time. This allows internal components to stabilize.
Note: This switch is designed for single-pole circuits only. It does not require a neutral wire or capacitor for normal operation, which differentiates it from some traditional smart switches.

Image: Comparison of smart switches, illustrating the MOES switch's no-capacitor design.
7. Setup (App Pairing)
To enable smart features, you need to pair the switch with the Tuya Smart Life App.
- Download App: Download the "Smart Life" app from the App Store (iOS) or Google Play Store (Android).
- Register/Login: Open the app and register for a new account or log in with an existing one.
- Connect to 2.4GHz Wi-Fi: Ensure your smartphone is connected to a 2.4GHz Wi-Fi network. The smart switch does not support 5GHz Wi-Fi.
- Enter Pairing Mode: Press and hold the switch button for approximately 5-10 seconds until the indicator light on the switch starts blinking rapidly. This indicates it's in pairing mode.
- Add Device in App: In the Smart Life app, tap the "+" icon in the top right corner to add a device. Select "Lighting" > "Switch (Wi-Fi)" or allow the app to auto-discover the device.
- Confirm Blinking: Confirm that the indicator light on the switch is blinking rapidly in the app.
- Enter Wi-Fi Credentials: Enter your 2.4GHz Wi-Fi network password.
- Pairing: The app will begin the pairing process. Once successful, the indicator light on the switch will stop blinking and remain solid, and the app will confirm the device has been added.
- Rename Device: You can rename the switch in the app for easier identification (e.g., "Living Room Light").
For Voice Control (Alexa/Google Home):
- Open your Alexa or Google Home app.
- Go to "Skills & Games" (Alexa) or "Works with Google" (Google Home).
- Search for and enable the "Smart Life" skill/service.
- Link your Smart Life account when prompted.
- Discover devices. Your MOES Smart Light Switch should now be controllable via voice commands.
8. Operation
The MOES Smart Light Switch offers multiple ways to control your lighting.
8.1 Manual Control
Press the physical button on the switch to turn the connected light ON or OFF.
8.2 App Control
Open the Smart Life app, select your switch, and tap the power icon to toggle the light ON/OFF. You can also set schedules, timers, and create smart scenes within the app.
8.3 Voice Control
Once integrated with Alexa or Google Home, use voice commands such as:
- "Alexa, turn on [Switch Name]."
- "Hey Google, turn off [Switch Name]."
- "Alexa, set [Switch Name] to 50%" (if dimming is supported by your bulb and switch model).
9. Maintenance
To ensure the longevity and proper functioning of your smart switch, follow these maintenance guidelines:
- Cleaning: Wipe the switch and wall plate with a soft, dry cloth. Do not use abrasive cleaners or solvents.
- Power Cycles: If the switch becomes unresponsive, try turning off the power at the circuit breaker for a few minutes, then turn it back on.
- Firmware Updates: Periodically check the Smart Life app for available firmware updates for your switch to ensure optimal performance and security.
10. Troubleshooting
If you encounter issues with your MOES Smart Light Switch, refer to the following common problems and solutions:
| Problem | Possible Cause / Solution |
|---|---|
| Switch not responding / Light flickering |
|
| Cannot pair with app |
|
| Voice control not working |
|
| Switch loses connection frequently |
|
11. Specifications
| Attribute | Value |
|---|---|
| Brand | MOES |
| Model Number | MOES_1234 |
| Operation Mode | Push Button, Smart Switch |
| Contact Type | Normally Open |
| Connector Type | Screw Terminals |
| Circuit Type | 1-way (Single Pole) |
| Mounting Type | Wall Mount |
| Actuator Type | Push Button |
| Contact Material | Metal |
| Minimum Wattage | 7W |
| Max Incandescent/Halogen Load | 1000W |
| Max LED Load | 350W |
| Wi-Fi Frequency | 2.4GHz only |
| Dimensions (Package) | 6.06 x 5.28 x 2.91 inches |
| Weight (Item) | 0.18 ounces |
12. Warranty and Support
For detailed warranty information, please refer to the product packaging or contact MOES customer support. Additional protection plans may be available for purchase.
For further assistance, you may refer to the official user manual PDF: Download User Manual (PDF)
For technical support or inquiries, please contact the seller or manufacturer directly through your purchase platform.