1. Introduction and Overview
Thank you for choosing the LEDLUX WiFi Thermostat, Model LL0269. This modern, slim-design thermostat is engineered to provide efficient temperature control for your gas boiler heating system. Featuring WiFi connectivity, it allows for remote management via the Tuya and Smart Life applications, and seamless integration with Amazon Alexa and Google Home for voice control. This manual provides essential information for safe installation, operation, and maintenance of your new thermostat.
2. Safety Information
- Electrical Installation: Installation must be performed by a qualified electrician in accordance with local electrical codes. Ensure the main power supply is disconnected before any wiring work.
- Voltage: This device operates on AC220V-240V 50/60HZ. Do not connect to other voltage supplies.
- Compatibility: Ensure the thermostat model is suitable for your specific gas boiler or water heating system before proceeding with installation.
- Environment: Do not install the thermostat in areas with excessive humidity, direct sunlight, or extreme temperatures.
3. Package Contents
Please check the package for the following items:
- LEDLUX WiFi Thermostat (Model LL0269)
- Mounting Screws (typically included)
- User Manual (this document)
4. Setup and Installation
4.1 Physical Installation
The LEDLUX LL0269 thermostat is designed with a slim profile (86x86x9mm) and is compatible with standard 86x86 flush mount electrical boxes. It can also be used with a 503 box, though it is not designed for flush mounting within a 503 box.
- Power Disconnection: Before starting, ensure the main power supply to your heating system is completely turned off at the circuit breaker.
- Mounting: Carefully remove the front panel of the thermostat to access the mounting holes. Secure the backplate to your chosen electrical box using the provided screws.
- Wiring: Connect the electrical wires from your heating system to the appropriate terminals on the thermostat's backplate. Refer to the wiring diagram provided with your specific product packaging for detailed connections. It is crucial to ensure correct polarity and secure connections.
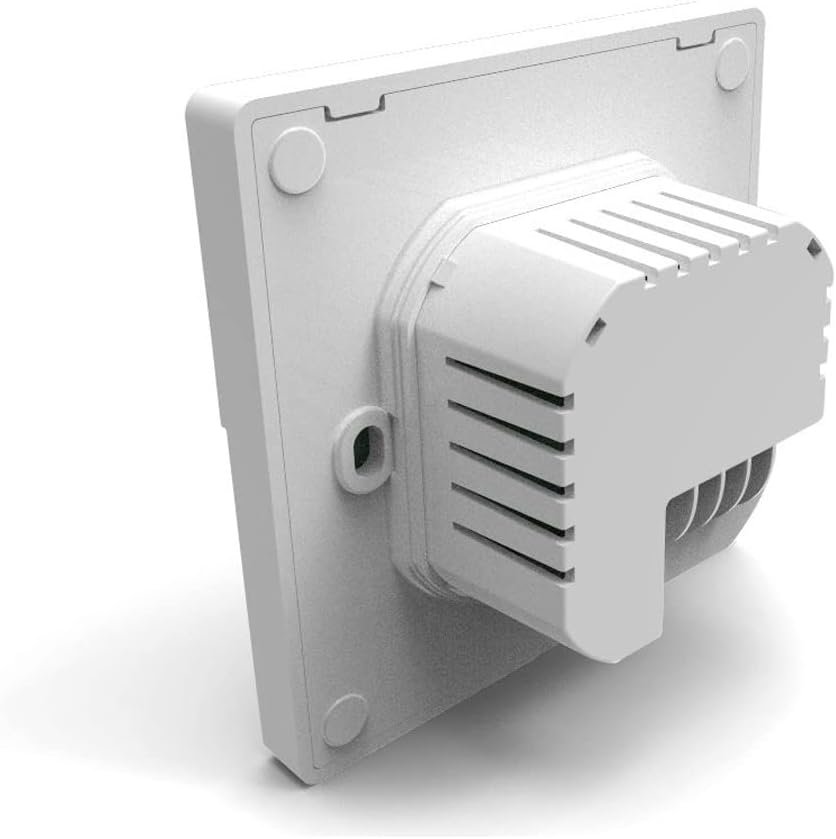
Figure 1: Rear view of the thermostat, illustrating the wiring terminal block. Professional installation is recommended for all electrical connections.
- Reassembly: Once wiring is complete and secure, carefully reattach the front panel of the thermostat to the backplate.
- Power Restoration: Restore power to your heating system at the circuit breaker. The thermostat display should illuminate.
4.2 Initial Power-On and WiFi Connection
Upon first power-on, the thermostat will display the current room temperature. To enable remote control and smart home integration, you must connect the thermostat to your home Wi-Fi network using the Tuya or Smart Life application.
- Download App: Download and install the "Tuya Smart" or "Smart Life" app from your smartphone's app store (available for iOS and Android).
- Register/Login: Open the app and register a new account or log in with an existing one.
- Add Device: Follow the in-app instructions to add a new device. Typically, you will select "Add Device" or the "+" icon, then navigate to "Small Home Appliances" or "Thermostat".
- Pairing Mode: Put the thermostat into pairing mode. This usually involves pressing and holding a specific button (refer to the thermostat's on-screen prompts or quick start guide for exact button combination). The Wi-Fi icon on the thermostat display will likely flash rapidly.
- Connect to Wi-Fi: In the app, select your 2.4GHz Wi-Fi network and enter the password. The thermostat will attempt to connect.
- Confirmation: Once connected, the Wi-Fi icon on the thermostat will become solid, and the app will confirm successful pairing. You can then rename your thermostat within the app.
5. Operating Instructions
The LEDLUX WiFi Thermostat features an intuitive LCD touchscreen display and physical buttons for easy control.

Figure 2: Front view of the thermostat, showing the LCD display and touch-sensitive control buttons for power, mode, and temperature adjustment.
5.1 Basic Controls
- Power Button (⏻): Press to turn the thermostat ON or OFF.
- Temperature Adjustment (+ / -): Use these buttons to increase or decrease the desired set temperature.
- Mode Button (Calendar/Person/Loop icons): Cycle through different operating modes such as Manual, Programmed (Schedule), and Temporary Hold.
5.2 Display Information
The LCD screen displays:
- Current Room Temperature
- Set Temperature
- Operating Mode (e.g., Manual, Programmed)
- Heating Indicator (flame icon)
- Wi-Fi Connection Status
- Time and Day (if configured)
5.3 Programming Schedules
The thermostat allows you to set up to 6 distinct time periods per day, each with its own desired temperature. This feature helps maximize comfort and energy savings. Detailed programming instructions are available within the Tuya/Smart Life app, which offers a more user-friendly interface for schedule management.
5.4 Power Loss Memory
In the event of a power outage, all your customized settings and programmed schedules will be automatically saved and restored once power is re-established.
6. Smart Home Integration
The LEDLUX WiFi Thermostat is designed for seamless integration with popular smart home platforms.
6.1 Amazon Alexa Integration
- Ensure your thermostat is connected to the Tuya/Smart Life app and your Alexa device is set up.
- Open the Alexa app, go to "Skills & Games", and search for "Tuya Smart" or "Smart Life". Enable the skill.
- Link your Tuya/Smart Life account with Alexa.
- Discover devices. Alexa should find your thermostat.
- You can now use voice commands such as:
- "Alexa, set [Thermostat Name] to 22 degrees."
- "Alexa, what is the temperature in [Thermostat Name]?"
- "Alexa, turn on [Thermostat Name]."
6.2 Google Home Integration
- Ensure your thermostat is connected to the Tuya/Smart Life app and your Google Home device is set up.
- Open the Google Home app, tap "Add" (the "+" icon), then "Set up device", and "Works with Google".
- Search for "Tuya Smart" or "Smart Life". Link your account.
- Assign your thermostat to a room.
- You can now use voice commands such as:
- "Hey Google, set [Thermostat Name] to 22 degrees."
- "Hey Google, what's the temperature in [Thermostat Name]?"
- "Hey Google, turn off [Thermostat Name]."
7. Maintenance
To ensure optimal performance and longevity of your thermostat, follow these simple maintenance guidelines:
- Cleaning: Gently wipe the thermostat's surface with a soft, dry cloth. Do not use abrasive cleaners, solvents, or harsh chemicals, as these can damage the display and casing.
- Avoid Liquids: Do not spray liquids directly onto the thermostat or allow water to seep into its internal components.
- Ventilation: Ensure the thermostat's vents (if any) are not obstructed to allow for accurate temperature sensing.
8. Troubleshooting
If you encounter issues with your LEDLUX WiFi Thermostat, refer to the following common problems and solutions:
- Thermostat Not Powering On:
- Check the main power supply to your heating system at the circuit breaker.
- Verify that all wiring connections to the thermostat are secure and correct.
- No Heating/Cooling:
- Ensure the thermostat is set to the correct mode (e.g., heating).
- Check that the set temperature is higher than the current room temperature (for heating).
- Verify that your boiler or heating system is operational.
- Wi-Fi Connection Issues:
- Ensure your Wi-Fi router is powered on and functioning correctly.
- Confirm that your Wi-Fi network is 2.4GHz. The thermostat does not support 5GHz networks.
- Restart your Wi-Fi router and the thermostat.
- Try re-pairing the thermostat with the Tuya/Smart Life app.
- Inaccurate Temperature Reading:
- Ensure the thermostat is not exposed to direct sunlight, drafts, or heat sources that could affect its internal sensor.
- Verify that the thermostat's vents are not obstructed.
If problems persist, contact LEDLUX customer support for further assistance.
9. Specifications
| Brand | LEDLUX |
| Model | LL0269 |
| Input Voltage | AC220V-240V 50/60HZ |
| Load Current | 3A |
| Static Consumption | <0.3W |
| Temperature Sensor | Internal NTC |
| Detected Temperature Range | 1°C - 70°C |
| Settable Temperature Range | 5°C - 35°C |
| Temperature Accuracy | ±0.5°C |
| Display Type | LCD Touchscreen |
| Dimensions (W x H x D) | 86 x 86 x 9 mm |
| Color | White |
| Material | ABS, Polycarbonate |
| Certifications | CE, RoHS |
| Compatibility | Gas Boiler, Water Heating, Amazon Alexa, Google Home, Tuya/Smart Life App |

Figure 3: The LEDLUX WiFi Thermostat integrated into a home environment, demonstrating its use with a heating system, potentially including underfloor heating.
10. Warranty and Support
For warranty information, please refer to the documentation provided at the time of purchase or contact your retailer. For technical support, product inquiries, or assistance with troubleshooting, please contact LEDLUX customer service through their official website or the contact information provided with your product packaging.


