1. Introduction
This manual provides essential information for the safe and effective operation of your Canon VIXIA HF G70 Camcorder. Please read it thoroughly before use and keep it for future reference.
The Canon VIXIA HF G70 Camcorder is designed for high-quality video capture, featuring a 4K UHD CMOS Sensor and a powerful 20x optical zoom lens. It offers advanced functionalities such as OSD Time Stamp recording, UVC livestreaming, and advanced autofocus with face detection, ensuring crisp and sharp images for all your filmmaking needs.
2. What's in the Box
Verify that all items listed below are included in your package:
- VIXIA HR G70 Body
- Lens Cap
- Lens Hood with Lens Barrier
- USB Power Adapter PD-E1
- AC Cable

Figure 2.1: Package Contents
3. Product Overview

Figure 3.1: Front-Right View of Camcorder
This image displays the main body of the Canon VIXIA HF G70 Camcorder, highlighting its compact design and the prominent lens with its attached hood. The Canon logo and VI XIA HF G70 model name are clearly visible, along with the 4K and 20x Optical Zoom indicators.

Figure 3.2: Top-Down View of Camcorder
A top-down perspective of the camcorder, showcasing its streamlined profile and the placement of the top-mounted controls and hot shoe. The lens hood is also visible from this angle.
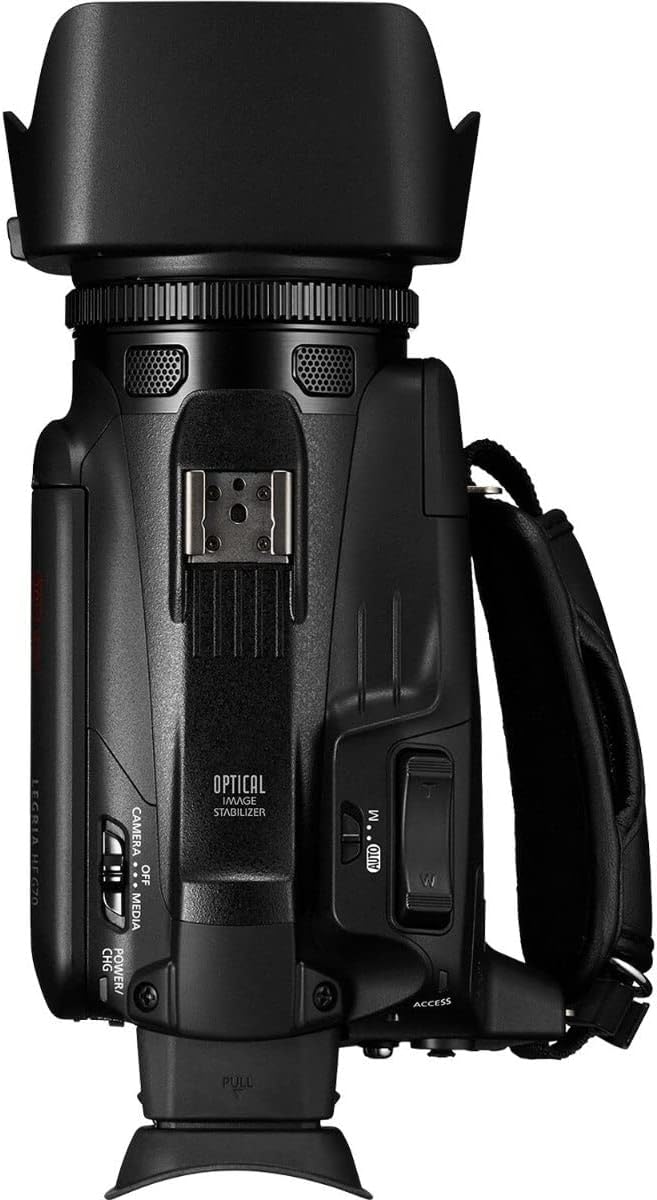
Figure 3.3: Top-Left View of Camcorder
This view provides a clear look at the left side of the camcorder, including the side strap and additional control buttons. The overall ergonomic design for handheld use is evident.

Figure 3.4: Internal Components
An illustrative diagram highlighting the key internal components responsible for the camcorder's high-quality imaging: the optical wide-angle lens, the 4K UHD CMOS sensor, and the DIGIC DV6 image processor.

Figure 3.5: On-Screen Display (OSD) Time Stamp Recording
A close-up of the camcorder's LCD screen showing the On-Screen Display (OSD) Time Stamp recording feature in action, which embeds date, time, and other data directly into the video files.

Figure 3.6: UVC Livestreaming Option
The camcorder's menu interface displaying the UVC (USB Video Class) livestreaming option, which allows direct HD video streaming to a PC or Mac computer.

Figure 3.7: Adjustable Focusing Speeds
A visual representation of the camcorder's adjustable focusing speeds and advanced Hybrid AF system, which provides fast and precise focusing capabilities, including face detection.
4. Setup
4.1 Charging the Battery
- Connect the USB Power Adapter PD-E1 to the camcorder's DC IN terminal.
- Plug the AC cable into a power outlet.
- The charging indicator will illuminate. Charging is complete when the indicator turns off.
4.2 Inserting a Memory Card
- Open the memory card slot cover.
- Insert an SDXC memory card into the slot until it clicks into place.
- Close the memory card slot cover securely.
4.3 Attaching the Lens Hood
- Align the lens hood with the front of the camcorder lens.
- Twist the lens hood clockwise until it locks into position.
- Ensure the lens barrier lever is accessible for opening and closing the lens cover.
5. Operating Instructions
5.1 Powering On/Off
To power on the camcorder, slide the POWER/CHG switch to the CAMERA or MEDIA position. To power off, slide the switch to the OFF position.
5.2 Recording Video
- Ensure the camcorder is in CAMERA mode.
- Open the LCD screen or extend the electronic viewfinder.
- Press the START/STOP button to begin recording. Press it again to stop.
5.3 Zoom Operation
Use the zoom rocker switch located on the top of the camcorder to zoom in (T) or out (W). The 20x optical zoom provides clear magnification.
5.4 Livestreaming (UVC)
Connect the camcorder to a PC or Mac using a USB cable. Select UVC Video Output from the USB Mode settings to stream HD video directly.
5.5 Official Product Videos
No official product videos from the seller are available for embedding in this manual.
6. Maintenance
6.1 Cleaning the Camcorder
- Use a soft, dry cloth to clean the camcorder body.
- For the lens, use a lens brush or a soft, lint-free cloth specifically designed for optical surfaces. Avoid using abrasive materials or harsh chemicals.
6.2 Battery Care
- Store batteries in a cool, dry place when not in use.
- Avoid fully discharging the battery frequently to prolong its lifespan.
- If storing for extended periods, charge the battery to approximately 50% capacity.
7. Troubleshooting
7.1 Common Issues and Solutions
| Problem | Possible Cause | Solution |
|---|---|---|
| Camcorder does not power on. | Battery is depleted or not inserted correctly. | Charge the battery fully. Ensure the battery is inserted correctly. |
| Recording stops unexpectedly. | Memory card is full or too slow. | Delete unnecessary files or insert a new/faster memory card (SDXC recommended). |
| Image is blurry. | Focus issue or dirty lens. | Check autofocus settings. Clean the lens carefully. |
8. Specifications
| Feature | Detail |
|---|---|
| Product Dimensions | 27.43 x 18.8 x 20.07 inches |
| Item Weight | 1 pounds |
| Item Model Number | 5734C002 |
| Batteries | 1 Lithium Ion batteries required (included) |
| Photo Sensor Technology | CMOS |
| Video Capture Resolution | 4K |
| Maximum Focal Length | 627.0 |
| Maximum Aperture | 1.8 f |
| Flash Memory Type | SDXC |
| Video Capture Format | MP4 |
| Supported Audio Format | AAC |
| Screen Size | 3.5 Inches |
| Connectivity Technology | USB |
| Manufacturer | Canon USA |
| Country of Origin | Japan |
| First Available Date | September 7, 2022 |
9. Warranty and Support
Canon provides a limited warranty for its products. Please refer to the warranty card included in your package for specific terms and conditions. For technical support, product registration, or service inquiries, please visit the official Canon support website or contact their customer service.
Protection plans are available for purchase to extend coverage beyond the standard warranty. Options include 2-Year Protection Plan, 3-Year Protection Plan, and Complete Protect (monthly subscription).
For more information, visit the Canon Store on Amazon.


