1. Introduction
This manual provides detailed instructions for the setup, operation, and maintenance of your Andonstar AD407 Pro Digital Microscope. Designed for precision tasks such as PCB inspection, soldering, and detailed examination, this microscope offers UHD 2160P video recording, a 7-inch IPS screen, and an upgraded metal stand for enhanced stability and working distance. Please read this manual thoroughly to ensure proper use and to maximize the performance of your device.

Figure 1.1: Andonstar AD407 Pro Digital Microscope with remote control.
2. Package Contents
Verify that all items listed below are included in your package. If any items are missing or damaged, please contact customer support.
- Microscope x1
- UV filter (assembled) x1
- Metal base x1
- Metal column x1
- Beam x1
- Wrench x1
- Metal clips x1
- Remote control x1
- Switch cable x1
- HDMI cable x1
- Power plug x1
- Instruction manual x1

Figure 2.1: All components included in the Andonstar AD407 Pro package.
3. Setup
Follow these steps to assemble and prepare your Andonstar AD407 Pro Digital Microscope for first use.
- Assemble the Metal Stand: Attach the metal column and beam to the large metal base plate. Ensure all connections are secure using the provided wrench. The upgraded 13-inch metal bracket allows for significant adjustment, including 360° horizontal rotation and vertical adjustment for precise positioning.
- Mount the Microscope Unit: Securely attach the microscope unit (with the 7-inch IPS screen) to the adjustable bracket on the metal column.
- Connect LED Lights: The two side LED lights on the base can be bent flexibly. Connect their power cable to the base.
- Power Connection: Connect the switch cable to the microscope unit and then to the power plug. Plug the power adapter into a suitable electrical outlet. The LED lights will illuminate upon power-on.
- Initial Power-On: The screen will display a warning message followed by a welcome screen.
- Remove Protective Film: Carefully peel off any protective film from the screen for optimal viewing clarity.

Figure 3.1: The upgraded metal stand of the AD407 Pro provides a higher view and larger working space compared to the AD407.

Figure 3.2: The new upgraded metal bracket allows for adjustable angles, vertical precision, and higher working distance.
Setup Video Guide
Video 3.1: A comprehensive guide on how to set up and use the Andonstar AD407-Pro digital microscope.
4. Components and Features
The Andonstar AD407 Pro is equipped with several key components designed for high-performance microscopic observation:
- 7-inch IPS Screen: Provides UHD 2160P video recording with sharp image quality and deep depth of field. The IPS technology offers wider viewing angles and better color contrast.
- Industrial-grade Metal Lens: High-temperature resistant, ideal for soldering and repair work. It includes an assembled UV filter to protect the lens from smoke and heat, and to reduce reflection.
- Large Metal Base Plate: Measuring 7 x 7.8 inches, it offers ample operating space for electronic work, such as phone/watch repair or soldering larger circuit boards.
- Adjustable LED Fill Lights: Two side lights on the base can be bent flexibly, dimmed, and brightened to provide optimal illumination for clear and precise observation.
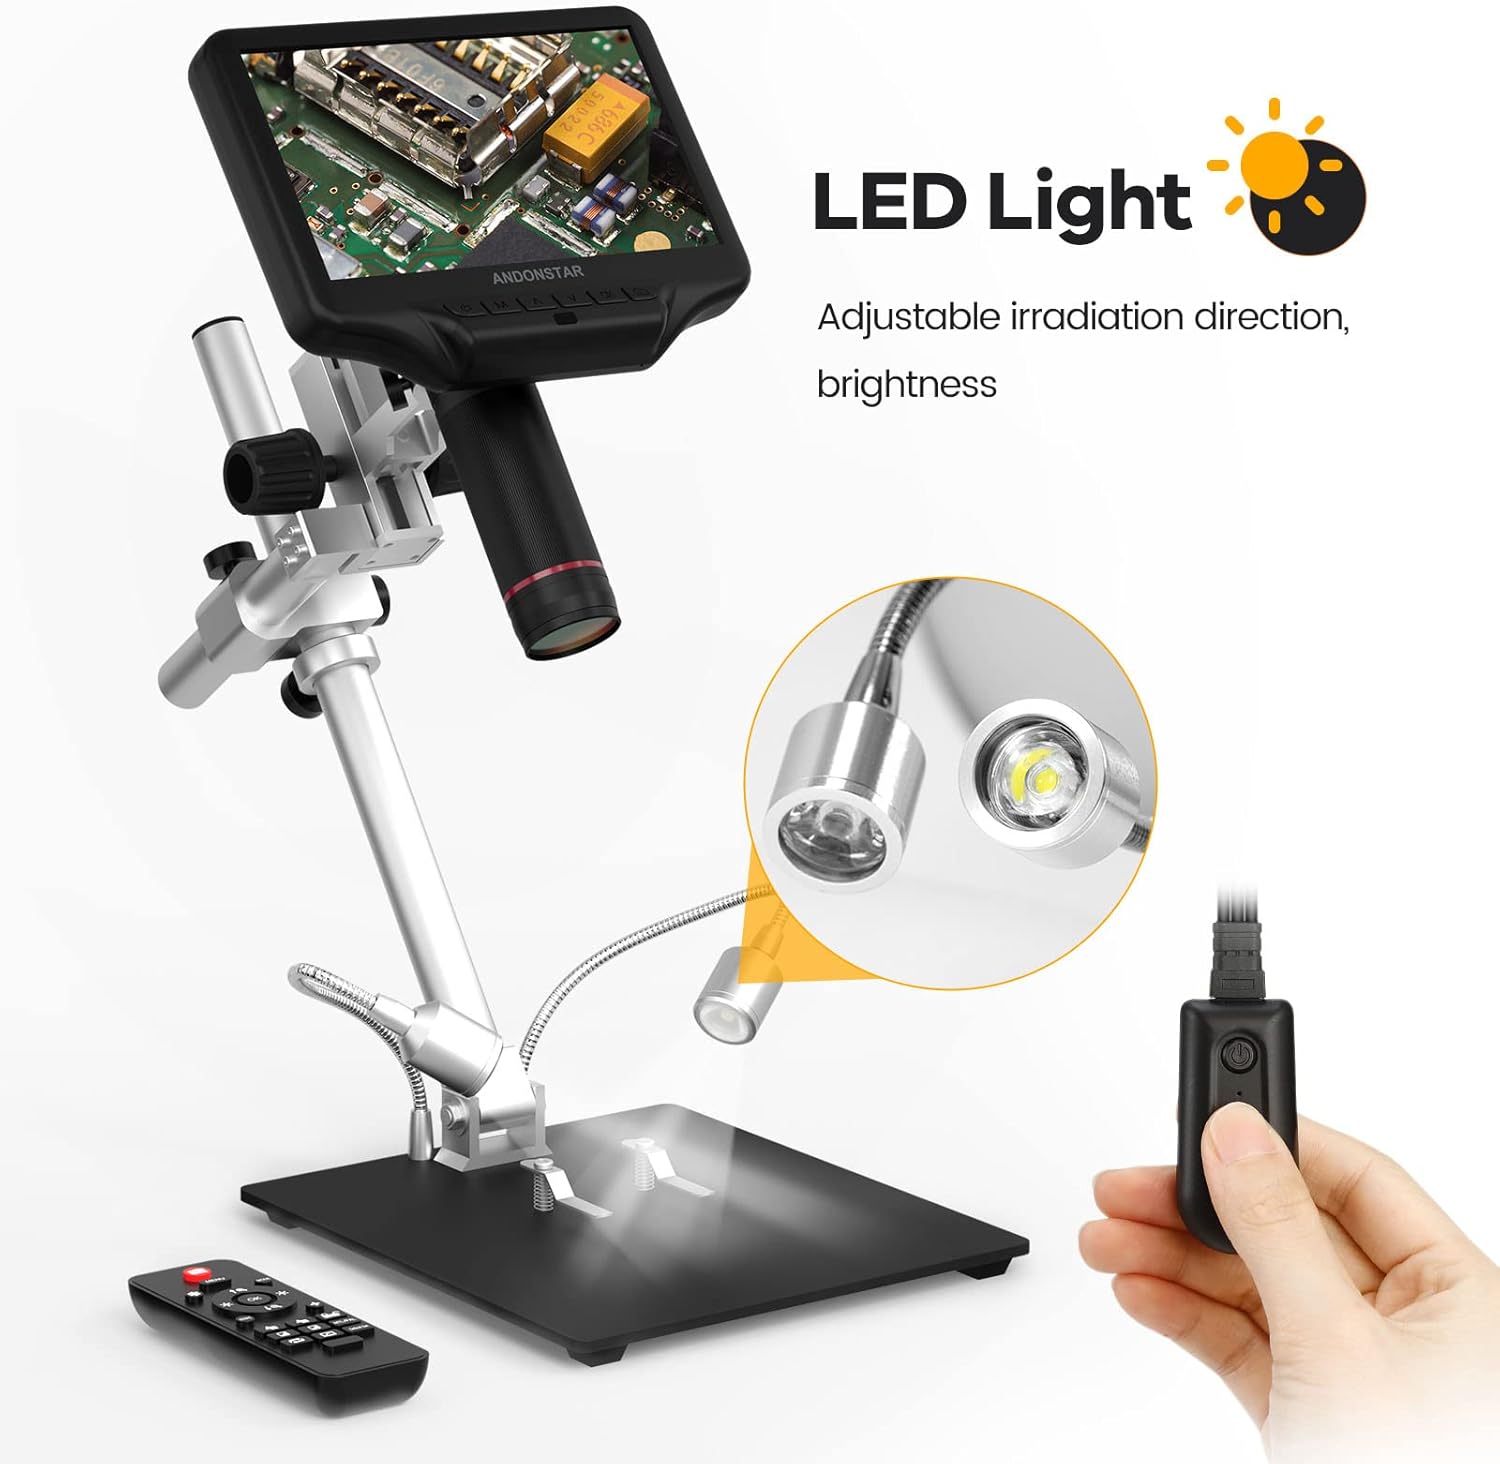
Figure 4.1: Adjustable LED lights provide flexible illumination and brightness control.

Figure 4.2: The industrial metal lens and UV filter protect against smoke, heat, and dust.

Figure 4.3: The large metal workbench provides ample space for detailed work.
5. Operating Instructions
Operating your AD407 Pro is intuitive, with options for direct control or via the smart remote.
5.1 Basic Operation
- Focusing: Rotate the focus knob on the microscope unit to achieve a clear image.
- Adjusting Object Distance: Use the adjustment knobs on the metal bracket to move the microscope unit up or down, changing the working distance from the object.
- LED Light Control: Adjust the brightness and direction of the LED lights using the controls on the switch cable.
5.2 Remote Control Functions
The smart remote control allows for convenient operation without touching the microscope, preventing screen shake.
- Photo/Video Capture: Dedicated buttons allow you to take still photos or start/stop video recording.
- Zoom: Adjust magnification levels.
- Image Settings: Control functions like image rotation, inverse color, line setting, and black & white mode.
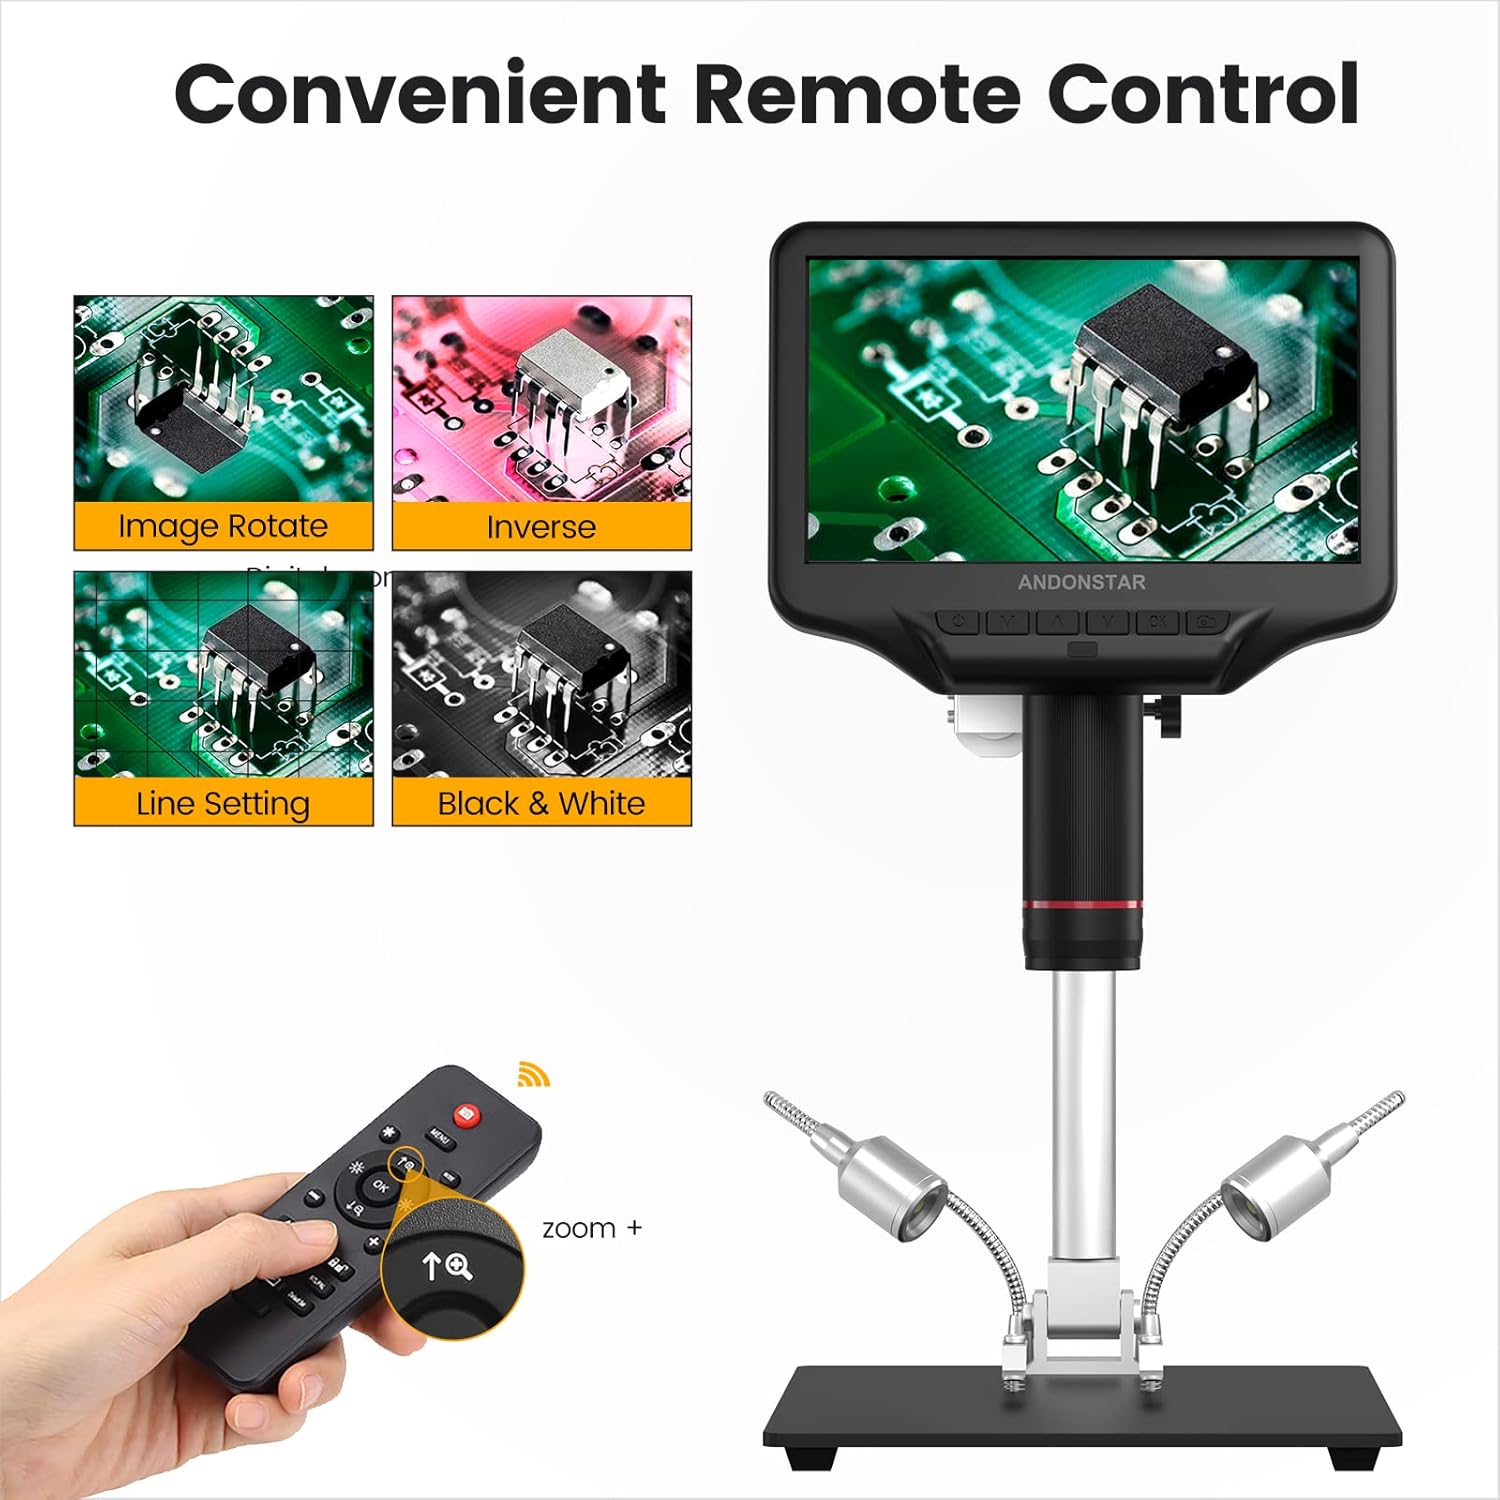
Figure 5.1: The convenient remote control allows for various image adjustments and captures.
5.3 Dual Screen Display (HDMI Output)
The AD407-Pro supports HDMI output, enabling observation on a larger external display. This dual display capability is ideal for sharing discoveries with a team or for more comfortable viewing.

Figure 5.2: Connect your AD407 Pro to an external HDMI screen for a larger view.
Operating Videos
Video 5.3: Demonstrates the use of the Andonstar AD407-Pro for soldering applications, highlighting its practical utility.
Video 5.4: Illustrates how to effectively use the remote control to operate the AD407-Pro, including menu navigation and image adjustments.
6. Applications
The Andonstar AD407-Pro microscope is a versatile tool suitable for a wide range of applications, including but not limited to:
- SMT work
- PCB assembly checking and soldering
- Circuit board inspection
- DIY electronics projects
- Watch/clock repair and inspection
- Jewelry repair and appraisal
- Coin and stamp collecting
7. Maintenance
To ensure the longevity and optimal performance of your Andonstar AD407 Pro Digital Microscope, follow these maintenance guidelines:
- Cleaning the Lens: Use a soft, lint-free cloth specifically designed for optical lenses. For stubborn smudges, a small amount of lens cleaning solution can be applied to the cloth, not directly to the lens.
- Cleaning the Screen: Wipe the screen gently with a microfiber cloth. Avoid abrasive cleaners or solvents.
- General Cleaning: Keep the microscope unit, stand, and base free from dust and debris. Use a soft brush or compressed air to remove particles from crevices.
- Storage: When not in use, store the microscope in a clean, dry environment, away from direct sunlight and extreme temperatures.
- UV Filter: Regularly check the UV filter for any damage or excessive residue, especially after soldering. Replace if necessary to maintain lens protection and image clarity.
8. Troubleshooting
If you encounter any issues with your Andonstar AD407 Pro, please refer to the following common troubleshooting tips:
- No Power: Ensure the power plug is securely connected to both the microscope and the electrical outlet. Check if the power adapter is functioning correctly.
- No Image on Screen: Verify that the microscope unit is properly connected to the stand. Check focus and illumination settings. If using HDMI output, ensure the cable is connected correctly and the external display is set to the correct input.
- Blurry Image: Adjust the focus knob carefully. Ensure the object is within the working distance range of the microscope. Clean the lens and UV filter if smudges are present.
- Remote Control Not Responding: Check the batteries in the remote control. Ensure there are no obstructions between the remote and the microscope's IR receiver.
- Image Glare/Reflection: Adjust the angle and brightness of the LED lights. Ensure the UV filter is clean and properly installed.
If the problem persists after attempting these solutions, please contact Andonstar customer support for further assistance.
9. Specifications
| Product Dimensions | 7.8 x 7 x 13 inches |
| Item Weight | 4.49 pounds |
| Item Model Number | AD407-Pro |
| Manufacturer | ShenZhen Andonstar Technology Co., Ltd |
| Light Source Type | LED |
| Material | Metal |
| Color | Black |
| Real Angle of View | 45 Degrees |
| Magnification Maximum | 270.00 |
| Voltage | 5 Volts |
| Compatible Devices | Television |
| Objective Lens Description | Achromatic |
10. Warranty and Support
For warranty information, technical support, or any inquiries regarding your Andonstar AD407 Pro Digital Microscope, please refer to the contact details provided on the product packaging or visit the official Andonstar website. Keep your purchase receipt as proof of purchase for warranty claims.


