
1. Safety Guidelines
Before operating the Hover-1 Highlander Electric Scooter, please read and understand all safety instructions. Failure to follow these guidelines may result in serious injury or property damage.
- Always wear a certified helmet and appropriate safety gear (knee pads, elbow pads) when riding.
- Observe all local traffic laws and regulations regarding electric scooter usage.
- Do not ride in wet conditions, on uneven surfaces, or in areas with poor visibility.
- The maximum weight limit for this scooter is 264 pounds (120 kg). Do not exceed this limit.
- This scooter is designed for adult use.
- Avoid sudden acceleration, braking, or sharp turns.
- Keep fingers and other body parts away from moving parts such as wheels and the folding mechanism.
2. Product Overview
The Hover-1 Highlander is a foldable electric scooter designed for urban commuting. It features a 250W motor, a maximum speed of 15 mph, and a range of up to 9 miles.
2.1. Components
- Handlebars: For steering and control.
- LCD Display: Shows speed, battery level, and speed mode.
- Throttle: Controls acceleration.
- Brakes: Electric handlebar brake and mechanical rear wheel brake.
- Headlight: For visibility.
- Folding Mechanism: Allows for compact storage and transport.
- Deck: Standing platform.
- Wheels: 6.5-inch solid rubber wheels.
- Kickstand: For parking the scooter.
- Bluetooth Speaker: Integrated for audio playback.
2.2. Product Images
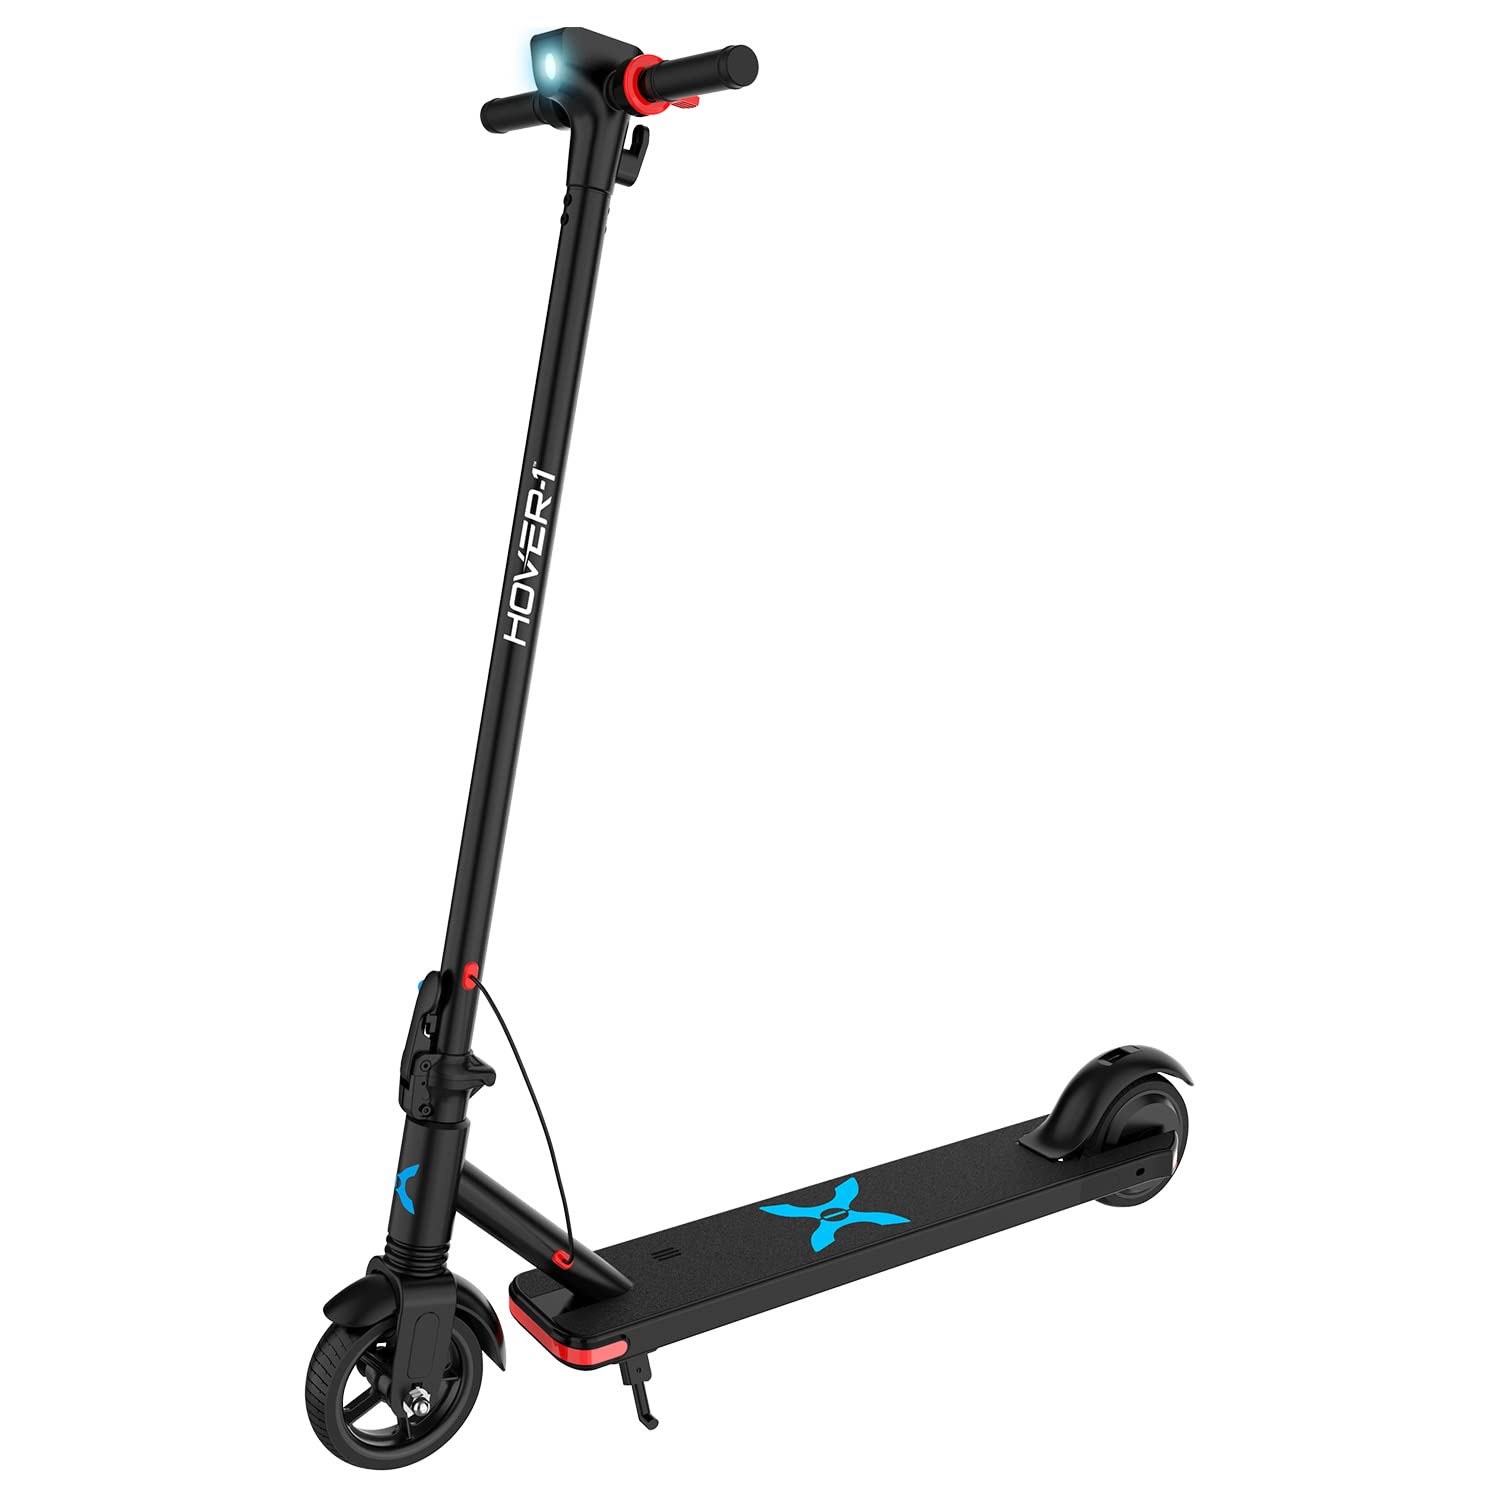
Figure 1: The Hover-1 Highlander Electric Scooter in its unfolded state, showcasing its sleek black design and overall structure.

Figure 2: The Hover-1 Highlander Electric Scooter in its folded configuration, highlighting its portability and compact storage design.

Figure 3: Close-up view of the Hover-1 Highlander's handlebar, showing the integrated LCD display, power button, and controls.

Figure 4: Detailed view of the rear wheel and fender of the Hover-1 Highlander Electric Scooter, including the rear brake mechanism.
3. Setup
3.1. Unboxing and Initial Inspection
Carefully remove all components from the packaging. Verify that all items listed in the 'What's in the Box' section are present and undamaged. Included components are the Highlander Electric Scooter, Charger, and Manual.
3.2. Assembly
- Unfold the Scooter: Release the folding mechanism and carefully raise the steering column until it locks into place. Ensure it is securely latched.
- Attach Handlebars: Insert the handlebars into the steering column. Ensure they are firmly seated and secured.
3.3. Initial Charging
Before first use, fully charge the scooter's battery. Connect the charger to the charging port on the scooter and then to a power outlet. The charging indicator on the charger will change when charging is complete. A full charge typically takes 3 hours.
4. Operation
4.1. Powering On/Off
Press and hold the power button on the LCD display to turn the scooter on or off.
4.2. Riding the Scooter
- Kick-to-Start: The scooter requires a manual kick-off to initiate movement. Push off with your foot to reach a speed of approximately 3 mph (5 km/h).
- Accelerate: Once moving, gently press the thumb throttle to engage the motor and accelerate.
- Braking: Use the electric handlebar brake for controlled deceleration. The scooter also has a mechanical manual brake on the rear wheel for additional stopping power.
4.3. Speed Modes
The Highlander offers multiple speed modes, indicated on the LCD display:
- ECO Mode: Up to 7 mph (11 km/h) for extended range.
- NORMAL Mode: Up to 11 mph (18 km/h) for balanced performance.
- SPORT Mode: Up to 15 mph (24 km/h) for maximum speed.
Press the power button briefly to cycle through the speed modes.
4.4. LCD Display Functions

Figure 5: Detailed illustration of the Highlander's LCD display, showing various indicators and their meanings.
The mid-mounted LCD display provides essential information:
- Speedometer: Displays current speed in MPH.
- Battery Indicator: Shows the current battery charge level.
- Speed Mode: Indicates the active speed mode (Eco, Normal, Sport).
- Headlight Icon: Illuminates when the headlight is active.
- Bluetooth Icon: Indicates Bluetooth connectivity status.
4.5. Folding the Scooter
To fold the scooter for storage or transport, locate the quick-release button at the base of the T-handle. Follow the instructions in the manual to safely disengage the locking mechanism and fold the steering column down to the foot deck.
4.6. Bluetooth Speaker
The Highlander includes a built-in Bluetooth speaker. To connect, ensure the scooter is powered on and Bluetooth is enabled on your mobile device. Search for 'Hover-1 Highlander' in your device's Bluetooth settings and pair. You can then play audio through the scooter's speaker.
5. Maintenance
Regular maintenance ensures the longevity and safe operation of your Hover-1 Highlander scooter.
5.1. Battery Care
- Charge the battery fully after each use.
- Do not overcharge the battery. Disconnect the charger once charging is complete.
- If storing the scooter for an extended period, charge the battery to approximately 50-70% and store in a cool, dry place. Recharge every 30-60 days to prevent deep discharge.
- Avoid exposing the battery to extreme temperatures.
5.2. Cleaning
Wipe down the scooter with a damp cloth after use. Do not use harsh chemicals or abrasive cleaners. Avoid direct water spray to prevent damage to electronic components.
5.3. Tire Care
The Highlander uses solid rubber tires, which do not require inflation. Regularly inspect the tires for signs of wear, cracks, or damage. Replace if necessary.
5.4. General Inspection
Periodically check all screws, bolts, and fasteners to ensure they are tight. Inspect the brakes for proper function and adjust if needed. Ensure the folding mechanism operates smoothly and locks securely.
6. Troubleshooting
If you encounter issues with your Hover-1 Highlander, refer to the following common solutions:
- Scooter not powering on: Ensure the battery is charged. Press and hold the power button firmly.
- Scooter not moving: Confirm the scooter has been kick-started to at least 3 mph before engaging the throttle. Check battery level.
- Reduced range or speed: This may indicate a low battery charge or riding in a lower speed mode. Ensure the battery is fully charged and select the desired speed mode. Rider weight and terrain can also affect performance.
- Bluetooth not connecting: Ensure the scooter is powered on and your device's Bluetooth is enabled. Try restarting both devices.
For issues not covered here, please refer to the full operation manual or contact customer support.
7. Specifications
| Feature | Detail |
|---|---|
| Brand | Hover-1 |
| Model Name | H1-HLNR |
| Motor Power | 250W |
| Max Speed | 15 mph (24 km/h) |
| Max Range | 9 Miles (14.5 km) |
| Charging Time | 3 Hours |
| Weight Limit | 264 Pounds (120 kg) |
| Item Weight | 37.5 Pounds (17 kg) |
| Wheel Size | 6.5 Inches |
| Wheel Material | Rubber (Solid) |
| Frame Material | Aluminum |
| Special Features | Bluetooth speaker, Foldable |
| Brake Style | Rear Braking (Electric & Mechanical) |
| Age Range | Adult |
| UPC | 888255264480 |
8. Warranty & Support
8.1. Warranty Information
The Hover-1 Highlander Electric Scooter comes with a 90-day limited warranty. This warranty covers manufacturing defects under normal use. Please retain your proof of purchase for warranty claims. The warranty does not cover damage due to misuse, accidents, unauthorized modifications, or normal wear and tear.
8.2. Customer Support
For technical assistance, warranty inquiries, or to order replacement parts, please refer to the contact information provided in your product packaging or visit the official Hover-1 website. When contacting support, please have your model number (H1-HLNR) and proof of purchase readily available.


