1. Product Overview
The Krightlink 20W Hot Glue Gun Kit is designed for various crafting, DIY, and quick home repair projects. It features fast preheating and a precise application nozzle, making it suitable for bonding materials such as plastic, paper, cardboard, artificial flowers, wood, and metal.

Image 1.1: The Krightlink 20W Hot Glue Gun Kit, including the glue gun, 30 glue sticks, and product packaging.
Key Features:
- Fast Preheating: Equipped with a PTC ceramic heating system, the glue gun heats up and is ready for use within 1-2 minutes, maintaining a constant temperature automatically.
- Anti-drip Nozzle: Features a precision-designed nozzle to minimize glue leakage and ensure accurate application.
- Ergonomic & Compact Design: The handle is designed for comfortable operation, and its lightweight nature facilitates easy use. Includes a foldable bracket for stable upright positioning.
- Versatile Application: Ideal for various materials including plastic, paper, cardboard, artificial flowers, wood, and metal.
- Complete Kit: Comes with one hot glue gun and 30 mini strong adhesive hot glue sticks.
2. Safety Instructions
Please read and understand all safety warnings before using the hot glue gun. Failure to follow these instructions may result in burns, electric shock, or other injuries.
- High Temperature: The nozzle and melted glue become very hot during operation. Never touch the nozzle or melted glue directly to avoid severe burns. Always hold the glue gun by its handle.
- Do Not Pull Out Glue Sticks: Once a glue stick is inserted and partially used, do not attempt to pull out the remaining stick from the back of the gun. This can damage the heating mechanism.
- Preheating: Do not squeeze the trigger during the preheating phase (first 1-2 minutes). This can cause excessive pressure and potential damage.
- Positioning: Do not tilt the hot glue gun upwards when it is hot or in use. This can cause melted glue to flow back into the gun, potentially damaging internal components or causing leakage.
- Children: Keep the hot glue gun and glue sticks out of reach of children. Adult supervision is required if children are using the tool.
- Ventilation: Use the glue gun in a well-ventilated area to dissipate any fumes.
- Storage: Always unplug the glue gun and allow it to cool completely before storing. Store in a dry, safe place.
- Power Cord: Inspect the power cord for any damage before each use. Do not use if the cord is frayed or damaged.
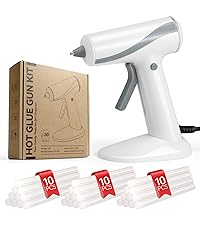
Image 2.1: Visual representation of key safety tips for hot glue gun operation.
3. Components
Familiarize yourself with the parts of your Krightlink Hot Glue Gun:

Image 3.1: Labeled diagram of the Krightlink Hot Glue Gun components.
- Nozzle: The metal tip where melted glue is dispensed. (7mm/0.28" diameter)
- Glue Stick Inlet: The opening at the back where glue sticks are inserted.
- Trigger: Squeezed to advance the glue stick and dispense melted glue.
- Power Switch: Red switch for turning the device on and off.
- Status Indicator Light: Illuminates when the glue gun is powered on and heating.
- Foldable Stand Holder: A metal wire stand that allows the gun to rest upright safely during use.
- Power Cord: Connects the glue gun to an electrical outlet. (Approximately 1.26m/50in long)
Glue Sticks:
The kit includes 30 mini hot glue sticks, approximately 4 inches in length and 7mm in diameter. These sticks are designed for strong adhesion, quick drying, and smooth flow.

Image 3.2: Features of the included hot glue sticks.
4. Setup and Operation
Follow these steps to set up and operate your Krightlink Hot Glue Gun:
- Insert Glue Stick: Insert a 7mm diameter glue stick into the round opening at the back of the glue gun. Push it in until it stops.
- Connect Power: Plug the power cord into a standard electrical outlet (100-240V AC).
- Power On: Flip the red power switch to the 'ON' position. The status indicator light will illuminate, indicating the gun is heating.
- Preheat: Allow the glue gun to preheat for 1-2 minutes. During this time, the internal heating element will melt the glue stick. Do not squeeze the trigger during preheating.
- Apply Glue: Once preheated, gently squeeze the trigger to dispense melted glue from the nozzle. Apply glue to the desired surface.
- Resting: When not actively applying glue, use the foldable metal stand to rest the gun upright on a heat-resistant surface.
- Power Off: When finished, flip the power switch to the 'OFF' position and unplug the power cord from the outlet.
- Cool Down: Allow the glue gun to cool completely before handling or storing.

Image 4.1: Step-by-step visual guide for operating the hot glue gun.
5. Maintenance
Proper maintenance ensures the longevity and optimal performance of your glue gun:
- Cleaning the Nozzle: After the glue gun has cooled completely, any excess dried glue around the nozzle can be carefully removed using a non-abrasive tool. Do not attempt to clean the nozzle while the gun is hot.
- Exterior Cleaning: Wipe the exterior of the glue gun with a soft, damp cloth. Do not use harsh chemicals or abrasive cleaners. Ensure no liquid enters the internal components.
- Storage: Store the glue gun in a dry, dust-free environment, away from direct sunlight and extreme temperatures. Ensure it is completely cool before storing.
- Glue Stick Management: Always ensure there is a glue stick in the gun when operating to prevent damage to the feeding mechanism. Do not force partially used glue sticks out.
6. Troubleshooting
If you encounter issues with your Krightlink Hot Glue Gun, refer to the following common problems and solutions:
| Problem | Possible Cause | Solution |
|---|---|---|
| Glue not dispensing | No glue stick inserted or stick is too short. Gun not heated sufficiently. | Insert a new glue stick. Allow 1-2 minutes for preheating after turning on. |
| Slow heating or no heat | Not plugged in. Power switch off. Faulty outlet. | Ensure the power cord is securely plugged into a working outlet. Check the power switch is in the 'ON' position. Try a different outlet. |
| Glue leakage from nozzle | Overheating (rare with PTC). Gun tilted upwards. | Ensure the gun is not tilted upwards. If leakage persists, unplug and allow to cool, then re-evaluate. |
| Trigger is stiff or stuck | Glue stick jammed or improperly inserted. | Ensure glue stick is correctly aligned. Do not force the trigger. Allow the gun to heat fully before attempting to dispense glue. |
7. Specifications
| Feature | Specification |
|---|---|
| Brand | Krightlink |
| Model Number | 2101 (SD-A601) |
| Color | White |
| Power Source | Corded Electric |
| Wattage | 20 Watts |
| Voltage | 100-240V AC (as per product image) |
| Preheating Time | 1-2 minutes |
| Item Weight | 8 ounces (approx. 227g) |
| Product Dimensions (L x W x H) | 5.51" x 1.5" x 4.33" (approx. 14cm x 3.8cm x 11cm) |
| Glue Stick Diameter | 7mm / 0.28 inches |
| Power Cord Length | 1.26m / 50 inches |
| Included Components | 1 Hot Glue Gun, 30 Glue Sticks |

Image 7.1: Dimensions of the Krightlink Hot Glue Gun and included glue sticks.
8. Warranty and Support
For warranty information or technical support, please refer to the contact details provided with your purchase or visit the official Krightlink website. Keep your purchase receipt as proof of purchase.


