
le-idea IDEA16
le-idea IDEA16 Drone User Manual
Model: IDEA16
1. Safety Guidelines
Always operate the IDEA16 drone responsibly and adhere to local regulations. Failure to do so may result in injury, property damage, or legal consequences.
- Pre-Flight Check: Ensure all components are securely attached and in good working order before each flight.
- Flight Environment: Fly in open areas, away from people, animals, buildings, and power lines. Avoid flying in strong winds or adverse weather conditions.
- Battery Safety: Use only the provided batteries and charging cable. Do not overcharge or puncture batteries. Discontinue use if batteries show signs of damage or swelling.
- Line of Sight: Maintain visual line of sight with the drone at all times during flight.
- Age Recommendation: This product is recommended for users aged 14 and above.
2. Product Overview and Components
The le-idea IDEA16 drone is a compact and versatile quadcopter equipped with dual cameras for enhanced aerial photography and videography. It features optical flow positioning for stable flight and a foldable design for portability.
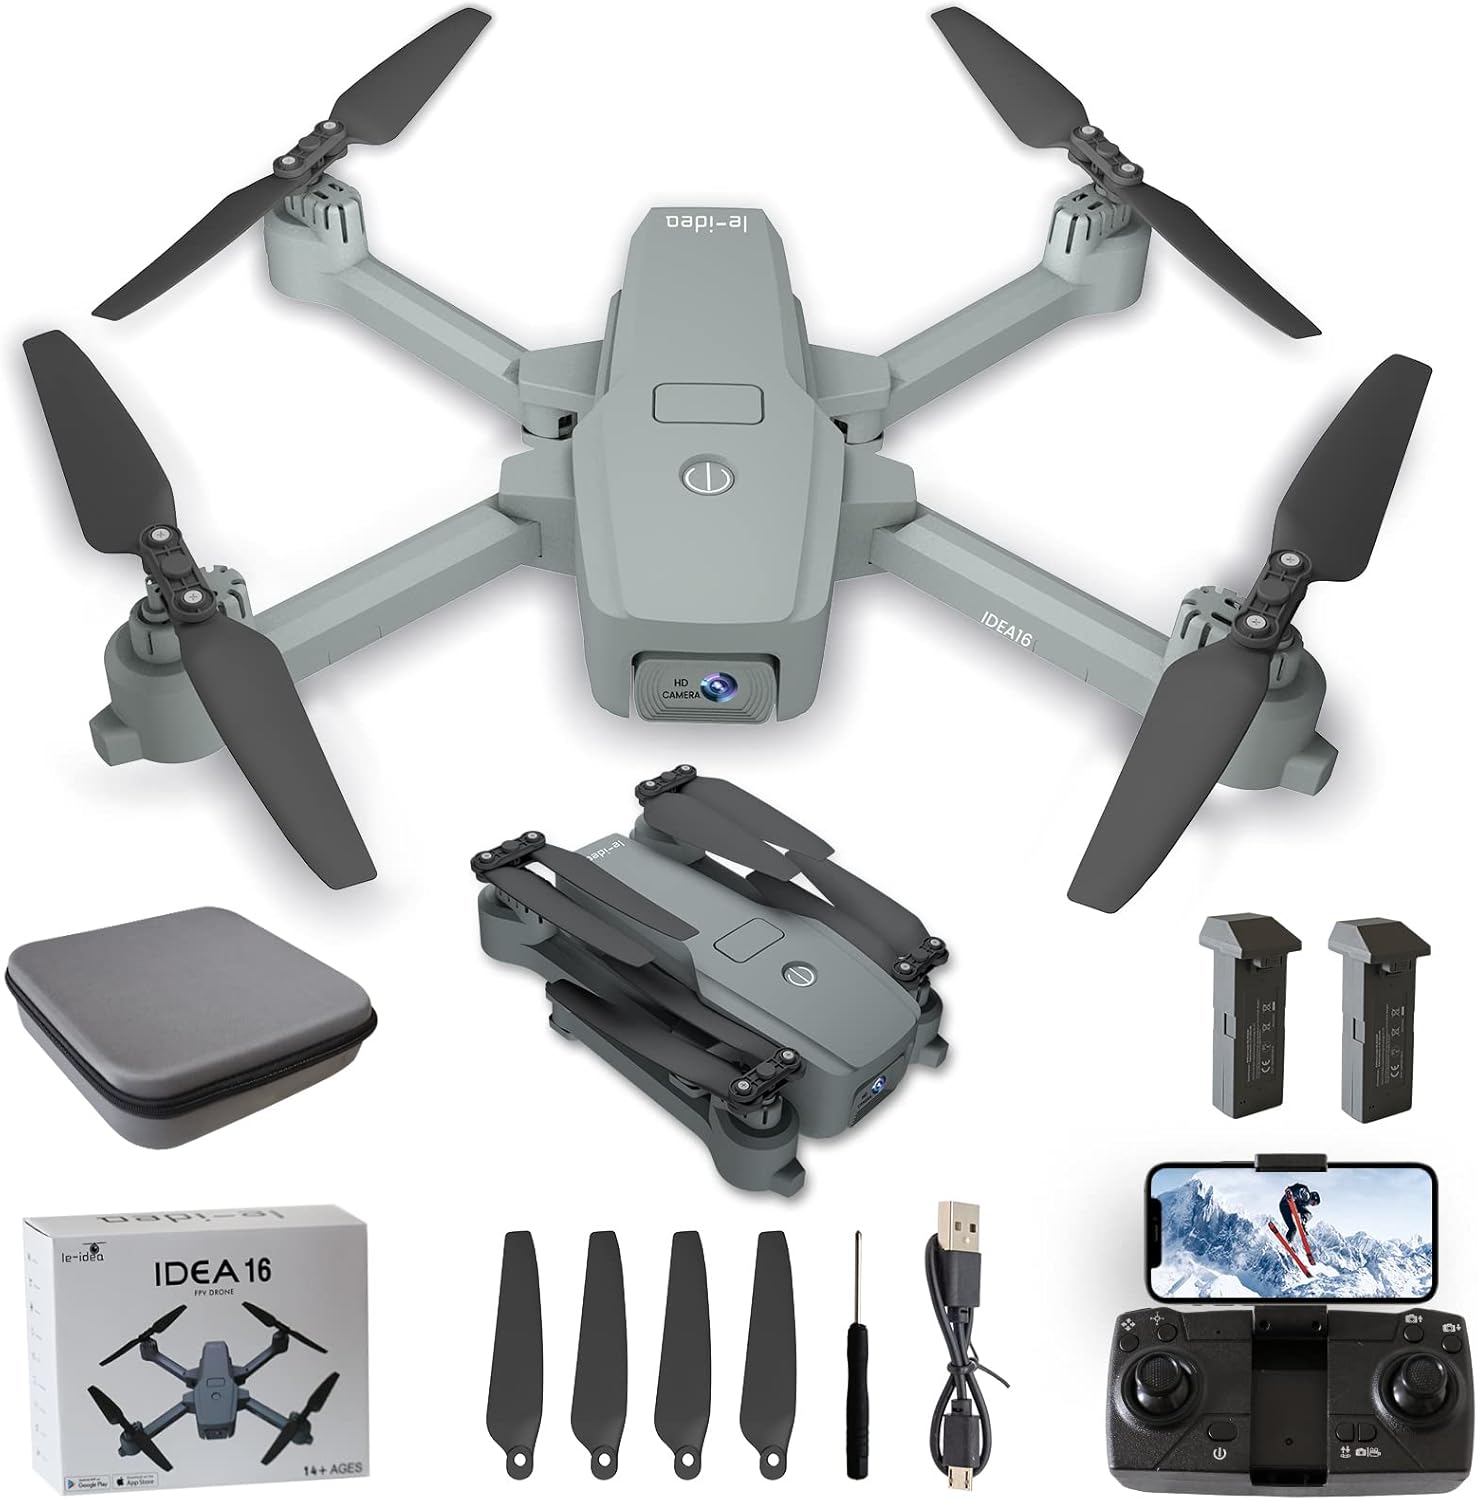
Image: The IDEA16 drone in its unfolded state, alongside its remote controller, two batteries, spare propellers, a screwdriver, USB charging cable, and a carrying case.
What's in the Box:
- IDEA16 Drone (x1)
- Remote Controller (x1)
- 3.7V 1200mAh Modular Batteries (x2)
- Spare Propellers (x4)
- Screwdriver (x1)
- USB Charging Cable (x1)
- Carrying Case (x1)

Image: A visual representation of the IDEA16 drone package contents, including the drone, remote, batteries, and accessories.
3. Setup Guide
3.1. Battery Installation and Charging
The IDEA16 drone comes with two modular 3.7V 1200mAh batteries, providing up to 30 minutes of flight time. Ensure batteries are fully charged before first use.
- Insert the modular battery into the designated slot on the rear of the drone until it clicks into place.
- Connect the USB charging cable to the battery and a suitable USB power source (e.g., computer USB port, USB wall adapter).
- The charging indicator light on the battery will show its charging status. Charging typically takes approximately 30 minutes per battery.

Image: Close-up view of the drone's battery compartment, illustrating the insertion of a 3.7V 1200mAh modular battery, highlighting its 30-minute flight capability with two batteries.

Image: A drone battery connected to a USB charging cable, indicating safe charging and a 30-minute charging time.
3.2. Propeller Installation (if needed)
The IDEA16 drone typically comes with pre-installed propellers. If replacement is necessary, ensure correct propeller orientation (A and B types) as indicated on the drone arms and propellers. Use the provided screwdriver for installation.
3.3. Remote Controller Setup
Insert 3 AAA batteries (not included) into the remote controller. Extend the phone holder on the controller to mount your smartphone.
3.4. App Download and Connection
Download the official le-idea drone application from your smartphone's app store. Power on the drone and the remote controller. Connect your smartphone to the drone's Wi-Fi network (usually named 'IDEA16-XXXX'). Open the app to establish a connection and view the live FPV feed.
4. Operating Instructions
Familiarize yourself with the remote controller and app interface before your first flight.
4.1. Pairing and Calibration
- Place the drone on a flat, level surface.
- Turn on the drone, then the remote controller.
- Push the left joystick up and then down to pair the drone with the controller. You will hear a beep.
- Perform gyroscope calibration by pushing both joysticks to the bottom-right corner simultaneously until the drone's lights flash rapidly and then become solid.
4.2. Take-off and Landing
The IDEA16 features a one-key take-off and landing function for ease of use.
- One-Key Take-off: After pairing and calibration, press the one-key take-off button on the remote controller (often marked with an upward arrow or an 'H' symbol in the app). The drone will automatically ascend to a safe hovering height.
- Manual Take-off: Alternatively, push both joysticks to the bottom-left corner simultaneously to start the propellers, then slowly push the left joystick up to ascend.
- One-Key Landing: Press the one-key landing button (often marked with a downward arrow or an 'H' symbol in the app). The drone will automatically descend and land gently.
- Manual Landing: Slowly pull the left joystick down to descend. Once landed, pull both joysticks to the bottom-left corner to stop the propellers.

Image: The drone hovering above a remote controller with a smartphone displaying the 'H' for one-key take-off/landing, illustrating the simplicity of operation.
4.3. Basic Flight Controls
- Left Joystick (Throttle/Yaw): Up/Down controls altitude. Left/Right controls rotation (yaw).
- Right Joystick (Direction): Up/Down controls forward/backward movement. Left/Right controls left/right sideward movement.
4.4. Advanced Flight Features
- 4K HD & 90° ESC Camera: The drone is equipped with a 4K camera that can be adjusted vertically from 0-90 degrees via the remote control or app, allowing for diverse shooting angles.
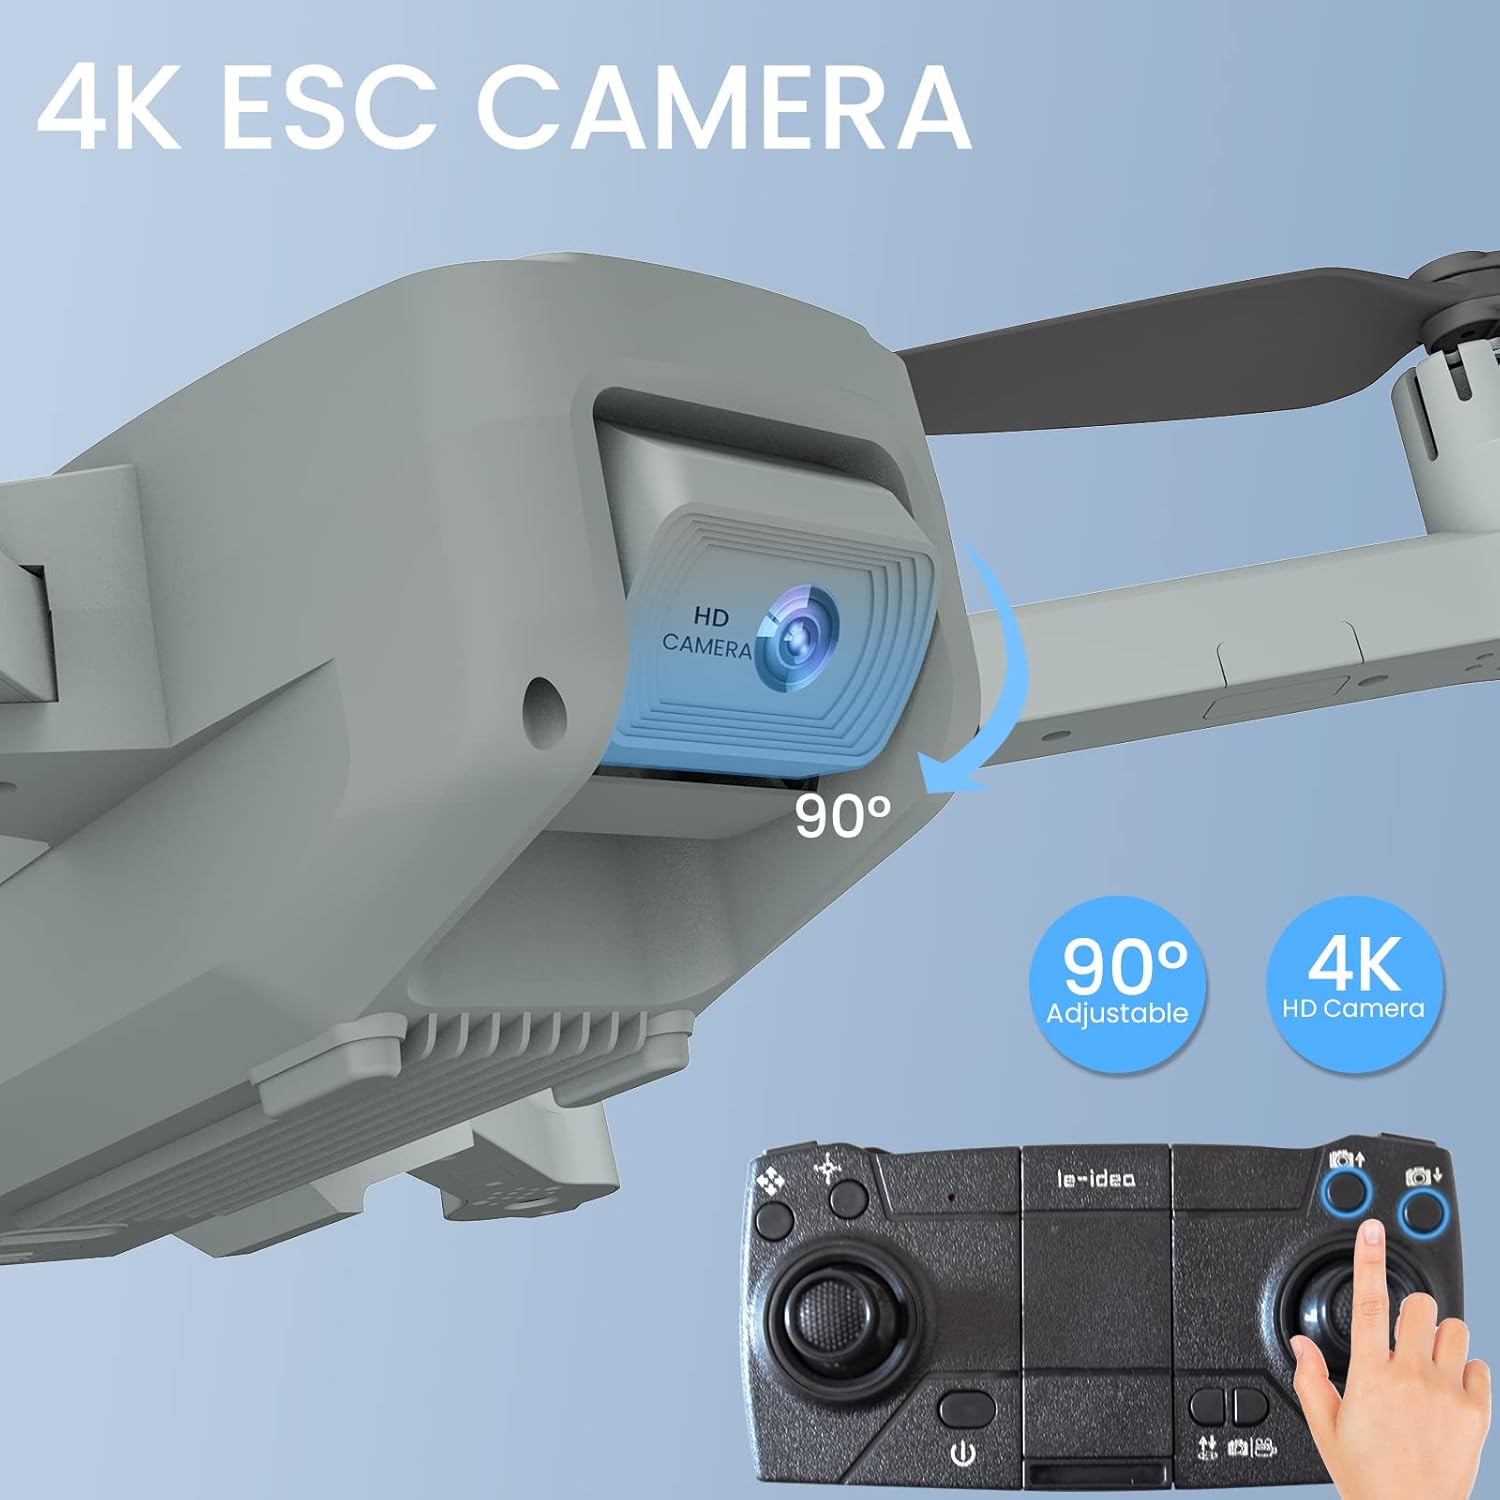
Image: Close-up of the drone's 4K ESC camera, showing its 90-degree adjustable range and the corresponding controls on the remote.
- 5GHz WIFI FPV: Experience real-time video transmission up to 200 meters, allowing you to see what the drone sees directly on your smartphone.

Image: The IDEA16 drone flying over various landscapes, illustrating its flight height capability of up to 120 meters and image transmission distance of up to 200 meters.
- Optical Flow Positioning & Dual Cameras: The built-in optical flow sensor enables precise hovering indoors and outdoors. The drone features two cameras, supporting both head-up and top-view shooting.

Image: The IDEA16 drone highlighting its dual cameras and optical flow positioning, with examples of head-up and top-view shooting.
- Gravity Sensor Control: Control the drone's flight direction by tilting your smartphone.

Image: A user holding a smartphone, demonstrating how the drone can be controlled using the device's gravity sensor.
- 3 Speed Modes: Adjust the drone's flight speed to suit your skill level and environment.

Image: Three drones depicted in motion, symbolizing the three adjustable speed modes available for the IDEA16.
- Headless Mode: In headless mode, the drone's orientation is relative to the pilot, making it easier to control regardless of its front direction.

Image: An overhead view of the drone with compass directions (N, S, E, W) around it, illustrating the Headless Mode feature.
- Trajectory Flight & Gesture Control: Draw a flight path on your smartphone screen, and the drone will follow it. Use specific hand gestures to trigger photo or video capture.

Image: A composite image showcasing the IDEA16 drone's advanced features: Trajectory Flight (following a drawn path), 120° Wide Angle camera view, and Gesture Control for photo/video.
5. Maintenance
Regular maintenance ensures the longevity and optimal performance of your IDEA16 drone.
- Propeller Inspection: Regularly check propellers for cracks, bends, or damage. Replace any damaged propellers immediately using the spare parts provided.
- Cleaning: Use a soft, dry cloth to clean the drone body and camera lens. Avoid using liquids or solvents.
- Battery Care: Store batteries in a cool, dry place. If not used for extended periods, charge them to about 50% capacity every three months to prolong battery life.
- Motor Care: Ensure no debris is obstructing the motors.

Image: A detailed view of a drone's motor and propeller assembly, emphasizing the importance of keeping these components clear and functional.
6. Troubleshooting
If you encounter issues with your IDEA16 drone, refer to the following common problems and solutions:
| Problem | Possible Cause | Solution |
|---|---|---|
| Drone does not respond to controller | Not paired, low battery, interference | Ensure drone and controller are powered on and batteries are charged. Re-pair the drone and controller. Fly in an area with less interference. |
| Unstable flight/Drifting | Gyroscope not calibrated, strong wind, damaged propeller | Perform gyroscope calibration on a flat surface. Avoid flying in windy conditions. Check and replace any damaged propellers. |
| No FPV feed on phone | Not connected to drone's Wi-Fi, app issue | Ensure your phone is connected to the drone's Wi-Fi network. Restart the app and drone. |
| Short flight time | Battery not fully charged, old battery | Ensure batteries are fully charged. Consider replacing old batteries if performance degrades significantly. |
| Drone lost signal and flew away | Exceeded control range, strong interference | Always fly within the specified control range (up to 200 meters). Avoid areas with high electromagnetic interference. Maintain visual line of sight. |
7. Specifications
| Brand | le-idea |
| Model Name | IDEA16 |
| Dimensions | 8.8"L x 8"W x 2"H |
| Item Weight | 177 Grams (6.2 ounces) |
| Video Capture Resolution | 4K |
| Connectivity Technology | Wi-Fi (5GHz FPV) |
| Maximum Range | 200 Meters |
| Battery Capacity | 1200 Milliamp Hours (per battery) |
| Flight Time | Up to 30 minutes (with 2 batteries) |
| Special Features | 360 Degree Flip, Long Distance Control, First Person View (FPV), Long Battery Life, Image Stabilization, Optical Flow Positioning, Dual Cameras, Adjustable Camera Angle (0-90°), 3 Speed Modes, Headless Mode, Trajectory Flight, Gesture Control |
| Skill Level | All |
| Material | Plastic |
8. Warranty and Support
le-idea is committed to providing high-quality products and excellent customer support. For any technical assistance or inquiries regarding your IDEA16 drone, please contact le-idea customer service.
Our dedicated team is available to assist you with any operational questions, troubleshooting, or warranty-related concerns. Please refer to the contact information provided with your product packaging or visit the official le-idea website for support details.

Image: A scenic banner featuring the le-idea brand logo and a drone flying over mountains, representing the brand's commitment to exploration and quality.
Related documentsIDEA16


Ask a question about this manual
Ask about setup, troubleshooting, compatibility, parts, safety, or missing instructions. Manuals+ will review the question and use this page’s manual context to help answer it.