1. Introduction
The Andoer A10 Teleprompter is designed to assist with video recording, live streaming, interviews, and presentations by displaying scrolling text for the speaker. It is compatible with DSLR cameras, smartphones, and tablets, offering a high-definition reflective display and various extension options for professional use.
2. Package Contents
Please verify that all the following items are included in your package:
- 1 x Teleprompter Unit
- 1 x Metal Bracket
- 1 x Tripod Head
- 1 x Mobile Phone Clip
- 1 x Remote Control
- 3 x Phone Barn Doors
- 1 x Cleaning Cloth
- 1 x User Manual

Figure 2.1: All components included in the Andoer A10 teleprompter package. This image displays the teleprompter unit, metal bracket, tripod head, mobile phone clip, remote control, phone barn doors, cleaning cloth, and user manual, laid out clearly.
3. Assembly and Setup
Follow these steps to assemble and set up your Andoer A10 Teleprompter:
- Attach the Teleprompter to a Tripod: Secure the teleprompter unit onto a compatible tripod (table tripod, camera tripod, or light stand) using the 1/4 inch screw mount at its base.
- Mount Your Camera/Smartphone:
- For DSLR Camera: Place your DSLR camera behind the teleprompter's reflective glass. Utilize the included lens fix pocket to ensure a snug fit for various camera lenses without requiring additional adapter rings.
- For Smartphone/Tablet: Insert your smartphone or tablet (up to 8 inches) into the mobile phone clip located on the platform below the reflective glass. Ensure it is securely fastened for either horizontal or vertical shooting orientations.
- Attach External Accessories (Optional): The teleprompter features dual cold shoe mounts. Use these to install external accessories such as an LED fill light or an external microphone for enhanced audio and lighting during recording.

Figure 3.1: The Andoer A10 teleprompter fully assembled with a DSLR camera, smartphone, microphone, and LED light, demonstrating a complete setup for video production.
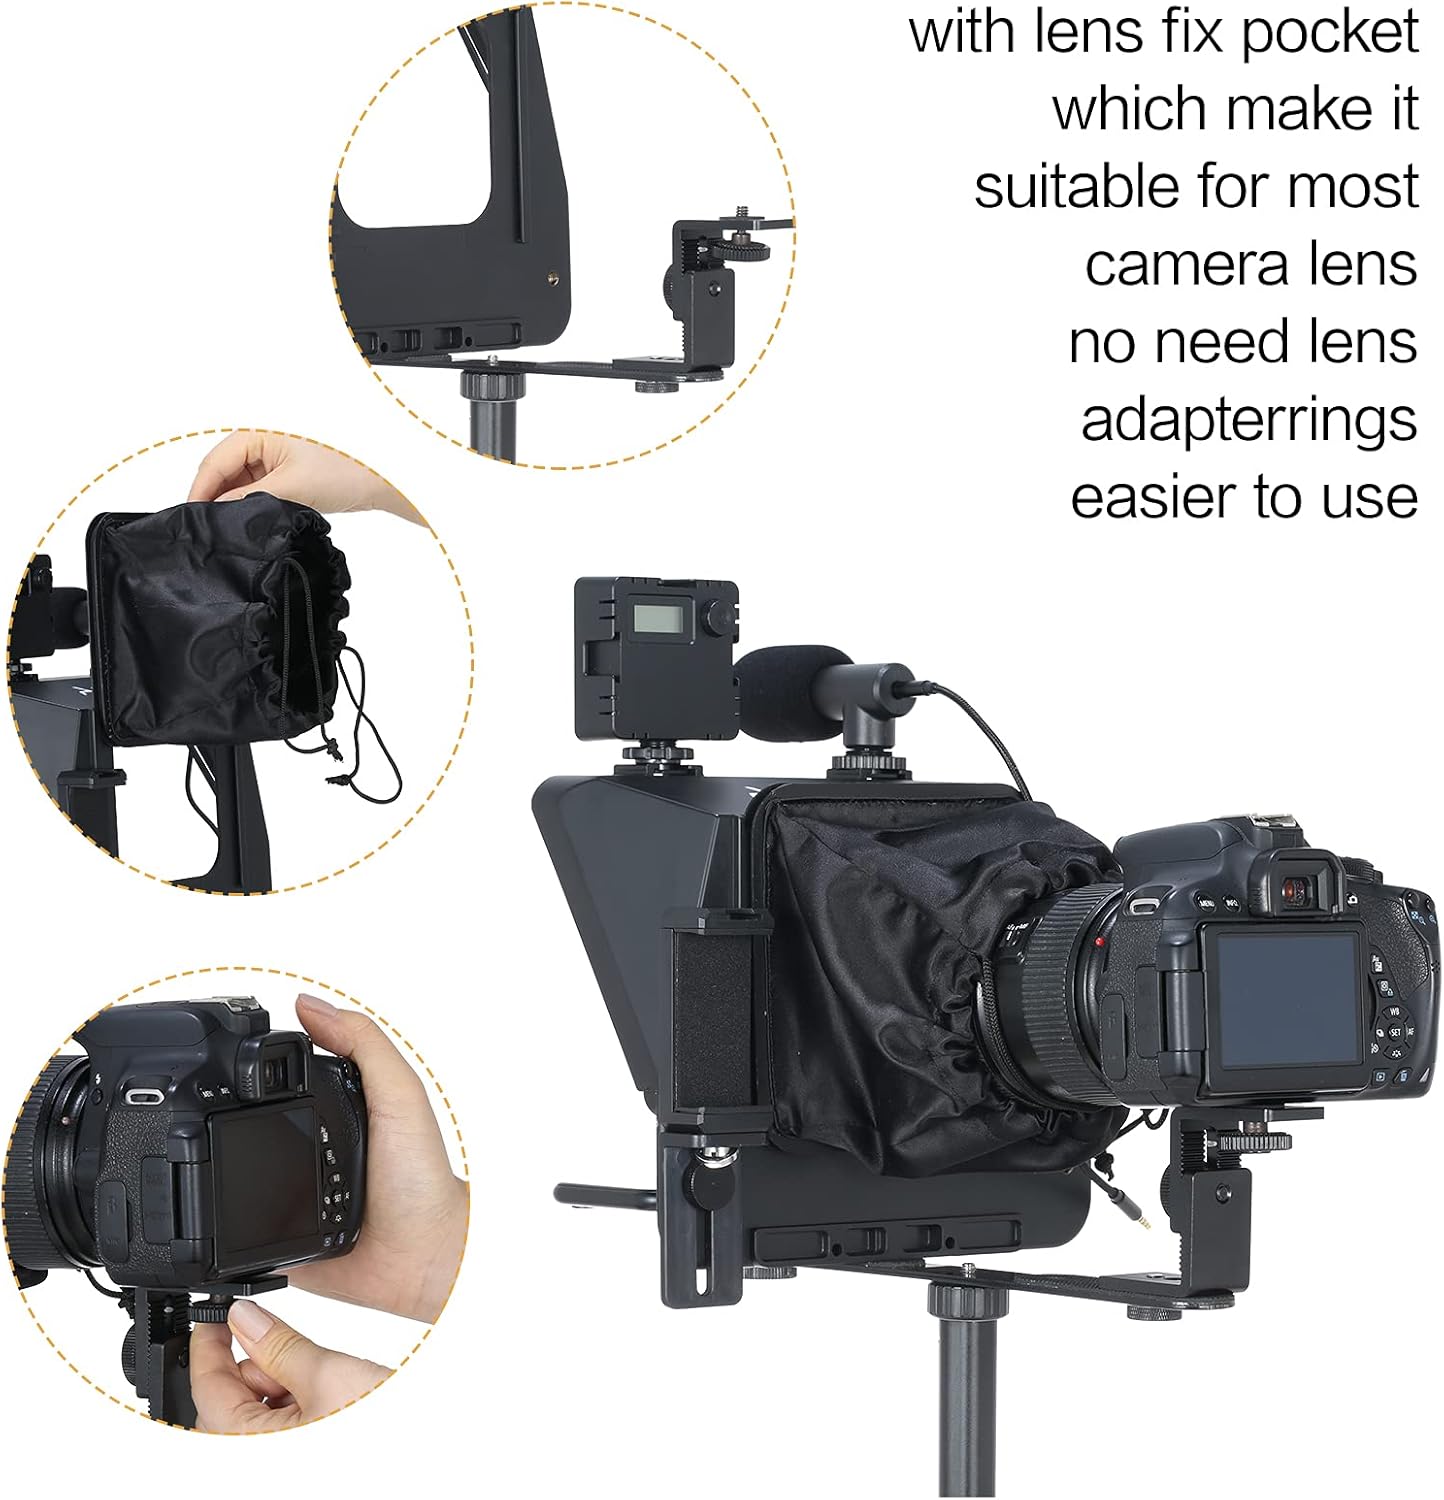
Figure 3.2: Close-up views illustrating the teleprompter's lens fix pocket, designed to accommodate various camera lenses securely without the need for additional adapter rings.
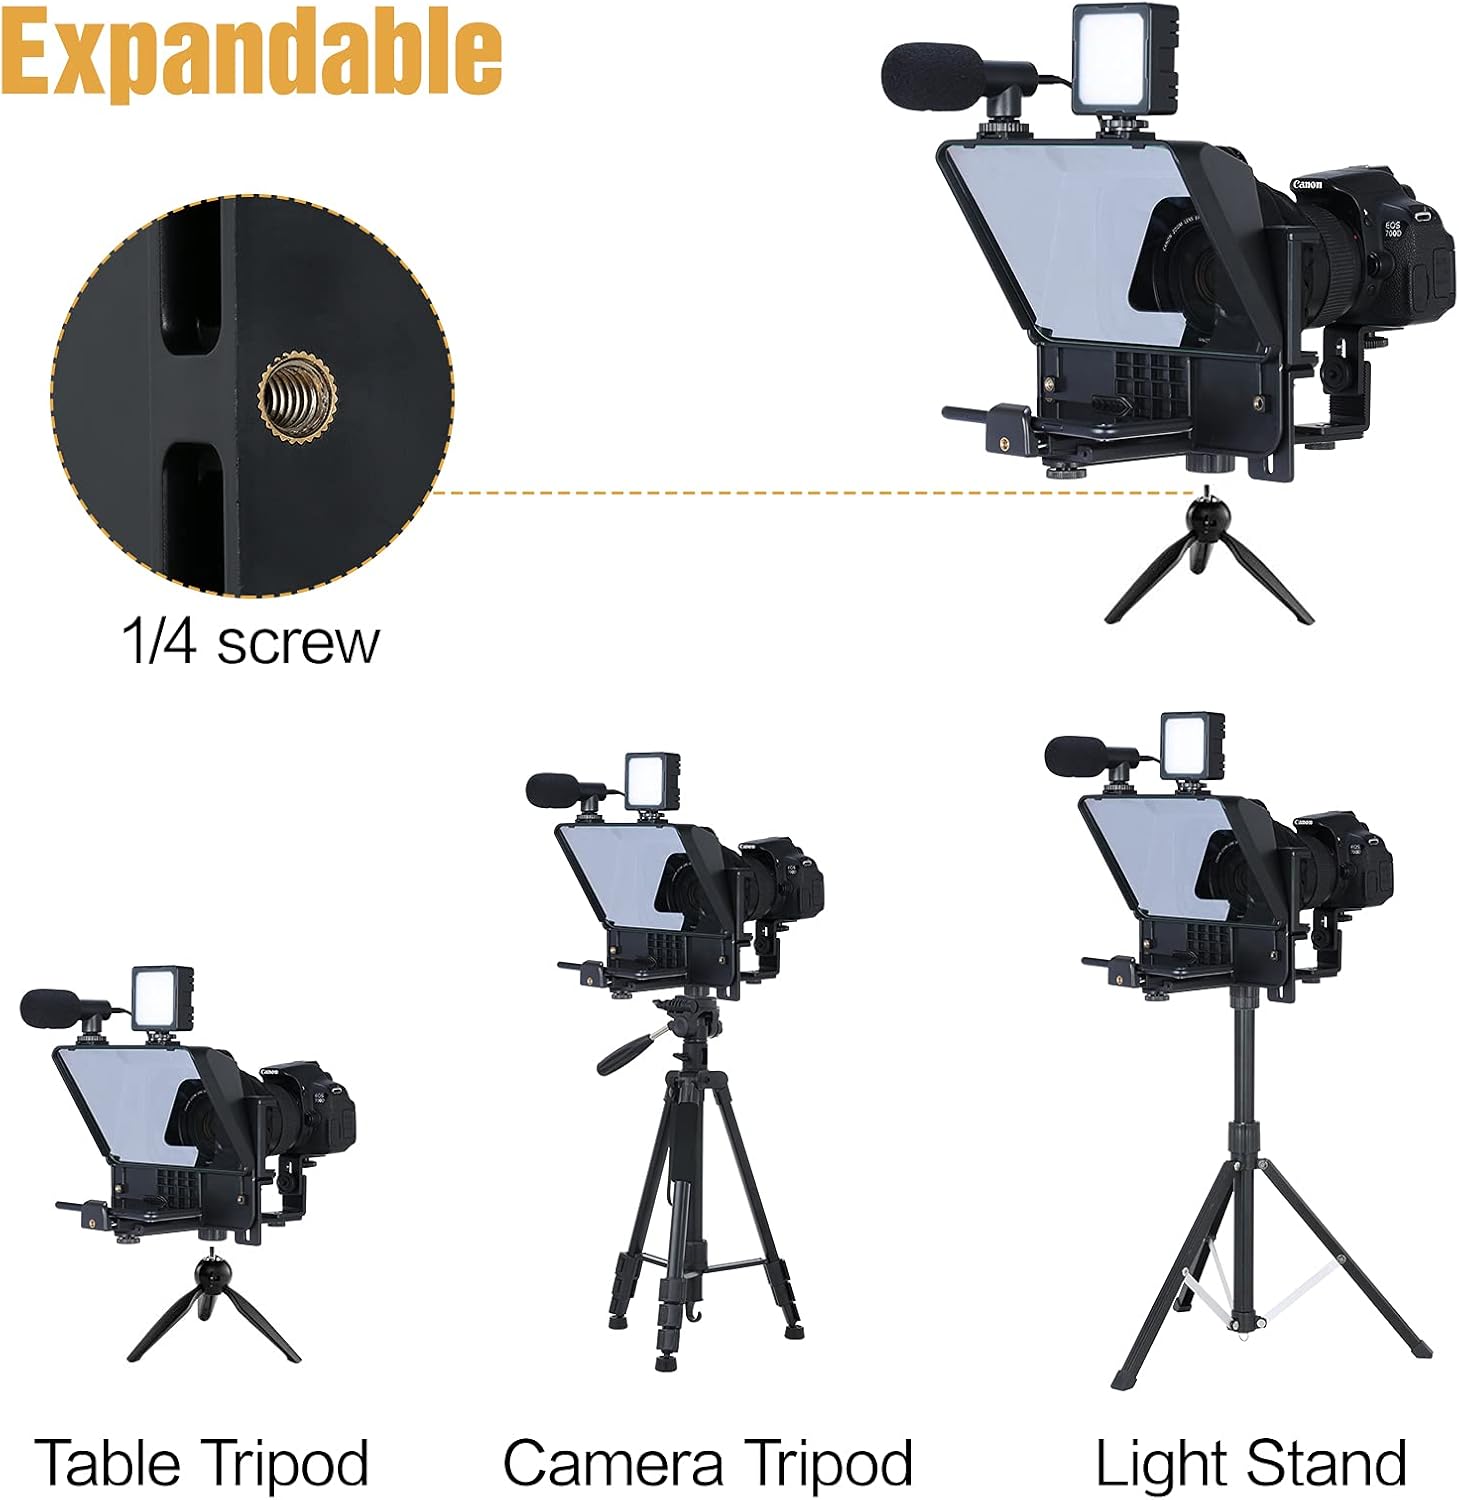
Figure 3.3: This image shows the teleprompter mounted on different types of stands, including a table tripod, a camera tripod, and a light stand, emphasizing its versatile 1/4 inch screw compatibility.

Figure 3.4: The teleprompter configured for both horizontal and vertical smartphone shooting modes, demonstrating its flexibility for different content creation needs.

Figure 3.5: A side view of the teleprompter illustrating its compatibility with both smartphones and tablet PCs up to 8 inches, showing how devices are secured.
4. App Installation and Remote Control
To utilize the teleprompter's full functionality, you will need to install the dedicated app and pair the remote control.
- App Download: Search for the "inmei Teleprompter" app on your smartphone or tablet's app store (Google Play for Android, App Store for iOS) and install it.
- Remote Control Pairing: Ensure the remote control has a working battery (not included). Turn on the remote control and pair it with your smartphone/tablet via Bluetooth. Refer to your device's Bluetooth settings for pairing instructions.
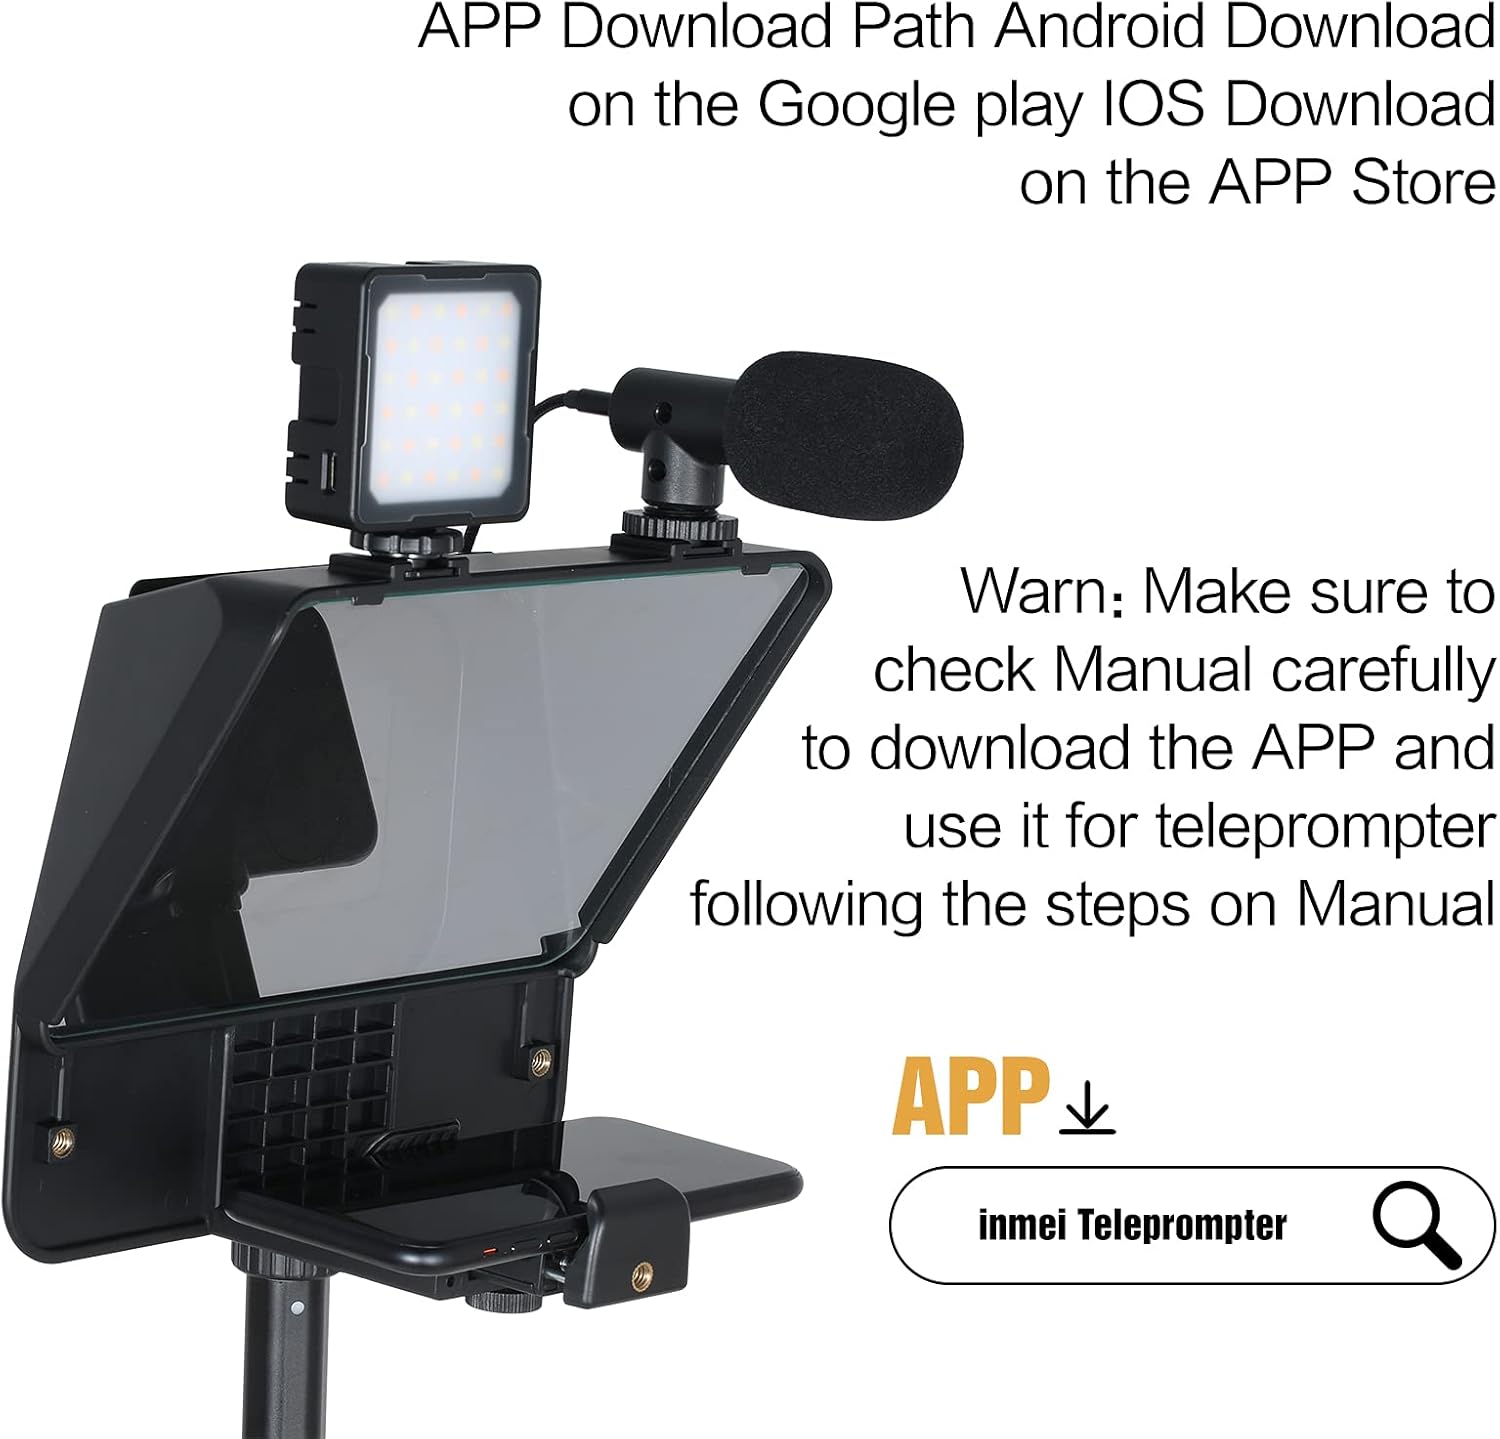
Figure 4.1: A visual guide indicating the app download path for the "inmei Teleprompter" app, available on Google Play for Android and the App Store for iOS devices.

Figure 4.2: This image displays the wireless remote control and its key functions, including buttons for Pause/Play, KEY/GAME, Forward, Backward, and Power ON/OFF, used to control the teleprompter app.
5. Operation
Once assembled and the app is ready, you can begin using your teleprompter:
- Prepare Your Script: Input or paste your script into the teleprompter app on your smartphone or tablet.
- Adjust Display Settings: Within the app, adjust the text size, scrolling speed, and background color for optimal readability. Ensure the text is mirrored horizontally so it appears correctly on the teleprompter's reflective glass.
- Position for Recording: Position your camera or smartphone to record through the teleprompter's glass. The high reflective mirror ensures clear prompting while minimizing interference with your video recording.
- Use Remote Control: Use the wireless remote control to play/pause the script, speed up or slow down the scrolling text, allowing for smooth delivery during your recording or live stream.
6. Maintenance
Proper maintenance will ensure the longevity and performance of your teleprompter:
- Cleaning the Glass: Use the provided cleaning cloth to gently wipe the reflective glass. Avoid abrasive materials or harsh chemicals that could scratch or damage the surface.
- General Cleaning: Keep the teleprompter unit free from dust and debris. Use a soft, dry cloth for cleaning the body.
- Storage: When not in use, store the teleprompter in a clean, dry place, preferably in its original packaging or a protective case, to prevent damage.
7. Troubleshooting
If you encounter issues with your Andoer A10 Teleprompter, refer to the following common problems and solutions:
- Unclear or Distorted Display:
- Ensure the reflective glass is clean and free of smudges.
- Verify that your smartphone/tablet screen brightness is set to a high level.
- Check that the script is correctly mirrored in the teleprompter app.
- Remote Control Not Responding:
- Check if the remote control has a fresh battery installed.
- Ensure the remote control is properly paired with your smartphone/tablet via Bluetooth.
- Confirm that the teleprompter app is active and in the correct mode to receive remote commands.
- Difficulty Assembling Components:
- Refer to the assembly diagrams and steps in Section 3.
- Ensure all screws and clips are tightened appropriately but not overtightened.
- If parts seem misaligned, double-check the orientation of each component.
- Smartphone/Tablet Not Fitting Securely:
- Ensure your device is within the supported size (up to 8 inches for tablets).
- Adjust the mobile phone clip to firmly grip your device.
8. Specifications
| Feature | Description |
|---|---|
| Brand | Andoer |
| Model | A10 |
| Color | Black |
| Material | ABS + Metal |
| Compatibility | DSLR cameras, Smartphones, Tablets (up to 8 inches) |
| Display | Single-sided high reflective mirror, high light transmittance |
| Extension Ports | Dual cold shoe mounts |
| Mounting | 1/4 inch screw mount for tripods |
| Package Dimensions | 10.24 x 9.25 x 4.72 inches |
| Item Weight | 2.39 pounds |
9. Warranty and Support
For warranty information, technical support, or service inquiries, please contact the manufacturer directly. Retain your purchase receipt for warranty claims.


