1. Introduction
This manual provides detailed instructions for the setup, operation, and maintenance of your EPOMAKER Feker Alice 80 Gasket 68-Key Hot-Swappable Mechanical Keyboard. Please read this manual thoroughly to ensure proper usage and to maximize your keyboard's performance.
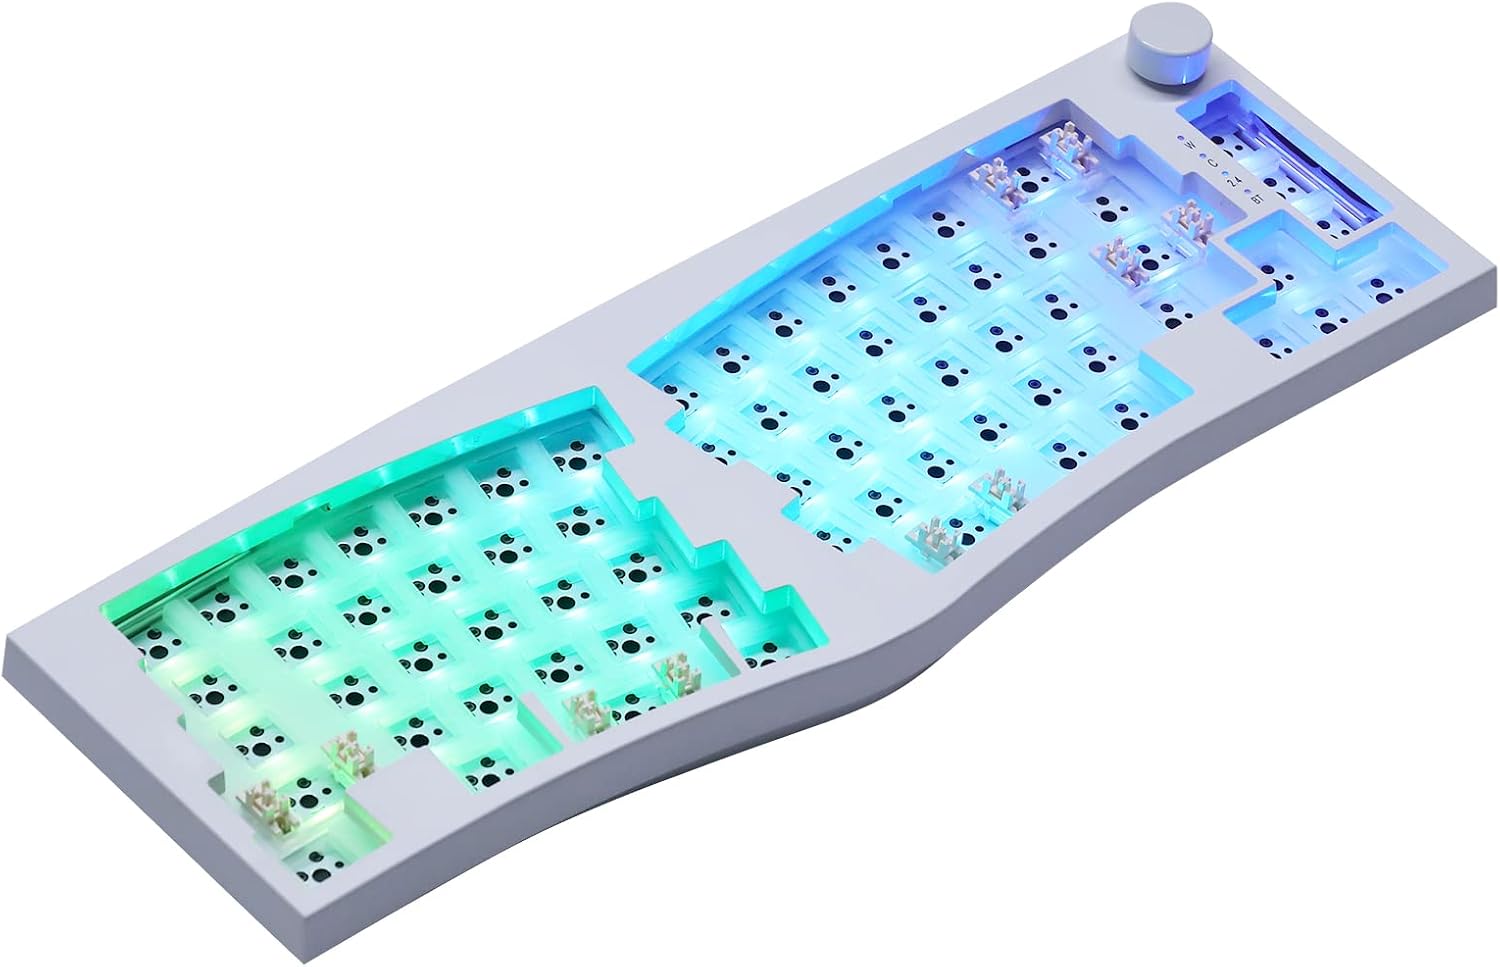
The Feker Alice 80 is a versatile mechanical keyboard kit featuring an ergonomic Alice split layout, gasket mount design, and triple connectivity modes (Type-C wired, Bluetooth 5.0, and 2.4GHz wireless). It includes an 8000mAh battery, NKRO (N-Key Rollover), and customizable RGB backlighting.
2. Package Contents
Verify that all items are present in your package:
- 1 x Feker Alice 80 Keyboard Kit
- 1 x USB Type-C Cable
- 1 x 2.4G USB Receiver
- 1 x Instructional Manual
- 2 x Spare Switches
- 1 x 2-in-1 Switch Puller
- 1 x Keycap Puller

3. Setup Guide
3.1 Installing Switches and Keycaps
The Feker Alice 80 is a hot-swappable keyboard, allowing you to install and change mechanical switches without soldering. This kit comes without pre-installed switches or keycaps, providing full customization flexibility.

- Prepare Switches: Ensure your mechanical switches have straight pins. Bent pins can damage the hot-swap sockets.
- Align Switches: Carefully align the pins of each switch with the holes in the hot-swap socket on the PCB. The switch should fit snugly.
- Press Firmly: Gently press the switch down until it clicks into place. Do not force it. If resistance is met, remove the switch, check the pins for bends, straighten them if necessary, and re-attempt installation.
- Install Keycaps: Once all switches are installed, align the keycaps with the switch stems and press down firmly until they are seated.
For a visual guide on switch installation, please refer to the video below:
3.2 Connectivity Options
The Feker Alice 80 supports three connection modes: Type-C Wired, Bluetooth 5.0, and 2.4GHz Wireless.


- Wired Mode: Connect the keyboard to your computer using the provided USB Type-C cable. Ensure the keyboard's power switch is in the 'On' position. The keyboard will automatically detect the wired connection.
- 2.4GHz Wireless Mode:
- Locate the 2.4G USB receiver, usually stored in a dedicated slot on the keyboard's underside.
- Plug the 2.4G USB receiver into an available USB port on your computer.
- Switch the keyboard's mode selector to '2.4G'. The keyboard should connect automatically.
- Bluetooth 5.0 Mode:
- Switch the keyboard's mode selector to 'BT'.
- On your computer or device, enable Bluetooth and search for new devices.
- Select 'Feker Alice 80' (or similar name) from the list of available devices to pair.
- The keyboard supports up to three Bluetooth devices. Use specific key combinations (e.g., Fn + 1, Fn + 2, Fn + 3) to switch between paired devices. Refer to the keyboard's specific key combination chart for details.
3.3 Operating System Compatibility
The Feker Alice 80 includes a switch to toggle between Windows (Win) and Mac operating system layouts. Locate the 'Mac/Win' switch on the side or back of the keyboard and set it to your desired operating system for optimal key mapping.
4. Operating Instructions
4.1 RGB Backlighting
The keyboard features south-facing SMD LED RGB backlighting with 21 pre-set lighting effects. Use the designated function key combinations (e.g., Fn + \| for changing effects, Fn + arrow keys for brightness/speed) to cycle through effects and adjust settings. Detailed key combinations can be found in the included instructional manual.
Advanced customization of RGB lighting and key remapping can be achieved using compatible software. Please refer to the manufacturer's website for software downloads and instructions.
4.2 Media Control Knob
The Feker Alice 80 includes a dedicated media control knob. This knob typically controls volume (rotate) and media playback (press). Specific functions may be customizable via software.
4.3 N-Key Rollover (NKRO)
The keyboard supports N-Key Rollover (NKRO) in all modes. This feature ensures that every key press is registered, regardless of how many keys are pressed simultaneously. This is particularly beneficial for fast typists and gamers, preventing ghosting or missed inputs.
4.4 Battery Management
The keyboard is equipped with an 8000mAh battery, providing extended usage in wireless modes. To charge the battery, connect the keyboard via the USB Type-C cable to a powered USB port. The RGB lighting may indicate charging status (e.g., pulsing while charging, solid when full).
5. Maintenance
5.1 Cleaning
To clean your keyboard, first disconnect it from your computer. Use a soft, lint-free cloth slightly dampened with water or a mild cleaning solution. For deeper cleaning, keycaps can be removed using the provided keycap puller, and compressed air can be used to clear debris from under the keycaps and switches.
5.2 Switch Replacement
As a hot-swappable keyboard, switches can be easily replaced. Use the provided switch puller to gently grip the switch from the top and bottom, then pull straight up. Insert new switches by aligning the pins and pressing down firmly, as described in Section 3.1.
6. Troubleshooting
- Keyboard not responding: Ensure the keyboard is charged and the power switch is 'On'. Check the connection mode (wired, 2.4G, Bluetooth) and ensure it matches your device's connection. For wired, try a different USB port or cable. For wireless, ensure the receiver is properly plugged in or Bluetooth is paired.
- Keys not registering: If specific keys are not working, try removing and re-inserting their switches. Ensure the switch pins are not bent.
- RGB backlight issues: Check the brightness settings using function key combinations. If using customization software, ensure it is correctly configured and applied.
- Connectivity drops: For 2.4GHz, ensure the receiver is close to the keyboard and there are no major obstructions. For Bluetooth, ensure no interference from other wireless devices and that the keyboard is within range.
If you encounter persistent issues, please refer to the EPOMAKER support website or contact customer service for further assistance.
7. Specifications
| Feature | Specification |
|---|---|
| Model | Feker Alice 80 kit |
| Layout | Split Alice, 68 Keys + 1 Knob |
| Mounting Structure | Gasket Mount (Silicone gasket material) |
| Case Material | ABS Plastic |
| Plate Material | PC |
| Connectivity | Type-C Wired, Bluetooth 5.0, 2.4GHz Wireless |
| Battery Capacity | 8000mAh |
| Anti-Ghosting | NKRO in all modes |
| Backlight | SMD RGB backlit, 21 effects, South-facing LEDs |
| Cable Length | 1.8m |
| Item Weight | 3.03 pounds |
| Package Dimensions | 15.59 x 7.13 x 2.32 inches |
8. Warranty and Support
EPOMAKER products are designed for quality and reliability. For warranty information, product registration, and technical support, please visit the official EPOMAKER website or contact their customer service directly. Keep your purchase receipt for warranty claims.


