
Introduction
This manual provides comprehensive instructions for the assembly, operation, and maintenance of your Caliber Gourmet 3D Wooden Puzzle Rubber Band Hand Gun Toy. This DIY craft kit offers an engaging building experience, resulting in a functional rubber band shooter. Please read all instructions carefully before beginning assembly or operation.
Safety Warning: This product is intended for adults over 15. All projectiles are rubber bands. Do not aim at humans or animals. Adult supervision is recommended for younger users.
Setup and Assembly
The Caliber Gourmet 3D Wooden Puzzle is designed for glueless assembly, providing an exciting and educational DIY experience. Detailed step-by-step instructions are included in your kit to guide you through the building process.

Figure 1: Kit Contents. The kit includes precision laser-cut wooden parts, rubber bands, picks, sanding paper, and a comprehensive instruction manual.
Follow the included instruction manual precisely. Each wooden piece is pre-cut and designed to fit together without adhesive. Gently detach pieces from the wooden sheets. If any pieces are difficult to remove, use the included picks or a small, blunt tool to assist. Light sanding may be applied to edges if necessary for a smoother fit.

Figure 2: Product Dimensions and Key Components. This image illustrates the overall dimensions and identifies the main parts of the assembled rubber band gun, such as the barrel, trigger, hammer, and grip.
Pay close attention to the orientation of each piece as indicated in the manual. Some parts may appear similar but have subtle differences crucial for correct assembly and function. Once assembled, ensure all connections are secure.
Operating Instructions
Your Caliber Gourmet 3D Wooden Puzzle Rubber Band Hand Gun Toy is designed to shoot standard rubber bands. It features both full-automatic and semi-automatic firing modes.
Loading Rubber Bands
- Ensure the safety lock (if present on your model) is engaged.
- Carefully stretch a rubber band and hook one end onto the designated gear or peg near the front of the barrel.
- Pull the rubber band back along the top of the gun and secure the other end onto the firing mechanism at the rear, typically a rotating gear or lever.
- For full-automatic mode, multiple rubber bands can be loaded onto different positions of the gears for continuous firing.

Figure 3: Loading Multiple Rubber Bands. This image demonstrates how to load several rubber bands for continuous shooting in full-automatic mode.
Firing the Rubber Band Gun
- Point the gun in a safe direction, away from people, animals, or fragile objects.
- Disengage the safety lock if it was engaged.
- Gently pull the trigger. The firing mechanism will release the rubber band(s).
- For continuous firing in full-automatic mode, hold the trigger down after loading multiple bands.

Figure 4: Firing Mechanism. This image shows the process of tying a rubber band to the gear and pulling the trigger to fire.
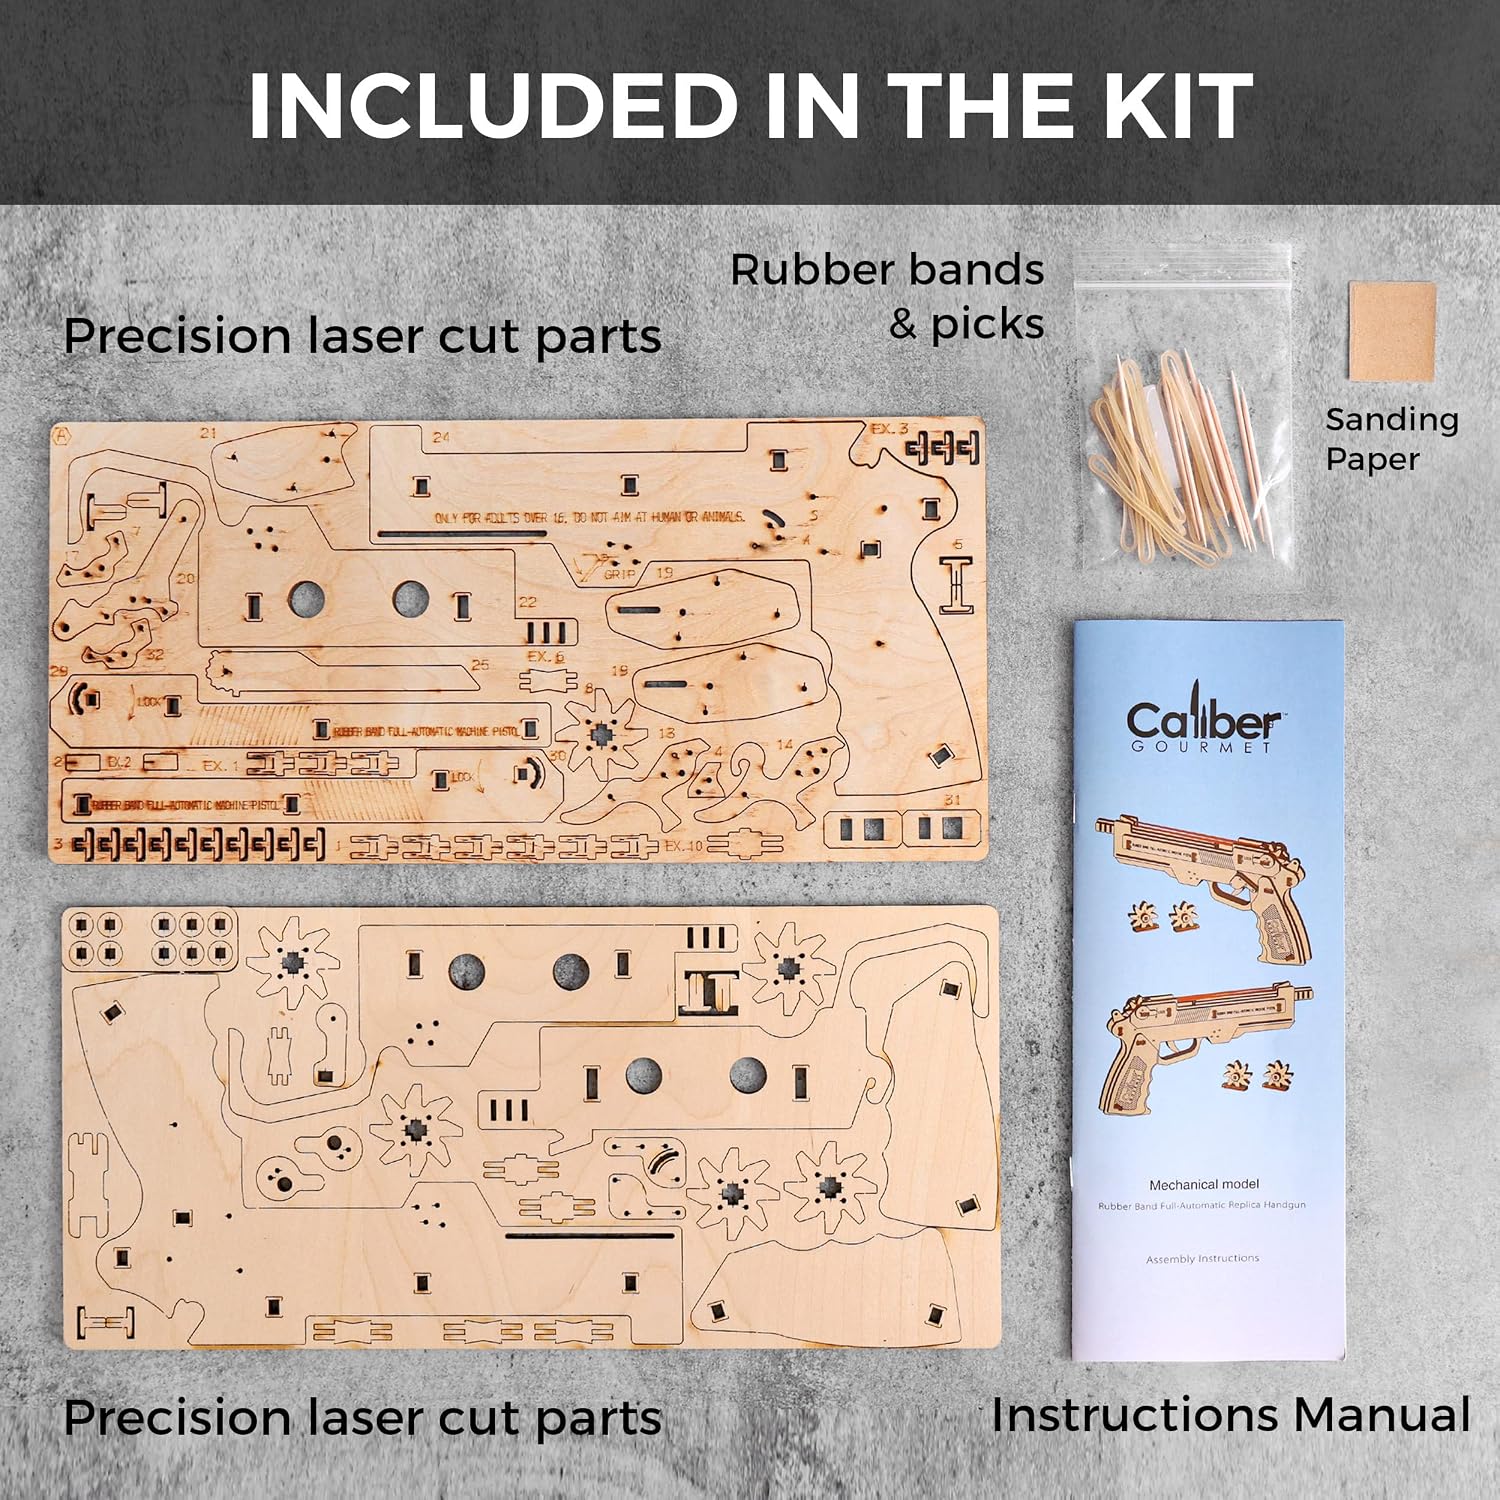
Figure 5: Dual Mode Operation. This graphic explains the full-automatic and semi-automatic firing modes, detailing how to load and shoot rubber bands for continuous or single-shot action.
Maintenance
To ensure the longevity and proper function of your wooden puzzle toy, follow these simple maintenance guidelines:
- Cleaning: Wipe the wooden surfaces with a dry, soft cloth. Avoid using water or chemical cleaners, as these can damage the wood.
- Storage: Store the toy in a dry environment, away from direct sunlight and extreme temperatures or humidity, which can cause the wood to warp or crack.
- Rubber Bands: Replace worn or stretched rubber bands as needed to maintain optimal firing performance.
- Inspections: Periodically check for any loose parts. If any connections feel loose, refer to the assembly instructions to re-secure them.
Troubleshooting
If you encounter any issues with your rubber band gun, refer to the following common problems and solutions:
- Rubber band does not fire:
- Ensure the rubber band is correctly hooked onto both the front peg and the rear firing mechanism.
- Check that the trigger mechanism moves freely and is not obstructed.
- Verify that the safety lock is disengaged.
- Parts do not fit together during assembly:
- Double-check the instruction manual to ensure you are using the correct pieces and orienting them properly.
- Gently sand any edges that appear too tight, but avoid removing too much material.
- Ensure no small wooden debris is blocking the connection points.
- Gun feels wobbly or loose after assembly:
- Review the assembly steps to confirm all pieces are fully inserted and locked into place.
- Apply gentle, even pressure to connections to ensure they are snug.
Specifications
| Feature | Detail |
|---|---|
| Brand | Caliber Gourmet |
| Model Number | CBG-P2L-02MG |
| Puzzle Type | Puzzle Box, 3D Wooden Puzzle |
| Material | Wood |
| Number of Pieces | 97 |
| Product Dimensions (L x W) | 25L x 4W centimetres (approx. 9.8 x 1.57 inches) |
| Recommended Age | 10 years and up (Manufacturer Minimum Age: 120 months) |
| Operation Mode | Automatic / Semi-automatic |
| Power Source | Manual |
| Educational Objective | Creative Thinking, Motor Skill |
| UPC | 024718514901 |
Warranty Information
This Caliber Gourmet product comes with a 1-year warranty from the date of purchase. This warranty covers manufacturing defects. Please retain your proof of purchase for any warranty claims. The warranty does not cover damage resulting from misuse, accidents, or unauthorized modifications.
Customer Support
For further assistance, detailed assembly instructions, or if you have questions not covered in this manual, please refer to the comprehensive instruction booklet included in your kit. If you require additional support, please contact Caliber Gourmet customer service through their official website or the retailer from whom you purchased the product.