1. Introduction
Thank you for choosing the ThiEYE 20V Cordless Tire Inflator. This portable air compressor is designed for efficient and convenient inflation of various items, including vehicle tires, bicycle tires, and sports equipment. Featuring a powerful 20V battery, digital pressure gauge with auto-off function, and dual power supply modes, it provides reliable performance for your inflation needs.
This manual provides essential information for the safe and effective operation, maintenance, and troubleshooting of your ThiEYE Airkit 3.

Image: The ThiEYE 20V Cordless Tire Inflator, showing the main unit, detachable 20V battery, and 12V car power adapter.
2. Safety Instructions
Please read and understand all safety warnings and instructions before using this product. Failure to follow the warnings and instructions may result in electric shock, fire, and/or serious injury.
- Keep out of reach of children: This device is not a toy.
- Proper Ventilation: Operate the inflator in a well-ventilated area.
- Avoid Over-inflation: Do not exceed the recommended pressure for the item being inflated. Always check the manufacturer's recommended PSI.
- Temperature: Do not expose the inflator to extreme temperatures or direct sunlight.
- Moisture: Do not use the inflator in wet conditions or immerse it in water.
- Power Source: Use only the provided battery or 12V car power adapter.
- Unplug When Not in Use: Disconnect the power source when the inflator is not in use or before performing any maintenance.
- Inspect Before Use: Check the inflator, hose, and connections for any damage before each use. Do not use if damaged.
- Heat: The inflator may become hot during prolonged use. Allow it to cool down before storing.
3. Package Contents
Ensure all items are present and in good condition upon opening the package:
- ThiEYE 20V Cordless Tire Inflator Unit
- 20V Rechargeable Lithium Battery
- 12V DC Car Power Adapter (with 3m power cord)
- Air Hose with Schrader Chuck
- Presta Valve Adapter
- Needle Adapter (for sports balls)
- USB-A to USB-C Cable (for battery charging)
- User Manual (this document)
- Storage Box
4. Product Overview
Familiarize yourself with the components of your ThiEYE Airkit 3:

Image: The ThiEYE 20V Cordless Air Compressor, highlighting its portability and cordless design.
- Inflator Unit: Main body with motor, digital display, and controls.
- 20V Lithium Battery: Detachable power source for cordless operation.
- 12V DC Car Power Adapter: Alternative power source for continuous operation via car's cigarette lighter.
- Air Hose: Connects the inflator to the item being inflated. Features a Schrader chuck for easy attachment.
- Digital Pressure Gauge: LCD screen displaying real-time pressure and allowing preset pressure settings.
- Control Buttons: Power button, unit selection button, and +/- buttons for adjusting pressure.
- Trigger: Activates the inflation process.
- LED Light: Integrated light for illumination in low-light conditions or emergencies.
- Accessory Storage: Built-in storage for the 12V power cord and valve adapters.

Image: Internal view of the ThiEYE Airkit 3, illustrating the metal movement, cooling fan for air flow, and cooling vents for heat dissipation, contributing to durable construction.

Image: Diagram illustrating the 18,000 RPM copper motor, which provides powerful inflation capabilities.

Image: Comparison showing the ergonomically designed handle and 40cm long air hose of the ThiEYE Airkit 3, allowing it to stand on the ground during inflation, unlike other models that may dangle.
5. Setup
5.1. Charging the Battery
Before first use, fully charge the 20V lithium battery. The battery can be charged using the provided USB-A to USB-C cable and a compatible USB power adapter (not included) or by connecting the 12V DC car charger directly to the inflator unit.
- Connect the USB-C end of the cable to the battery and the USB-A end to a power source.
- Alternatively, insert the 12V DC car charger into your vehicle's cigarette lighter socket and connect the other end to the inflator unit.
- The battery indicator lights will show charging progress.
5.2. Attaching the Battery or 12V Adapter
The ThiEYE Airkit 3 offers two power modes:
- Cordless Operation: Slide the fully charged 20V lithium battery into the base of the inflator unit until it clicks securely into place.
- Corded Operation: If the battery is low or for continuous use, remove the 20V battery and insert the 12V DC car power adapter into the base. Connect the adapter to your vehicle's 12V power outlet.

Image: The ThiEYE Airkit 3 demonstrating its dual power supply modes: operation with the 20V rechargeable battery and with the 12V DC car adapter.

Image: The ThiEYE Airkit 3 connected to a car's 12V power outlet, illustrating that it can be powered anytime, even if the battery runs out.
6. Operating Instructions
Follow these steps for effective inflation:
- Power On: Press the power button (●) to turn on the inflator. The LCD screen will illuminate.
- Select Unit: Long press the power button to cycle through pressure units (PSI, BAR, KPA, KG/CM²). Release the button when your desired unit is displayed.
- Set Target Pressure: Use the '+' and '-' buttons to adjust the desired target pressure. The digital display will show the preset value.
- Connect Air Hose: Screw the air hose securely onto the inflator's output port.
- Attach to Item:
- For vehicle/bicycle tires (Schrader valve): Securely attach the Schrader chuck to the tire valve stem.
- For Presta valves: Use the included Presta valve adapter.
- For sports balls: Use the included needle adapter.
- Start Inflation: Press the trigger to begin inflation. The inflator will automatically stop once the preset pressure is reached.
- Monitor Pressure: The LCD screen displays the real-time pressure during inflation.
- Disconnect: Once inflation is complete, release the trigger (if still held) and quickly disconnect the air hose from the item.
- Power Off: Long press the power button to turn off the inflator, or it will automatically power off after a period of inactivity.

Image: A visual step-by-step guide on how to use the ThiEYE Airkit 3, from plugging in the battery to setting pressure and starting inflation.
6.1. Inflation Performance
The ThiEYE Airkit 3 is designed for fast inflation. It can fully inflate 4 standard car tires (185/70 R14) in less than 25 minutes on a single full charge of the 20V battery. A normal flat tire can be inflated in approximately 6 minutes.
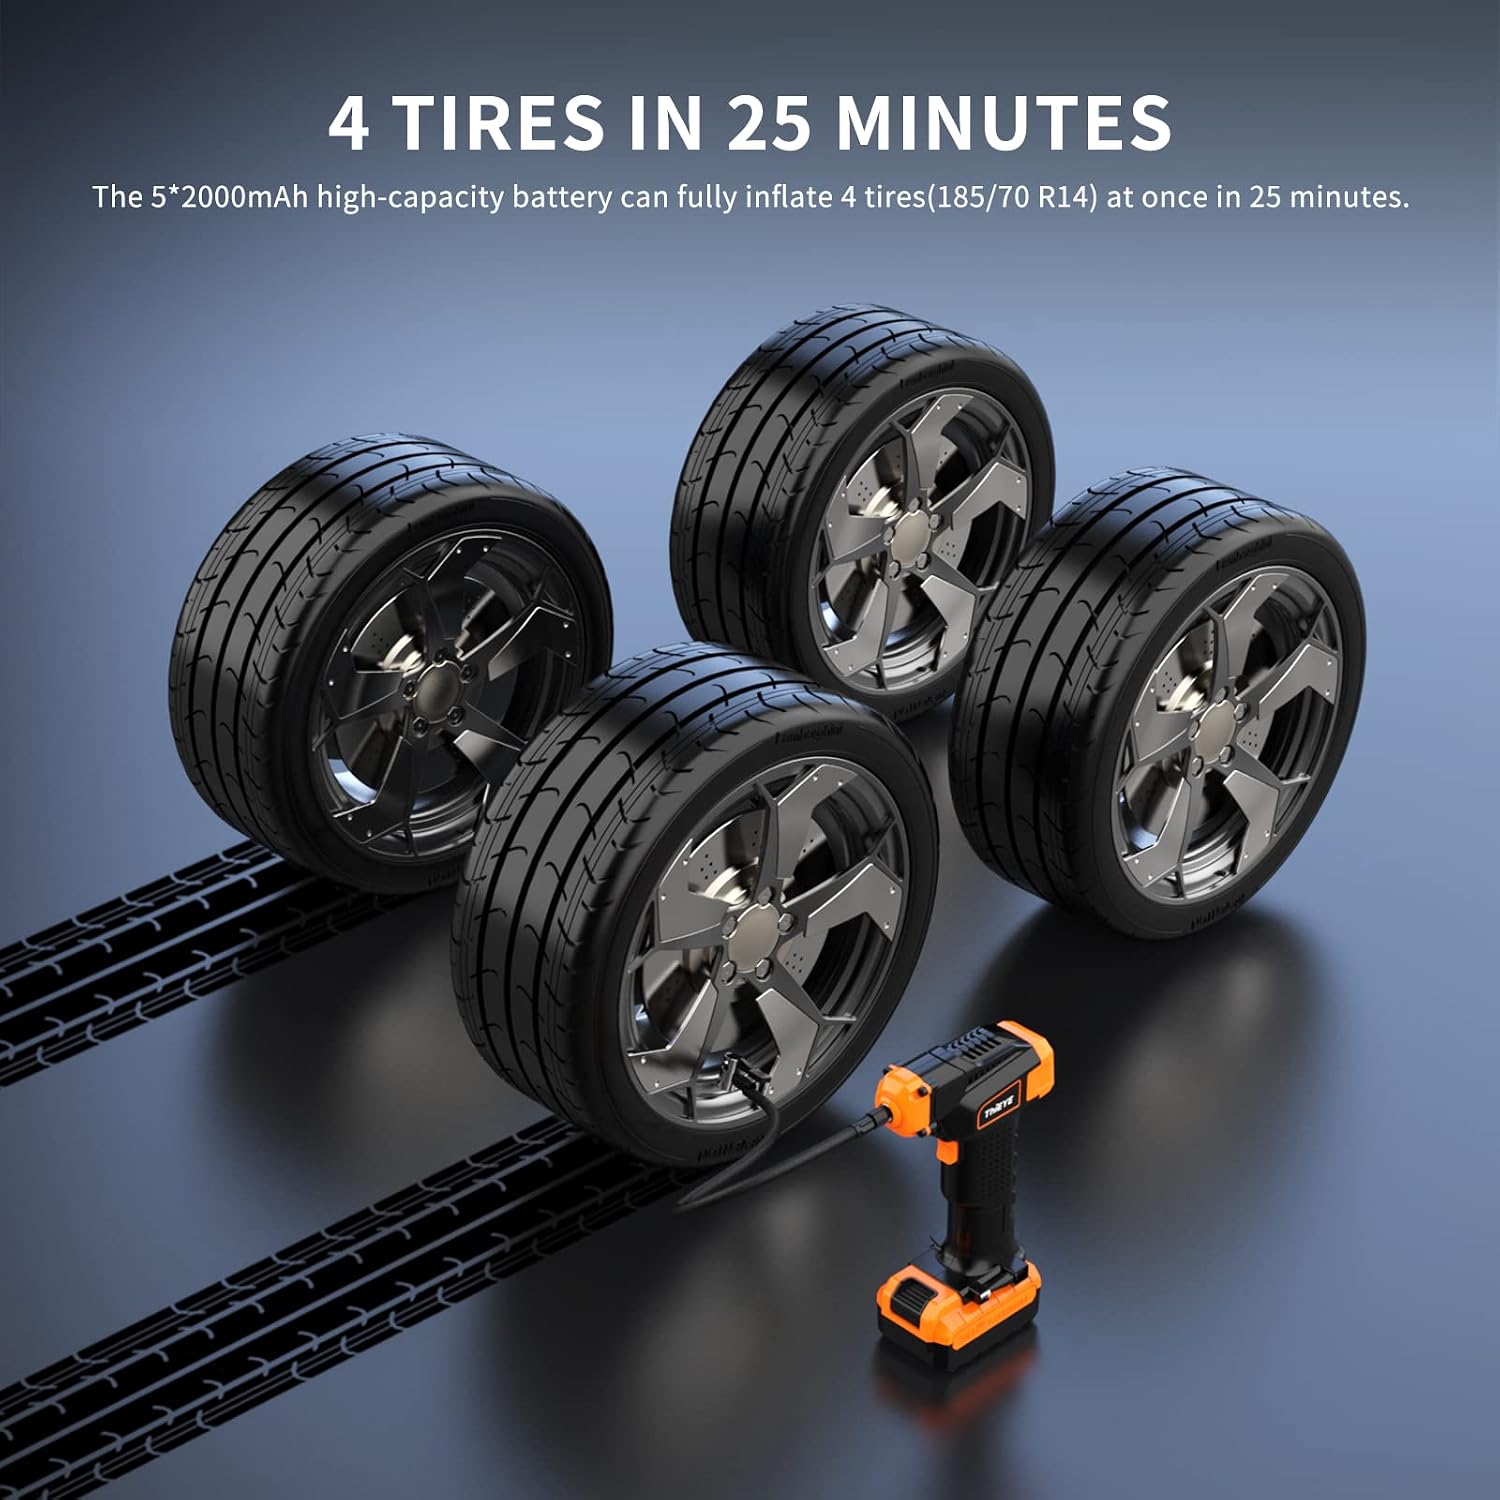
Image: The ThiEYE Airkit 3 positioned next to four car tires, illustrating its capability to inflate all four tires within 25 minutes on a single charge.
6.2. Using the LED Light
The integrated LED light provides illumination for use in dark environments or during nighttime emergencies. The light is always on when the unit is powered on, ensuring visibility during operation.

Image: The ThiEYE Airkit 3 illuminating a car tire with its built-in LED light, demonstrating its utility for nighttime use.
6.3. Versatile Applications
The included valve adapters allow the ThiEYE Airkit 3 to inflate a wide range of items:
- Car, SUV, Motorcycle, and Bicycle Tires
- Sports Balls (basketballs, footballs, etc.)
- Inflatable Toys and Floats

Image: The ThiEYE Airkit 3 shown with its three different nozzles, demonstrating its versatility for inflating various items such as car tires, motorcycle tires, bicycle tires, sports balls, and inflatable rings.
6.4. Product Video
Video: An introductory video for the ThiEYE AirKit 3, showcasing its features and ease of use.
7. Maintenance
Proper maintenance ensures the longevity and optimal performance of your inflator:
- Cleaning: Wipe the unit with a soft, damp cloth. Do not use harsh chemicals or abrasive cleaners.
- Storage: Store the inflator and its accessories in the provided storage box in a cool, dry place, away from direct sunlight and extreme temperatures.
- Battery Care: For long-term storage, charge the battery to approximately 50% every 3-6 months to maintain battery health.
- Hose Inspection: Regularly check the air hose for cracks, kinks, or damage. Replace if necessary.
8. Troubleshooting
If you encounter issues with your ThiEYE Airkit 3, refer to the following common problems and solutions:
| Problem | Possible Cause | Solution |
|---|---|---|
| Inflator does not turn on. | Battery is depleted or not properly inserted. 12V adapter not connected or car outlet is faulty. | Charge the battery or ensure it is securely inserted. Check 12V connection and car outlet. Try a different power source. |
| Inflator runs but does not inflate. | Air hose not securely connected. Valve adapter not properly attached to item. Hose or chuck is damaged. | Ensure air hose is tightly screwed onto the inflator. Re-attach valve adapter firmly. Inspect hose and chuck for leaks or damage. |
| Inaccurate pressure reading. | Minor calibration variance. | It is recommended to verify pressure with a separate, calibrated pressure gauge for critical applications. Adjust preset pressure accordingly based on observed variance. |
| Inflator stops prematurely. | Preset pressure reached. Overheating protection activated. | Check the preset pressure setting. Allow the unit to cool down for several minutes before resuming operation. |
If the problem persists after attempting these solutions, please contact ThiEYE customer support.
9. Specifications
| Feature | Detail |
|---|---|
| Brand | ThiEYE |
| Model Name | Airkit 3 |
| Max Air Pressure | 150 PSI |
| Battery Capacity | 10000mAh (20V, 5*2000mAh cells) |
| Motor Speed | 18000 RPM |
| Power Source | Battery Powered (20V) / 12V DC Car Charger |
| Hose Length | 40 Centimeters |
| Noise Level | 78 dB |
| Special Features | Portable, LED Light, Automatic Shut-Off, Digital Pressure Gauge |
| Item Weight | 1.53 Kilograms (approx. 3.36 pounds) |
| Package Dimensions | 12.36 x 9.61 x 4.84 inches |
10. Warranty and Support
ThiEYE products are designed and manufactured to the highest quality standards. For warranty information or technical support, please refer to the warranty card included with your product or visit the official ThiEYE website. You may also contact customer service through the platform where you purchased the product.
For additional resources and product information, visit the ThiEYE Store on Amazon.


