1. Introduction
This manual provides detailed instructions for the setup, operation, and maintenance of your KOORUI 27E6QCA 27-inch Curved QHD 180Hz Gaming Monitor. Please read this manual thoroughly before using the product to ensure proper functionality and to prevent damage.
2. Package Contents
Verify that all items listed below are present in your product package:
- 1 x KOORUI 27E6QCA Monitor
- 1 x Power Cable
- 1 x DisplayPort (DP) Cable
- 1 x User Manual
- 1 x Power Adapter
- 1 x Monitor Stand
- 1 x Monitor Base

Image: Front view of the KOORUI 27E6QCA Curved Gaming Monitor, showcasing its 27-inch curved display and sleek design.
3. Product Overview
The KOORUI 27E6QCA is a 27-inch curved gaming monitor designed for an immersive visual experience. Key features include:
- Display: 27-inch VA Panel with 1500R curvature.
- Resolution: QHD (2560x1440) for clear and detailed images.
- Refresh Rate: 180Hz for smooth motion.
- Response Time: 1ms (MPRT) to minimize motion blur.
- Color Gamut: 85% DCI-P3 for rich and accurate colors.
- Adaptive Sync: Compatible with Adaptive Sync technology to reduce screen tearing and stuttering.
- Eye Protection: Features like blue light filter and flicker-free technology for reduced eye strain.
- Connectivity: Multiple HDMI and DisplayPort inputs.
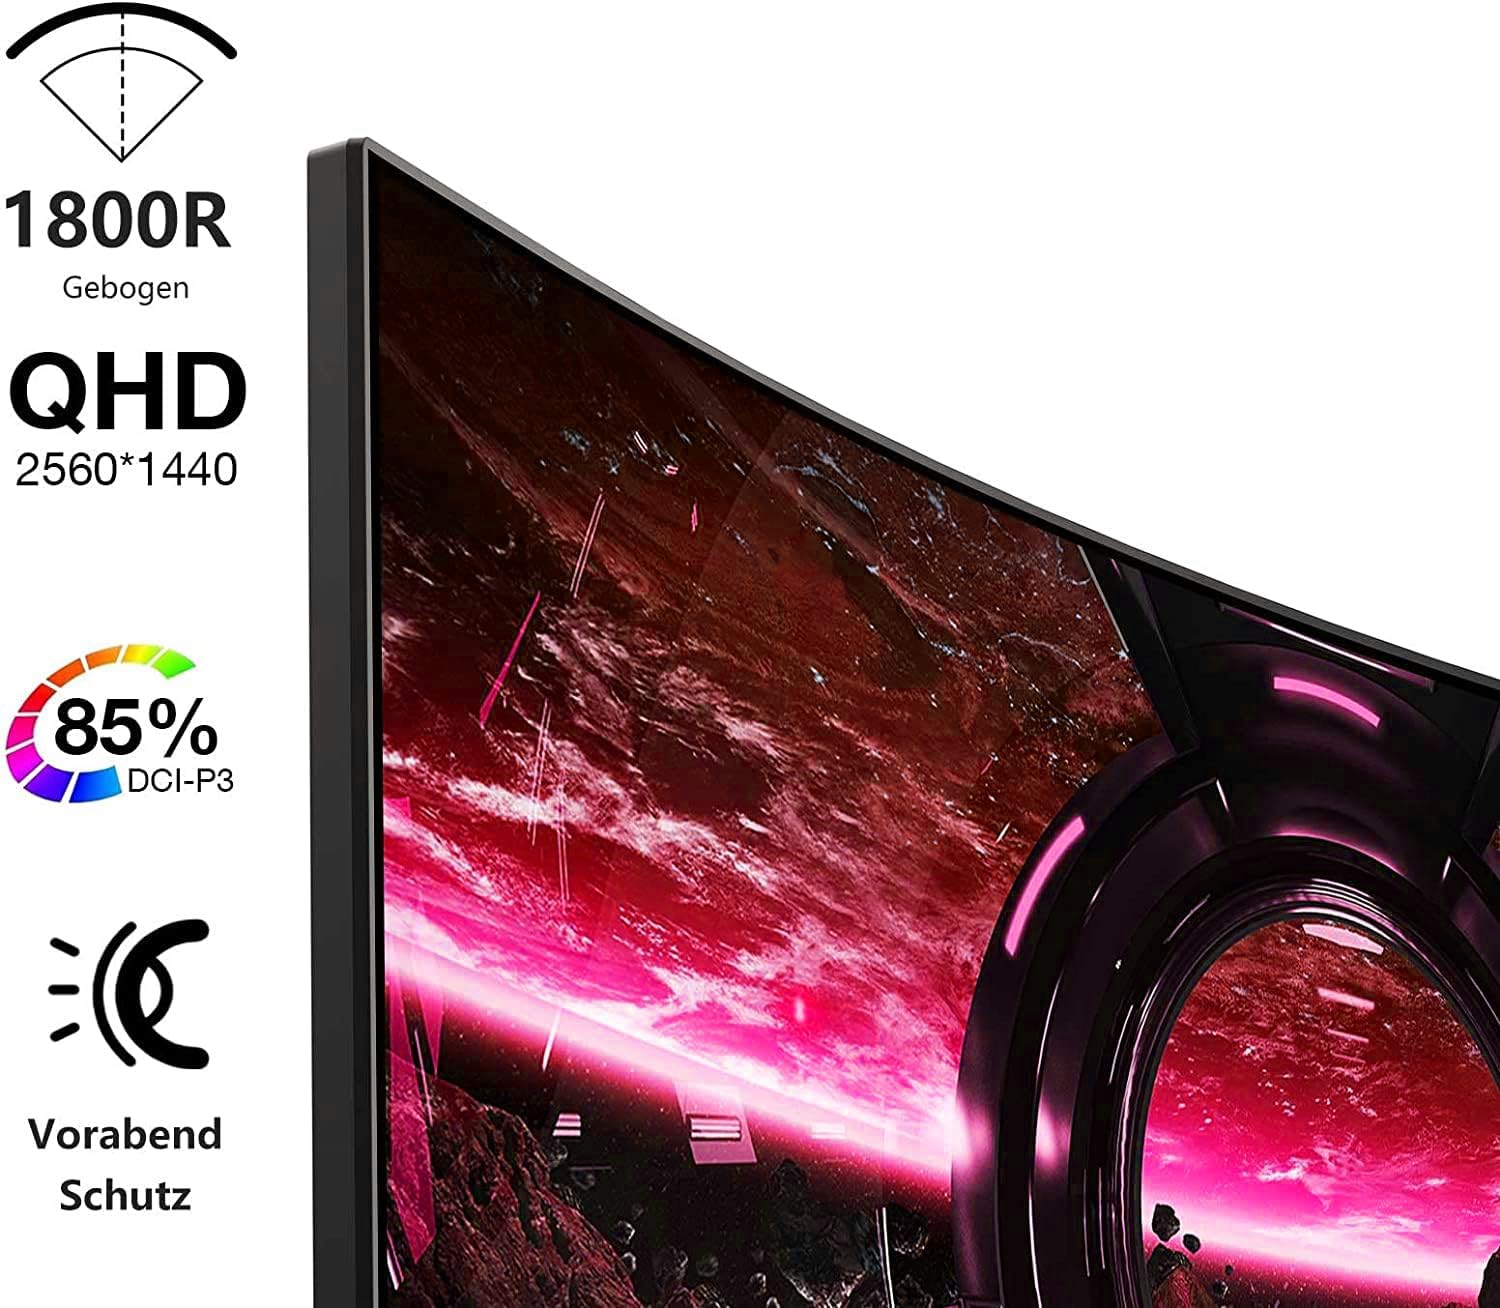
Image: Visual representation of the monitor's key features, including its 1500R curvature, QHD resolution (2560x1440), 85% DCI-P3 color coverage, and eye protection technology.
4. Setup Instructions
4.1 Assembling the Stand
- Carefully remove the monitor, stand, and base from the packaging.
- Attach the stand to the base, ensuring it clicks securely into place or is fastened with the provided screw.
- Attach the assembled stand to the back of the monitor. Ensure the connection is firm.

Image: Rear view of the KOORUI 27E6QCA monitor, showing the attachment point for the stand and the overall back panel design.
4.2 Connecting to a Device
The monitor supports HDMI and DisplayPort connections. Use the appropriate cable for your device.
- DisplayPort (DP): Connect one end of the DP cable to the DisplayPort output on your computer's graphics card and the other end to the DisplayPort input on the monitor. This connection is recommended for achieving the full 180Hz refresh rate and QHD resolution.
- HDMI: Connect one end of an HDMI cable (version 1.4 or higher recommended) to the HDMI output on your device and the other end to one of the HDMI inputs on the monitor.
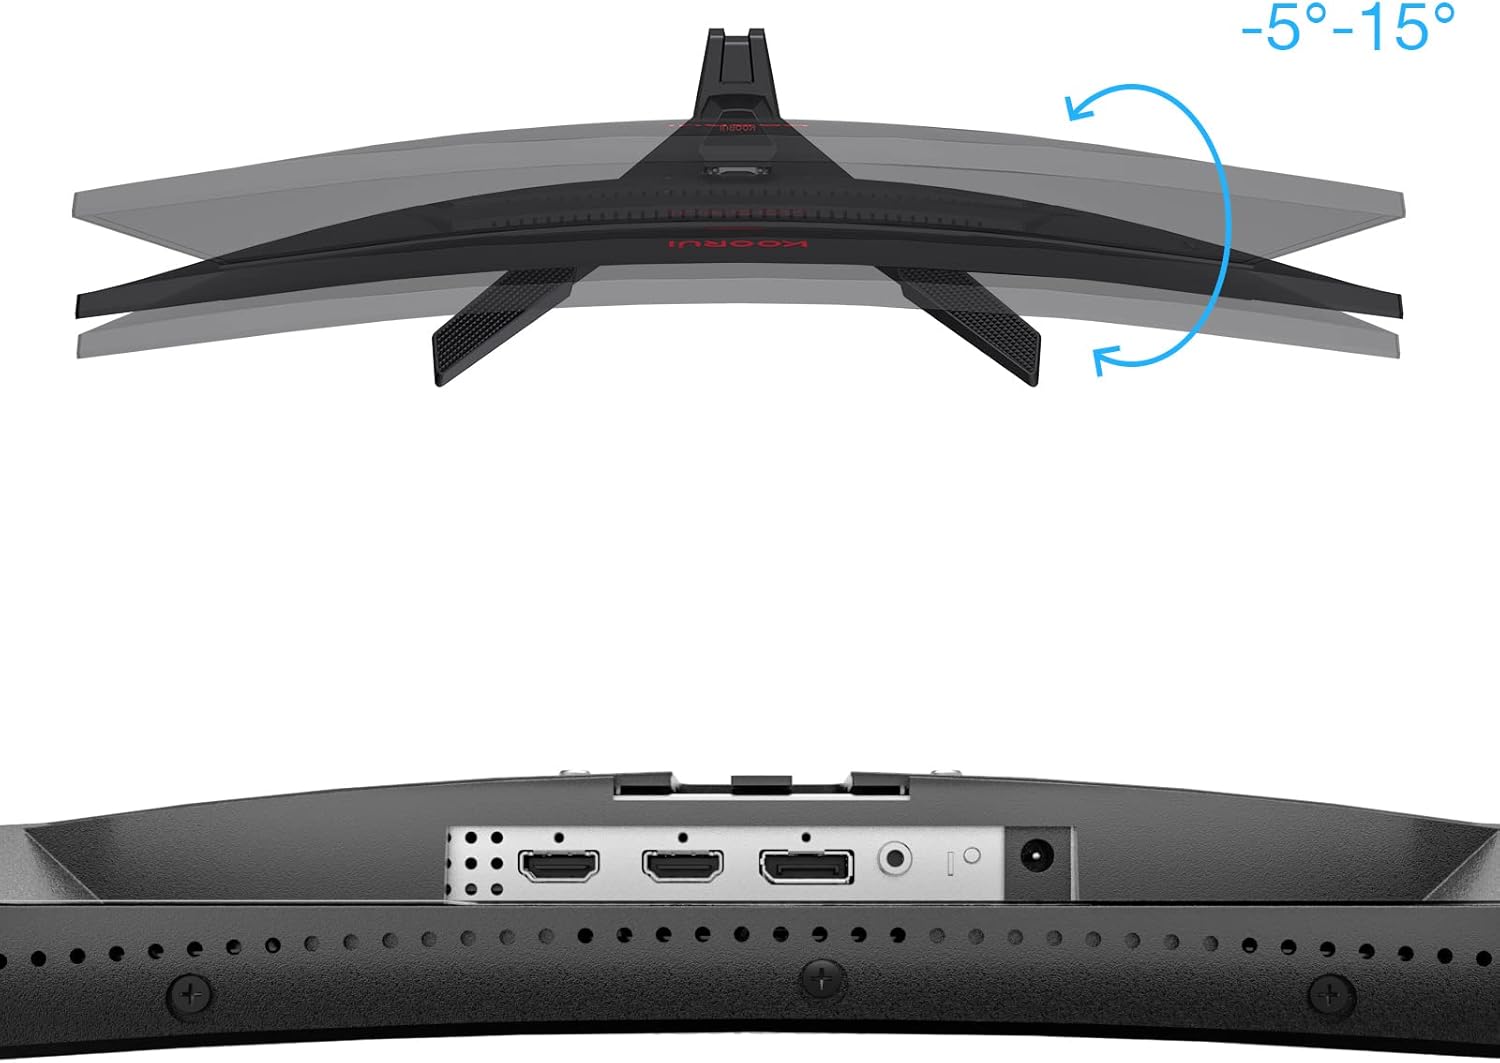
Image: Close-up view of the monitor's rear ports, including HDMI and DisplayPort inputs, along with an illustration of the monitor's tilt adjustment range (-5° to 15°).

Image: Diagram illustrating the monitor's compatibility with various devices such as PS5, Xbox, Laptops, and Nintendo Switch via its multiple connection interfaces.
4.3 Power Connection
- Connect the power adapter to the monitor's power input.
- Plug the power cable into the power adapter, then plug the other end of the power cable into a wall outlet.
5. Operating Instructions
5.1 Power On/Off
- Power On: Short press the multi-function joystick button located on the back of the monitor.
- Power Off: Long press the multi-function joystick button for a few seconds.
5.2 Menu Navigation
The monitor features a single multi-function joystick button for navigating the On-Screen Display (OSD) menu.
- Access OSD: Short press the joystick button when the monitor is on.
- Navigate: Push the joystick left/right/up/down to move through menu options.
- Confirm: Press the joystick button to confirm a selection.
- Return: Push the joystick up to go back to the previous menu or exit the OSD.

Image: Diagram illustrating the functions of the multi-function joystick button on the rear of the monitor: long press for power off, short press for power on, push left for minus, push right for plus, push up for return, and press for confirm.
5.3 Display Settings
Adjust various display settings through the OSD menu:
- Brightness/Contrast: Adjust image luminance and distinction.
- Color Settings: Modify color temperature, gamma, and saturation.
- Picture Mode: Select from preset modes (e.g., Standard, Game, Movie, Text).
- Game Settings:
- Adaptive Sync: Enable this feature to synchronize the monitor's refresh rate with your graphics card, reducing screen tearing and stuttering. Ensure your graphics card supports Adaptive Sync.
- Response Time (Overdrive): Adjust for faster pixel response, reducing ghosting.
- Game Modes: Specific modes like RTS, FPS, Reticle, and Timer are available to optimize visuals for different game genres.
- Input Source: Manually select between HDMI and DisplayPort inputs.
For optimal gaming performance, ensure your operating system's display settings are configured to the monitor's native resolution (2560x1440) and highest refresh rate (180Hz).
6. Maintenance
Proper maintenance ensures the longevity and performance of your monitor.
- Cleaning the Screen:
- Always power off the monitor and unplug the power cable before cleaning.
- Use a soft, lint-free cloth slightly dampened with water or a specialized screen cleaner.
- Do not spray cleaner directly onto the screen.
- Avoid using abrasive cleaners, alcohol, or ammonia-based solutions.
- Cleaning the Casing: Use a soft, dry cloth to wipe the monitor casing.
- Ventilation: Ensure the monitor's ventilation openings are not blocked to prevent overheating.
7. Troubleshooting
If you encounter issues with your monitor, refer to the following common troubleshooting steps:
7.1 No Power
- Ensure the power cable is securely connected to the monitor and the power outlet.
- Verify the power outlet is functioning by plugging in another device.
- Check if the power adapter is correctly connected.
7.2 No Signal / Blank Screen
- Confirm that the video cable (DP or HDMI) is securely connected to both the monitor and your computer/device.
- Ensure the correct input source is selected in the monitor's OSD menu.
- Check if your computer/device is powered on and not in sleep mode.
- Try a different video cable or port if available.
7.3 Image Flickering or Tearing
- Enable Adaptive Sync in the monitor's OSD menu and ensure it is enabled in your graphics card settings.
- Verify that your graphics drivers are up to date.
- Check the refresh rate setting in your operating system's display settings. It should be set to 180Hz.
7.4 Ghosting or Motion Blur
- Adjust the "Response Time" or "Overdrive" setting in the OSD menu. Experiment with different levels to find the optimal balance.
- Ensure Adaptive Sync is enabled.
7.5 Incorrect Resolution or Refresh Rate
- Go to your operating system's display settings and set the resolution to 2560x1440 and the refresh rate to 180Hz.
- Ensure you are using a DisplayPort cable or an HDMI cable that supports these specifications.
8. Specifications
| Feature | Specification |
|---|---|
| Brand | KOORUI |
| Model Number | 27E6QCA |
| Screen Size | 27 Inches |
| Panel Type | VA |
| Curvature | 1500R |
| Resolution | QHD (2560 x 1440 Pixels) |
| Aspect Ratio | 16:9 |
| Refresh Rate | 180 Hz |
| Response Time | 1 millisecond (MPRT) |
| Color Gamut | 85% DCI-P3 |
| Contrast Ratio | 2000:1 |
| Connectivity | HDMI (x1), DisplayPort (x1) |
| Tilt Adjustment | -5° to 15° |
| Power Consumption | 78 Watt |
| Dimensions (L x W x H) | 61.2 x 45.2 x 18.5 cm |
| Weight | 5.1 Kilograms |
| Special Features | Blue Light Filter, Curved, Flicker-Free, Adaptive Sync |

Image: Diagram showing the approximate dimensions of the KOORUI 27E6QCA monitor, including height (40cm), width (50cm), and depth (30cm).
9. Warranty and Support
For warranty information and technical support, please refer to the warranty card included in your product package or visit the official KOORUI website. Keep your purchase receipt as proof of purchase for warranty claims.


